
Introduction
This project will involve creating a 3D catalog of the library, which will include a search engine for the library. Users will be able to visit the website and search for a book, and the system will show the exact location of the book on the library racks. This project will require the use of Three.js and JavaScript. I may also explore database management and use SQL to improve the website’s performance.
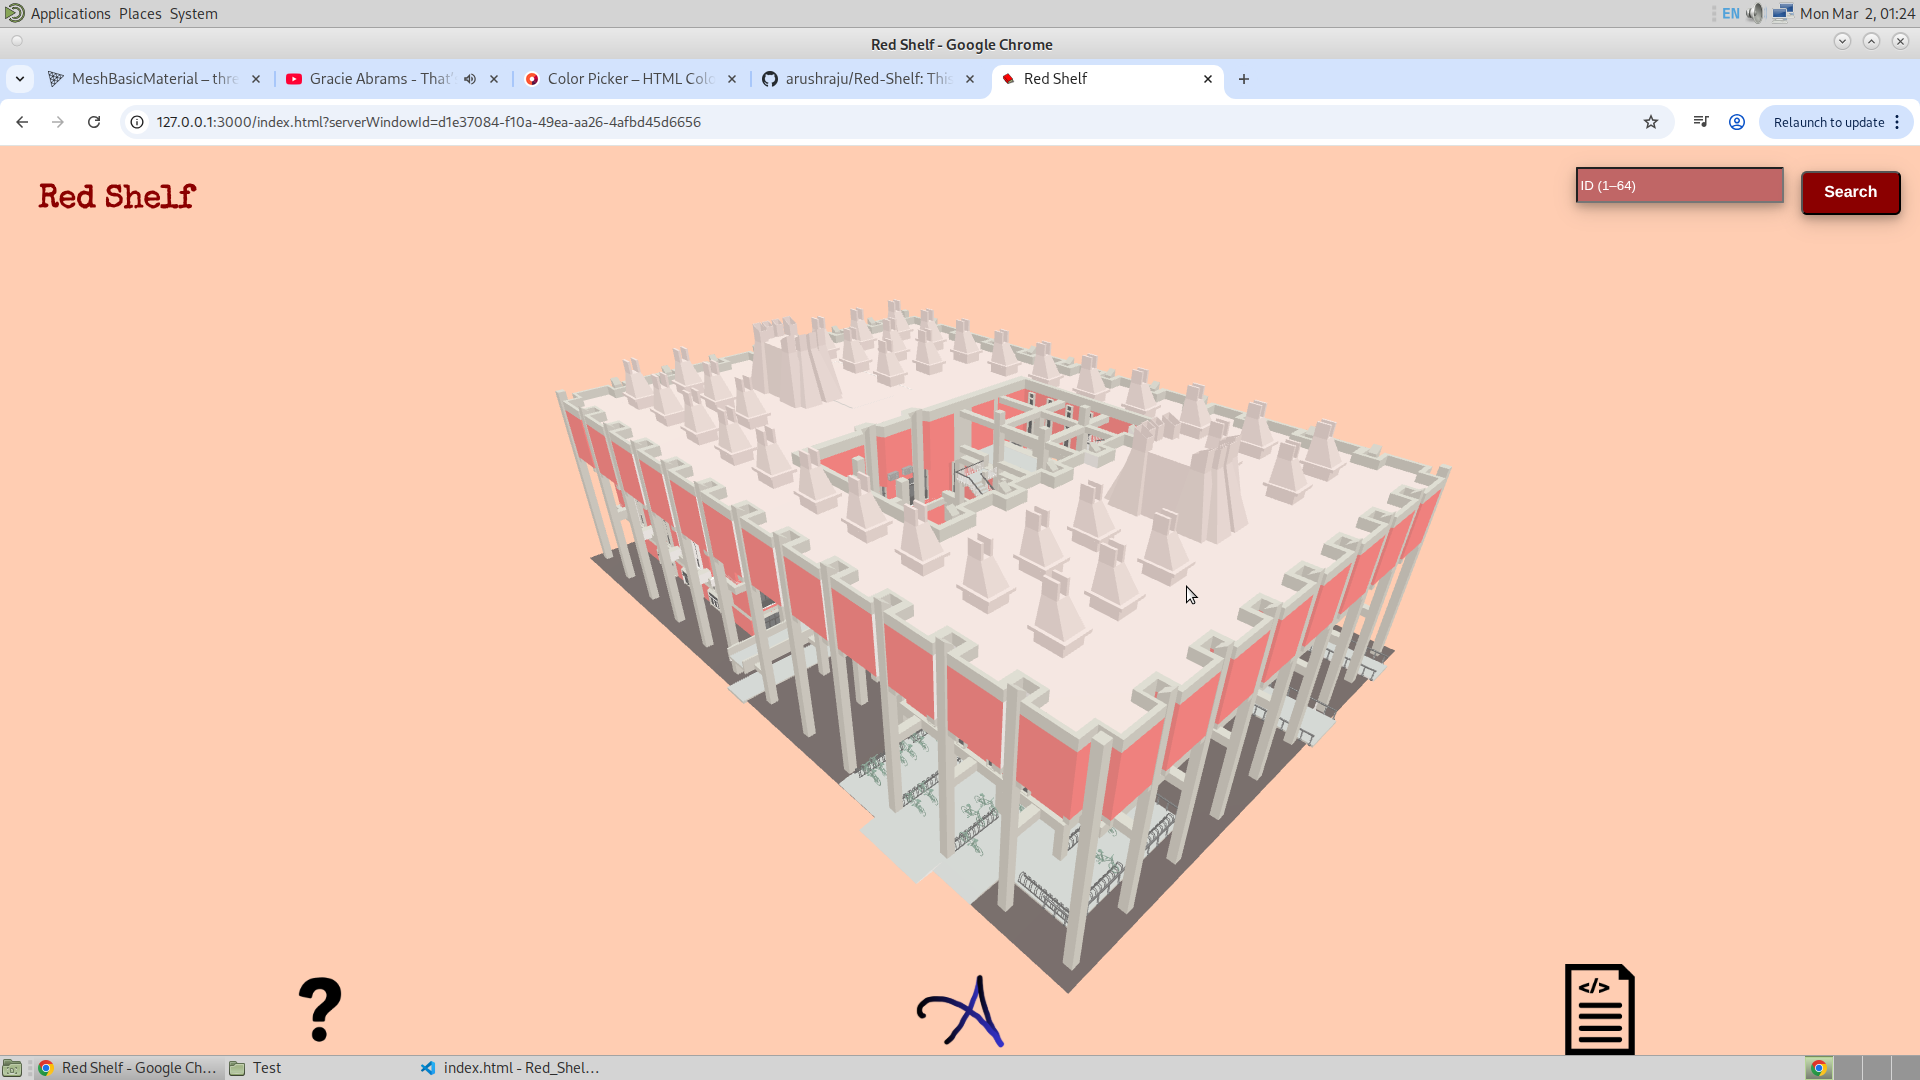
Interactive 3D Book Locator for P. K. Kelkar Library, IIT Kanpur The Red Shelf is a web-based library navigation system designed to help users quickly locate physical books inside the large and complex layout of the P. K. Kelkar Library. Instead of relying only on shelf codes or floor numbers, the system provides a visual, spatial wayfinding experience using an interactive 3D model of the library. Users search for a book by title, author, or identifier through a simple search interface. The backend queries catalog data and maps the book to its corresponding physical bookshelf. The frontend then displays a 3D model of the library, where the target bookshelf is dynamically highlighted in red, allowing users to visually understand the exact location of the book. This makes physical navigation faster, especially for new users and large collections. The system is built using Three.js for real-time 3D visualization and Blender for modeling the library layout and shelves. PostgreSQL will be used to maintain a relational mapping between books and their physical shelf locations. The project is designed to integrate with the institute’s existing library catalog infrastructure. The Red Shelf focuses on clarity, usability, and performance rather than visual excess, ensuring that the experience remains lightweight and accessible. The project demonstrates the application of full-stack web development, database design, and 3D visualization to solve a real, campus-scale problem and is intended to be handed over as a functional tool for institutional use. This will be my third 3D website.
Phases of this project
This project will be excuted in three phases. And they are as follows:
-
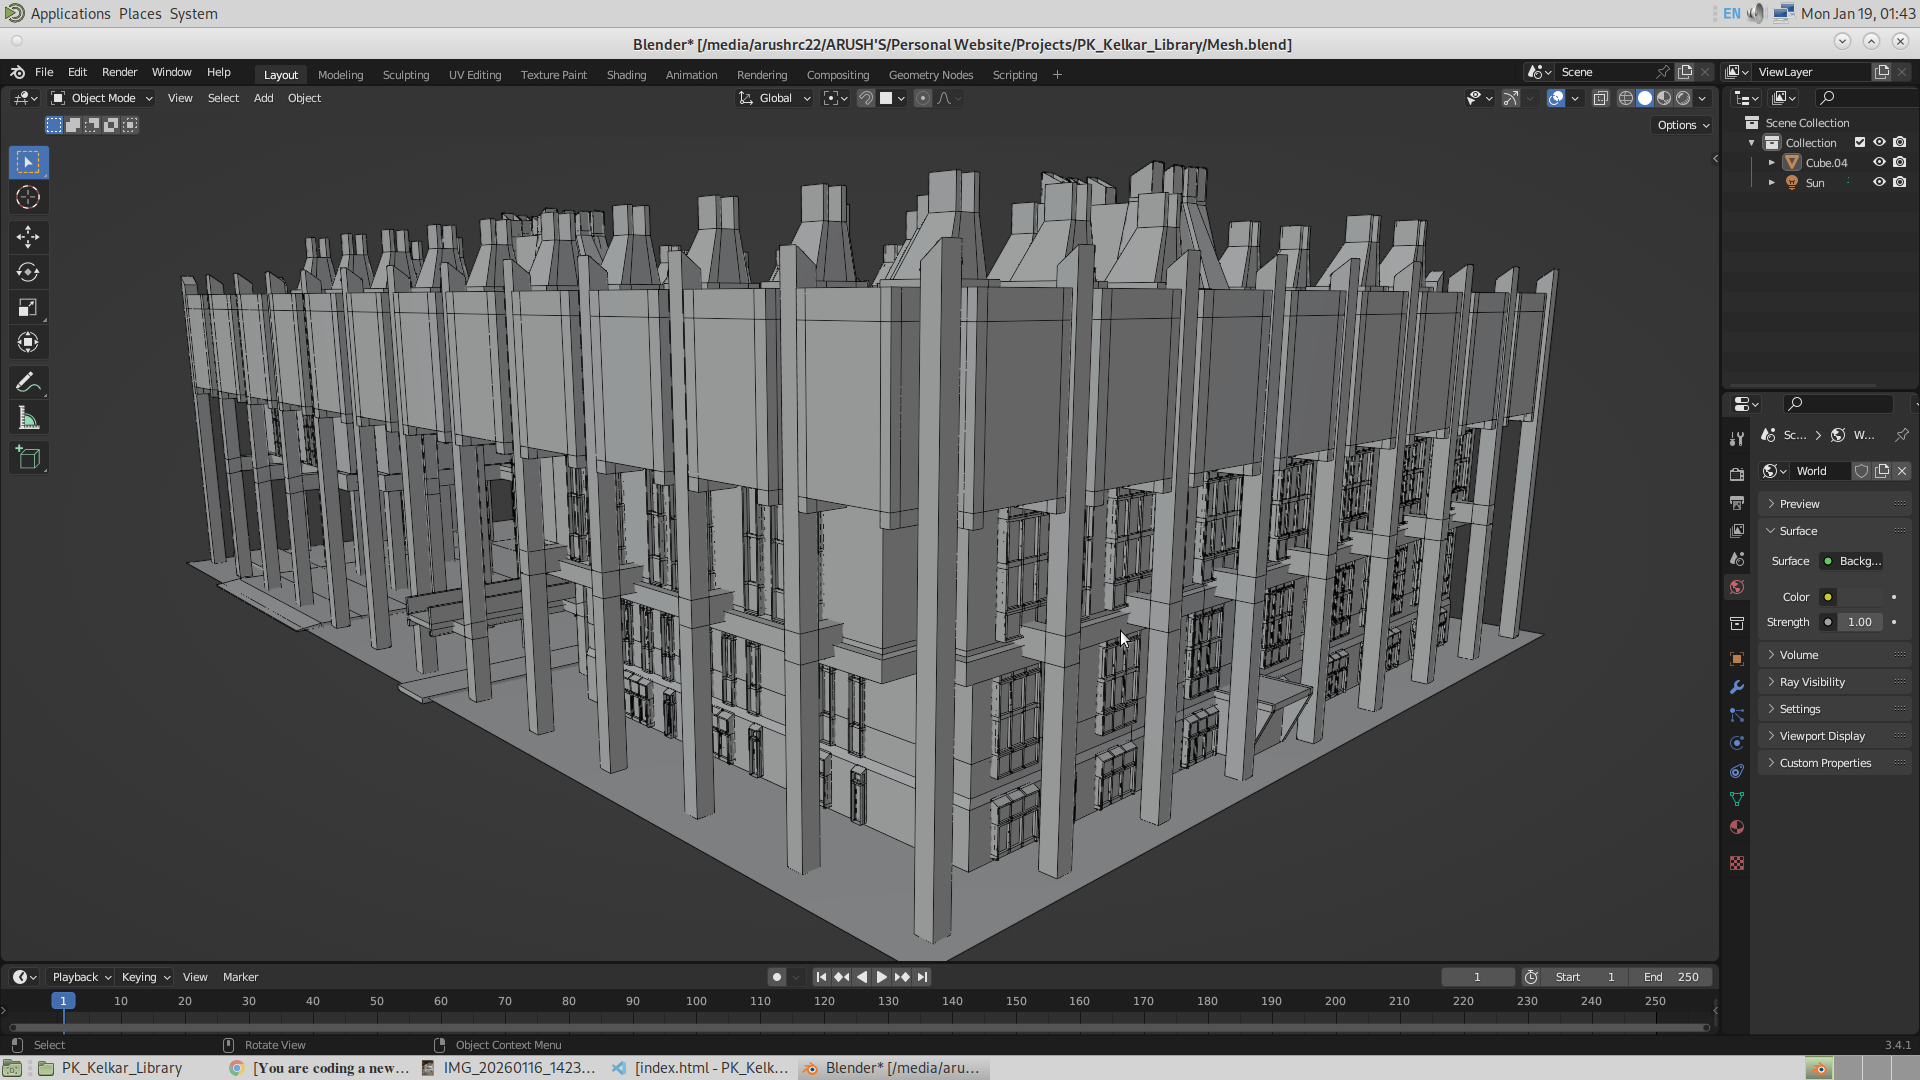
Modelling: I will have to build the model of this library, an dfor this I will first take many pictures of my own library. After whcih i will make the model in bledner. I will also take the pictures of my shelfs and there IDs. Names of the model in blender has to given carefully. FOr this phases I am giving myself three days. One day to get the refrences and setting up the idea, and the rest two days to model the whole library. This is schedules to be executed on 16th January to 18th January. Link to the final blender file is given here :
Download (16.3MB)
- Front-End : This will not be the for the first time that i will be used thre js to make this. The Front-End of the website will be kept minimal. I will add the search bar where I will be aksing for the ID of each book. And thats it. So all that the front end will contain is the Search bar, and Library model, and also space for the title of this project. Along with the footer with links to this documentation, code, and also link to my personal website, damn it!
-
Back-End : This will be the tough part. The backend will be made in node.js and also PostgreSQl. node js tp send the query to databse, and PostgreSQl to retrieve the data from the database. This will be my first expereice with Database.
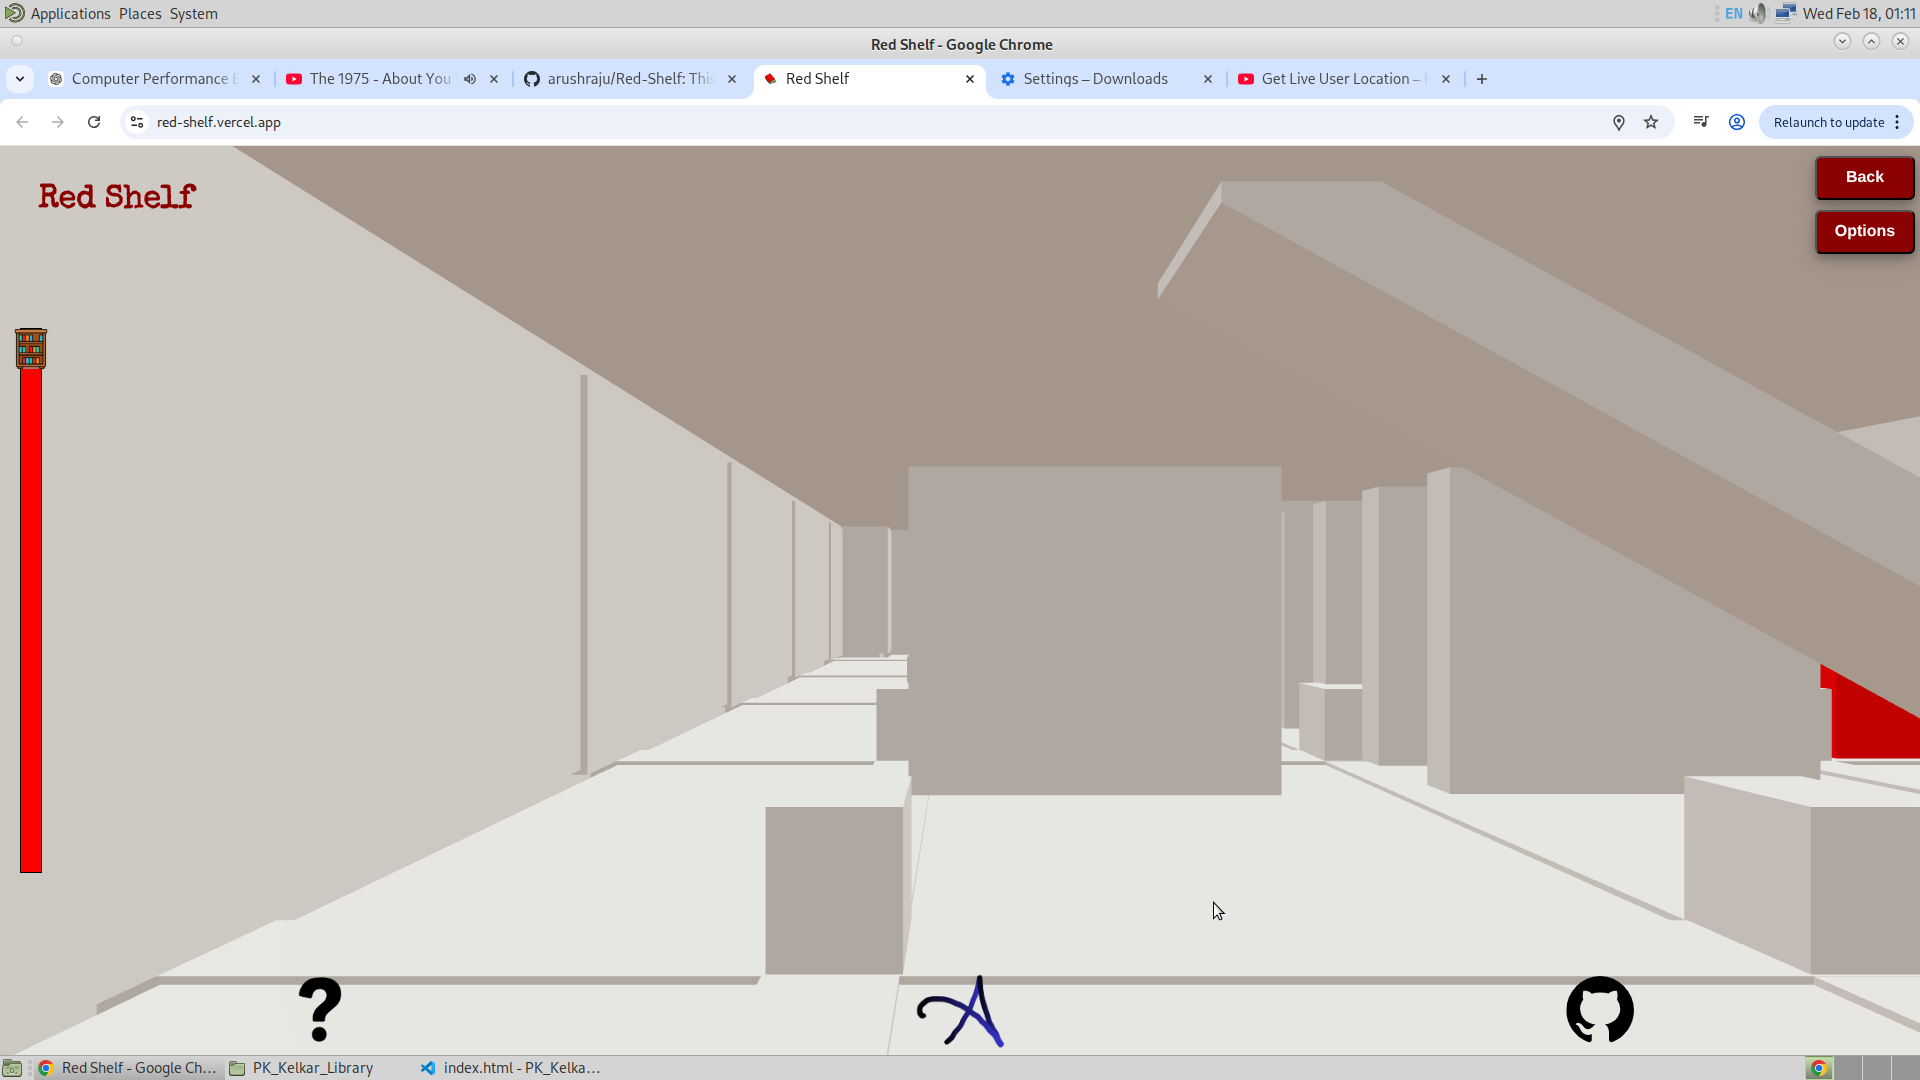
Once the location of the bookshelf is retirved, I will remove the search bar, make the library's opacity very low, and the bookshelf inside it will be made to appear somewhat dim, and then the bookshelf where you would find the book will be turned Red. Hence the name Red Shelf.
Phase 1: Modelling
16/1/26
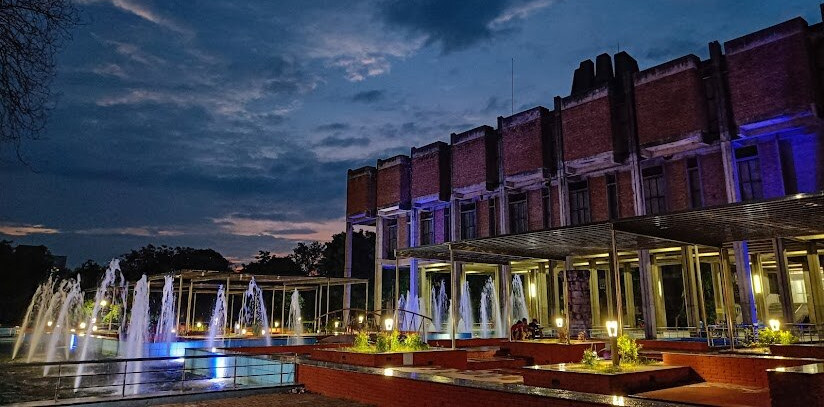
I have just now came taking some pictures of the library. And the link to all the pictures of library is given below. And after seeing the library closely, which I haven't done even though I have visited it multiple times, I see that it's architecture is magnificent. The complexity, and unsymmetricity in the desing makes me wonder how could some one even imagine this. The architect of our library is Achyut Kanvinde. I don't have words to describe how great his work is. Truly Amaaazing a work and an Amaaazing Architect! I have linked all the downloadable pictures of the library that I will be using as reference, below.
From tommorrow onwards, I will start modelling the library. So the plan it to make the model as low poly as possilbe, and visit the library later on perfecting the model with small details. But I dont aim to have a perfect model ready by tomorrow.
17/1/26
Ok so today, I got wasted. I am feeling very low from the start of this day. nothing seems to be working out. I am feeling very low. This might be the lowest poitn in my life. But I don't want to make this documentation a personal diary. So I will meet you tomorrow. And whether or not I start modelling will depend on my mood tomorrow.
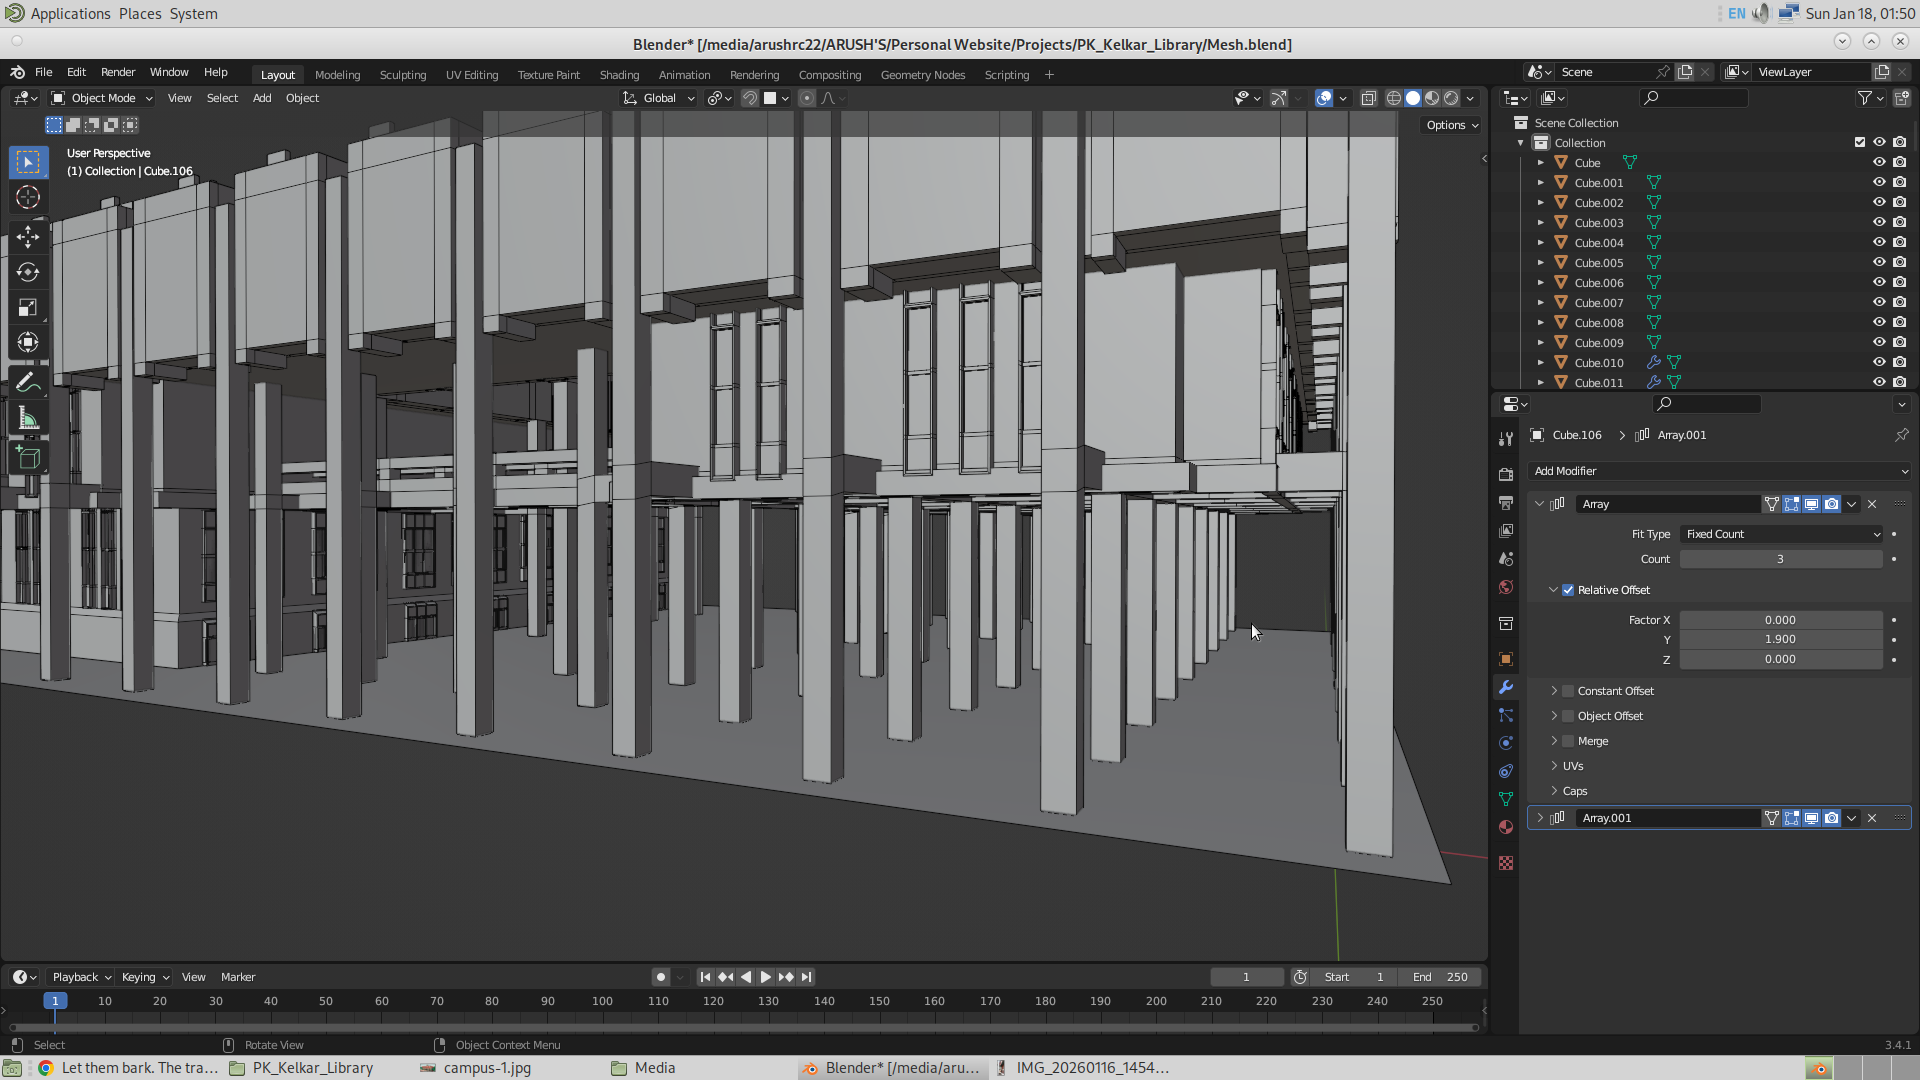
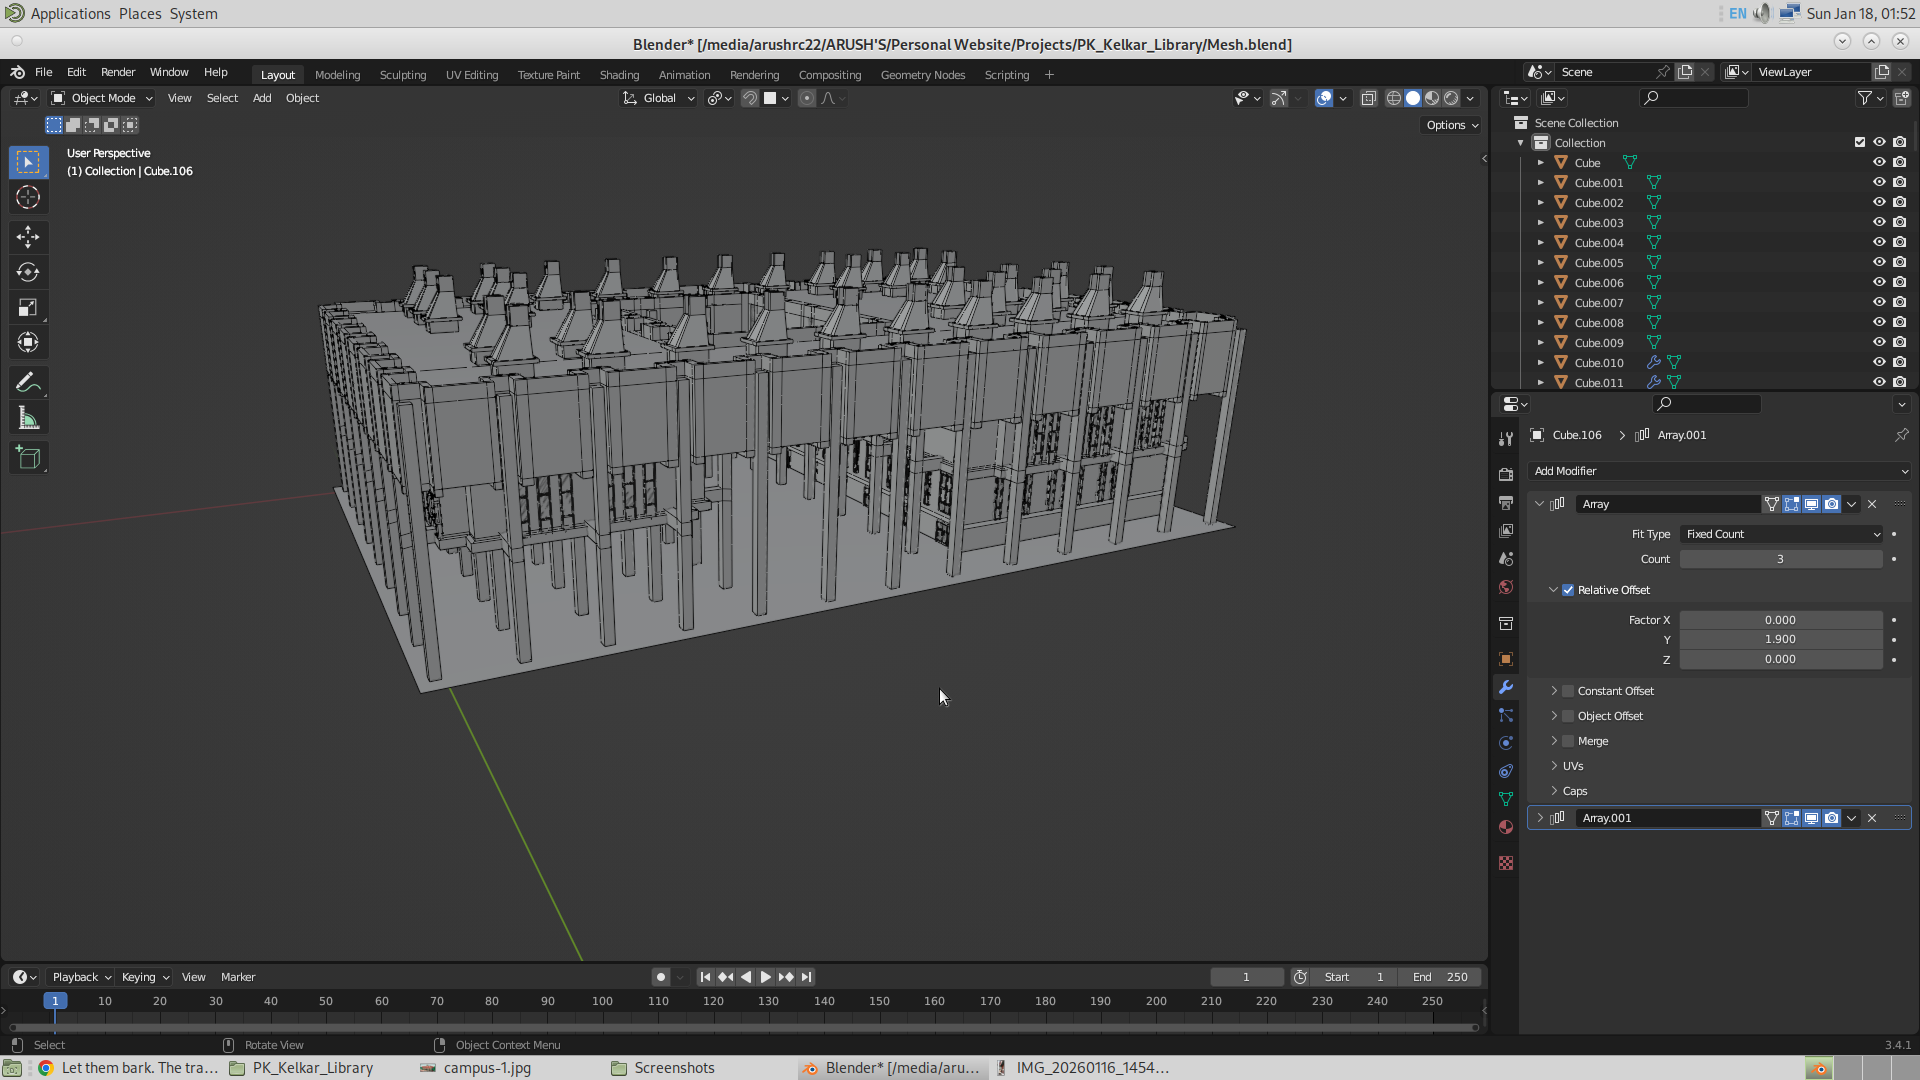
I had almost completed the entire exterior of the library when Blender crashed and deleted hours of work. It was fucking painful. Everything had finally started working properly, the adrenaline had kicked in, and then suddenly the entire progress was gone.
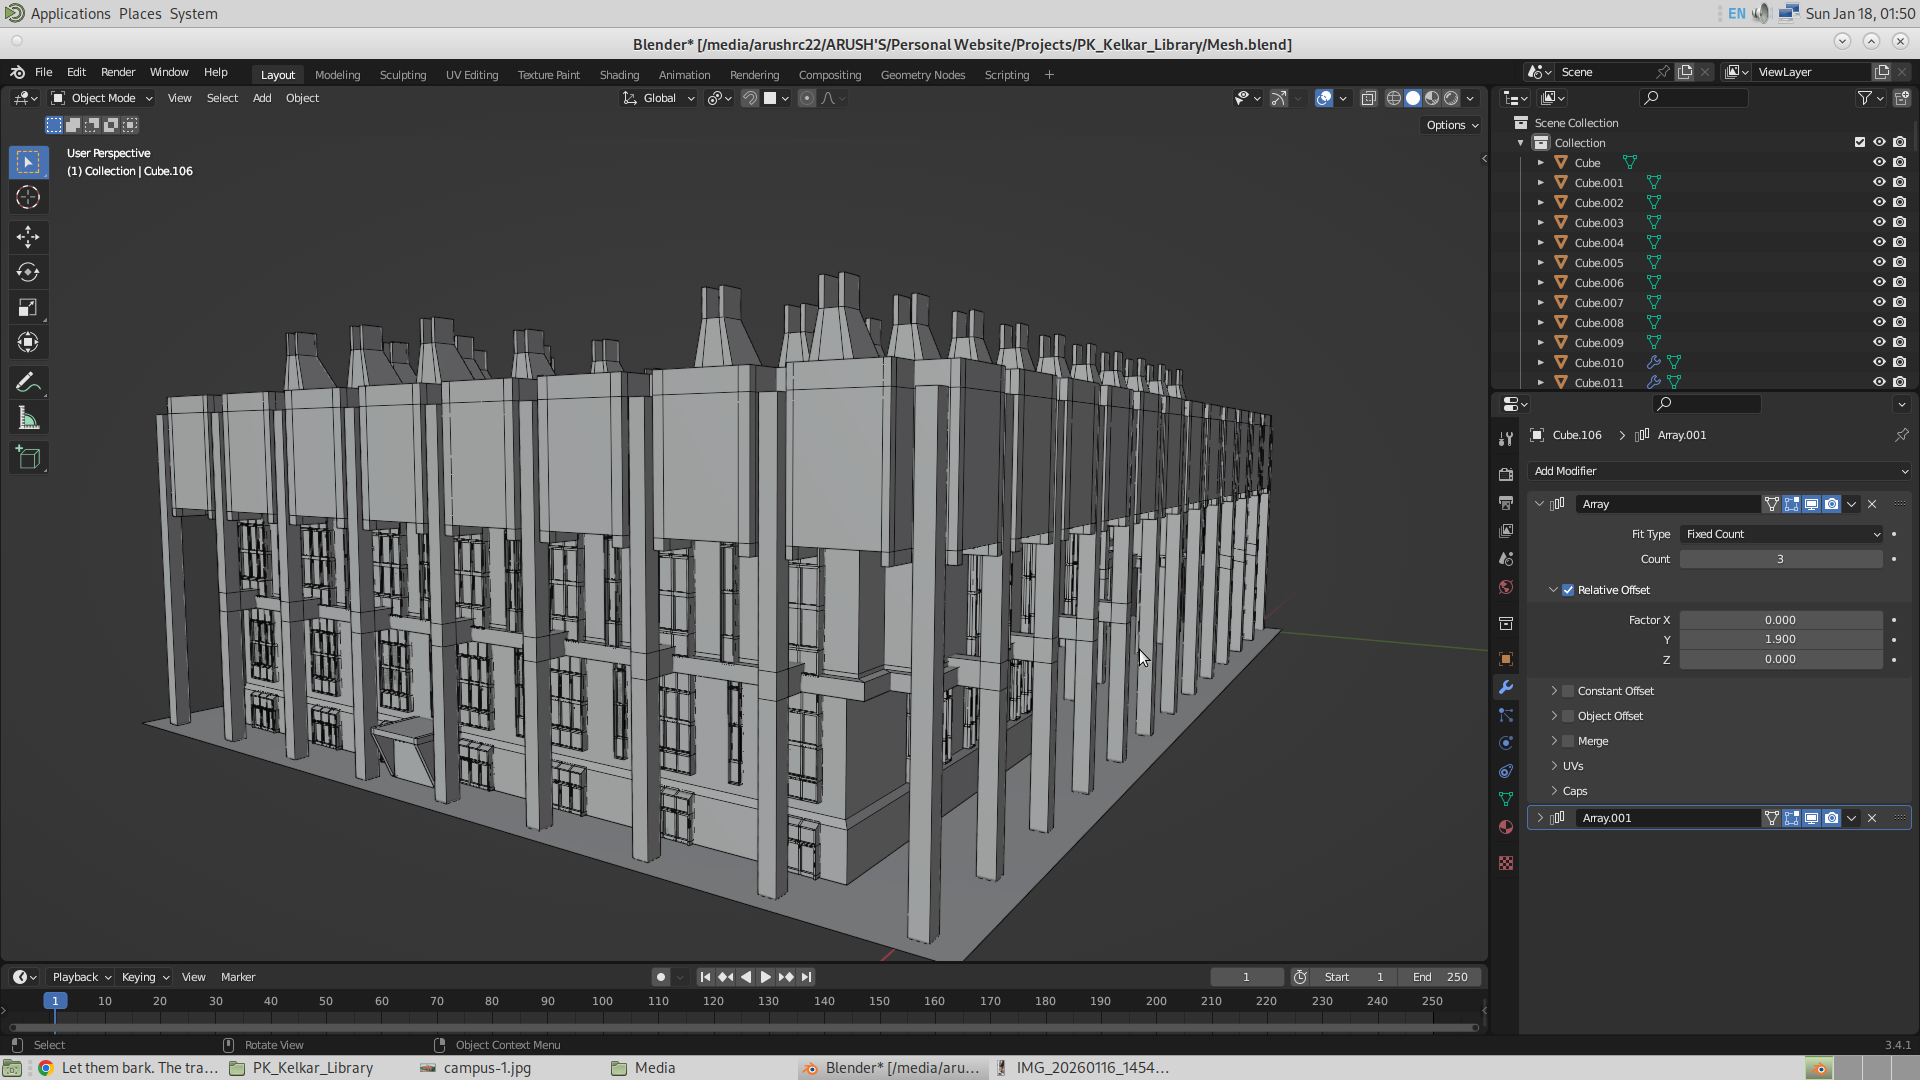
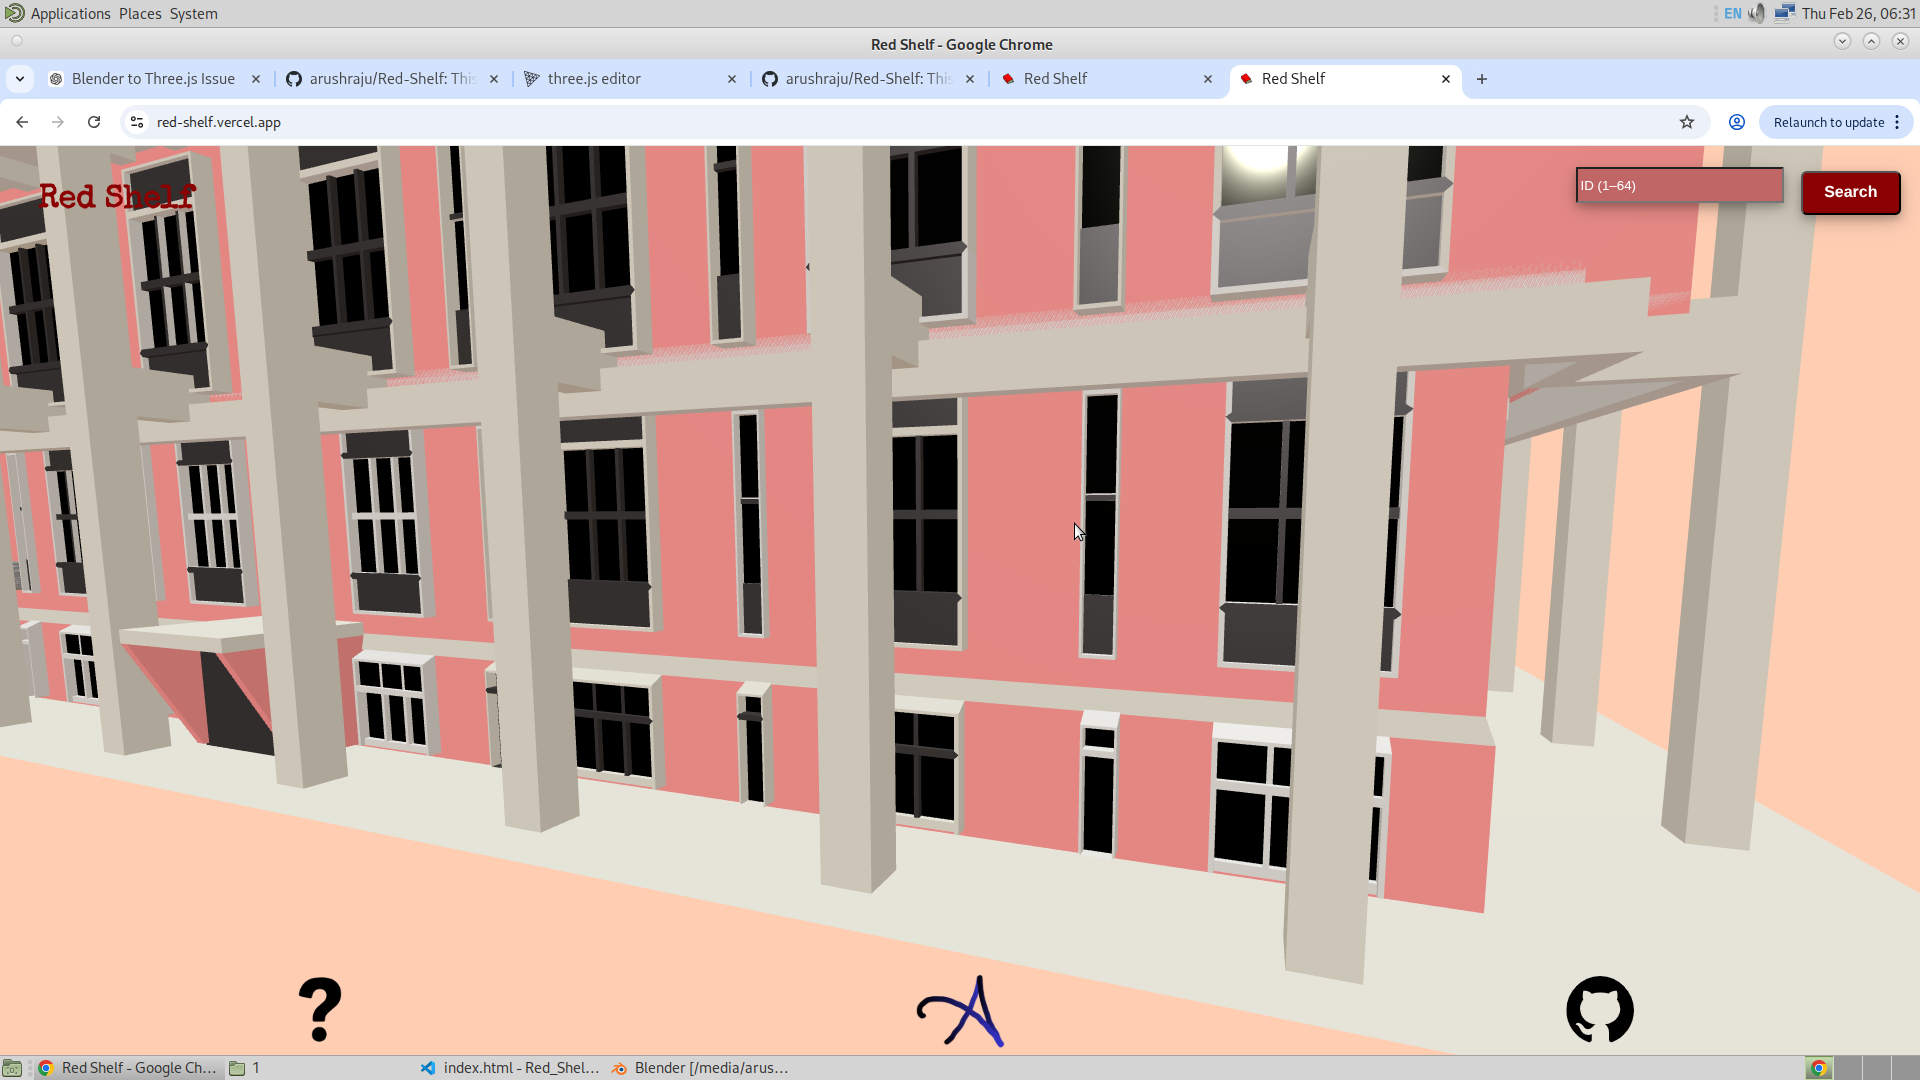
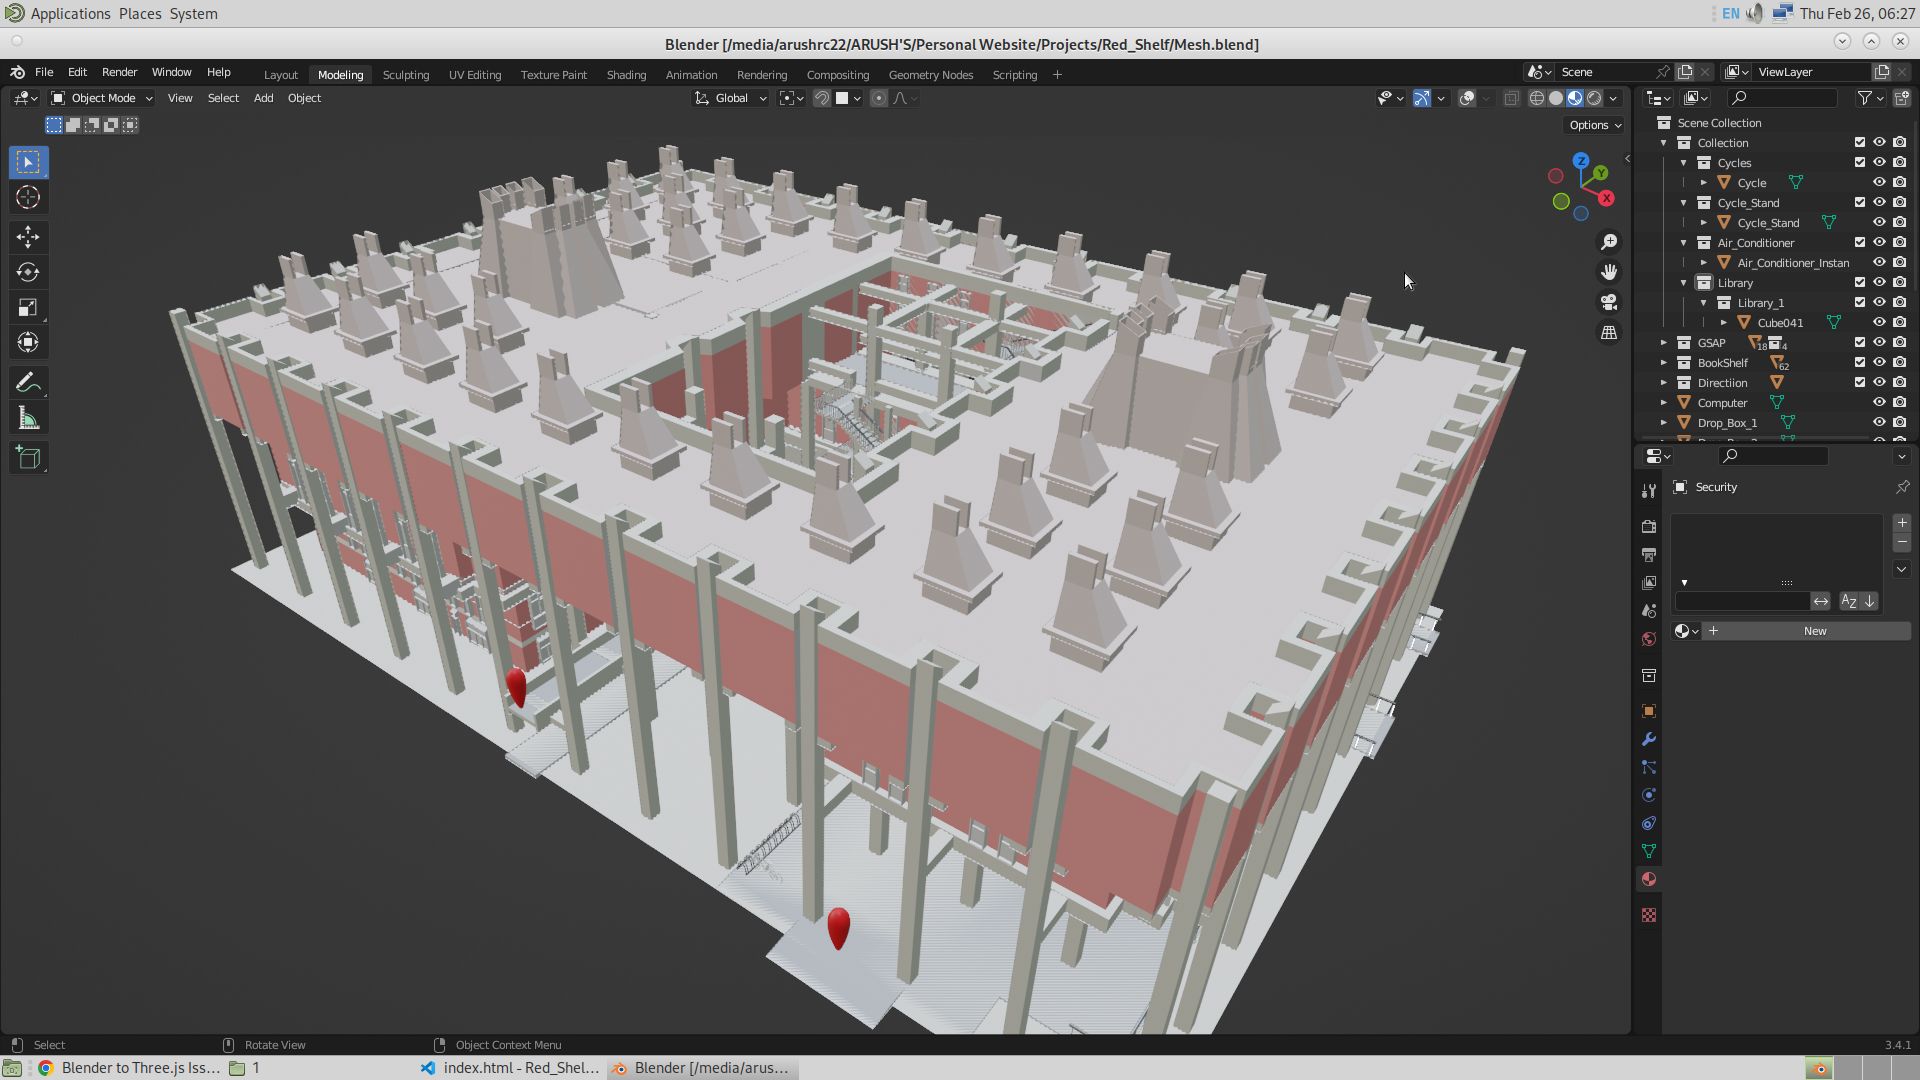
Ok, so I put some more time in and made the model again. Now here are the results. As I proceed with the modeling, it becomes more and more easier, and more and more interesting. I have made more than what I expected.
Here are the images.
18/1/26
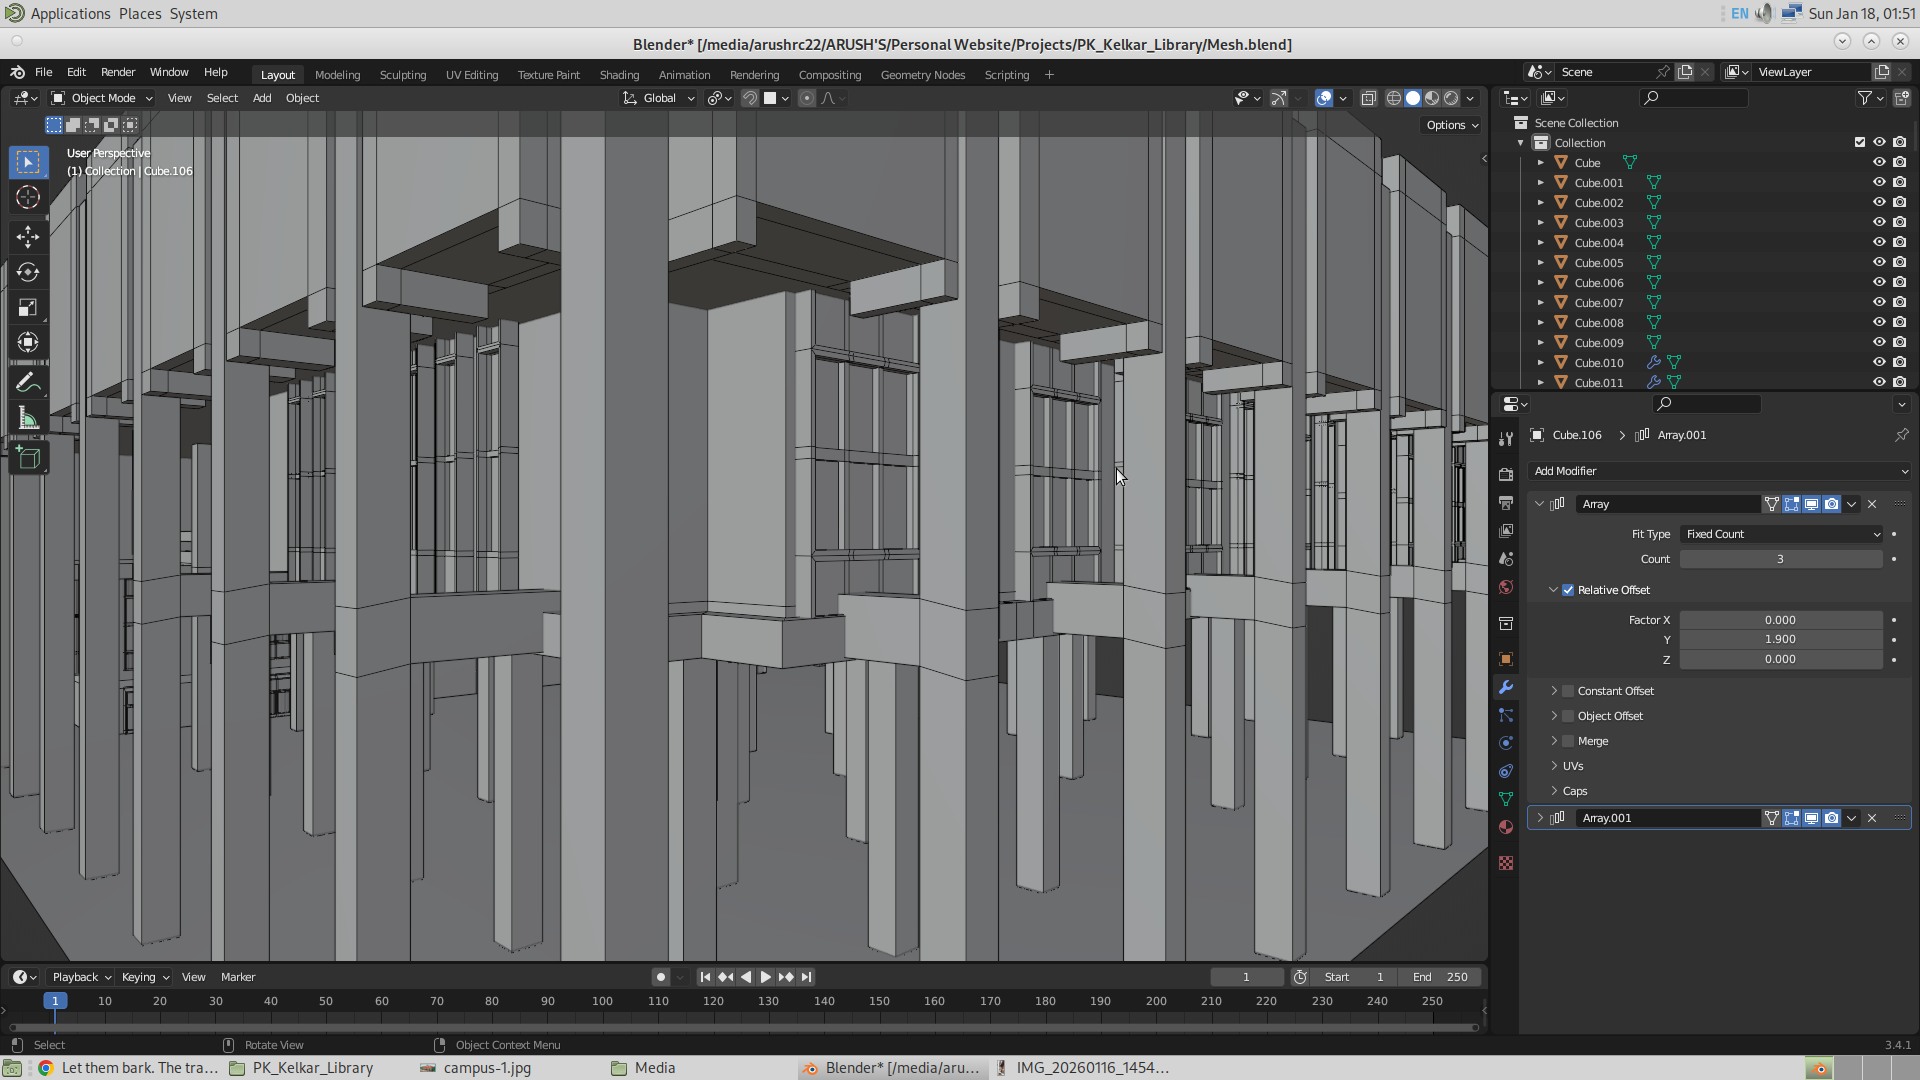
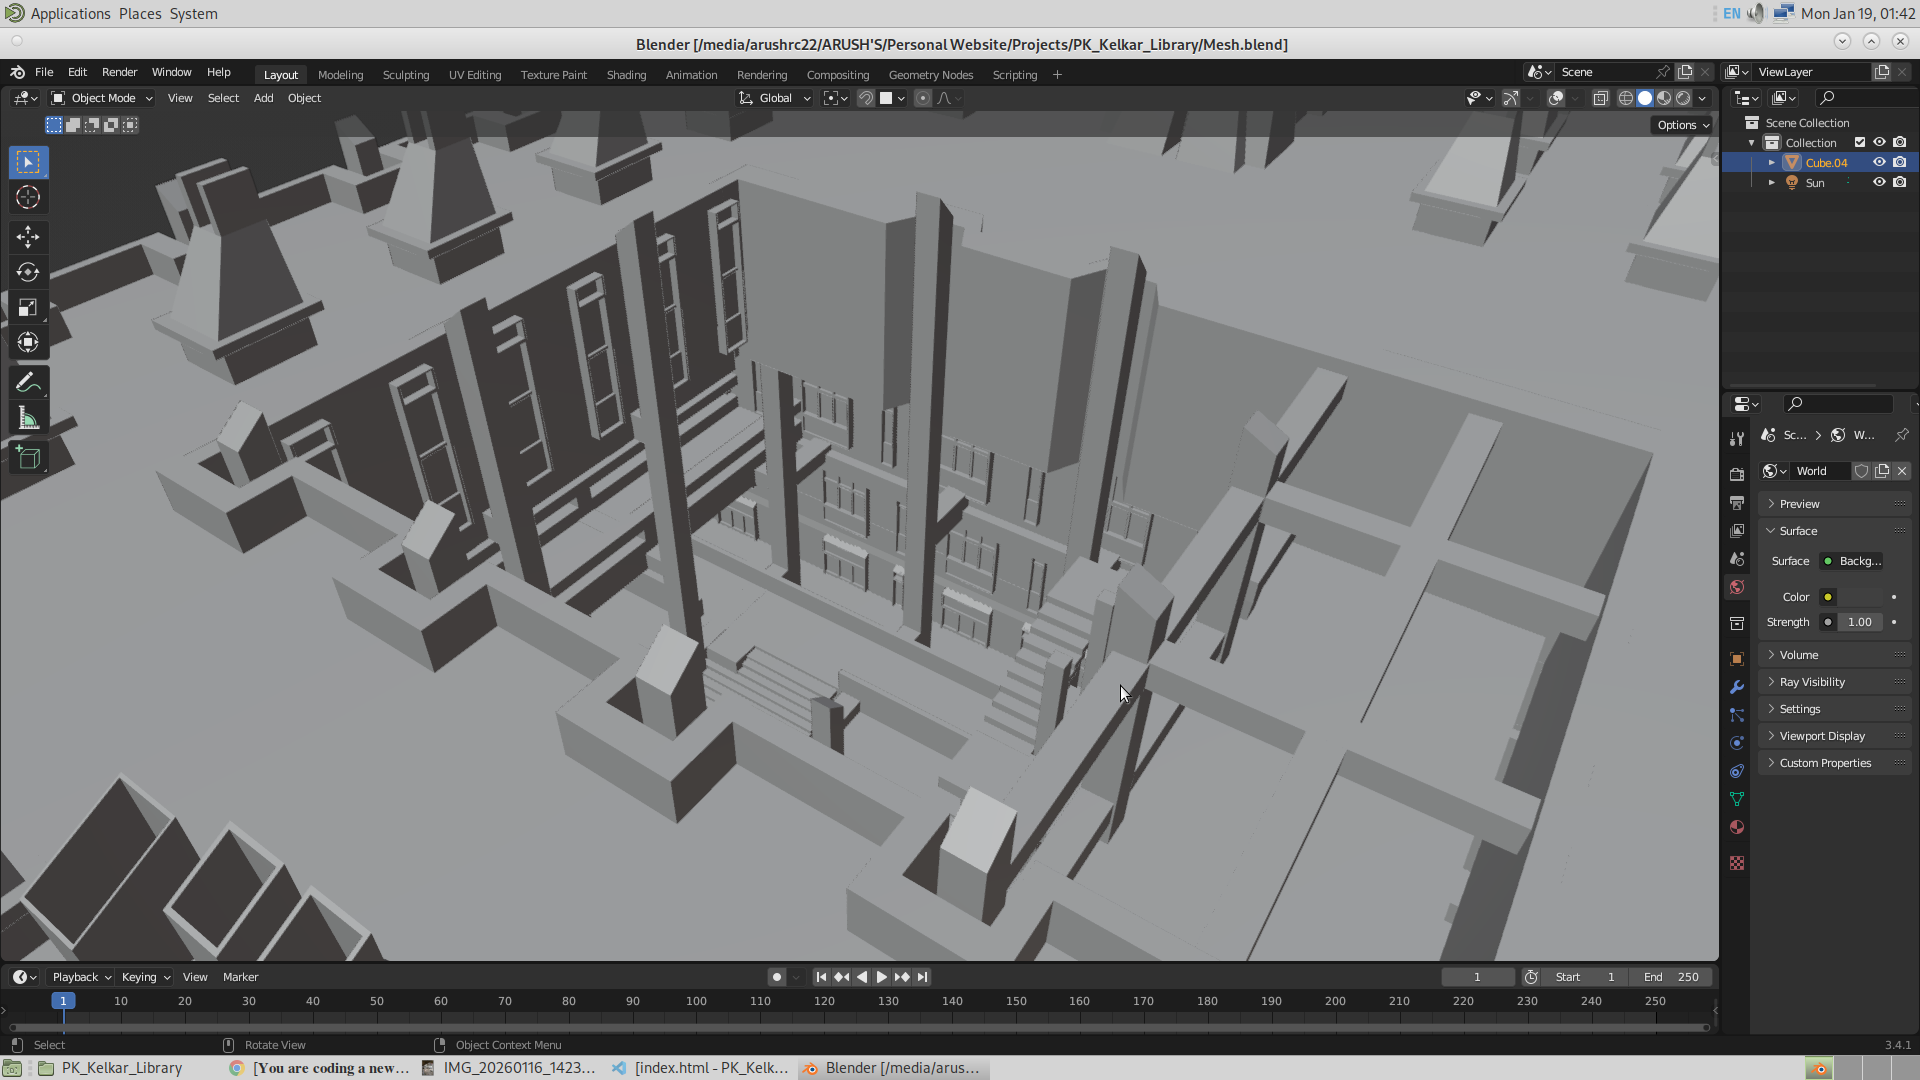
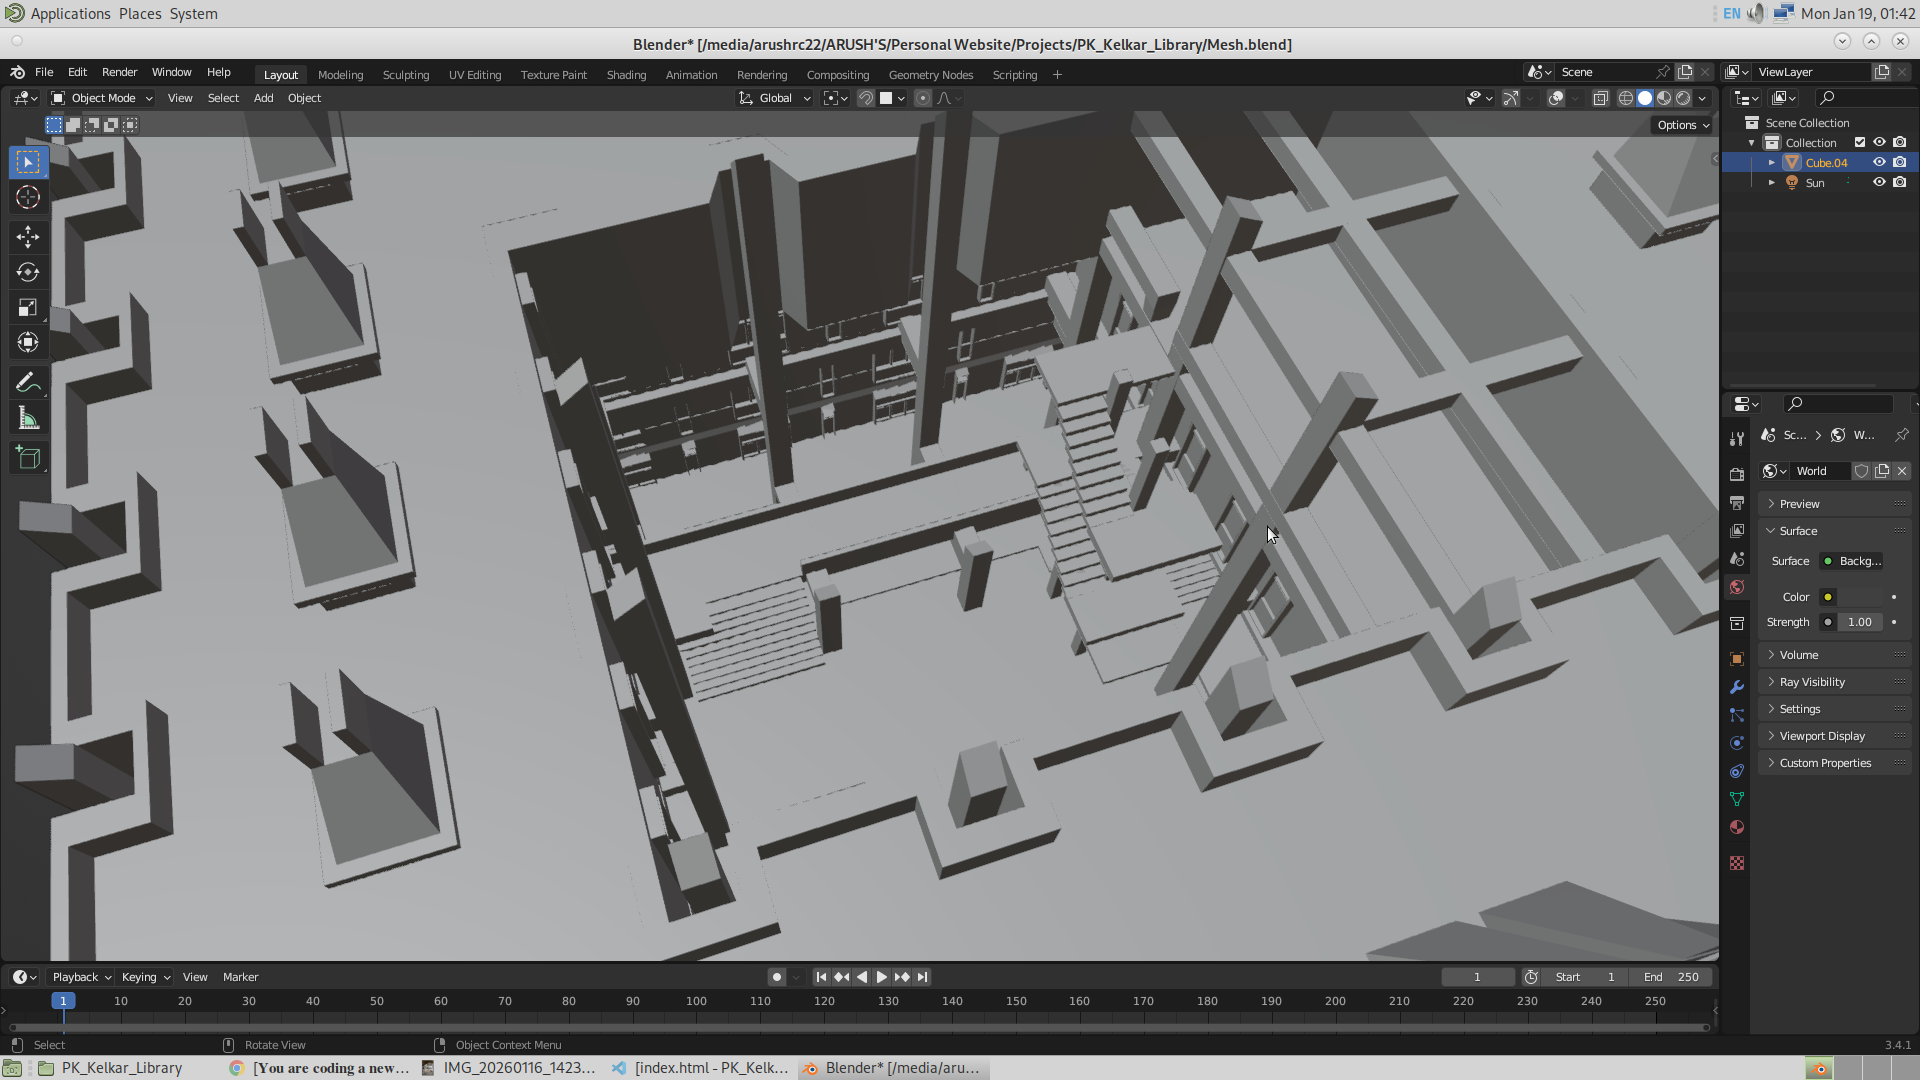
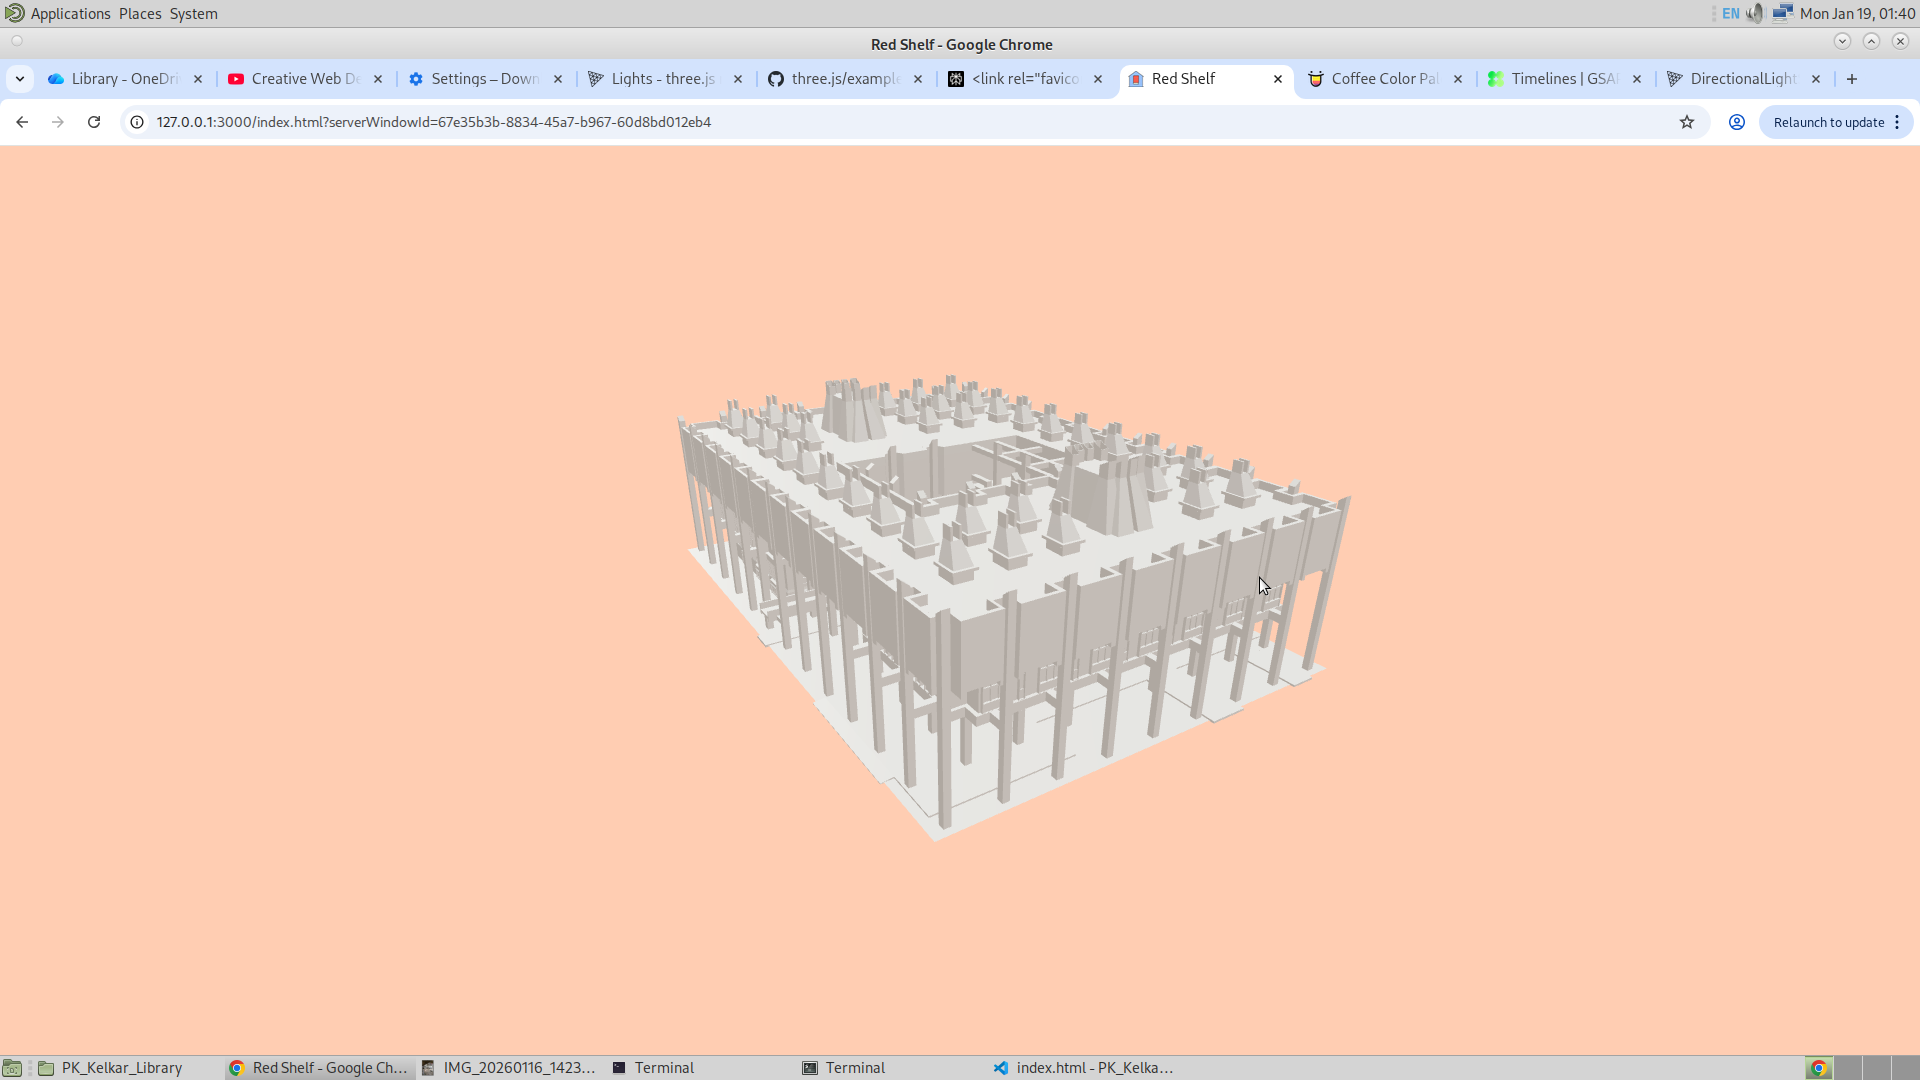
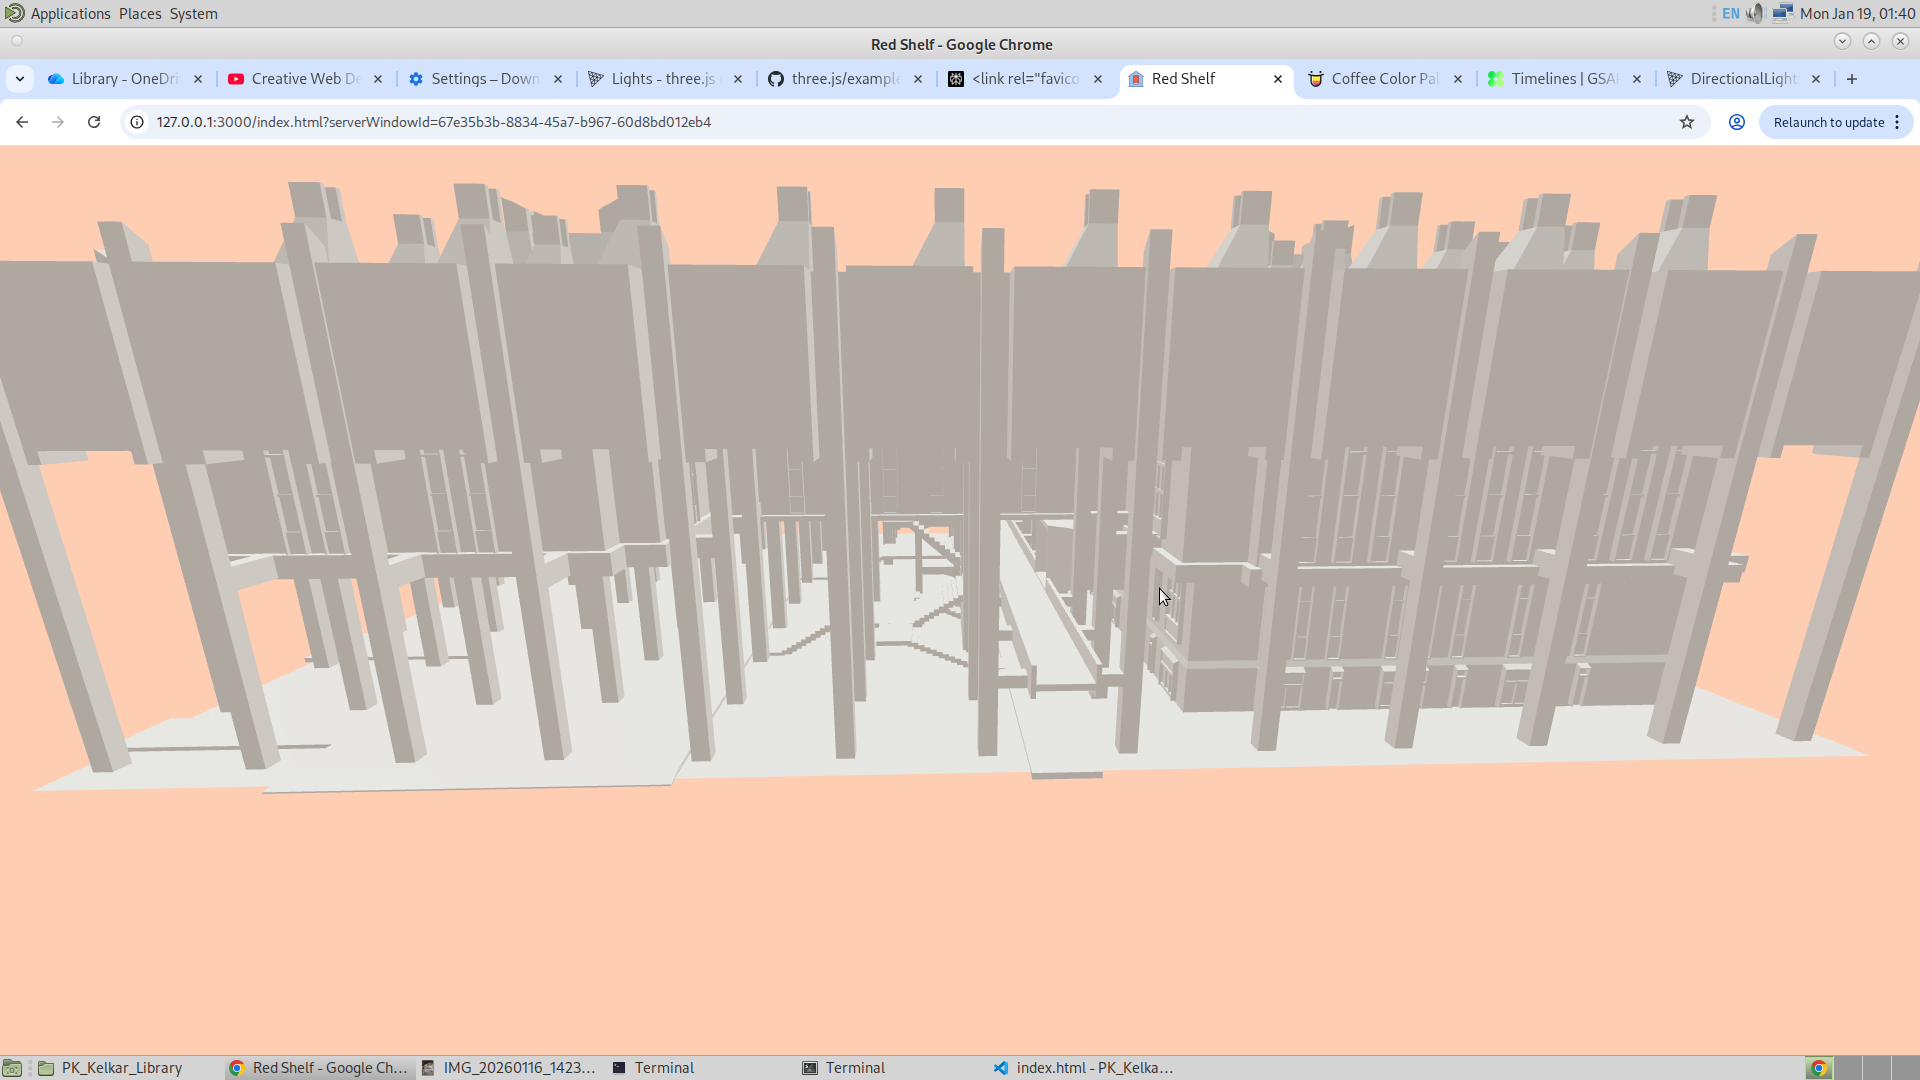
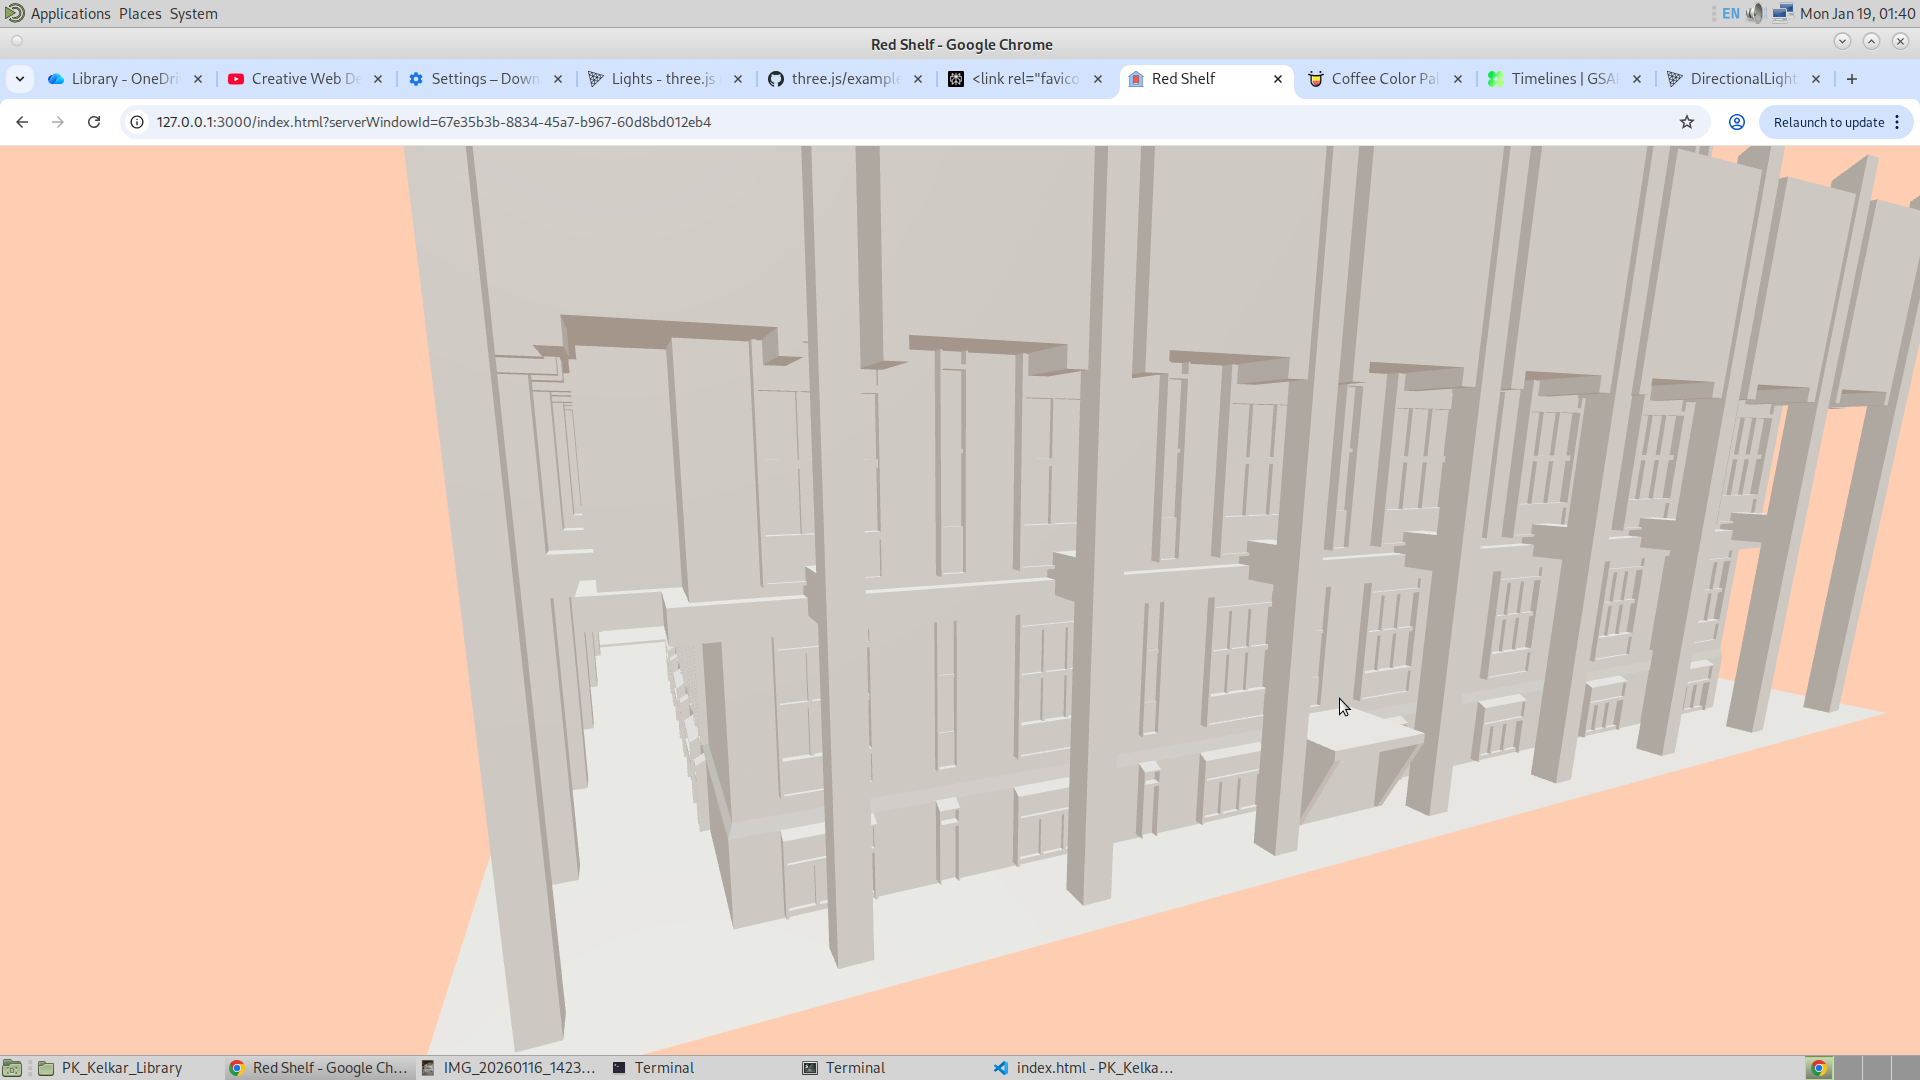
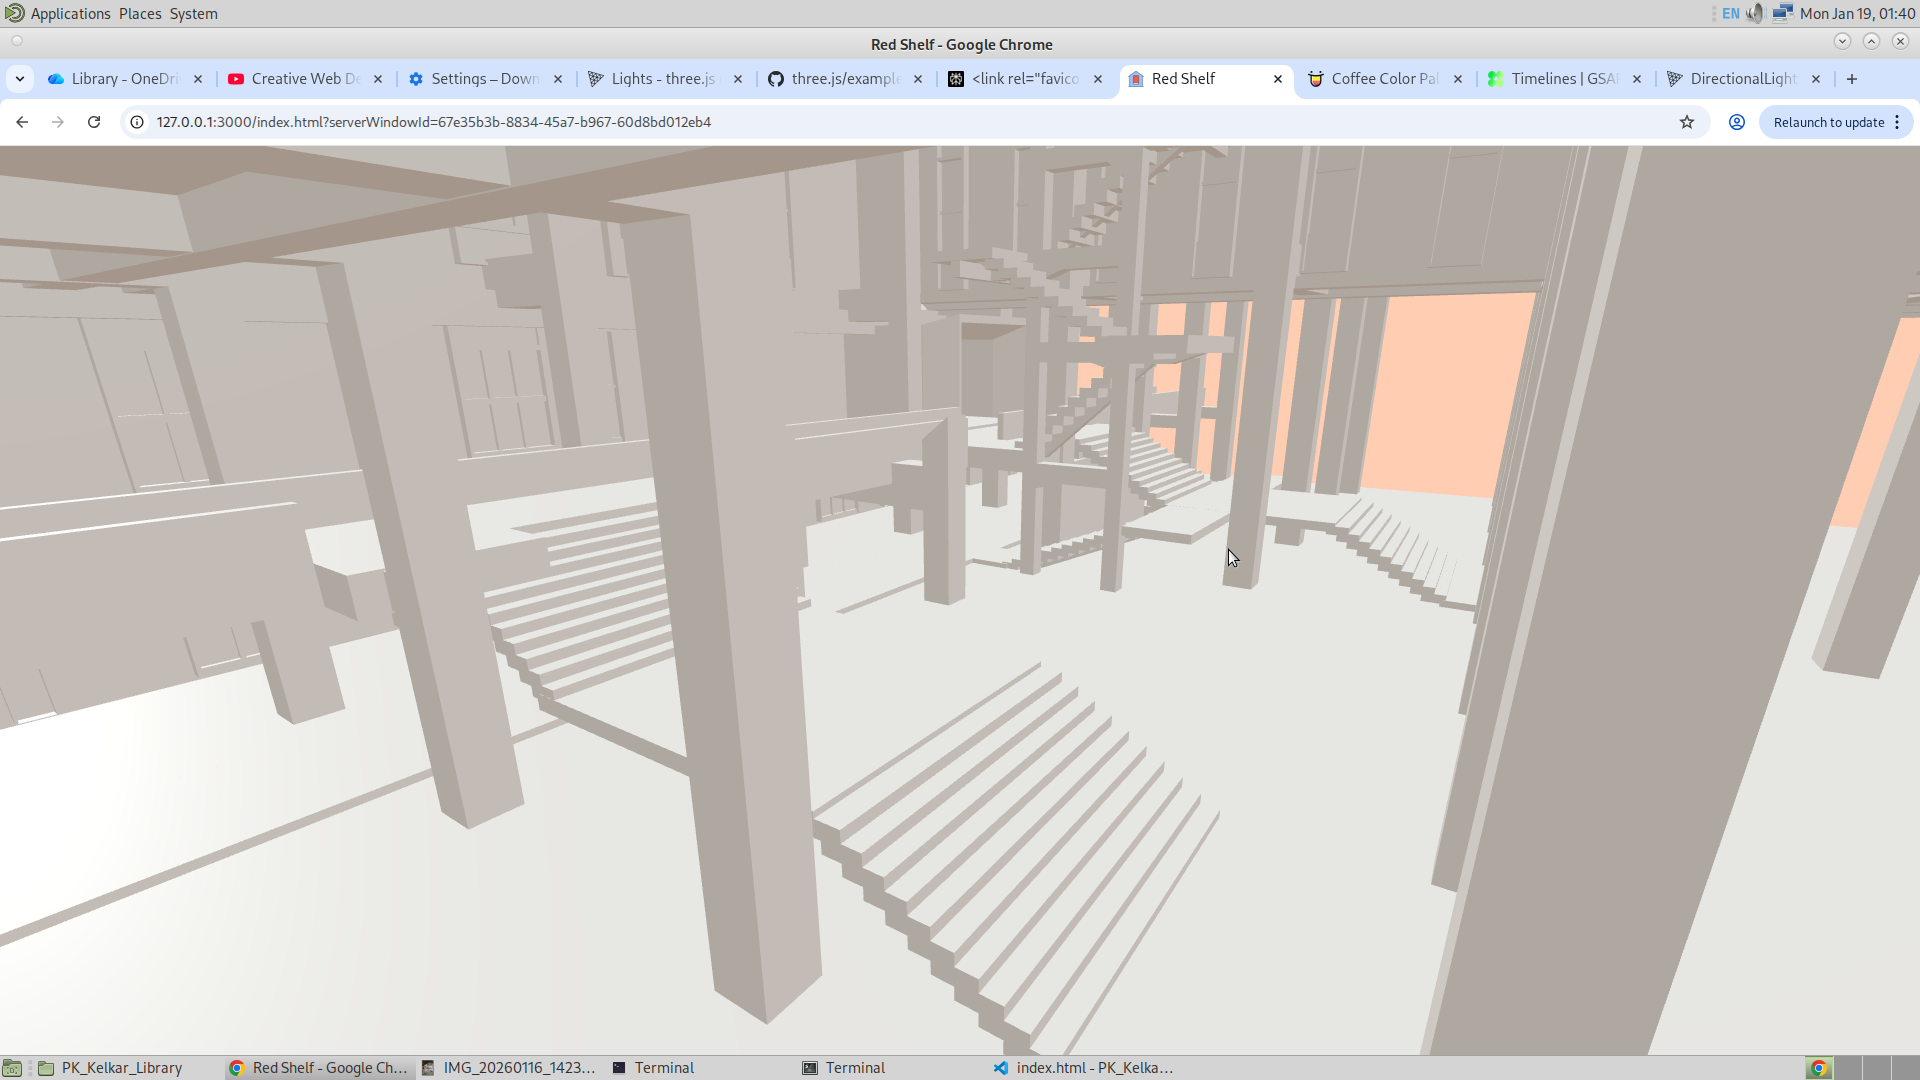
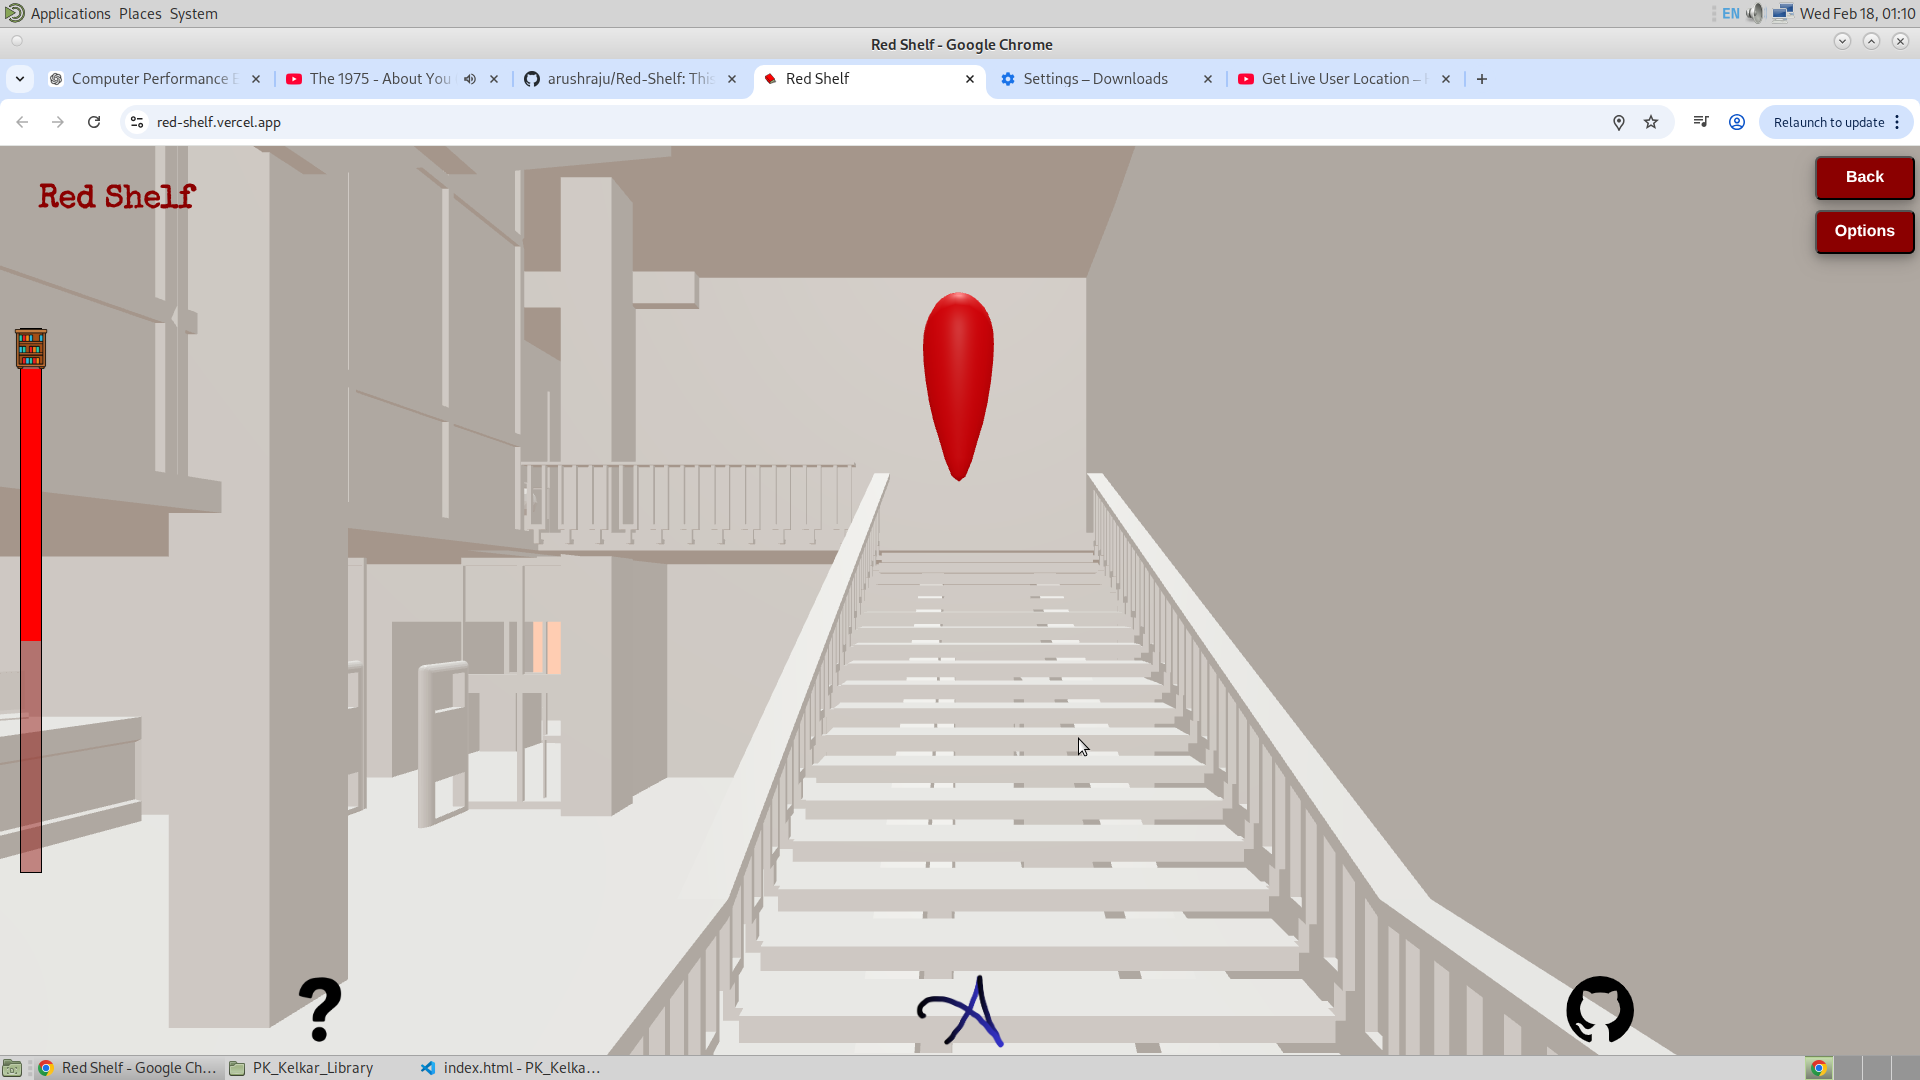
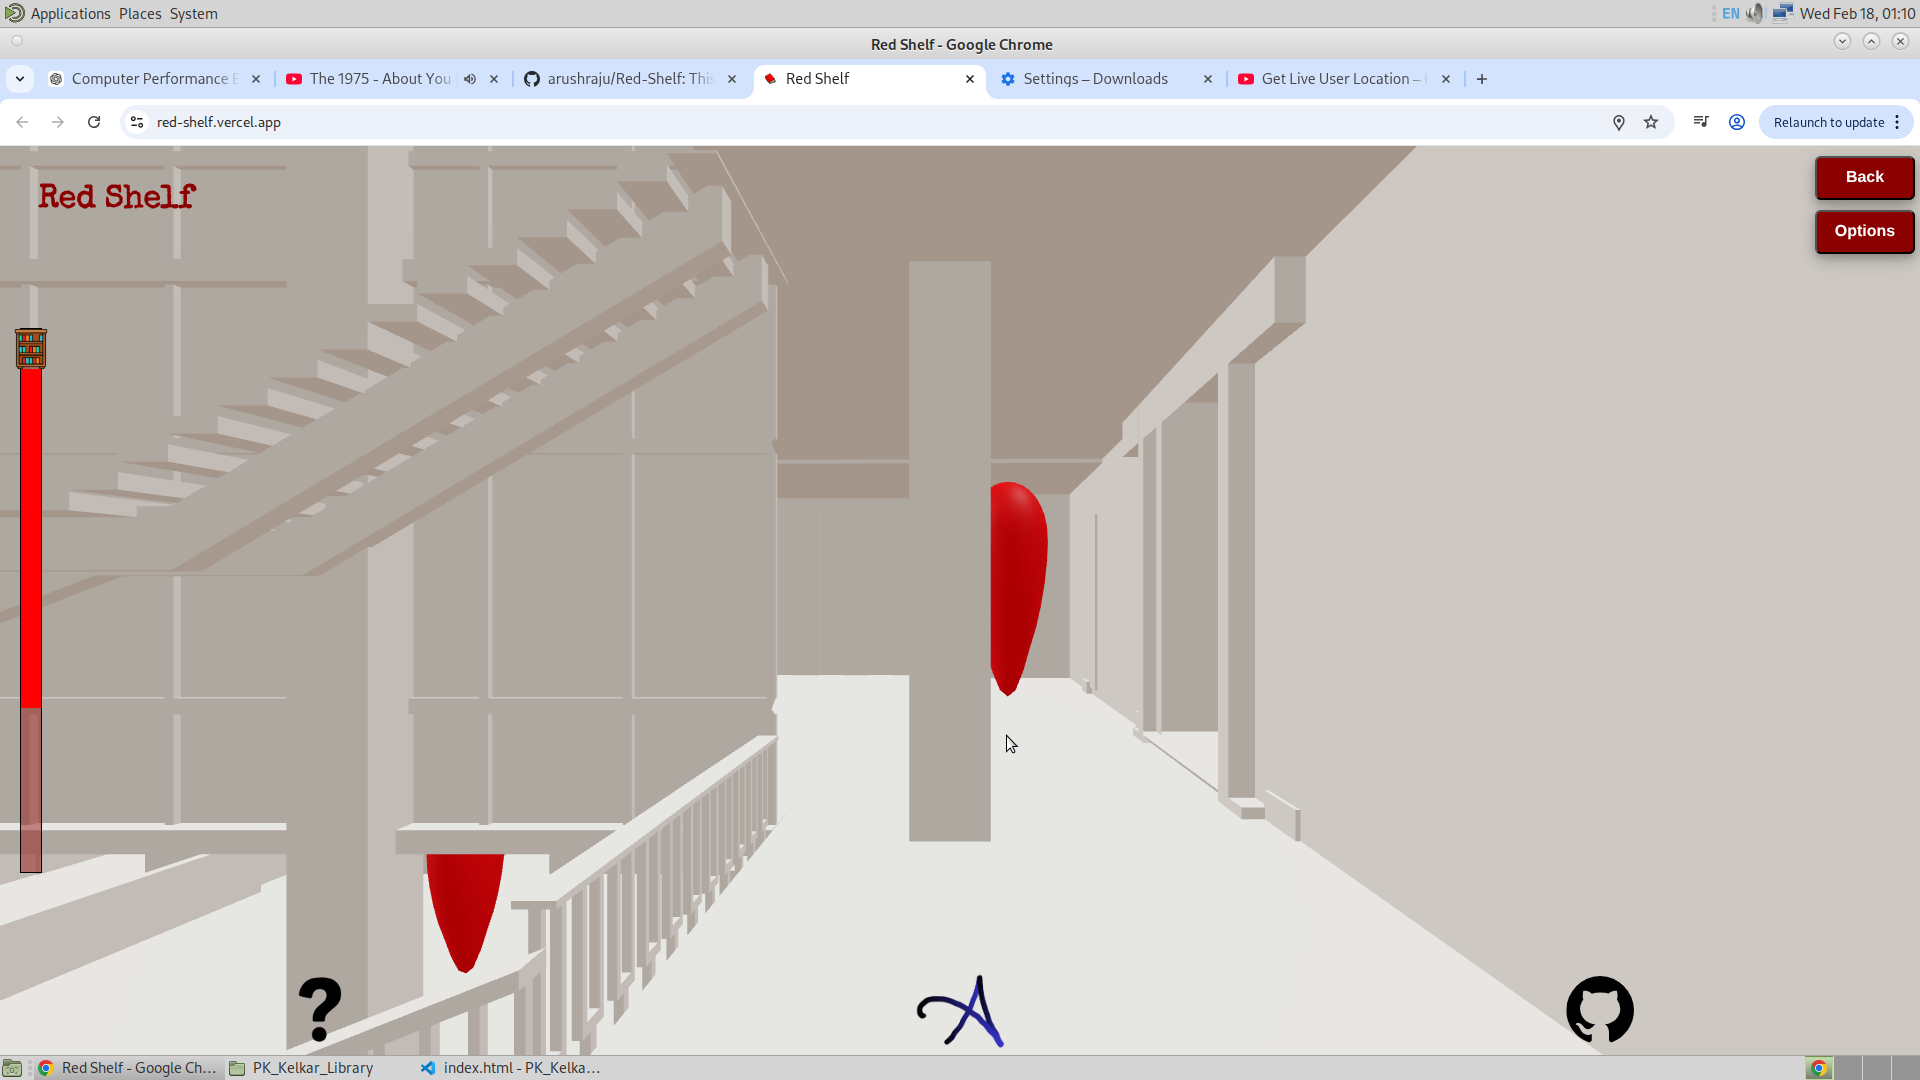
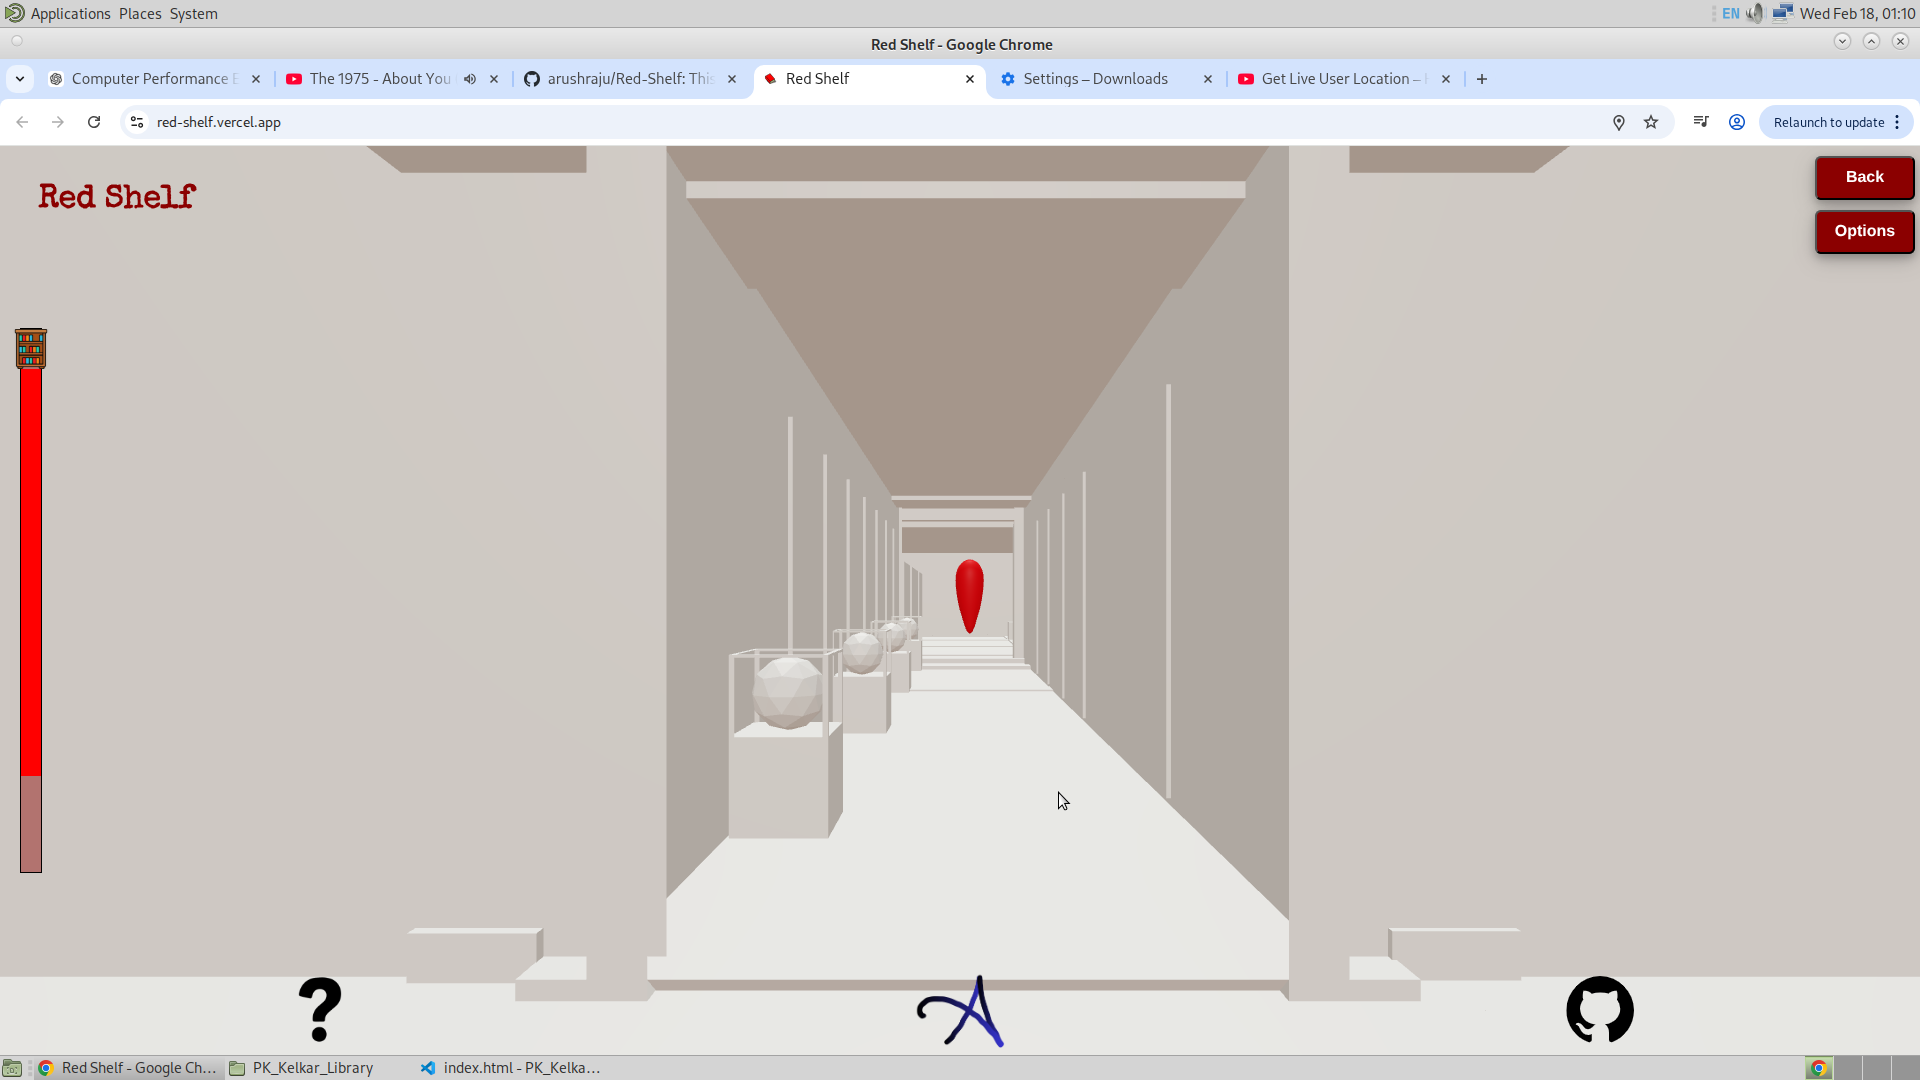
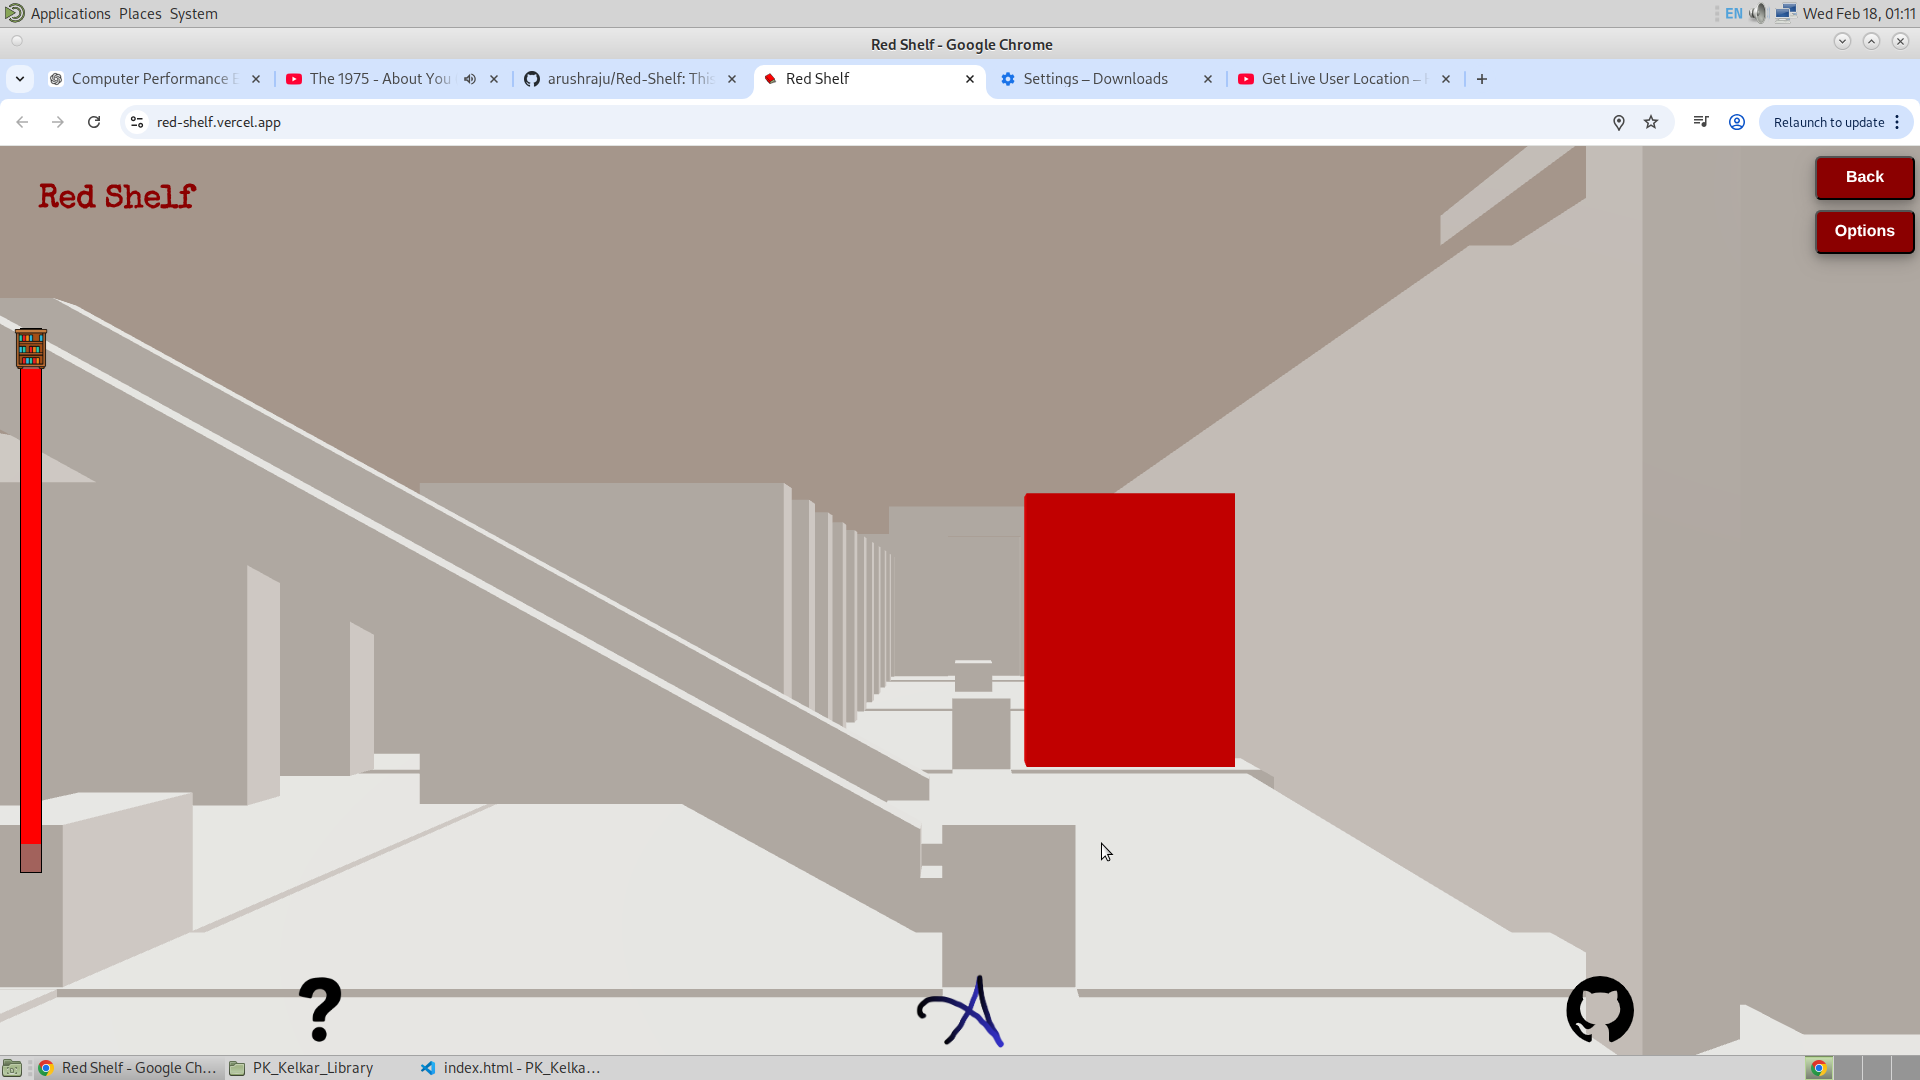
I am completely satisfied by today’s work. I have successfully made almost the entire exterior of our library, and now is the time when I will be building the interior, since that is why this application will be used. So today, I have completed the exterior except for the handles for the stairs and the staircase at the other side of the library. And apart from that, everything is done, along with the first implementation of Three.js. So with that, I will show some of the results that I have done today. I have also added an opening animation to make it look good, but haven’t added the search bar and the footer. I will be adding that in the next schedule.
Blender file

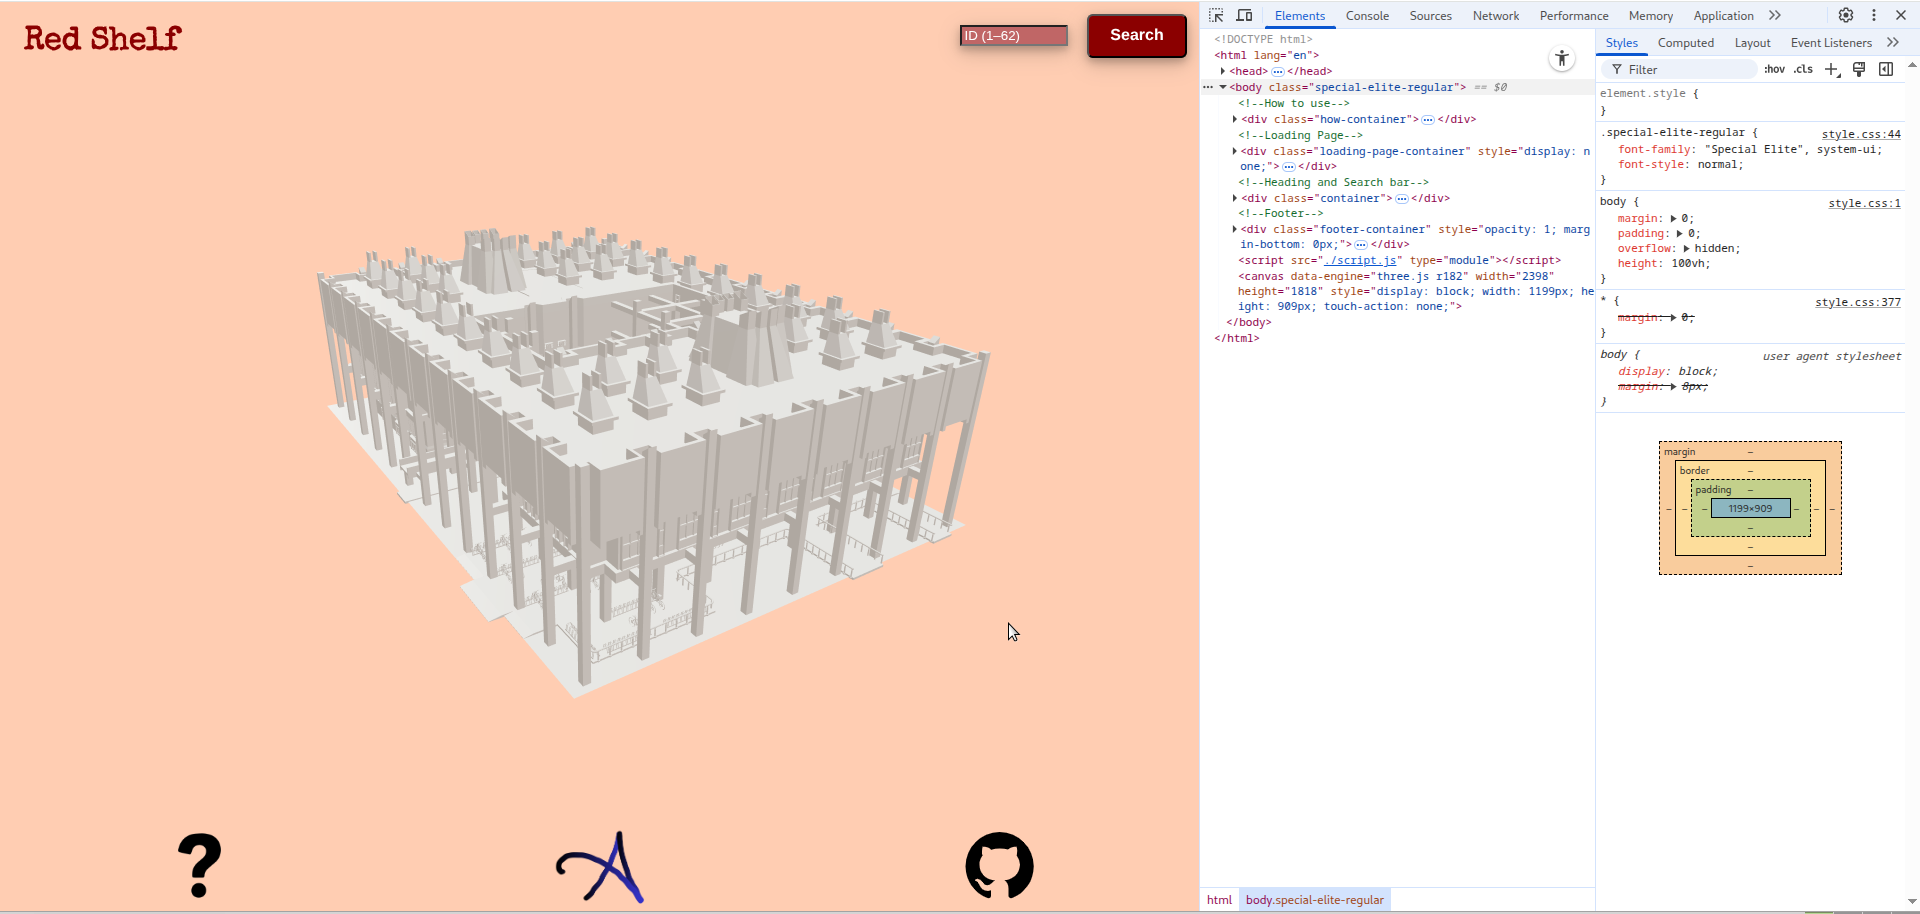
The Website (First Appearance)
So today, now that I have completely made the model and its website, next week I will work on perfecting the model and also working on the front end. So the task that is left is to make the frontend, which includes making the search bar and the footer, and also fixing the animation of the opening page of the website. And then the most important part is to name the shelves of the website. And then one thing I am thinking to do is use GSAP and make the user experience the interior of the library too. And this will give them an immersive experience to travel to the bookshelf. I will make the interior as minimal as possible.
So here is the flow. The user will click a start button and then he will see the website starting along with the animation. And then he will see the search bar, where he will put the ID of the book. And then after phase three of the project is completed, the user will see the bookshelf of that book turning red. So after that, the user has the option to use the GSAP method and actually travel along the path through the interior to get to the bookshelf. And once he clicks the first “flag,” he will be locked in the position of the camera, but he can rotate. And then he will click the next flag, and likewise he can travel to the bookshelf. So when he is locked in the GSAP, he will be allowed to go back to the normal view (global orbital), and during the GSAP mode, he will not be able to change the location of the camera, only the rotation. This will not allow the user to move into the mesh.
19/1/26
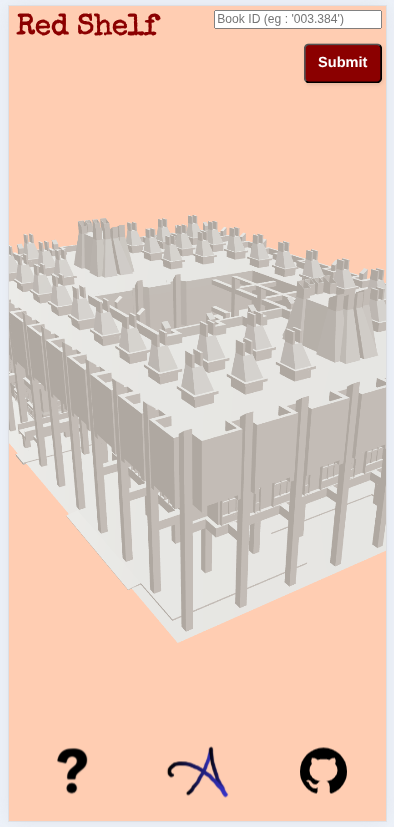
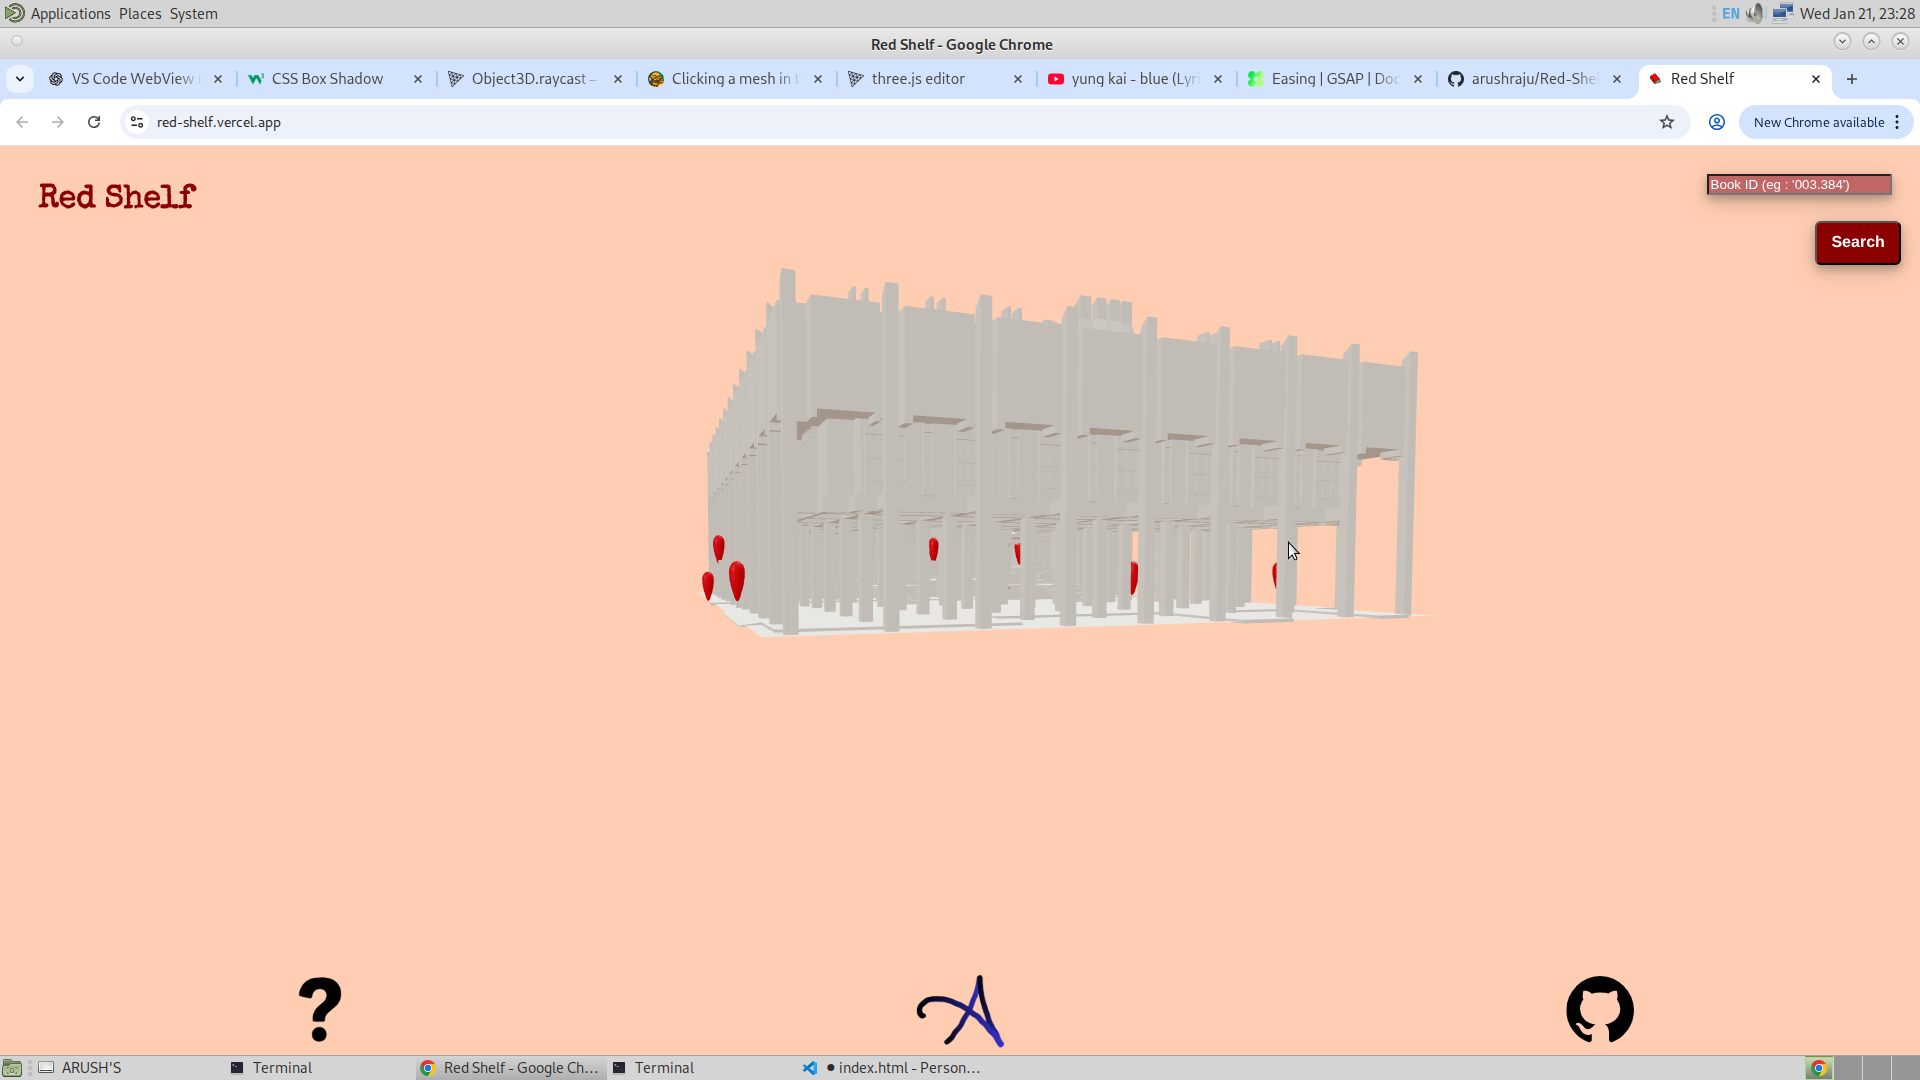
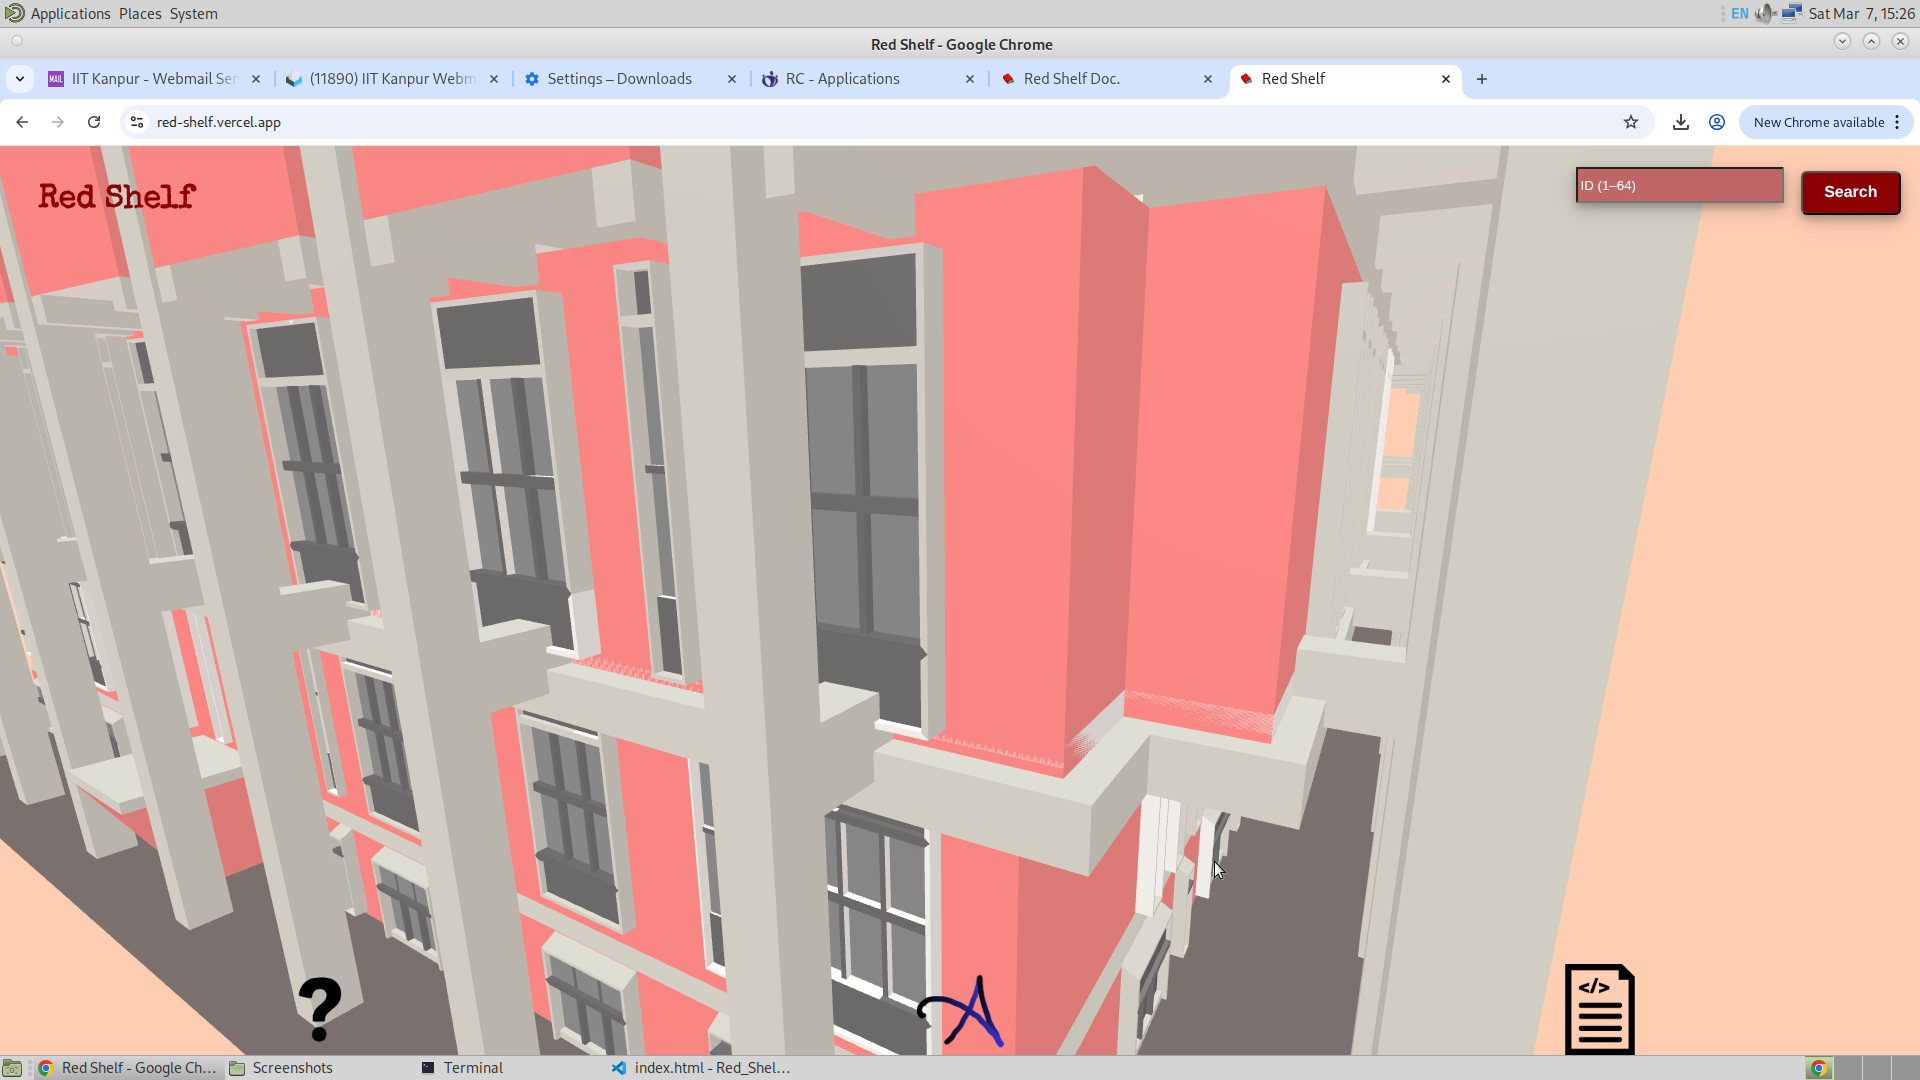
So today,I have added the search bar which will take in the ID of the book, and have also added the footer, the headign of the app. GIven below is the picture of the application. I also fixed the footer to become responsive.
21/1/26
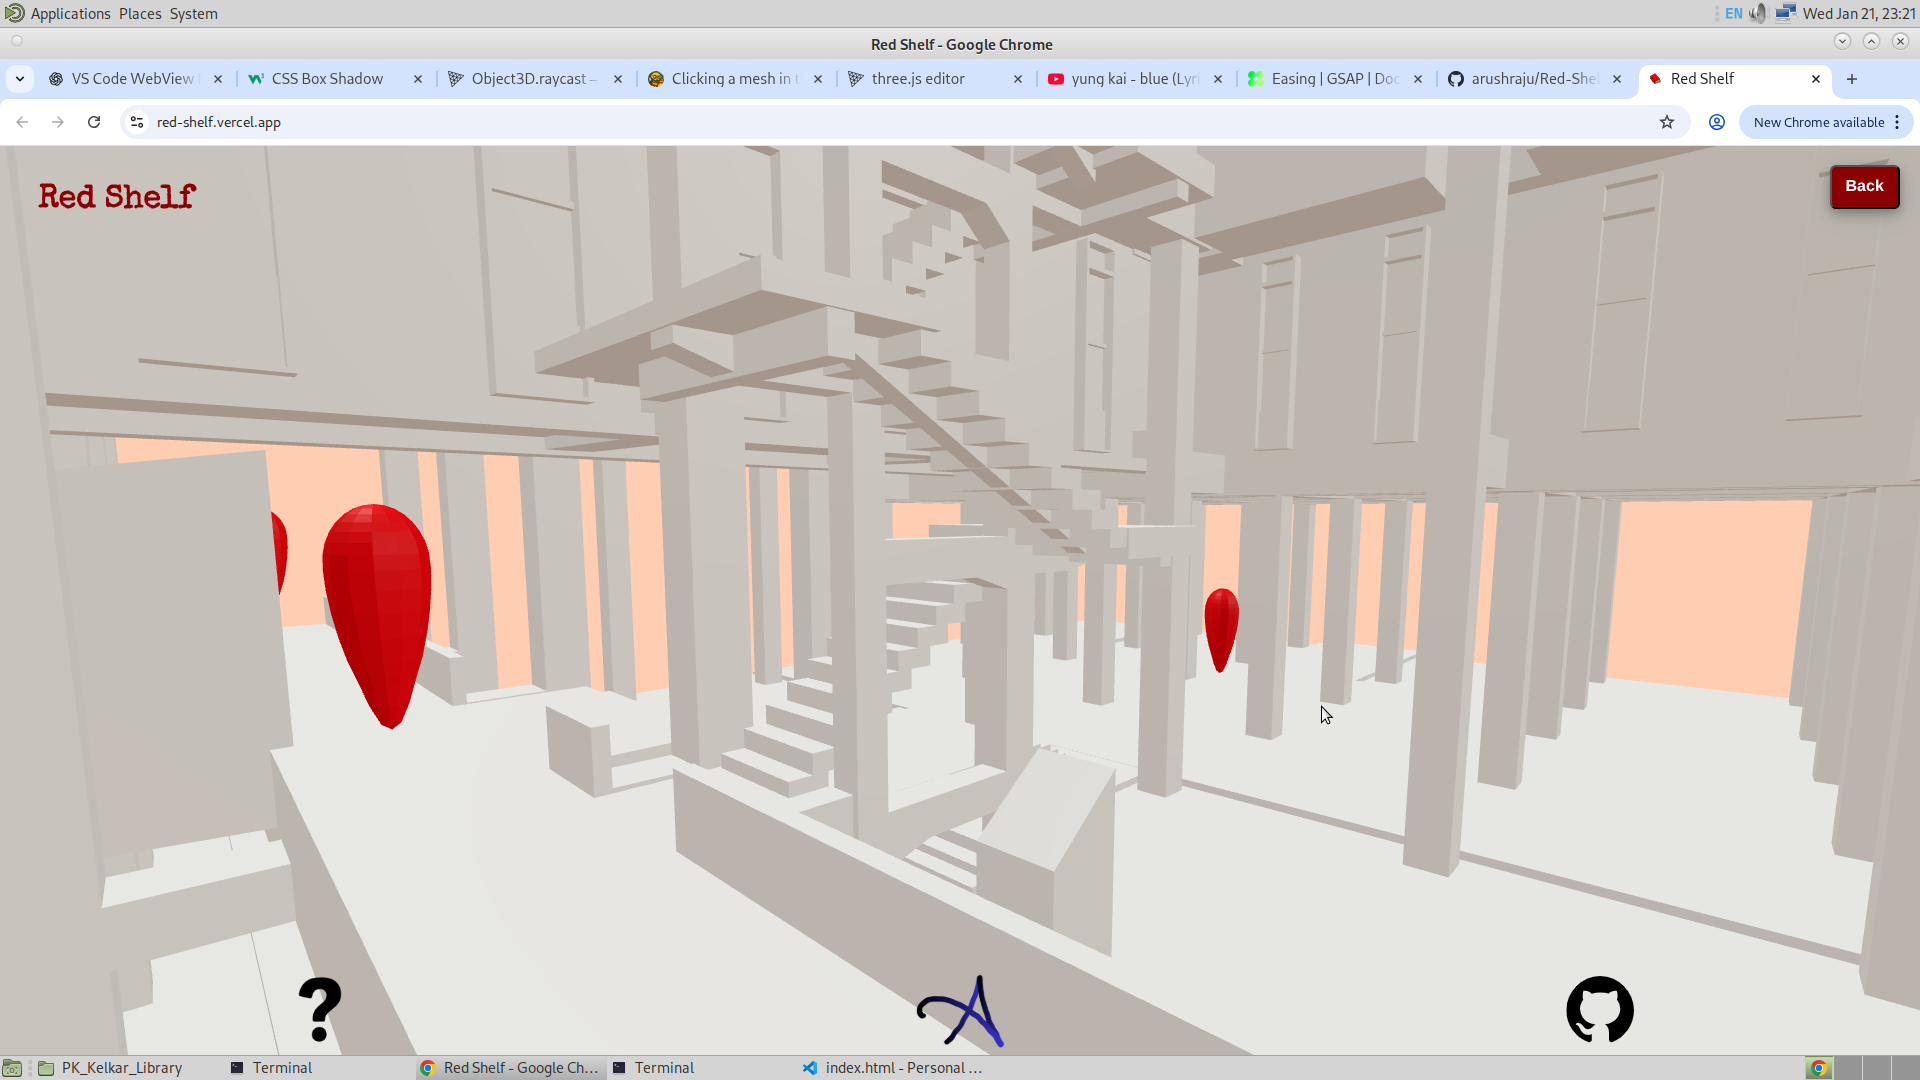
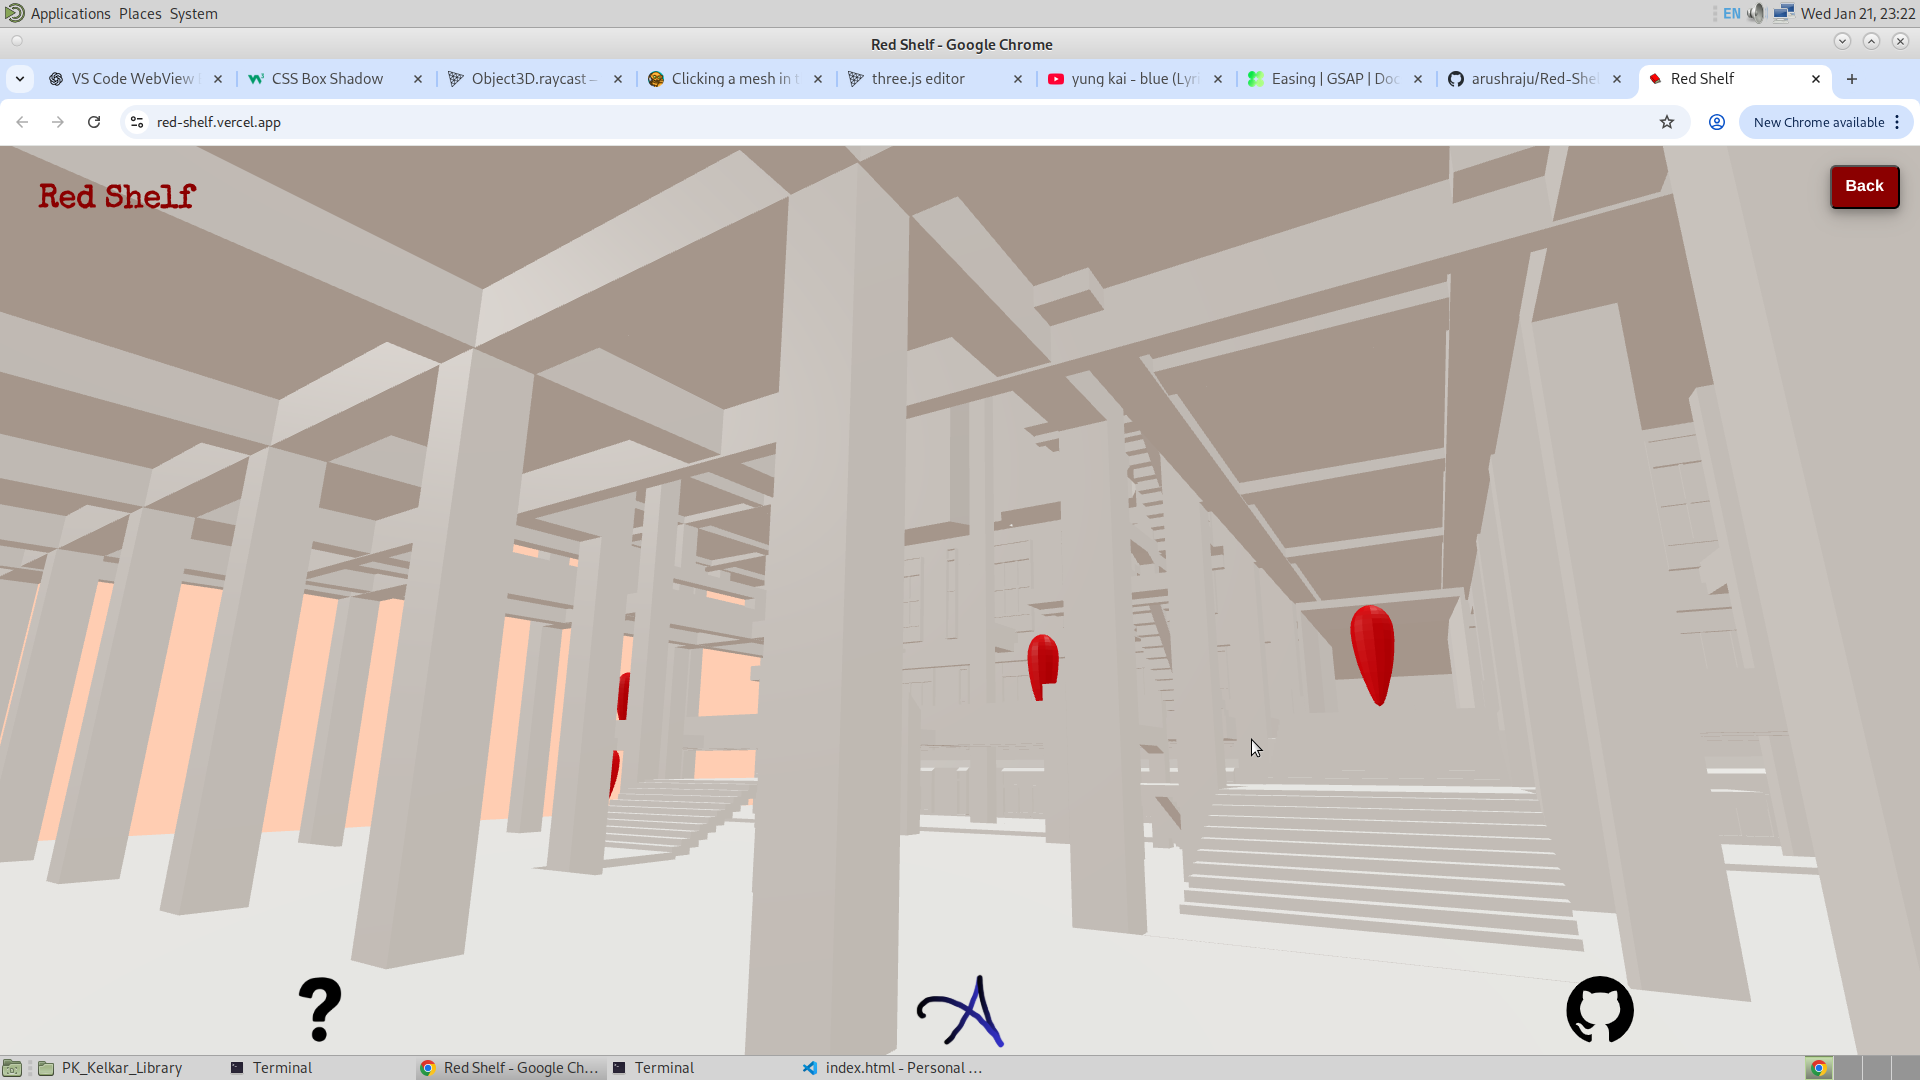
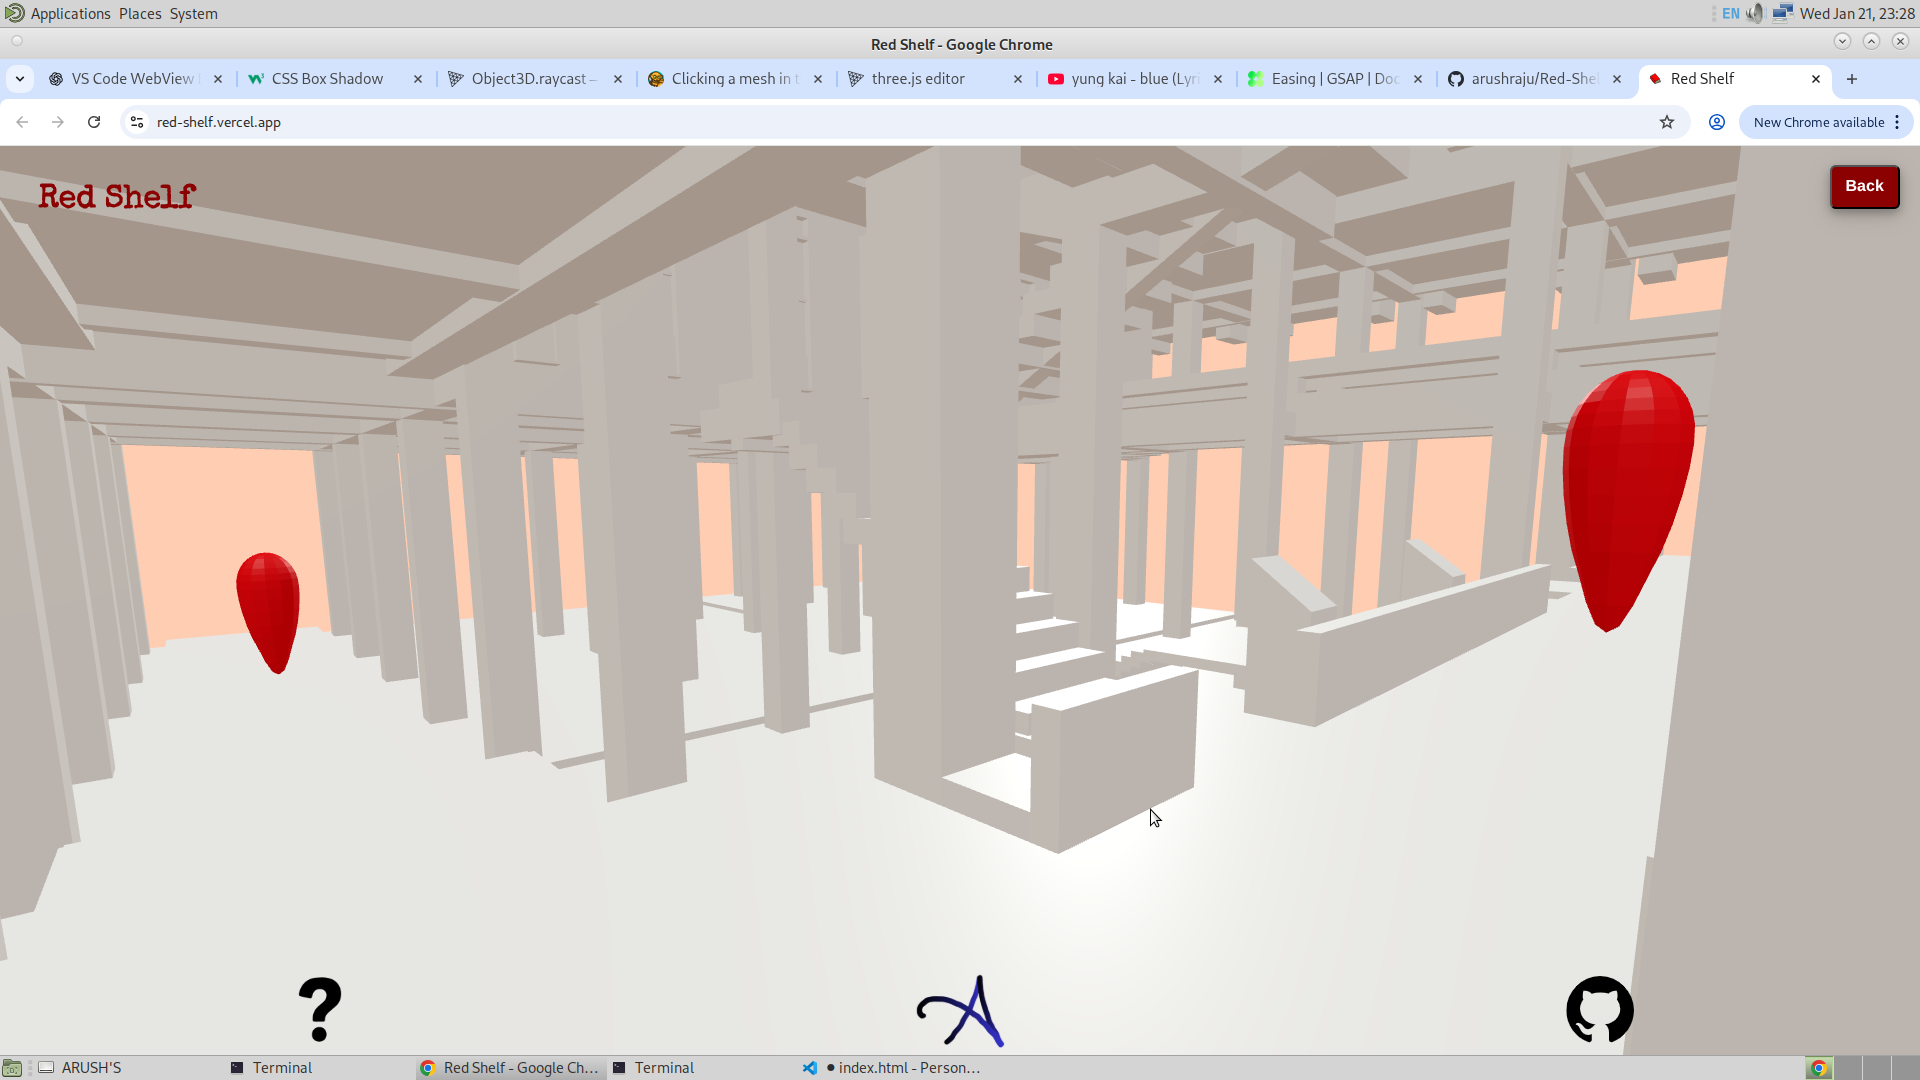
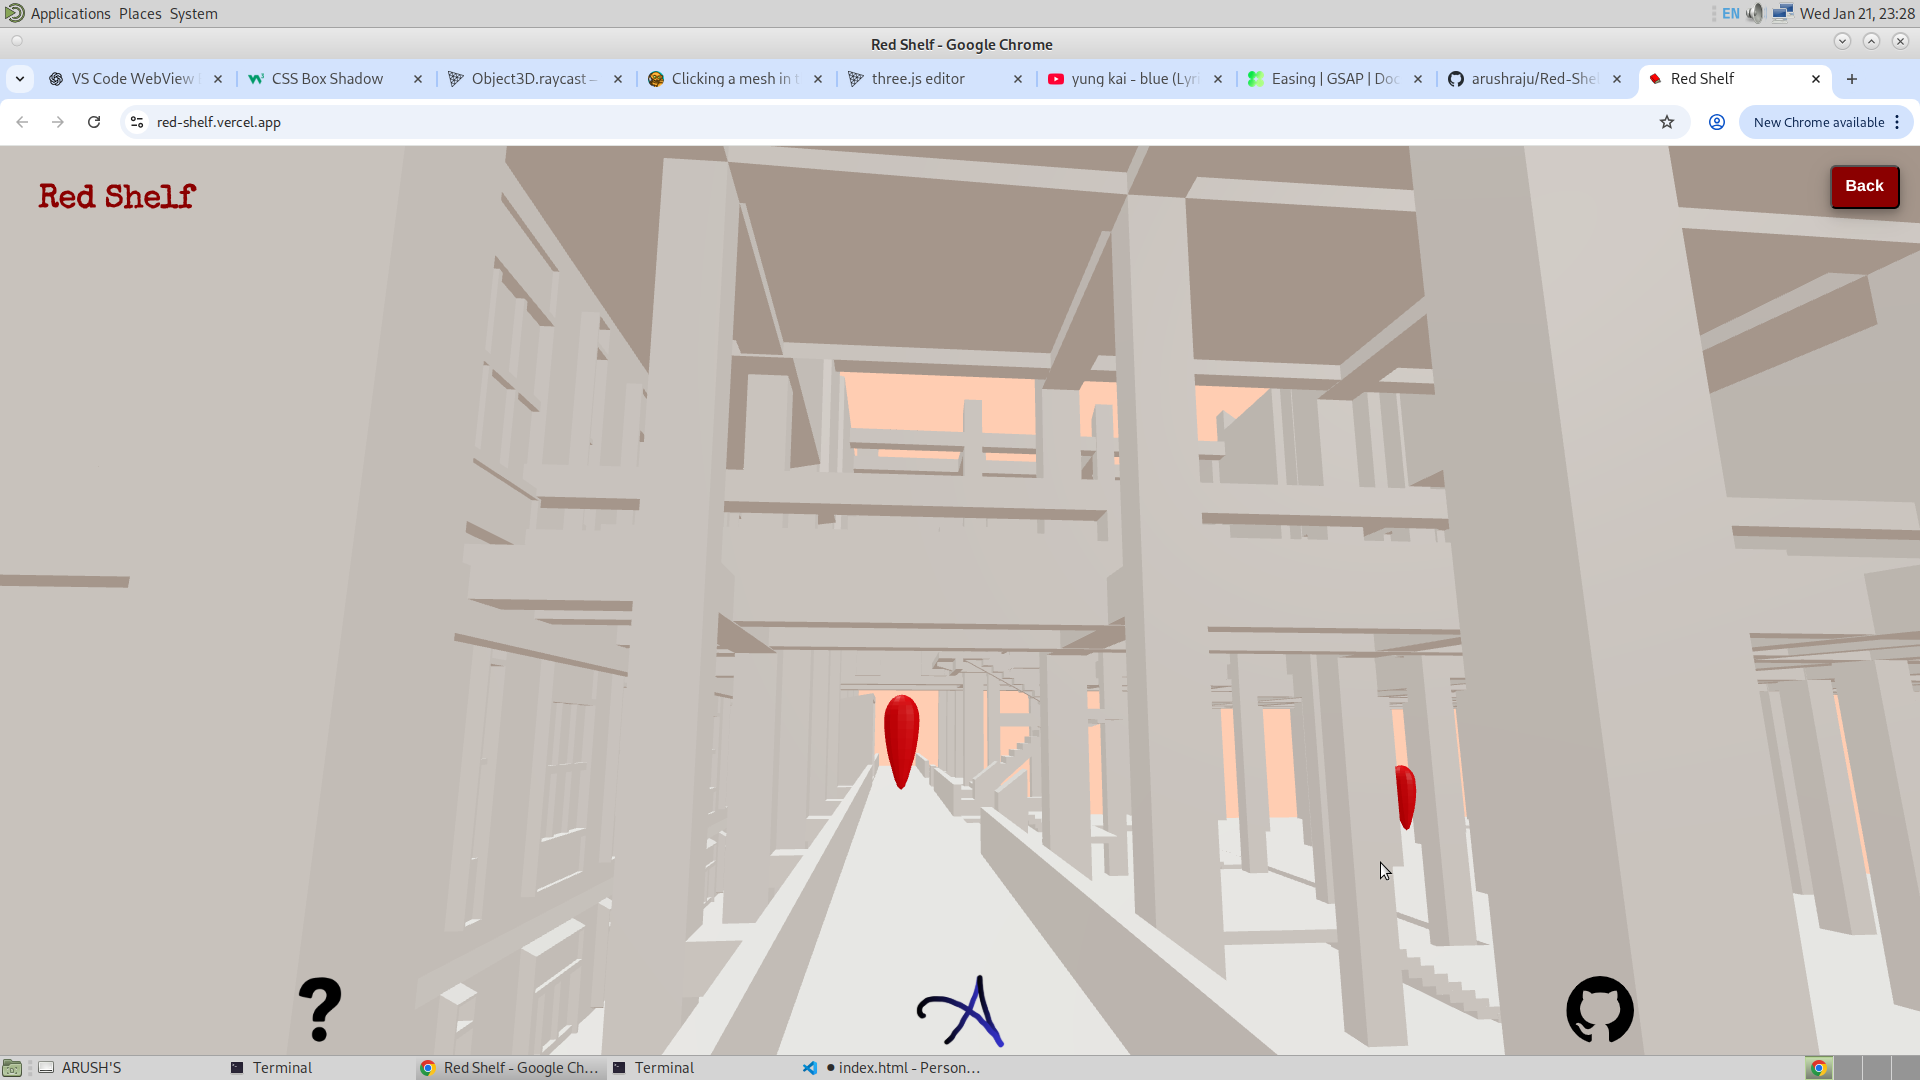
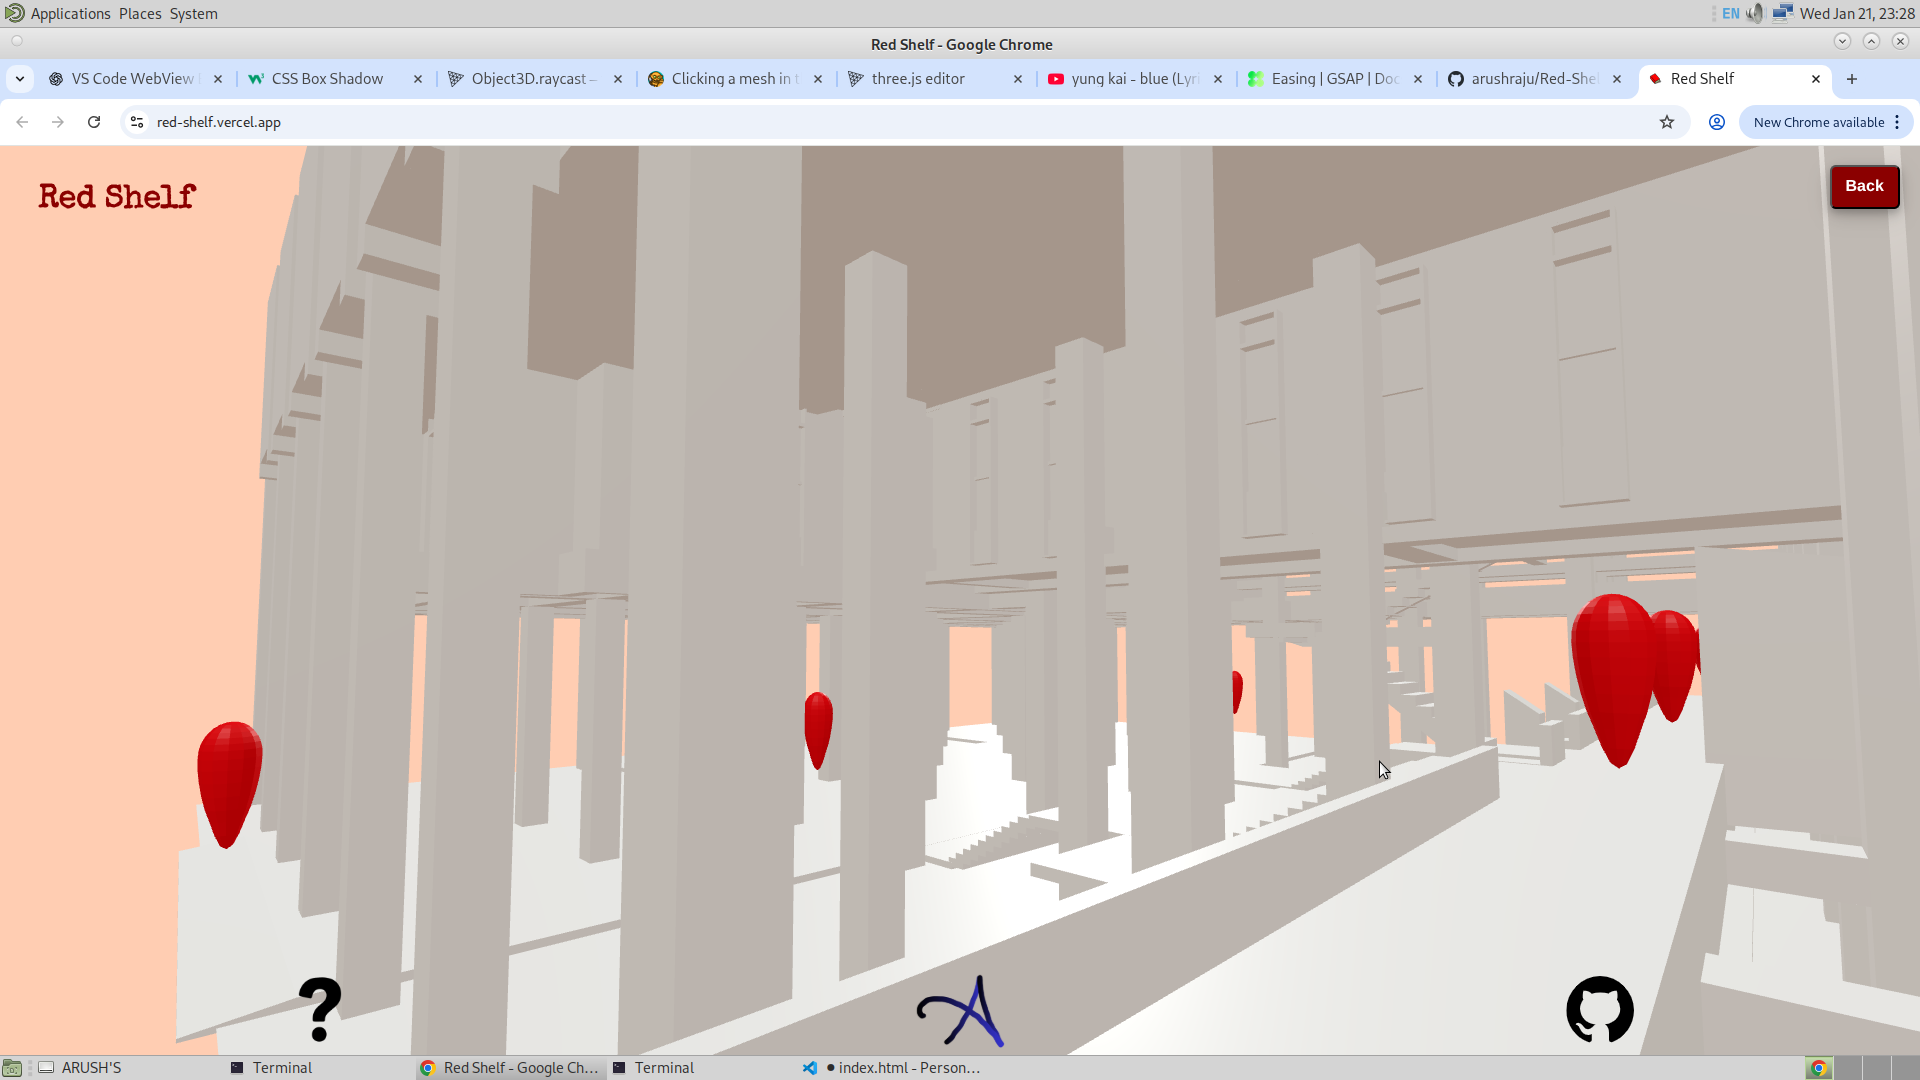
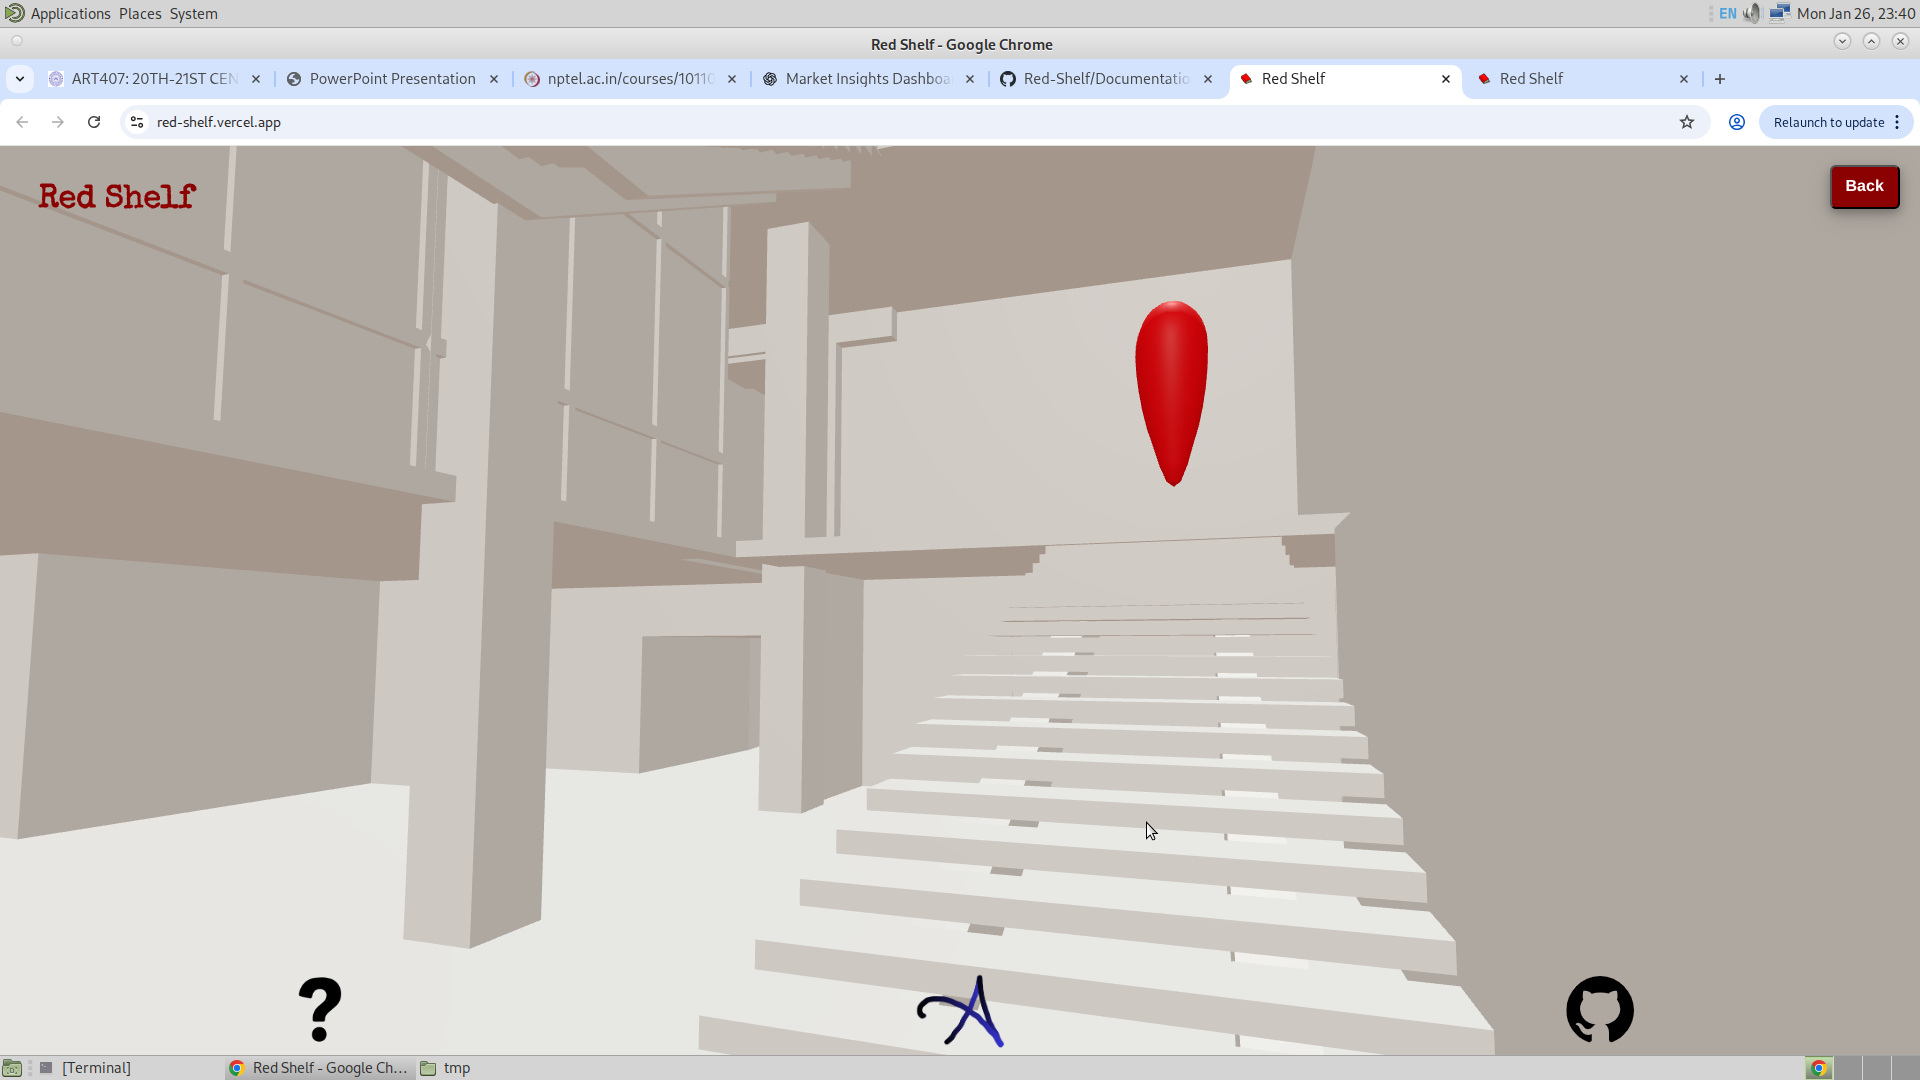
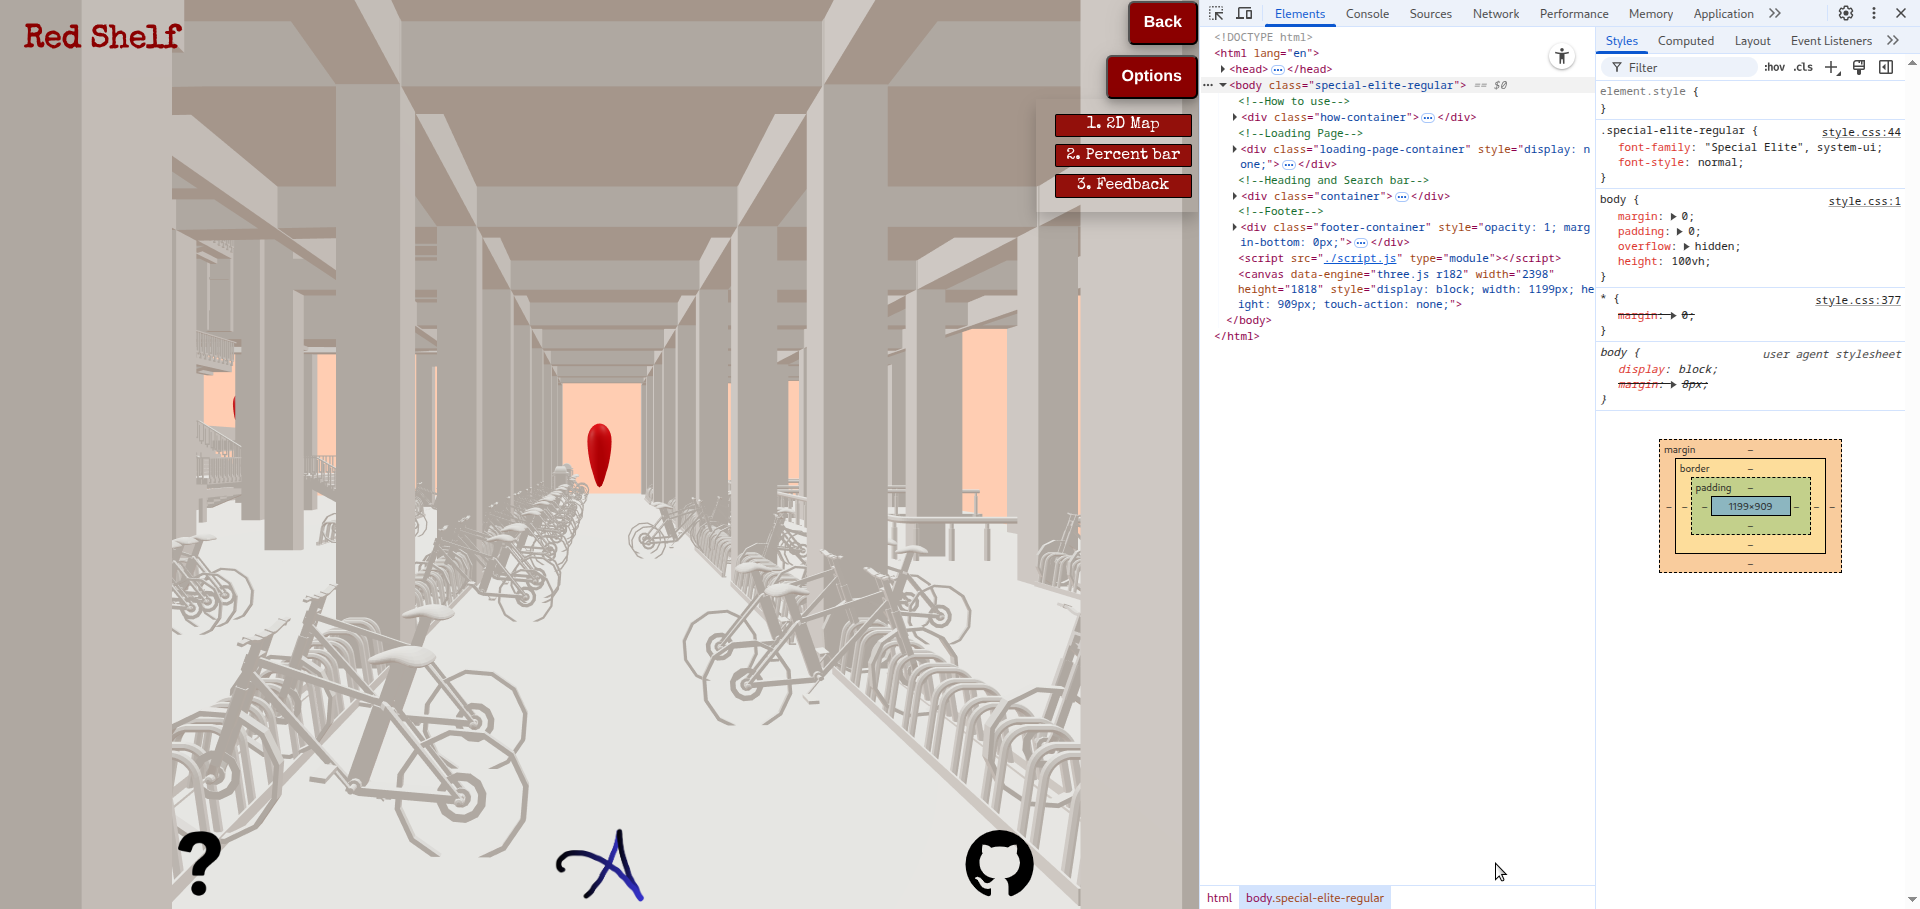
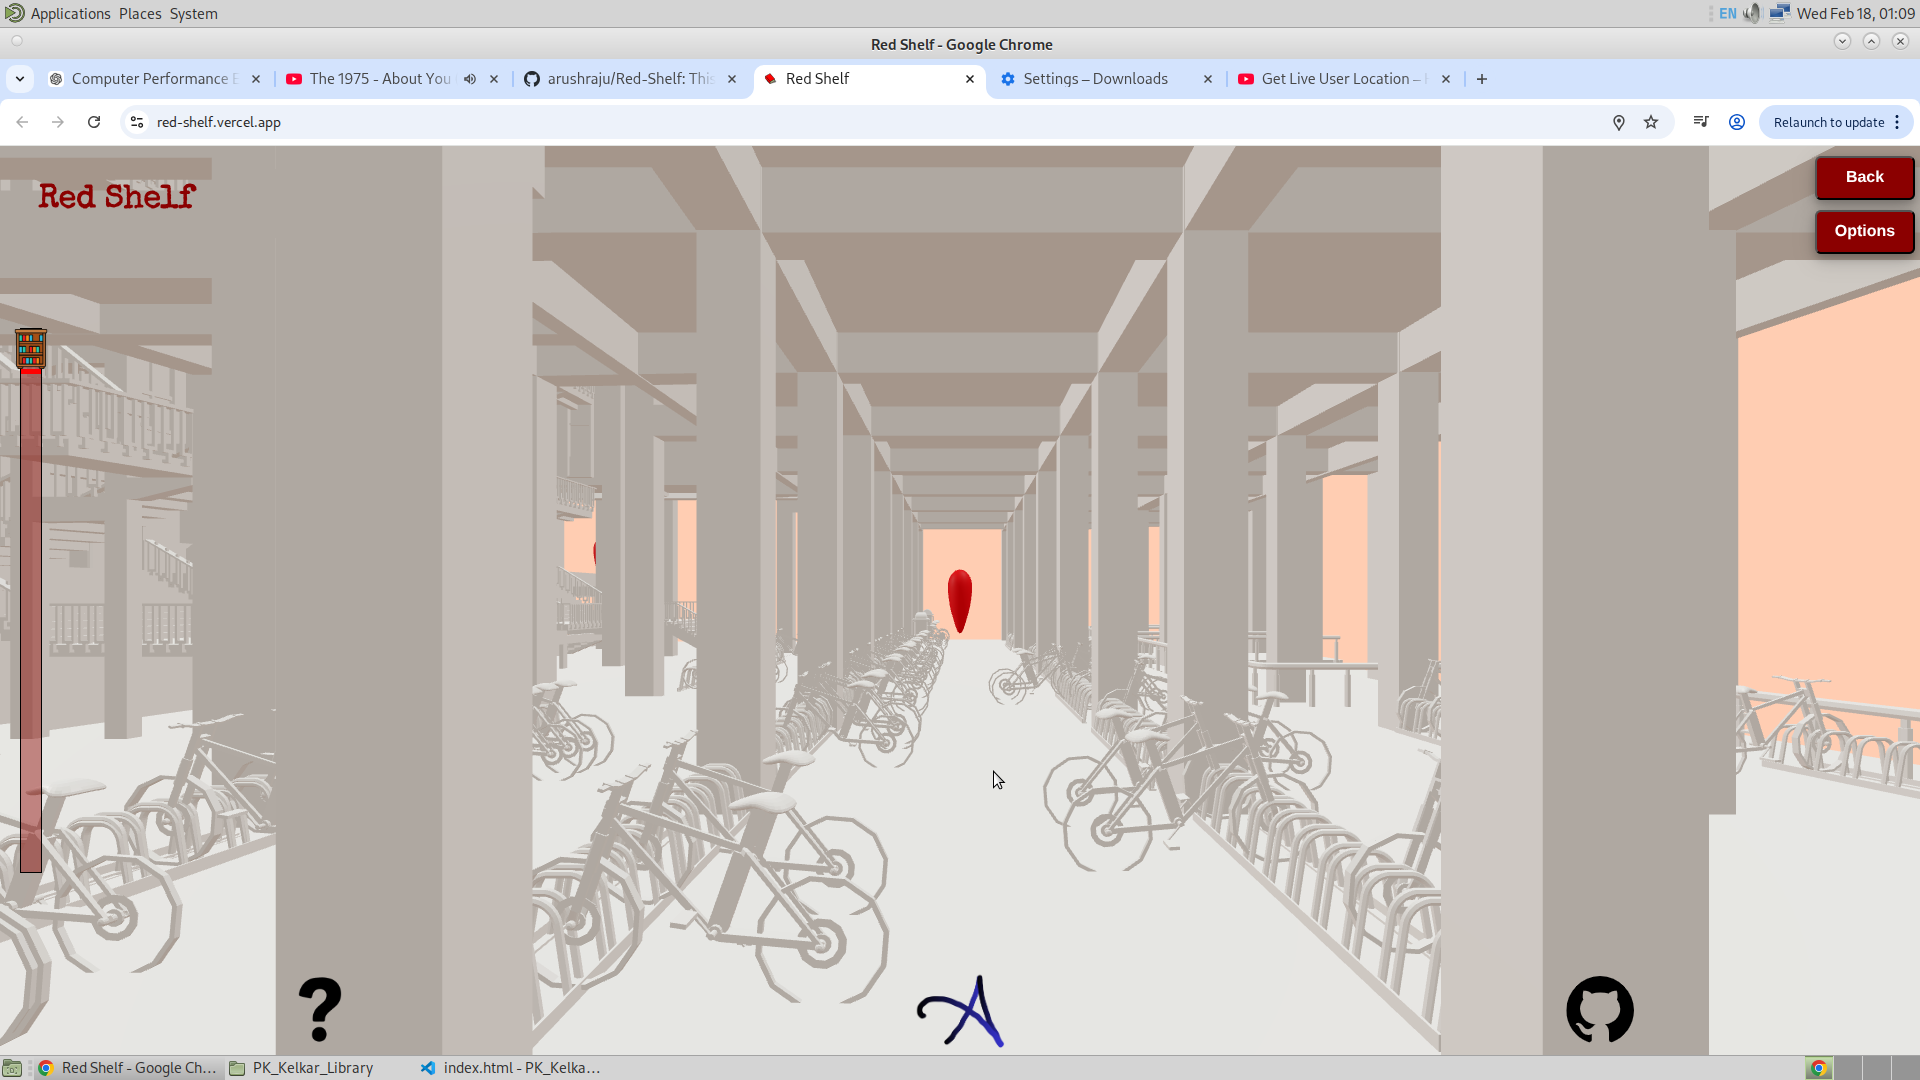
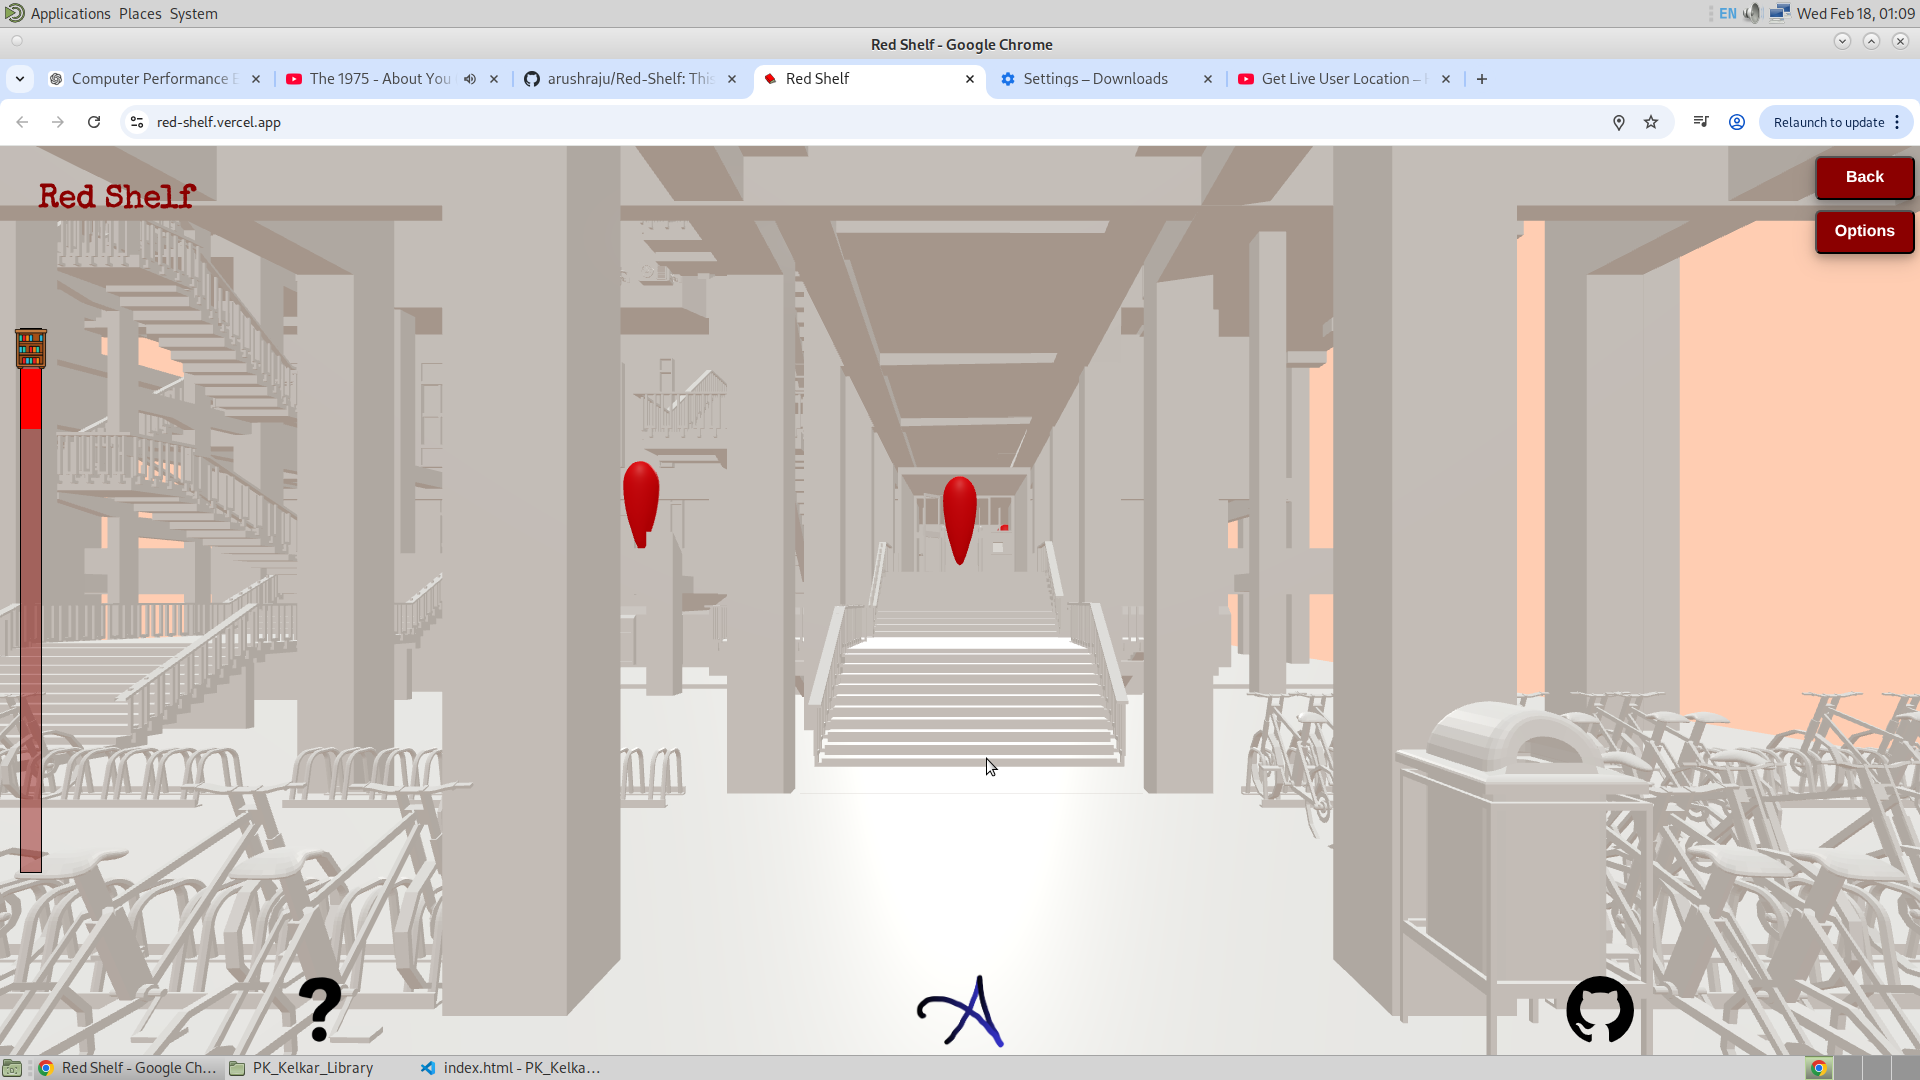
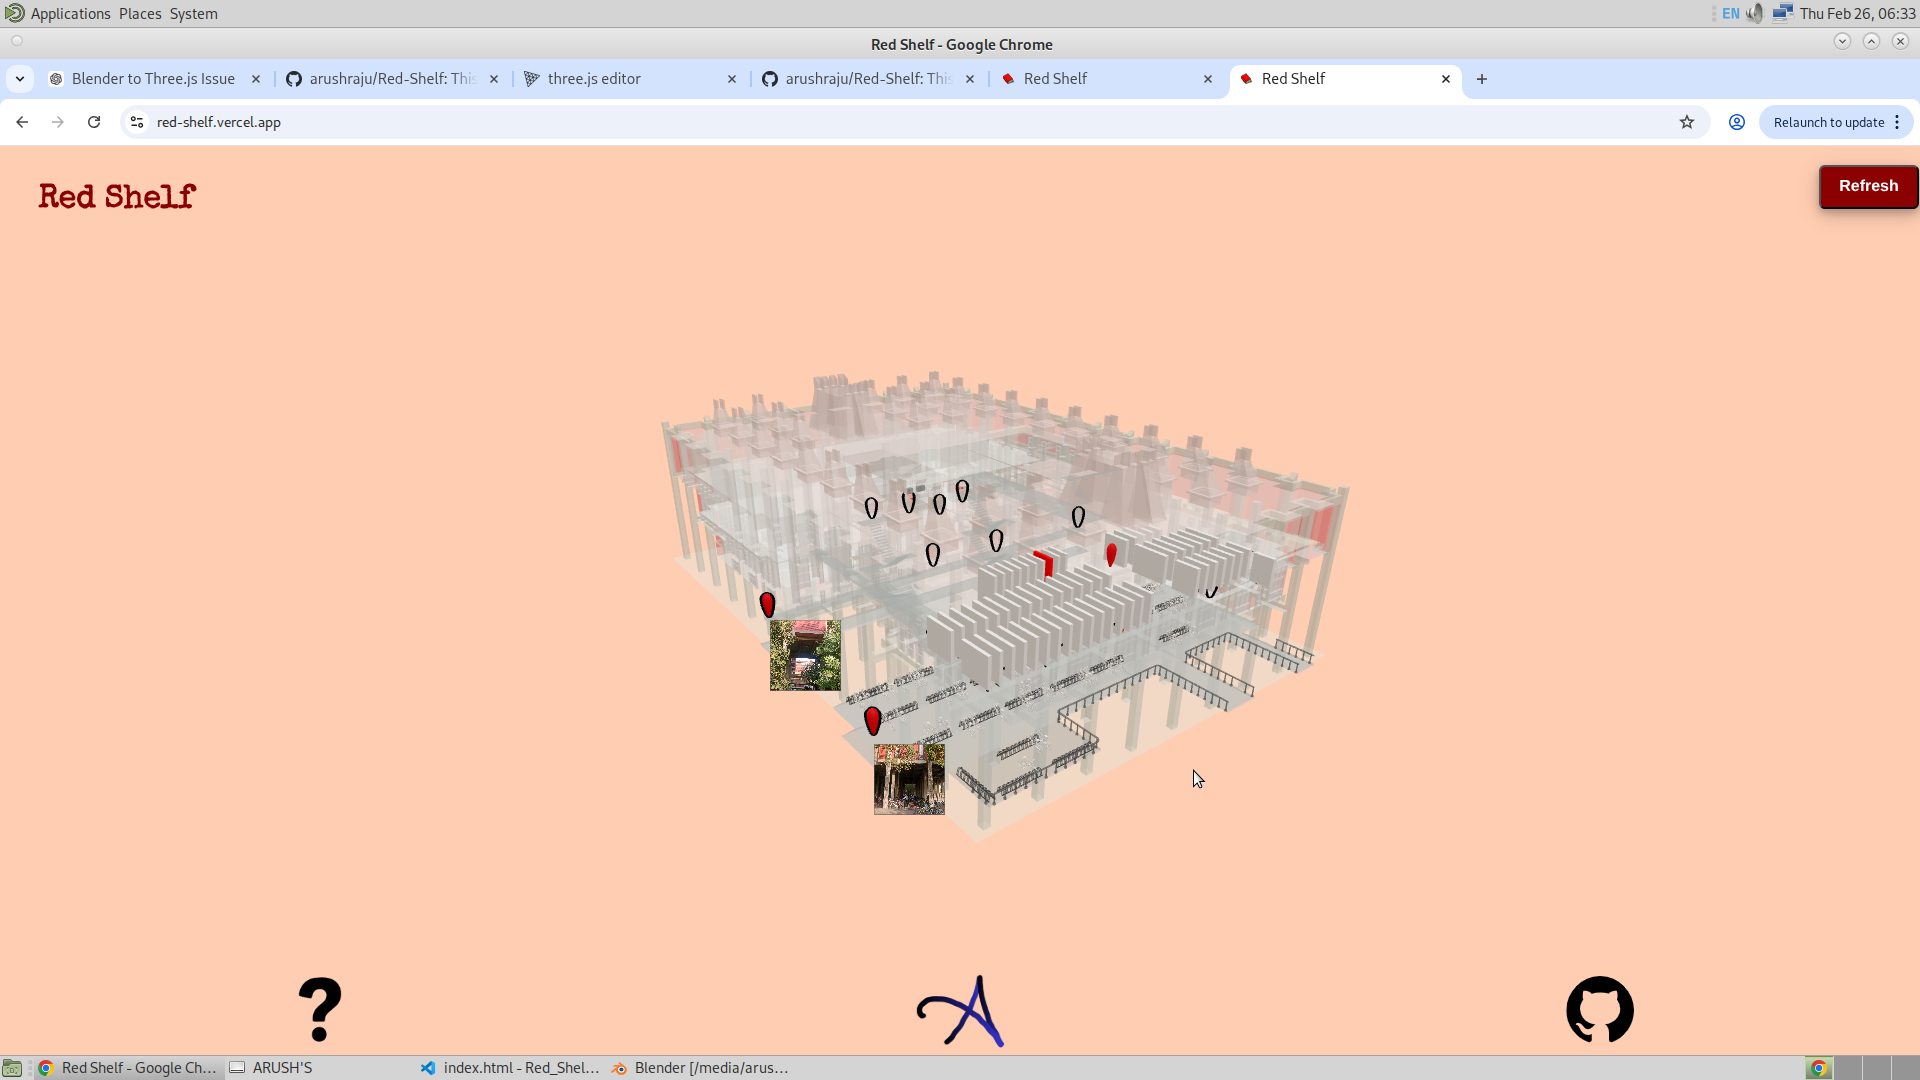
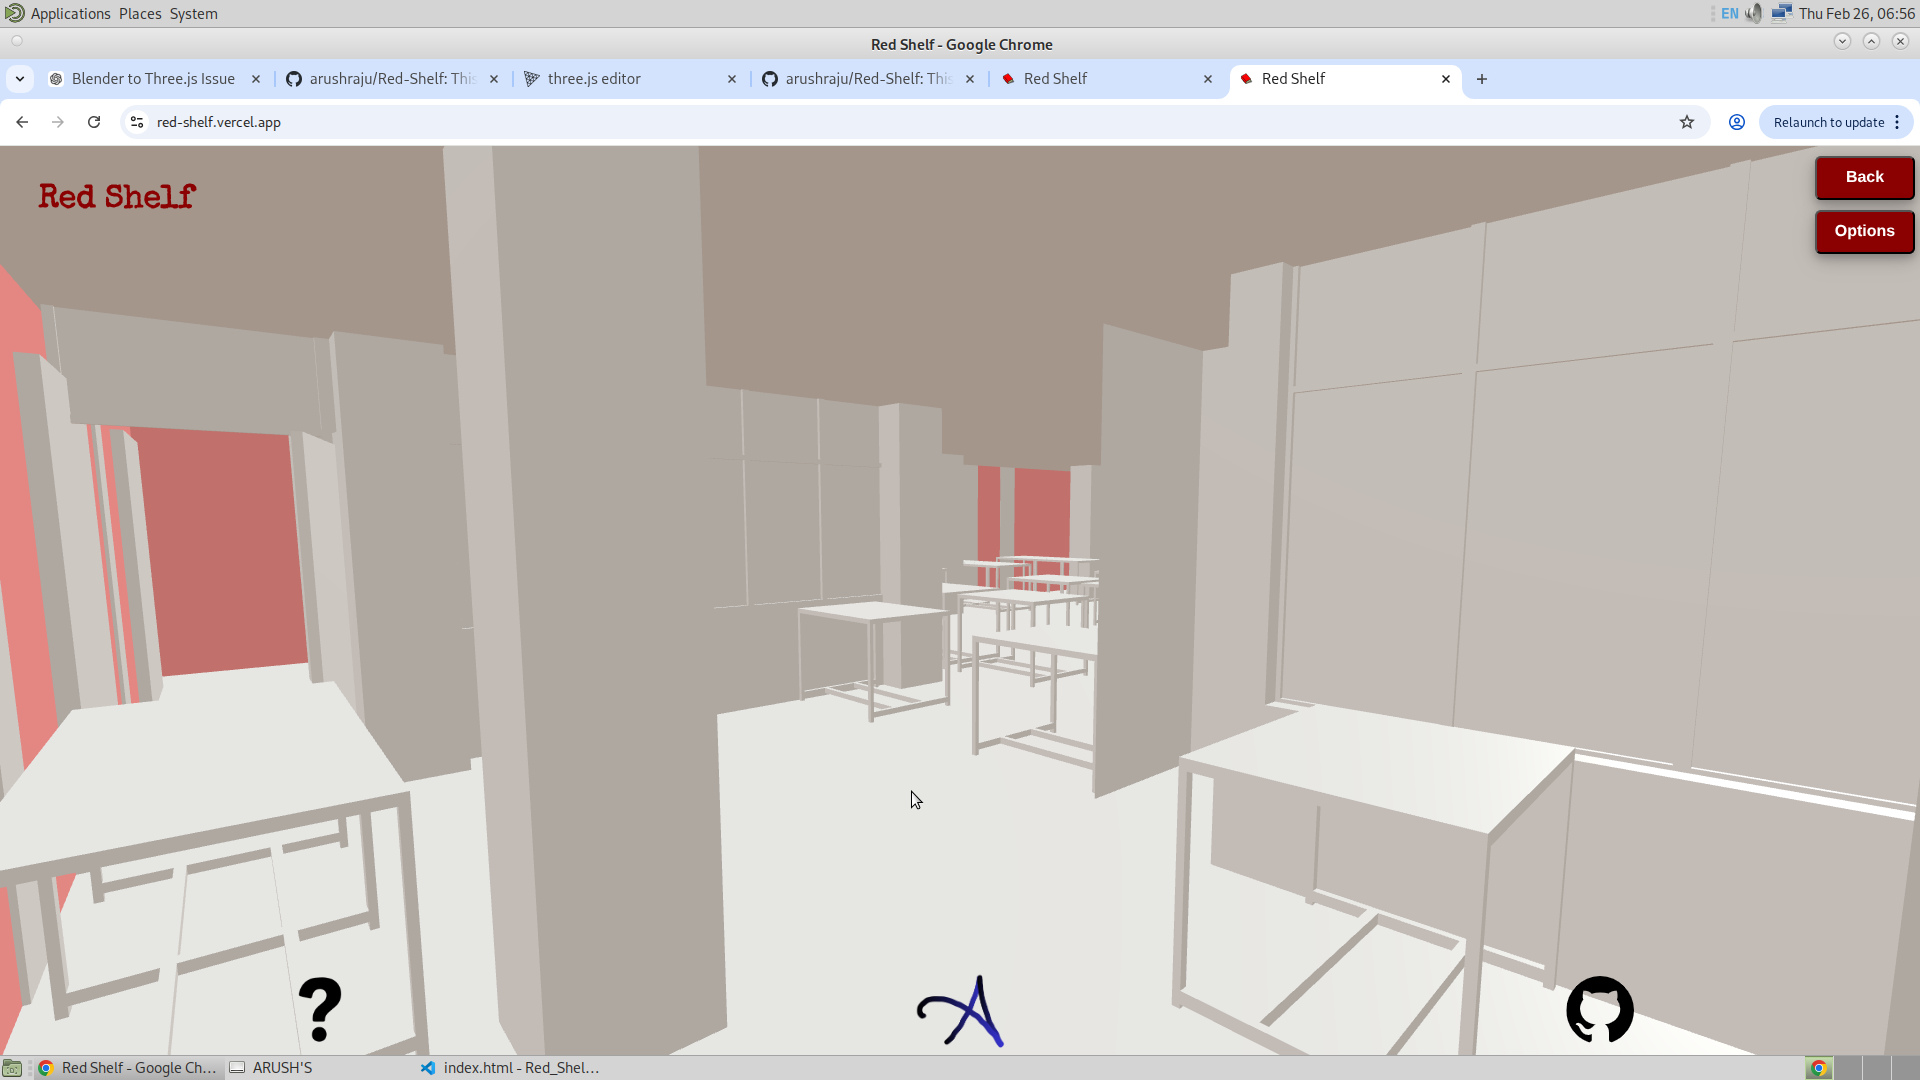
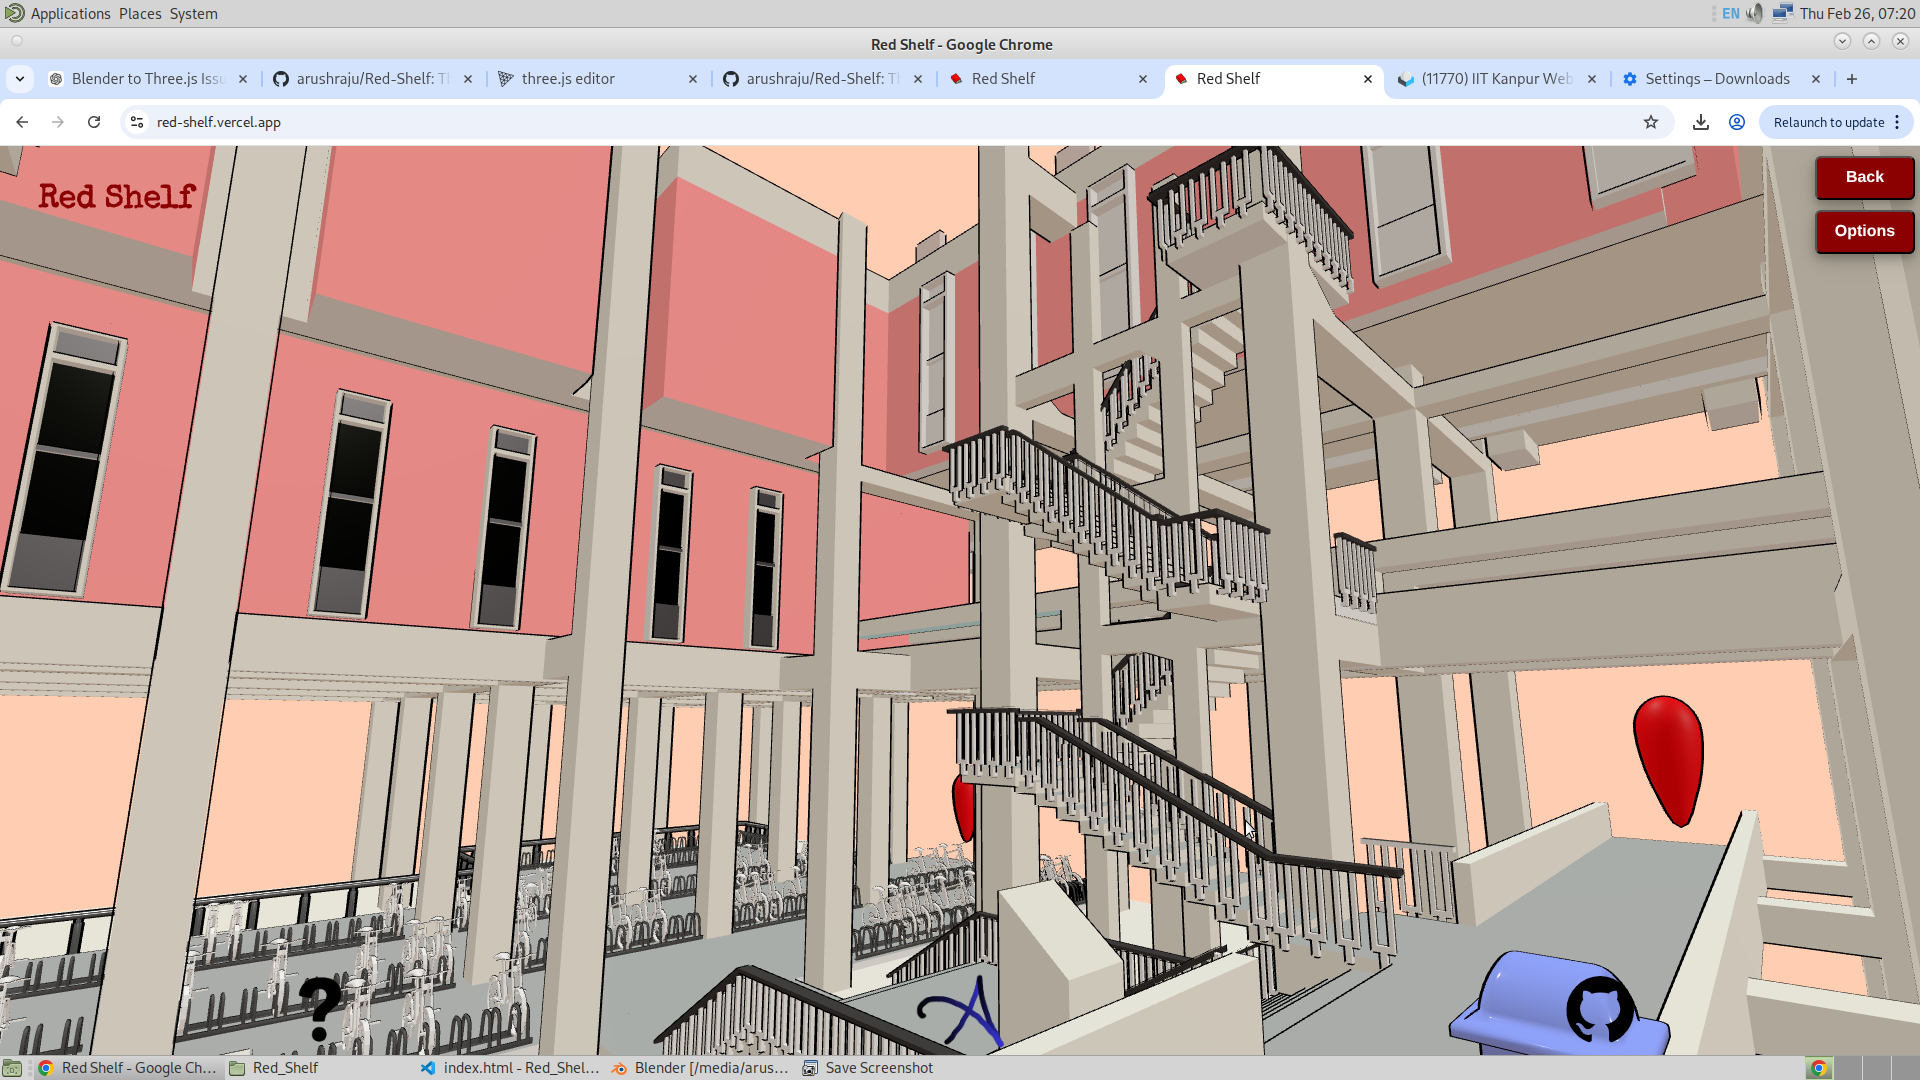
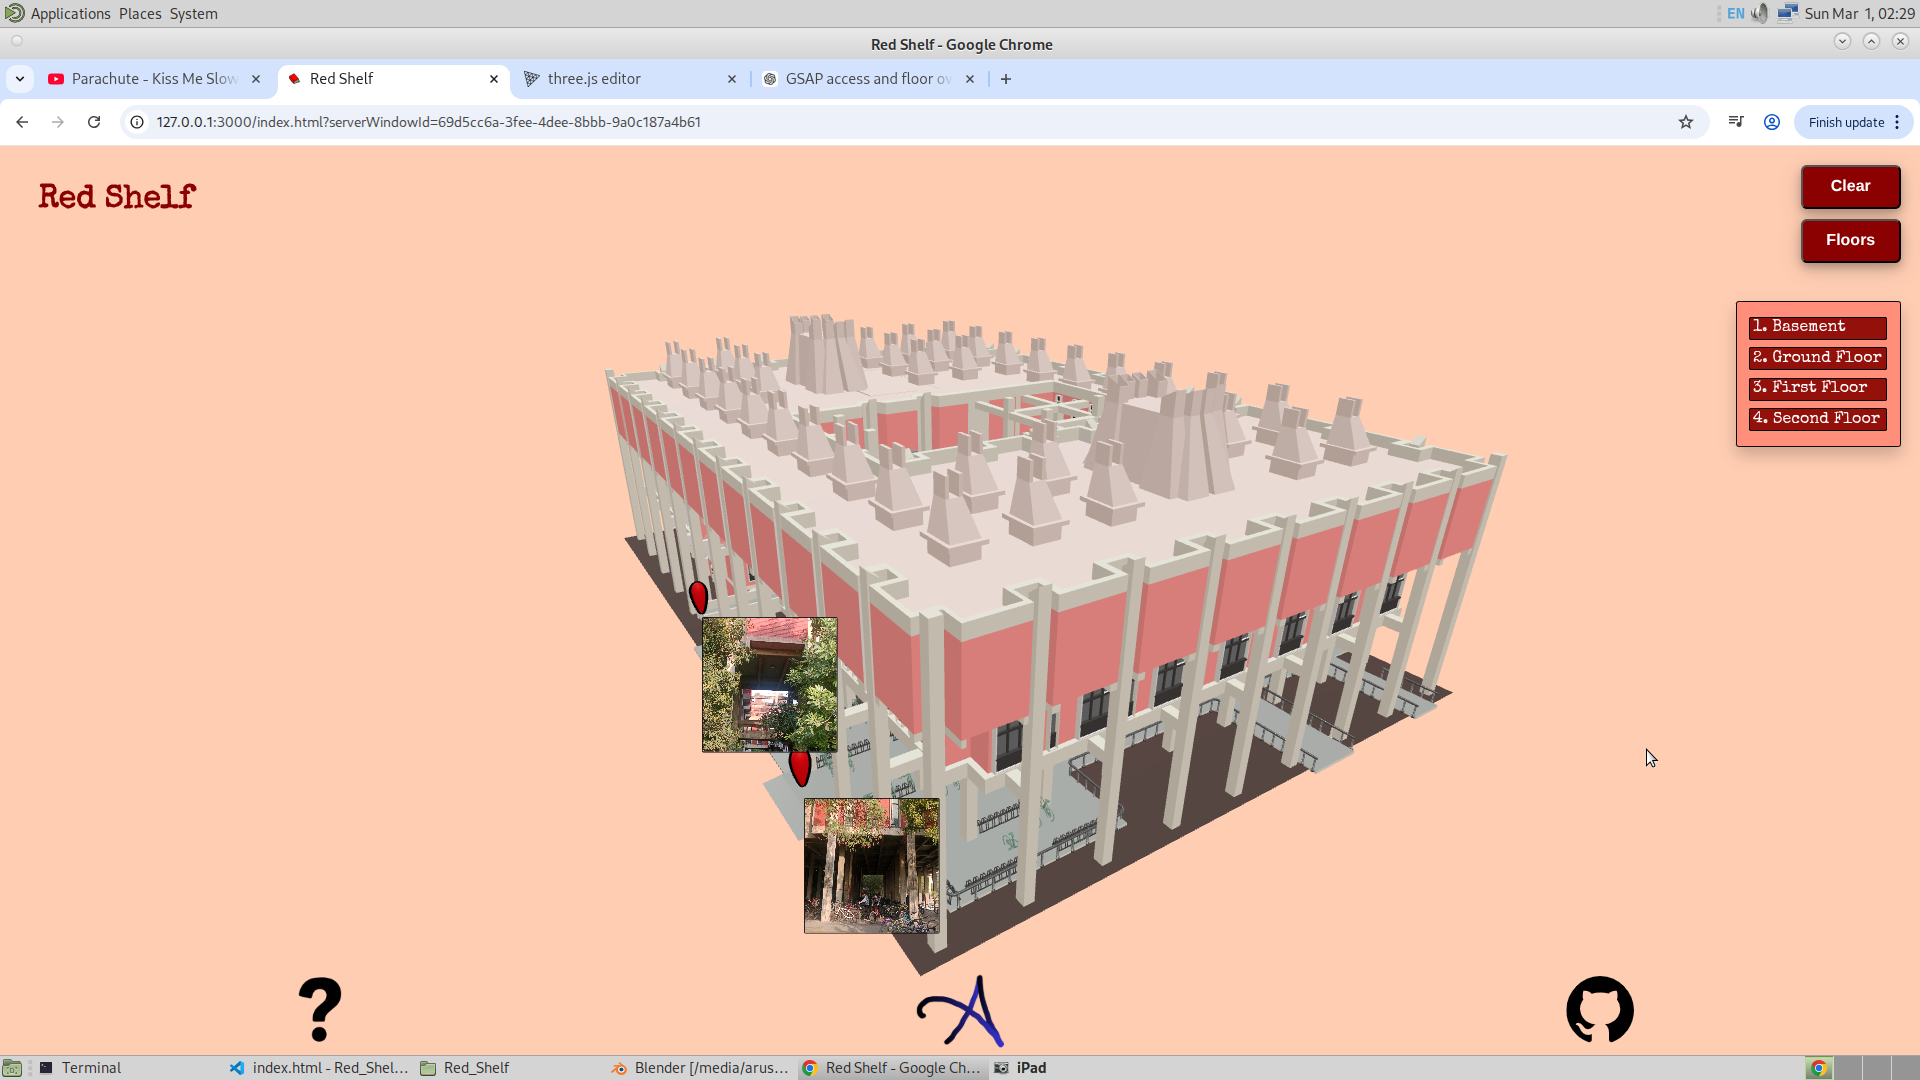
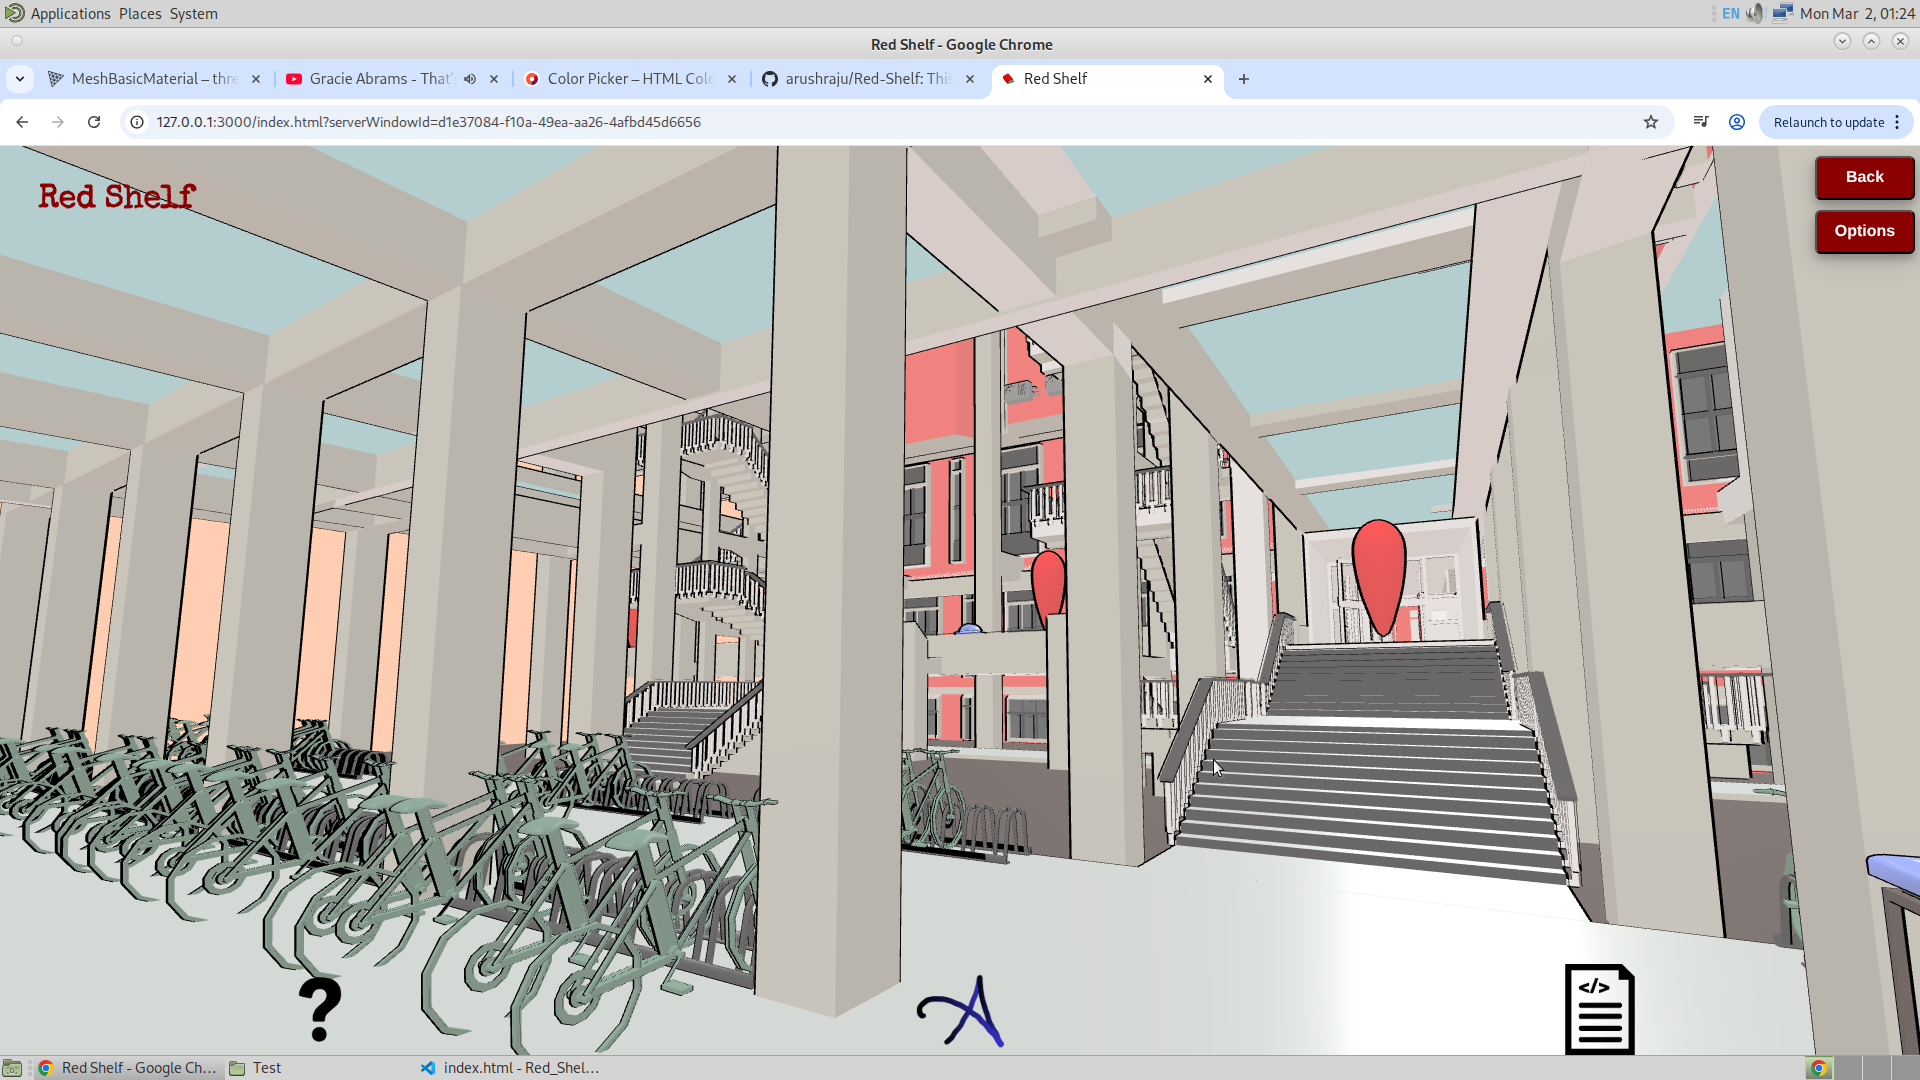
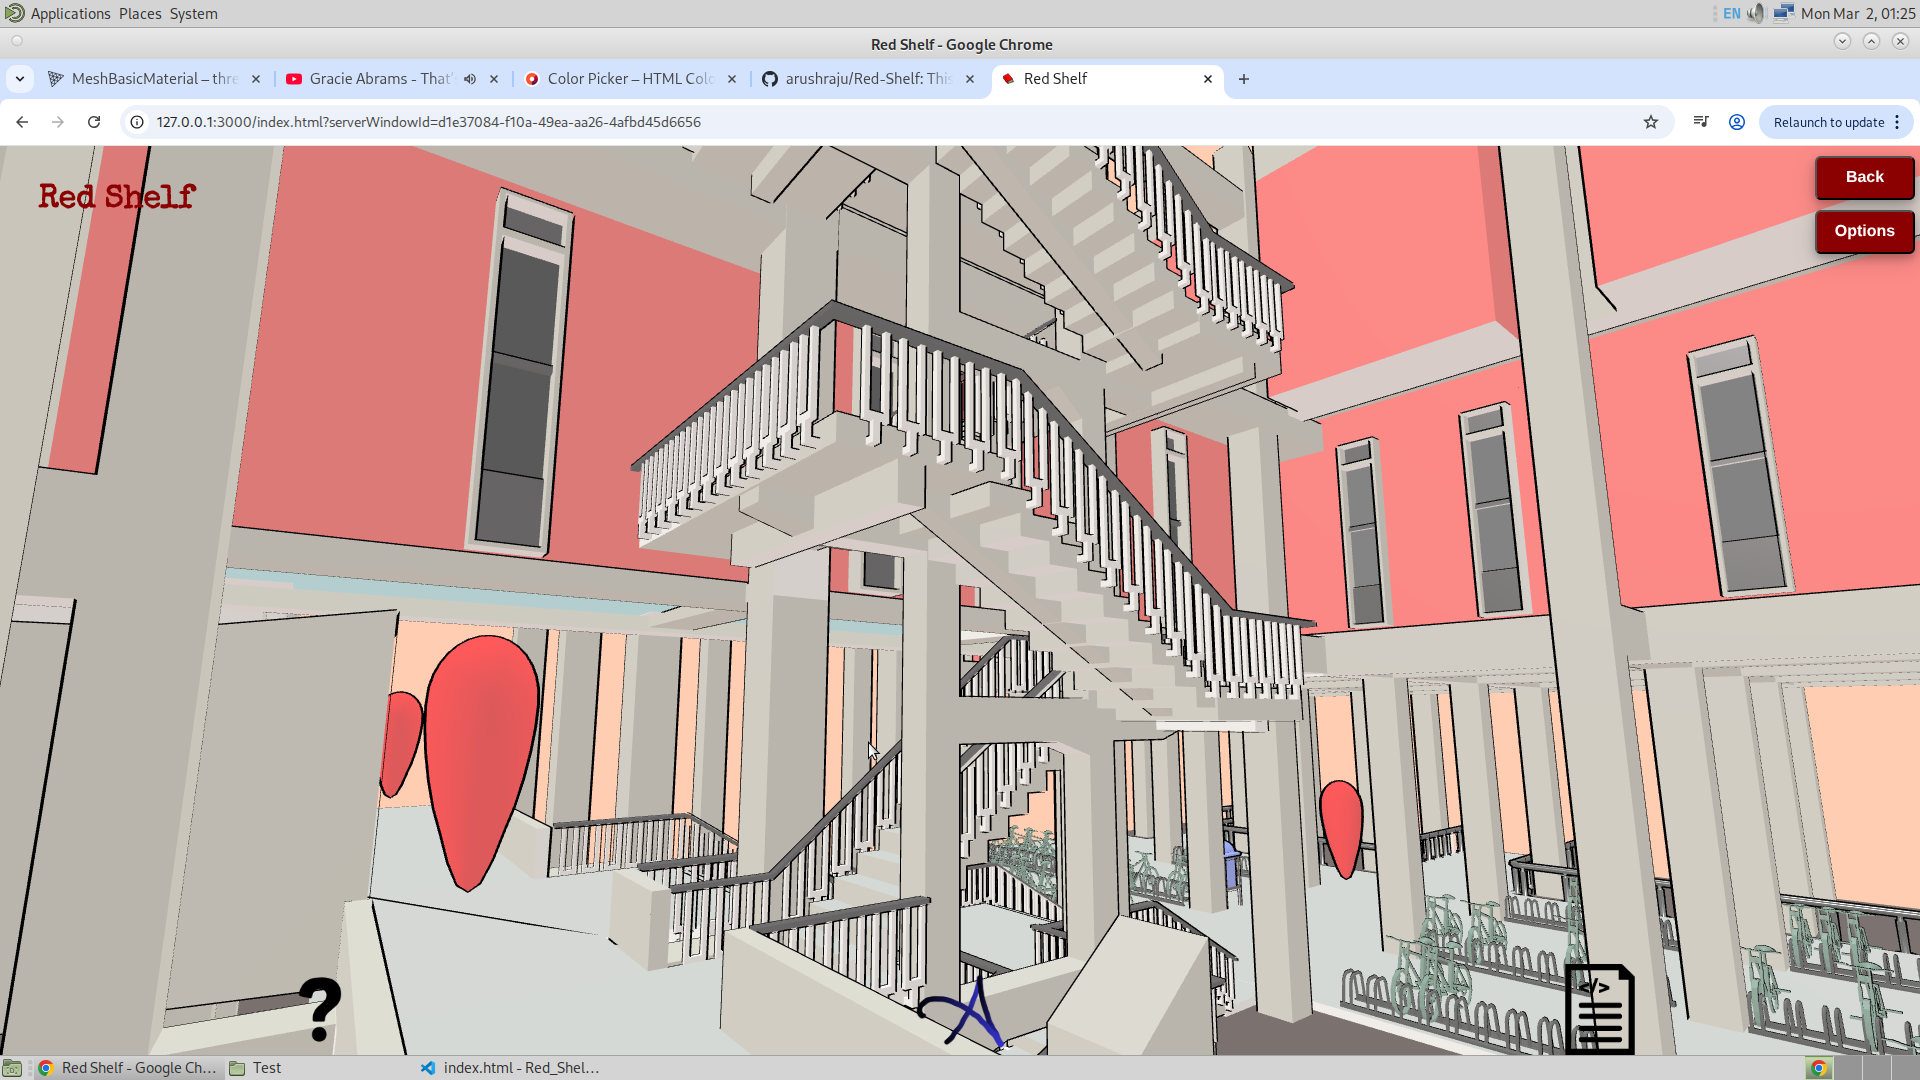
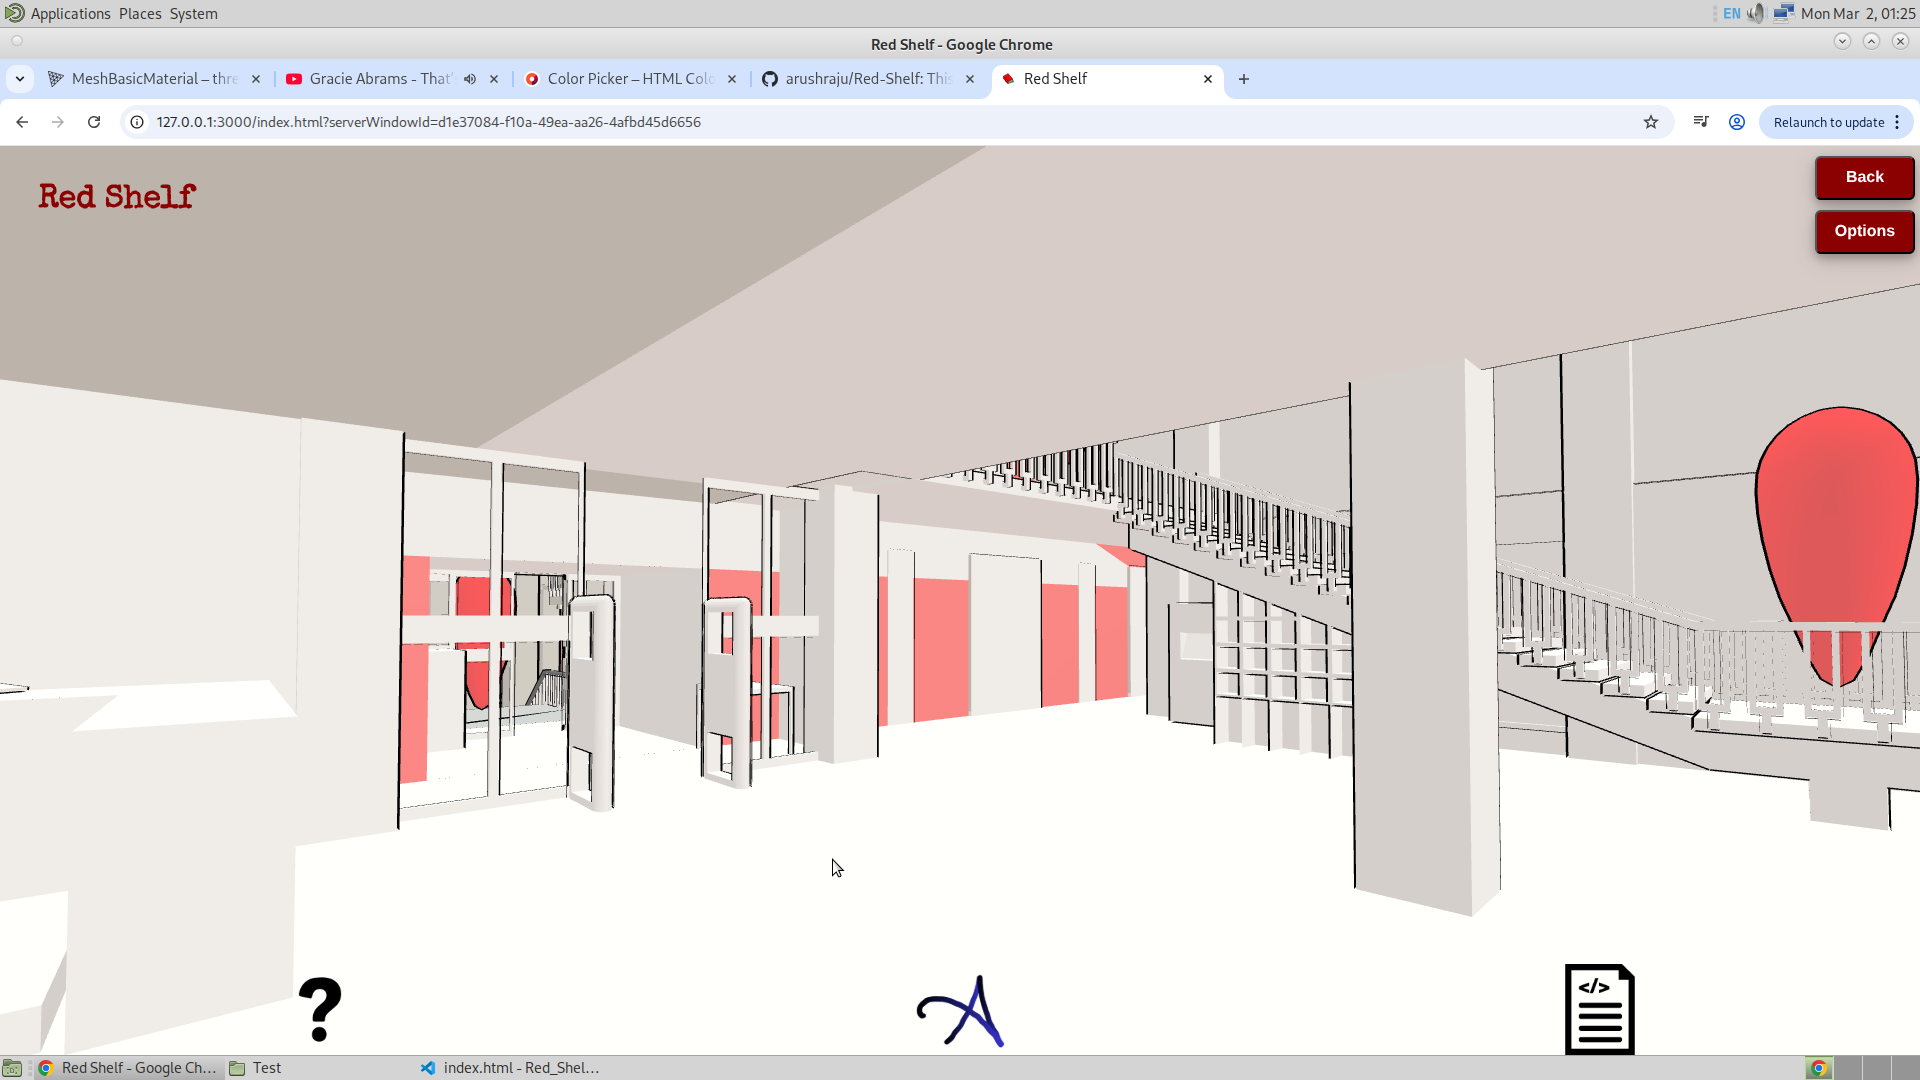
I have done a lot of work today. I successfully animated the camera using GSAP. I added red-colored location icons, and when they are clicked, the camera animates to those locations, allowing the user to explore the library from the inside. My aim is to build on this and allow the user to navigate all the way to the final bookshelf they are looking for. The GitHub repository has also been updated, and the application is now live. The app is hosted on Vercel. I usually host all frontend websites on Vercel and use Render for the backend—just a recommendation.
26/1/26
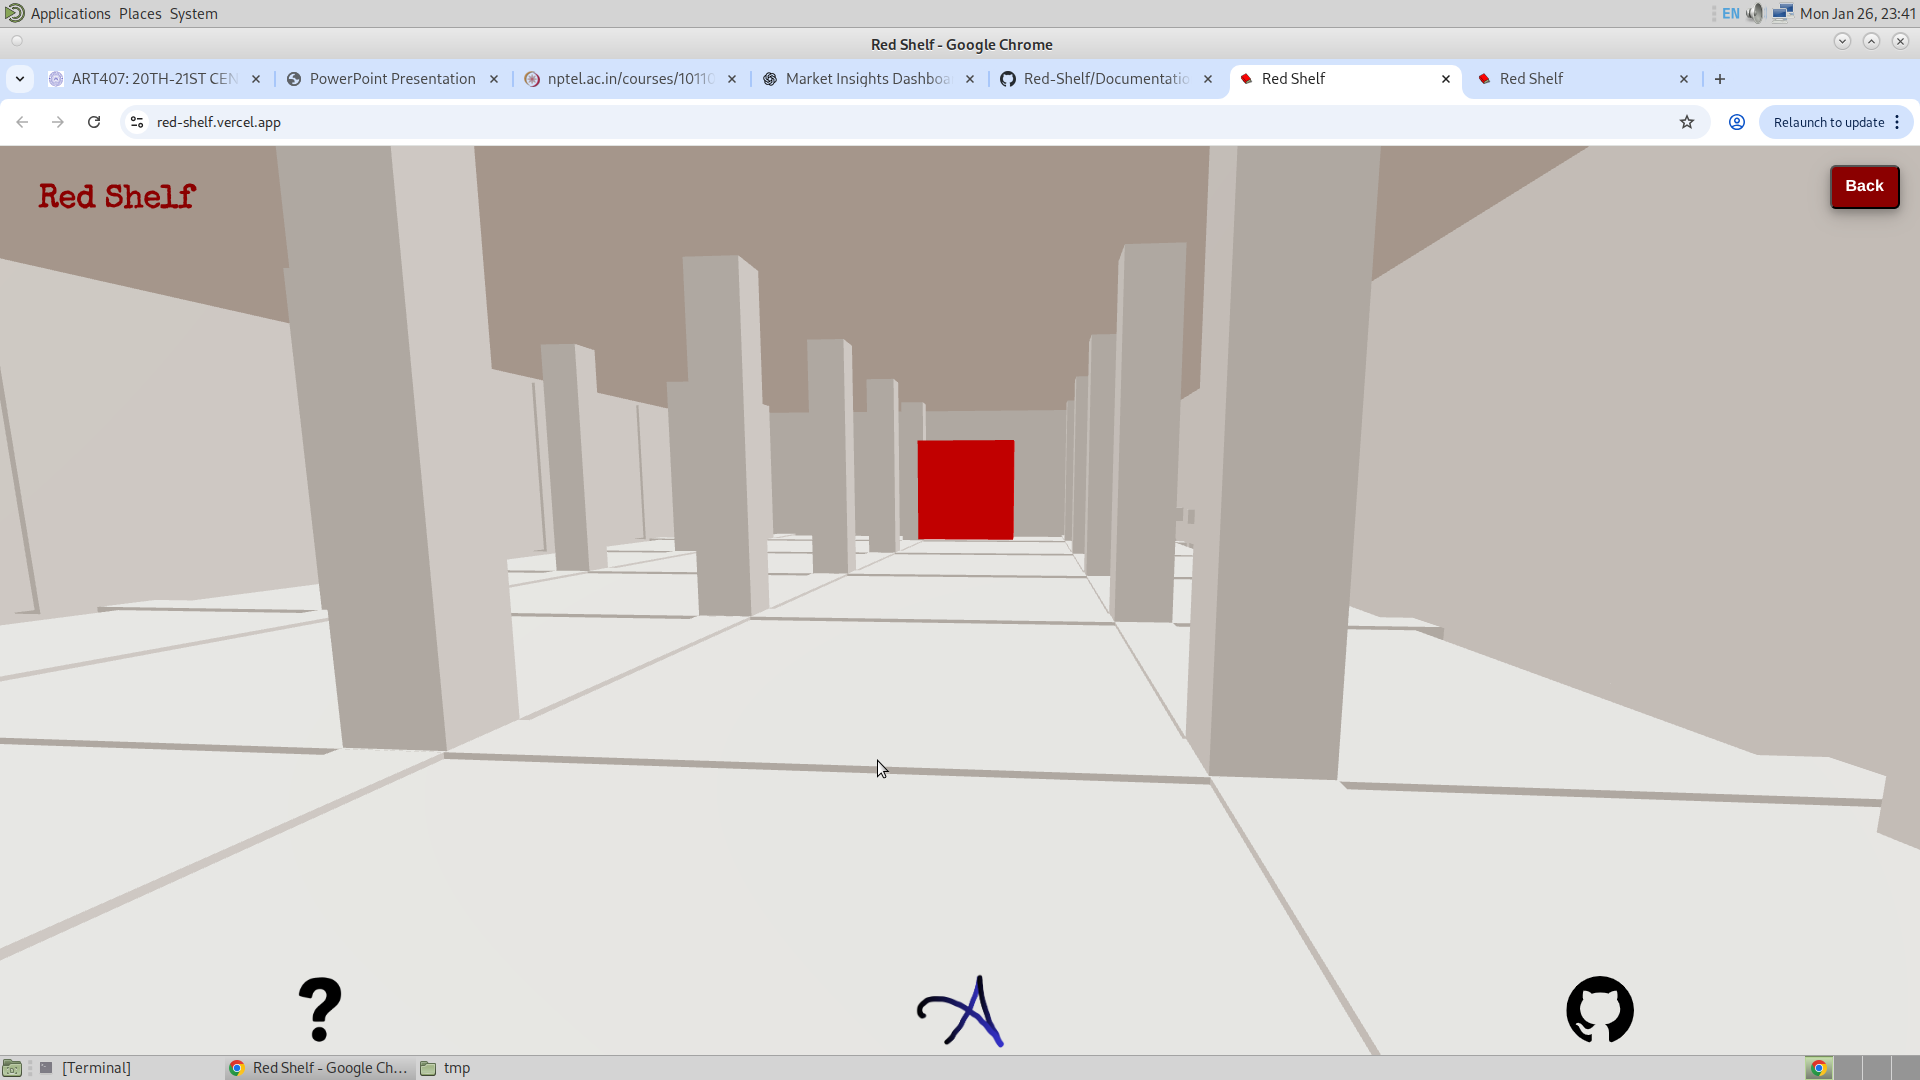
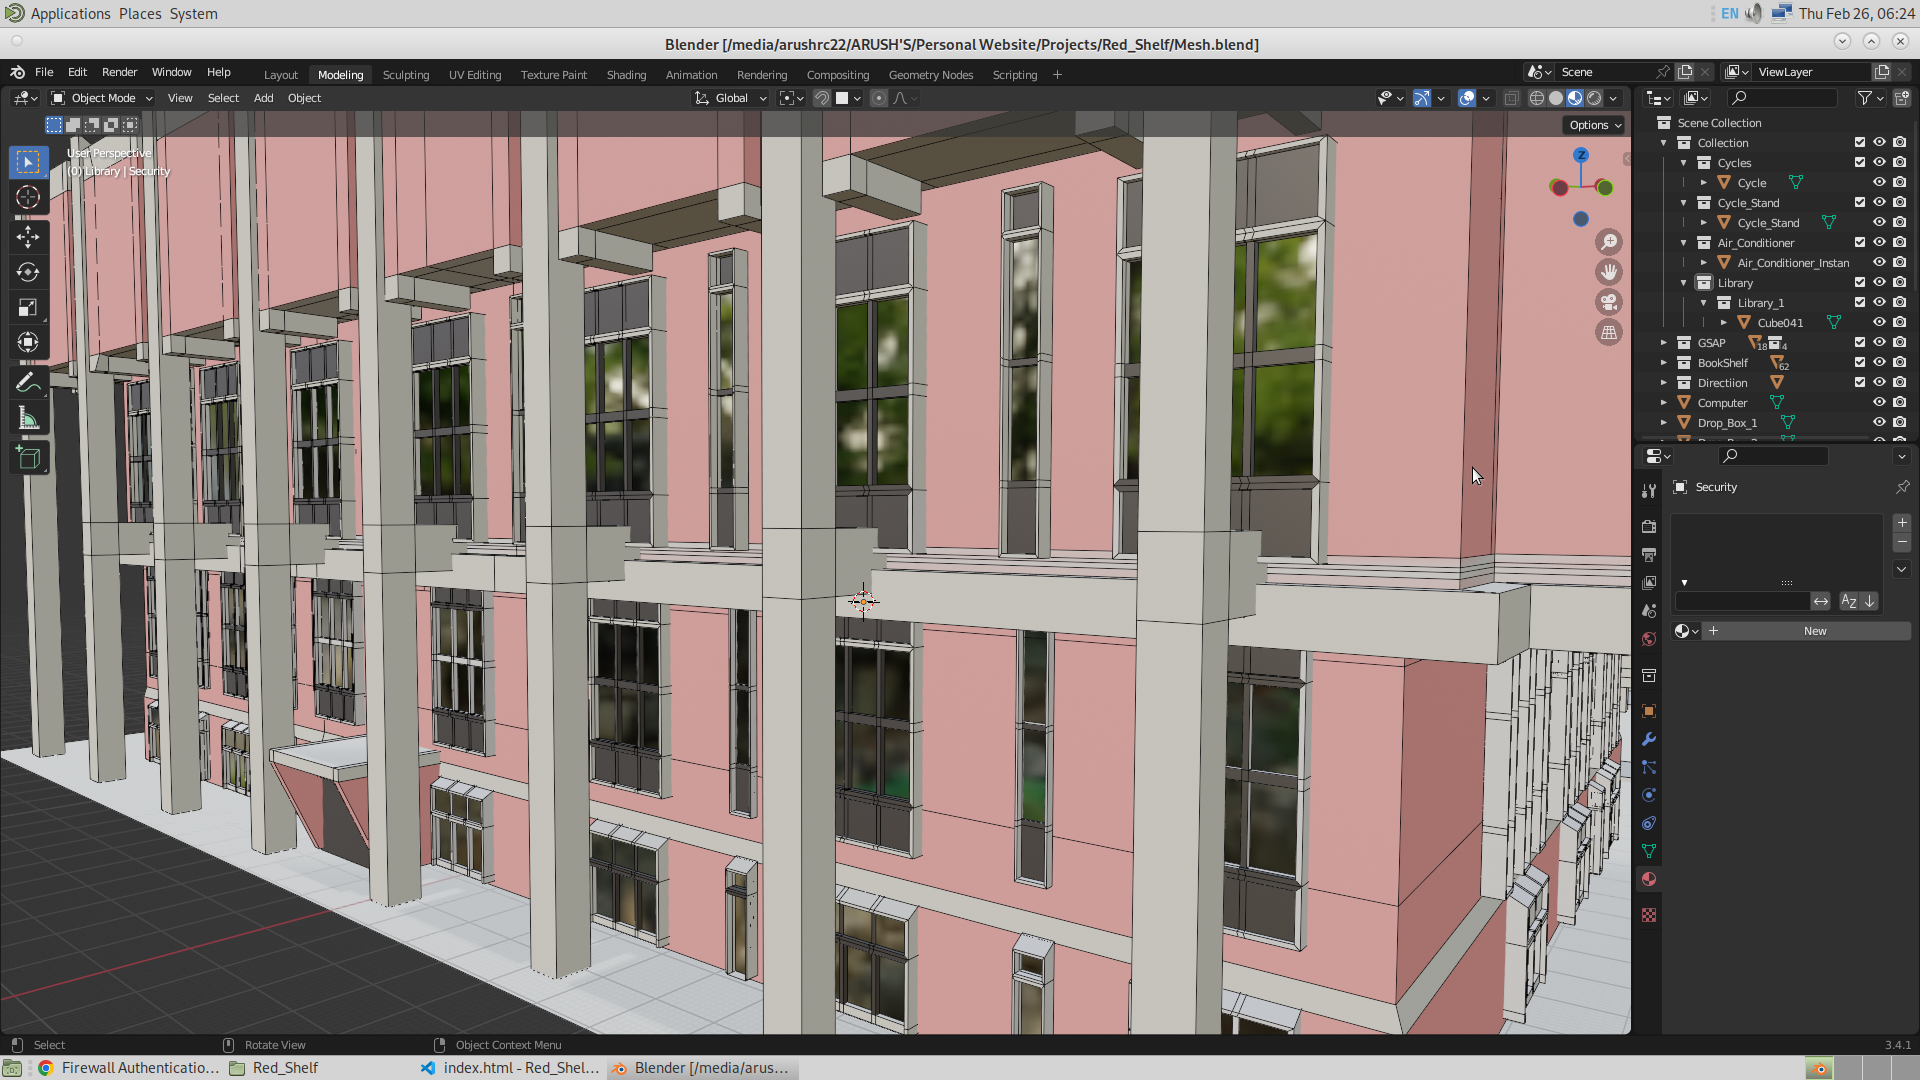
AA lot of work has been done in these five days and I am going to explain them one by one. The first and major feature is the search. I have successfully added the search feature into the application, wherein now it is possible to search for a bookshelf, and for a dummy shelf system I have numbered them from 1 to 36.
So the way this is done is I have named the bookshelf such that it matches their actual names that will be used to make their color red in Three.js. And then when the search button is clicked, I make the bookshelf which was entered by the user red. The user will enter any number from 1 to 36, and so as soon as it submits the form, the bookshelf will be turned red, and also I make the whole library translucent. Now one issue I was getting was that even if the opacity was turning down, it was not making the mesh behind it visible. I was still unable to see the bookshelf behind the walls, and so I added these two lines.
            if (child.isMesh && child.name == 'Cube041') {
                child.material.transparent = true;

                gsap.to(
                    child.material,
                    {
                        opacity : 0.5,
                        duration : 1,
                        onComplete : ()=>{
                            child.material.depthTest = true;
                            child.material.depthWrite = false;
                        }
                    }
                )
            }

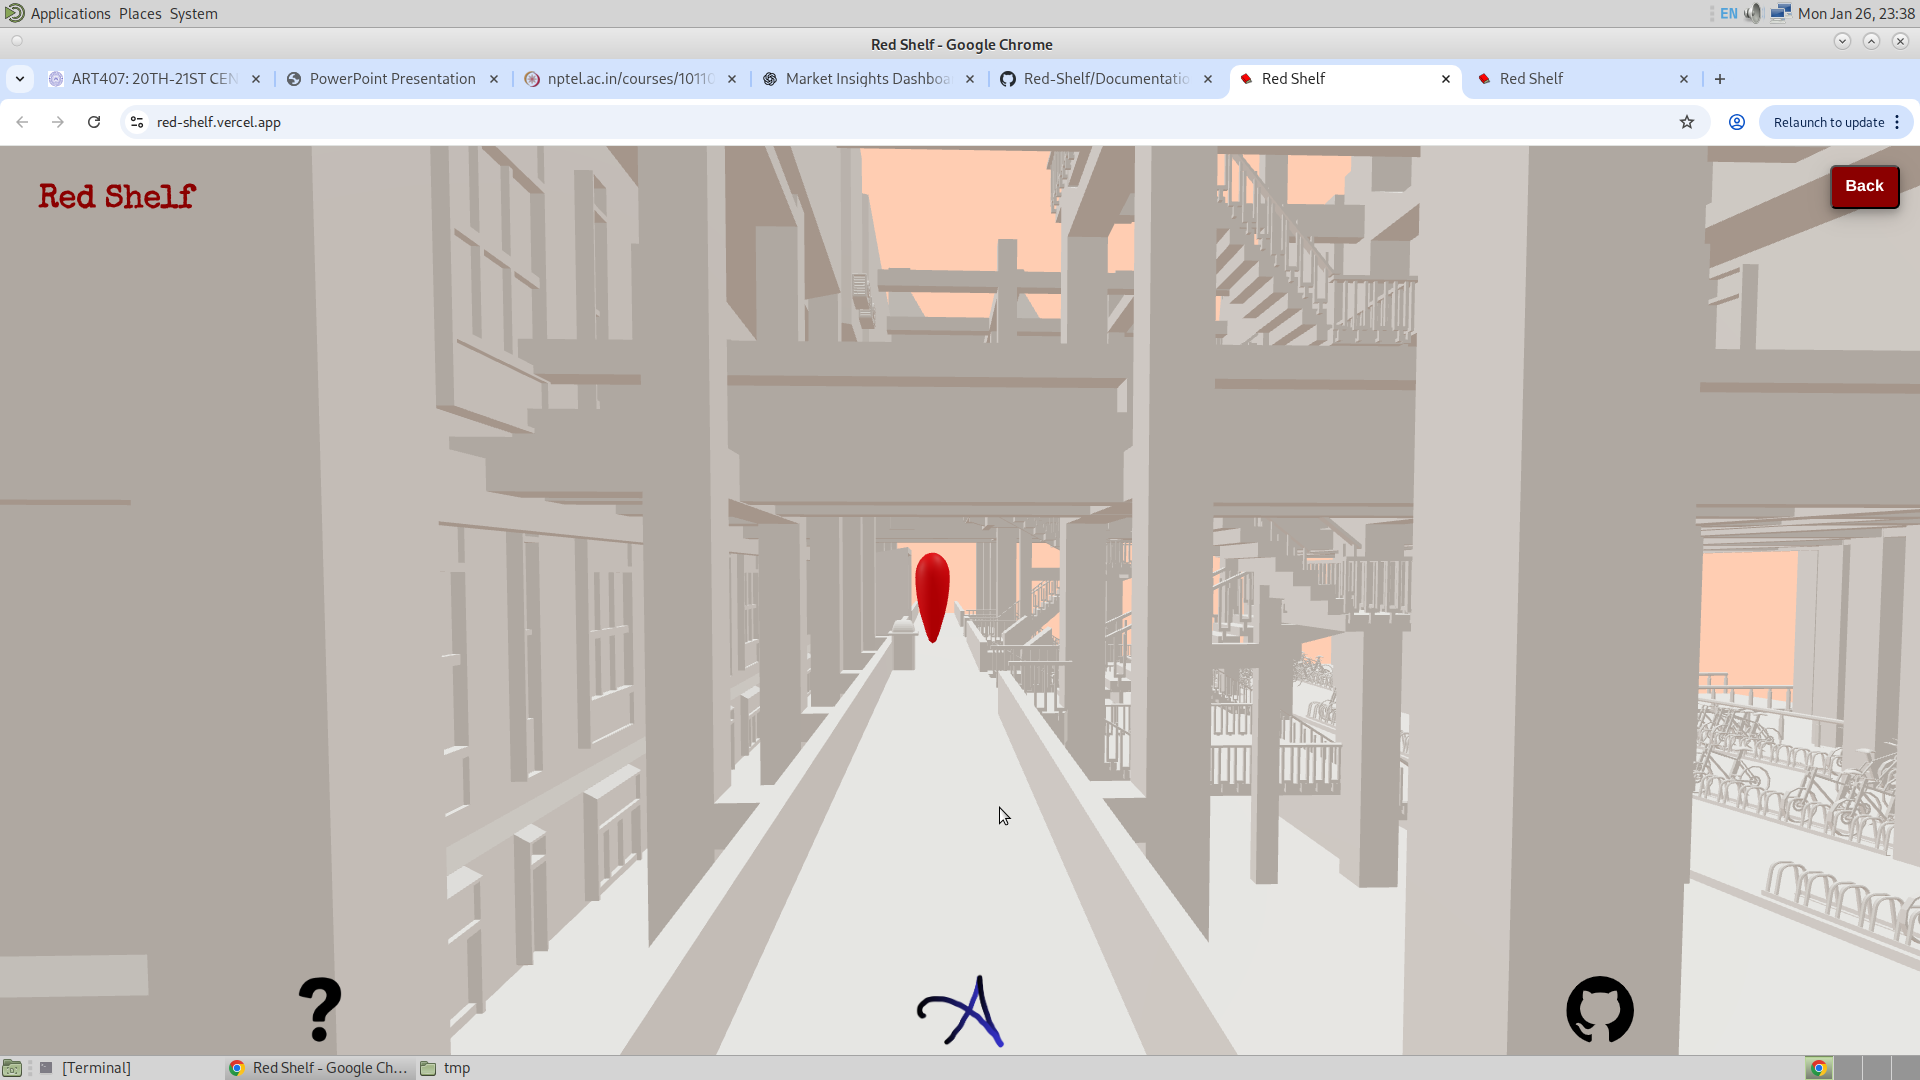
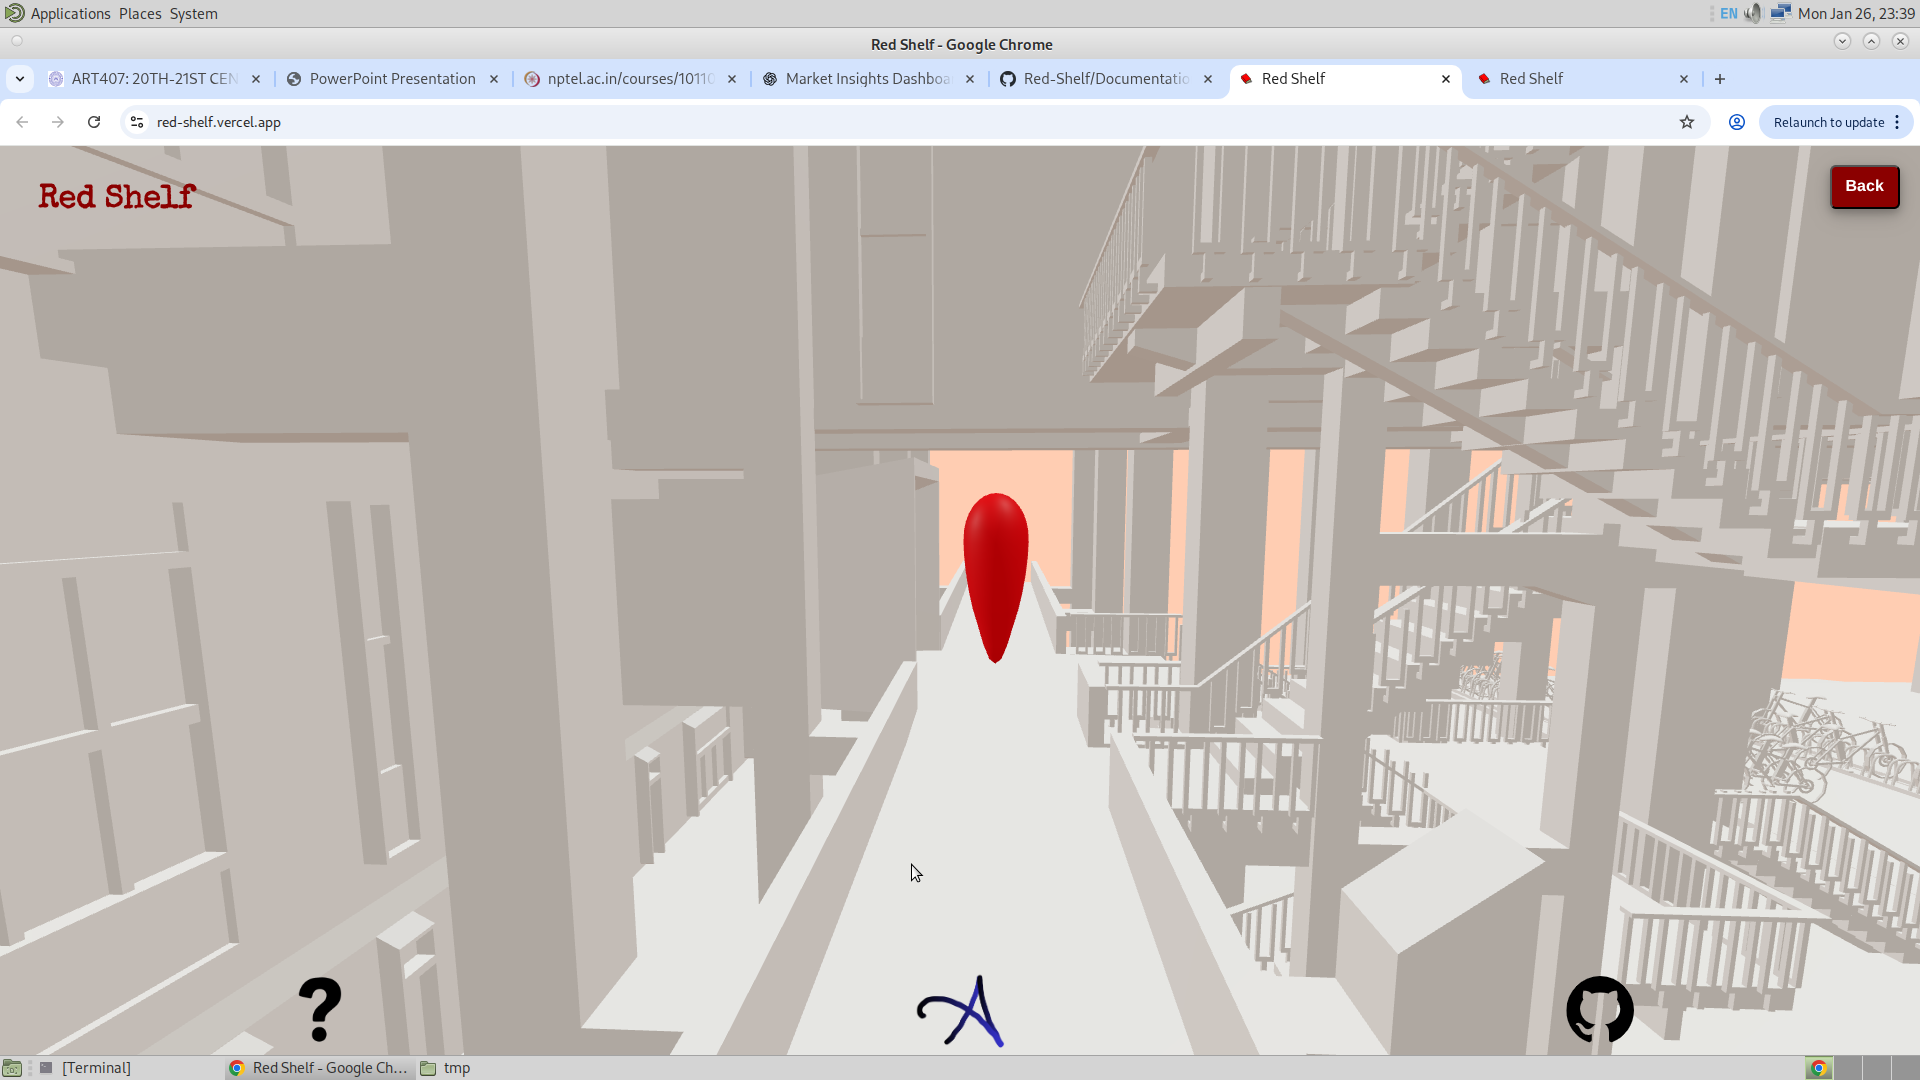
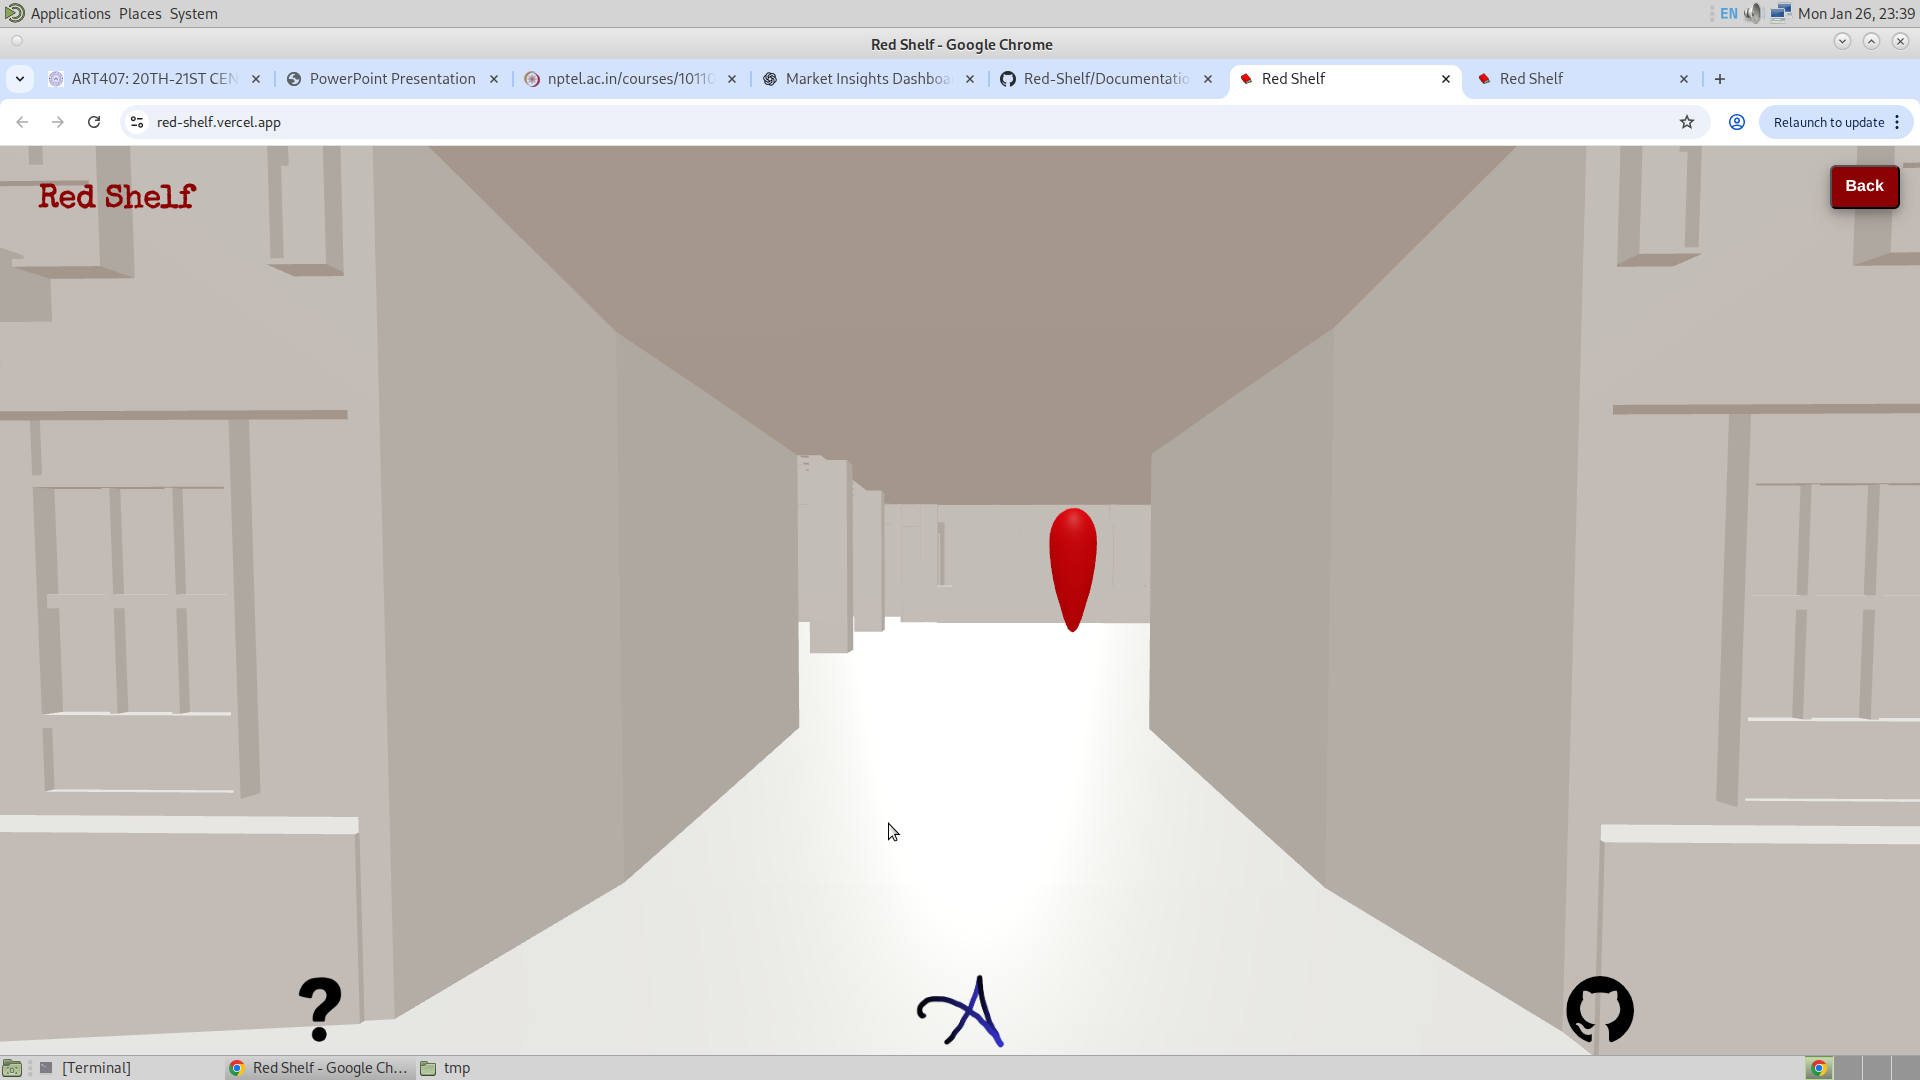
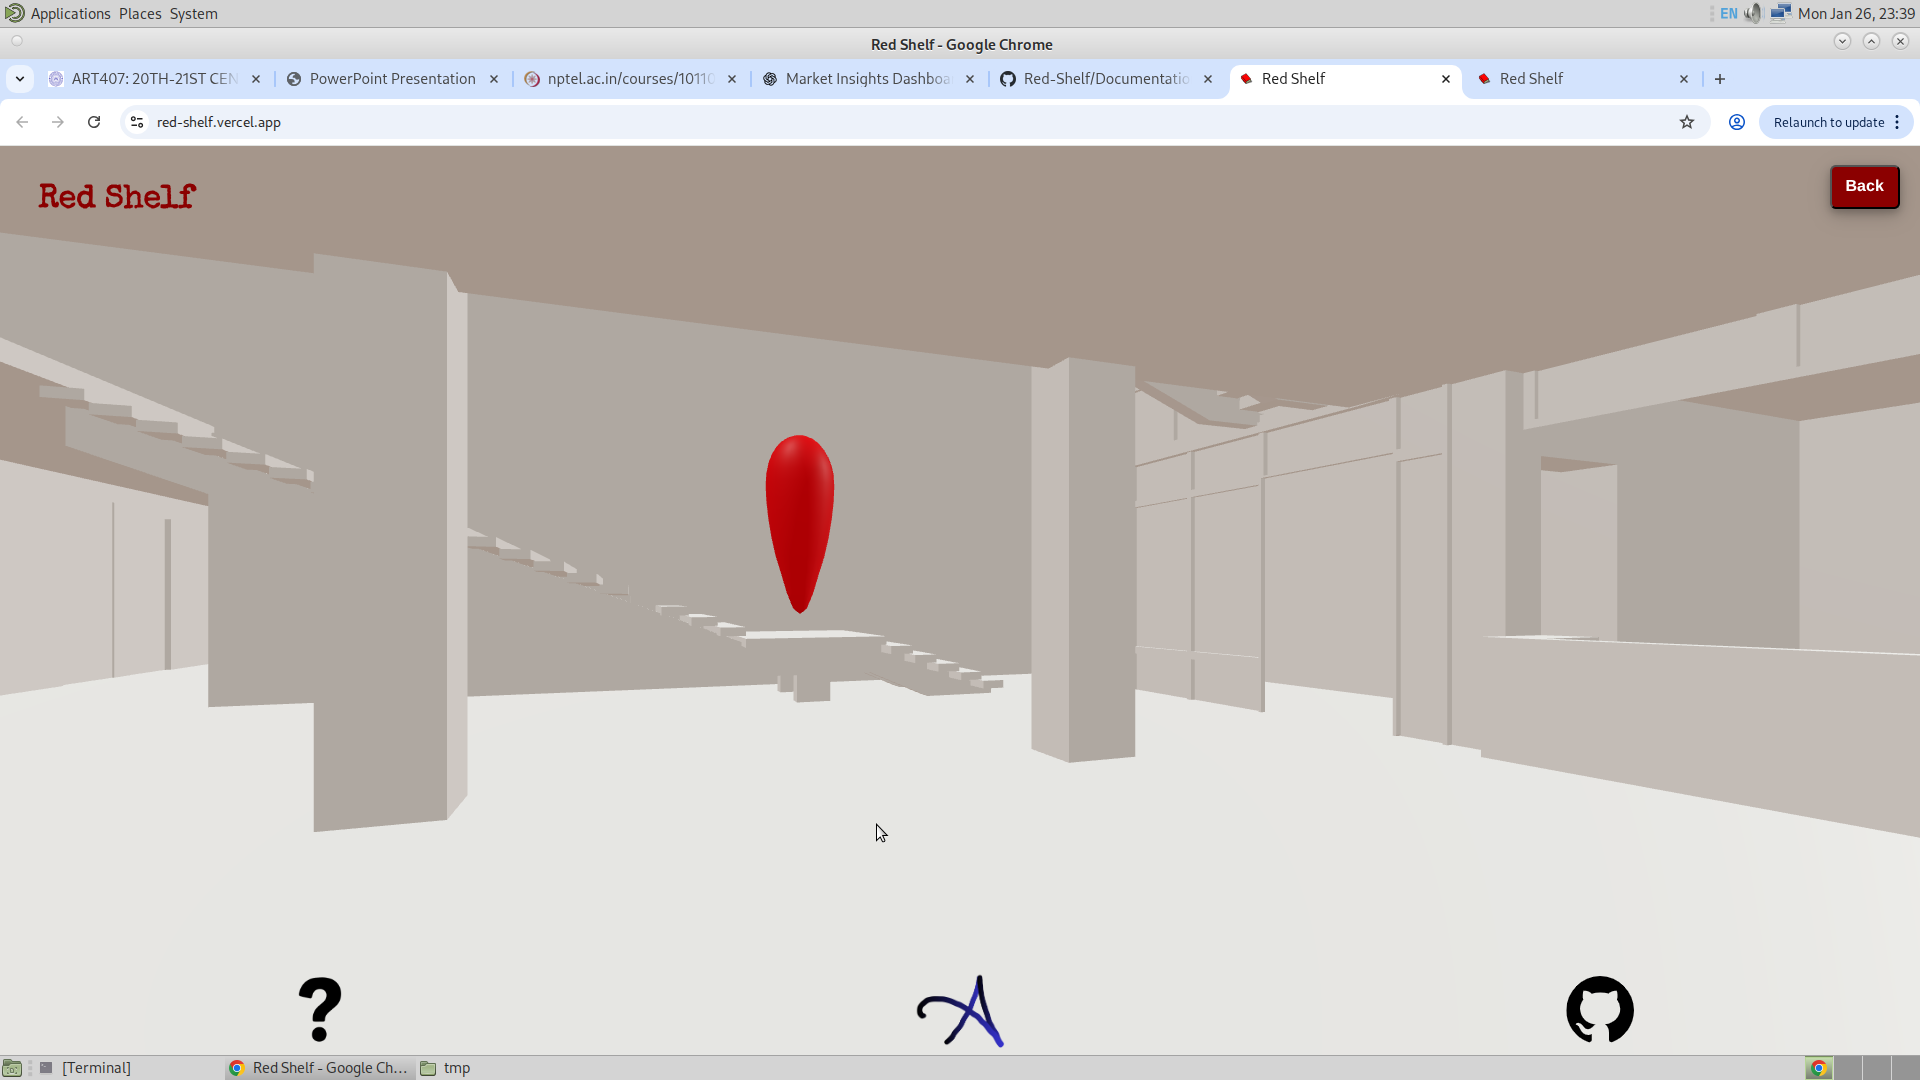
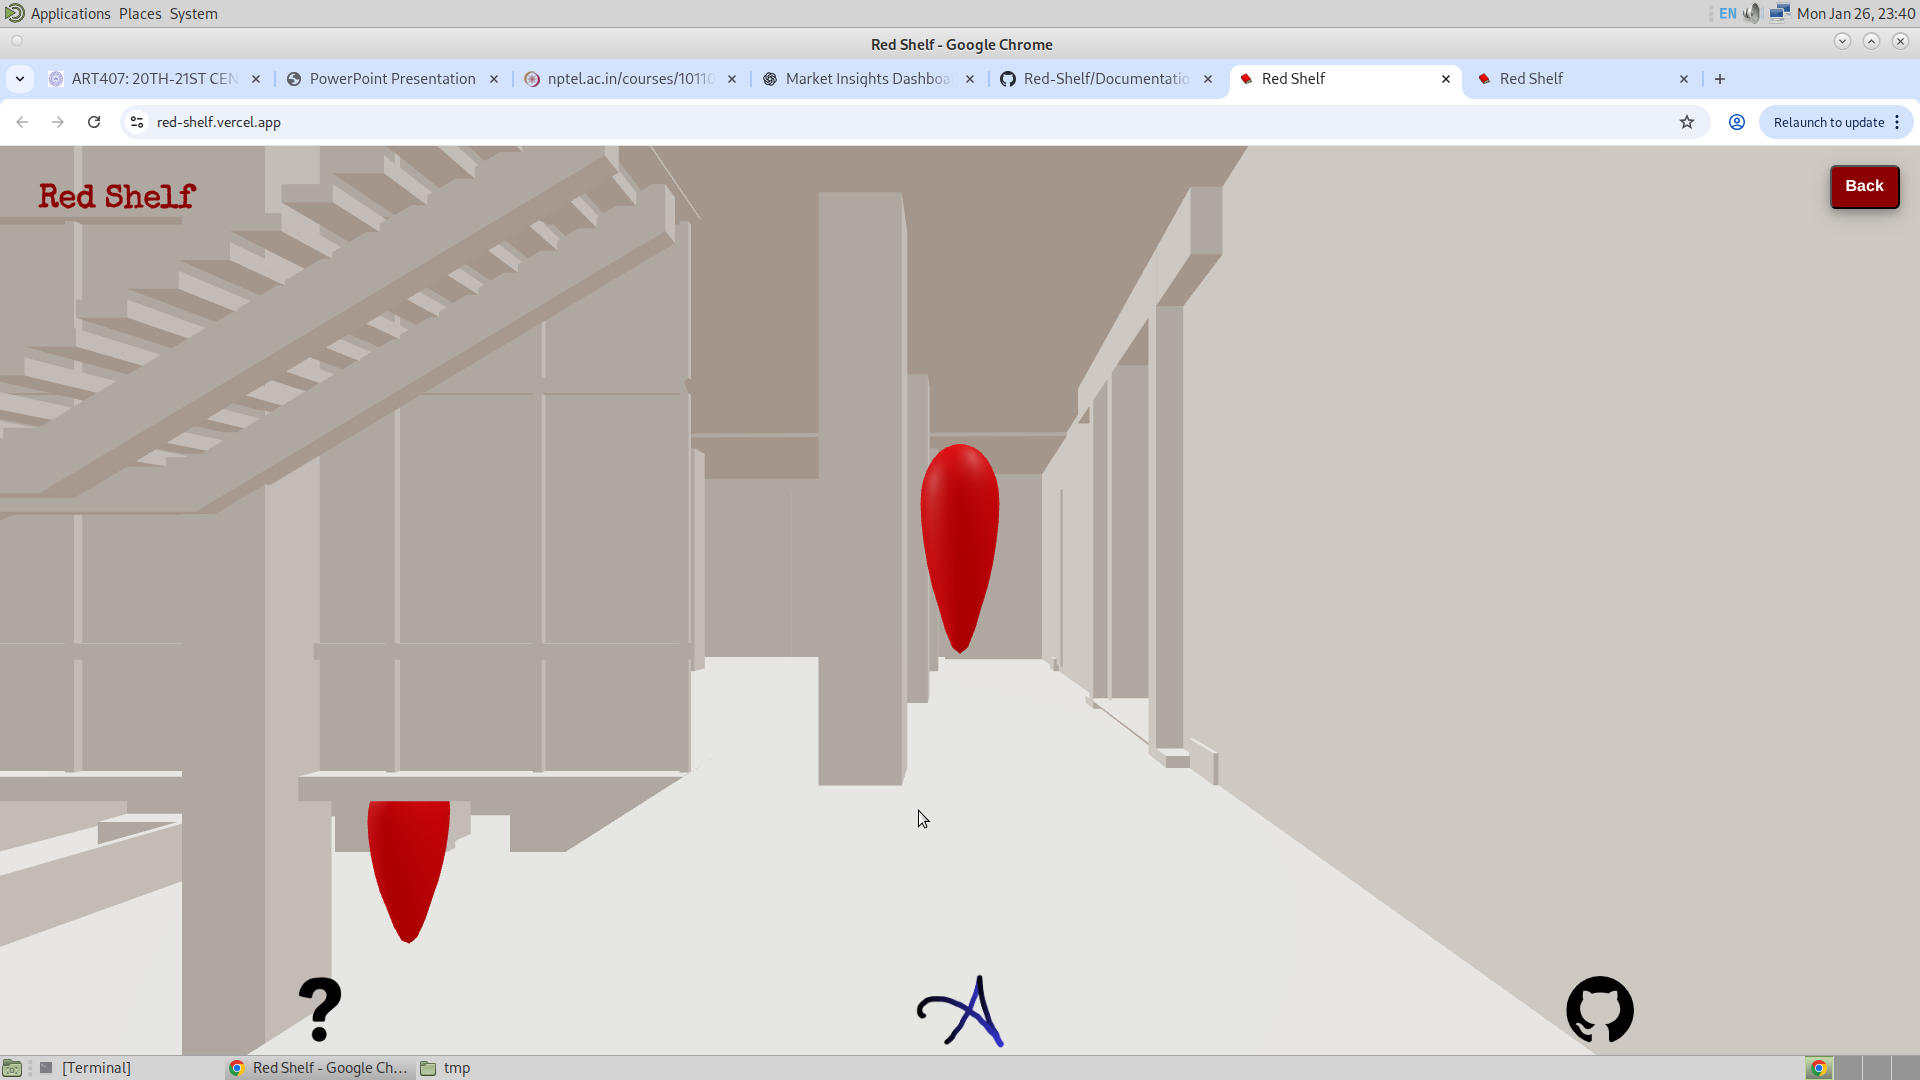
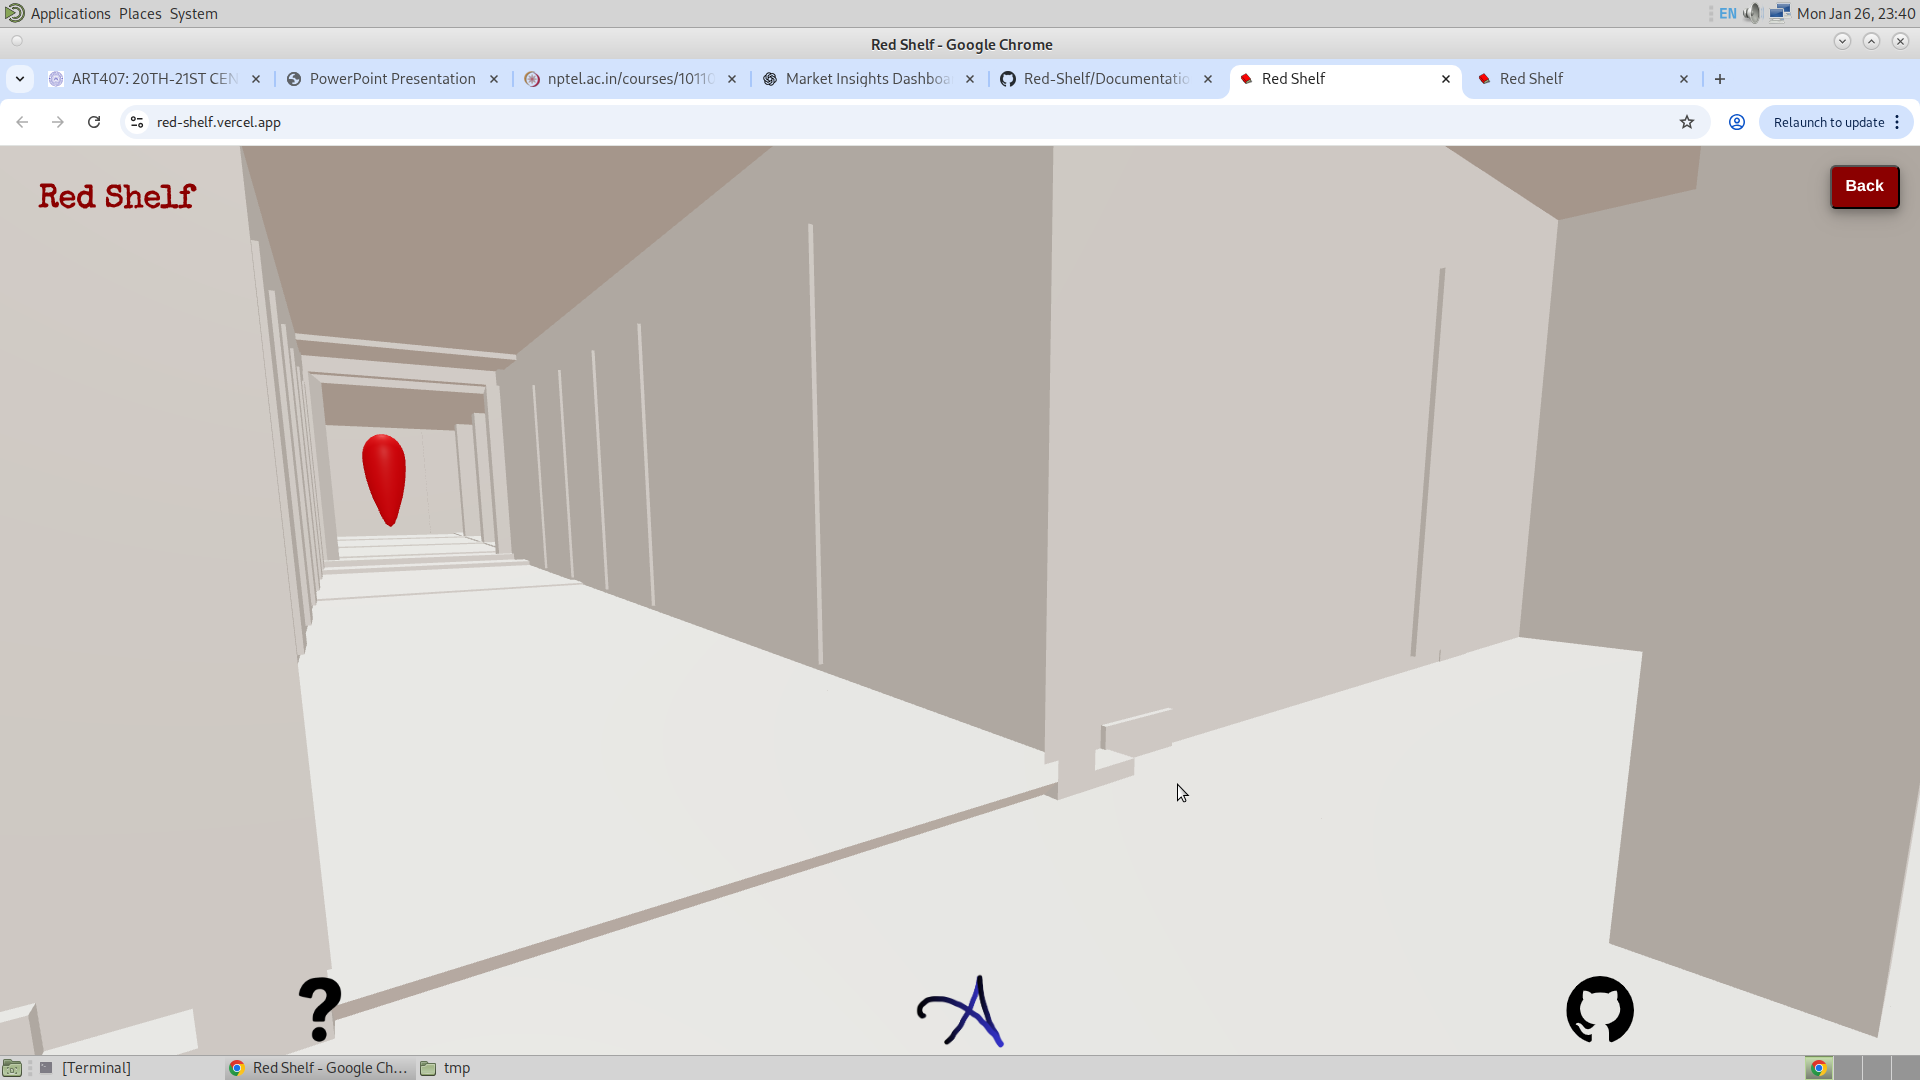
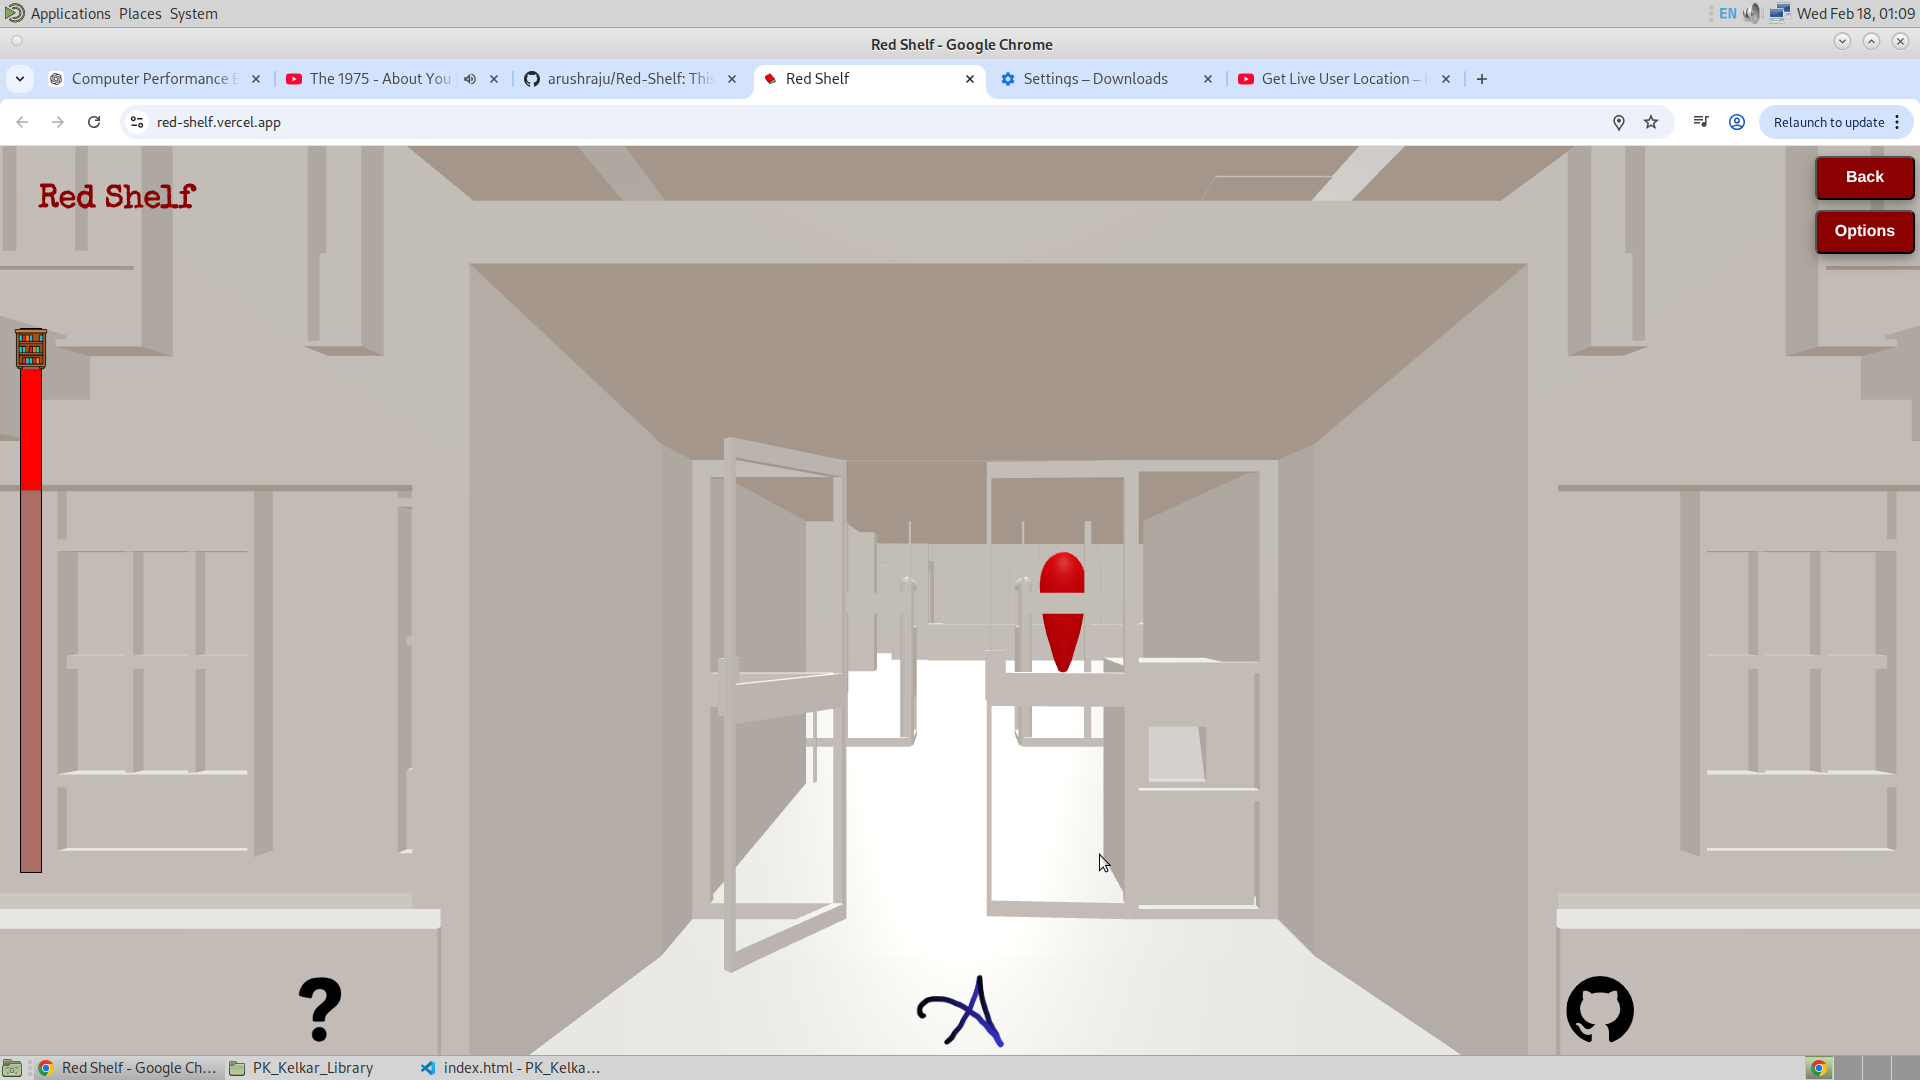
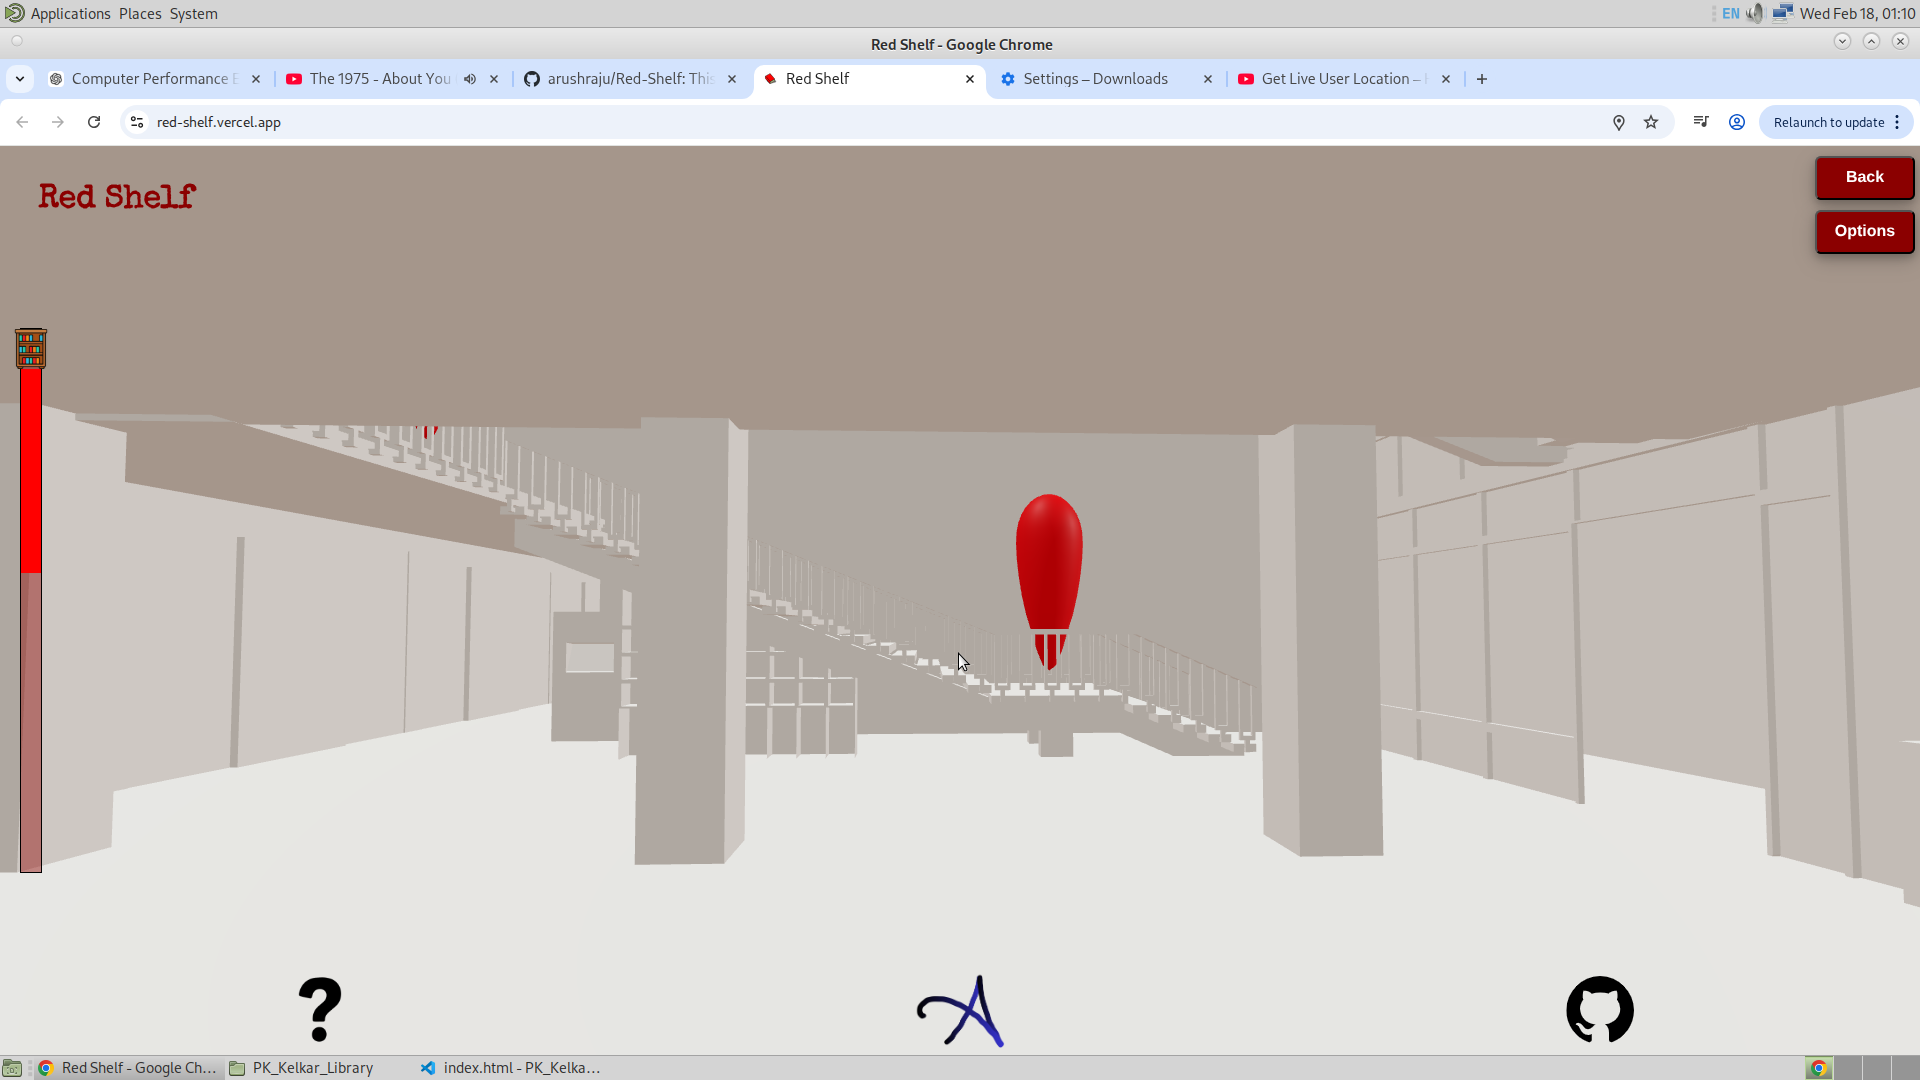
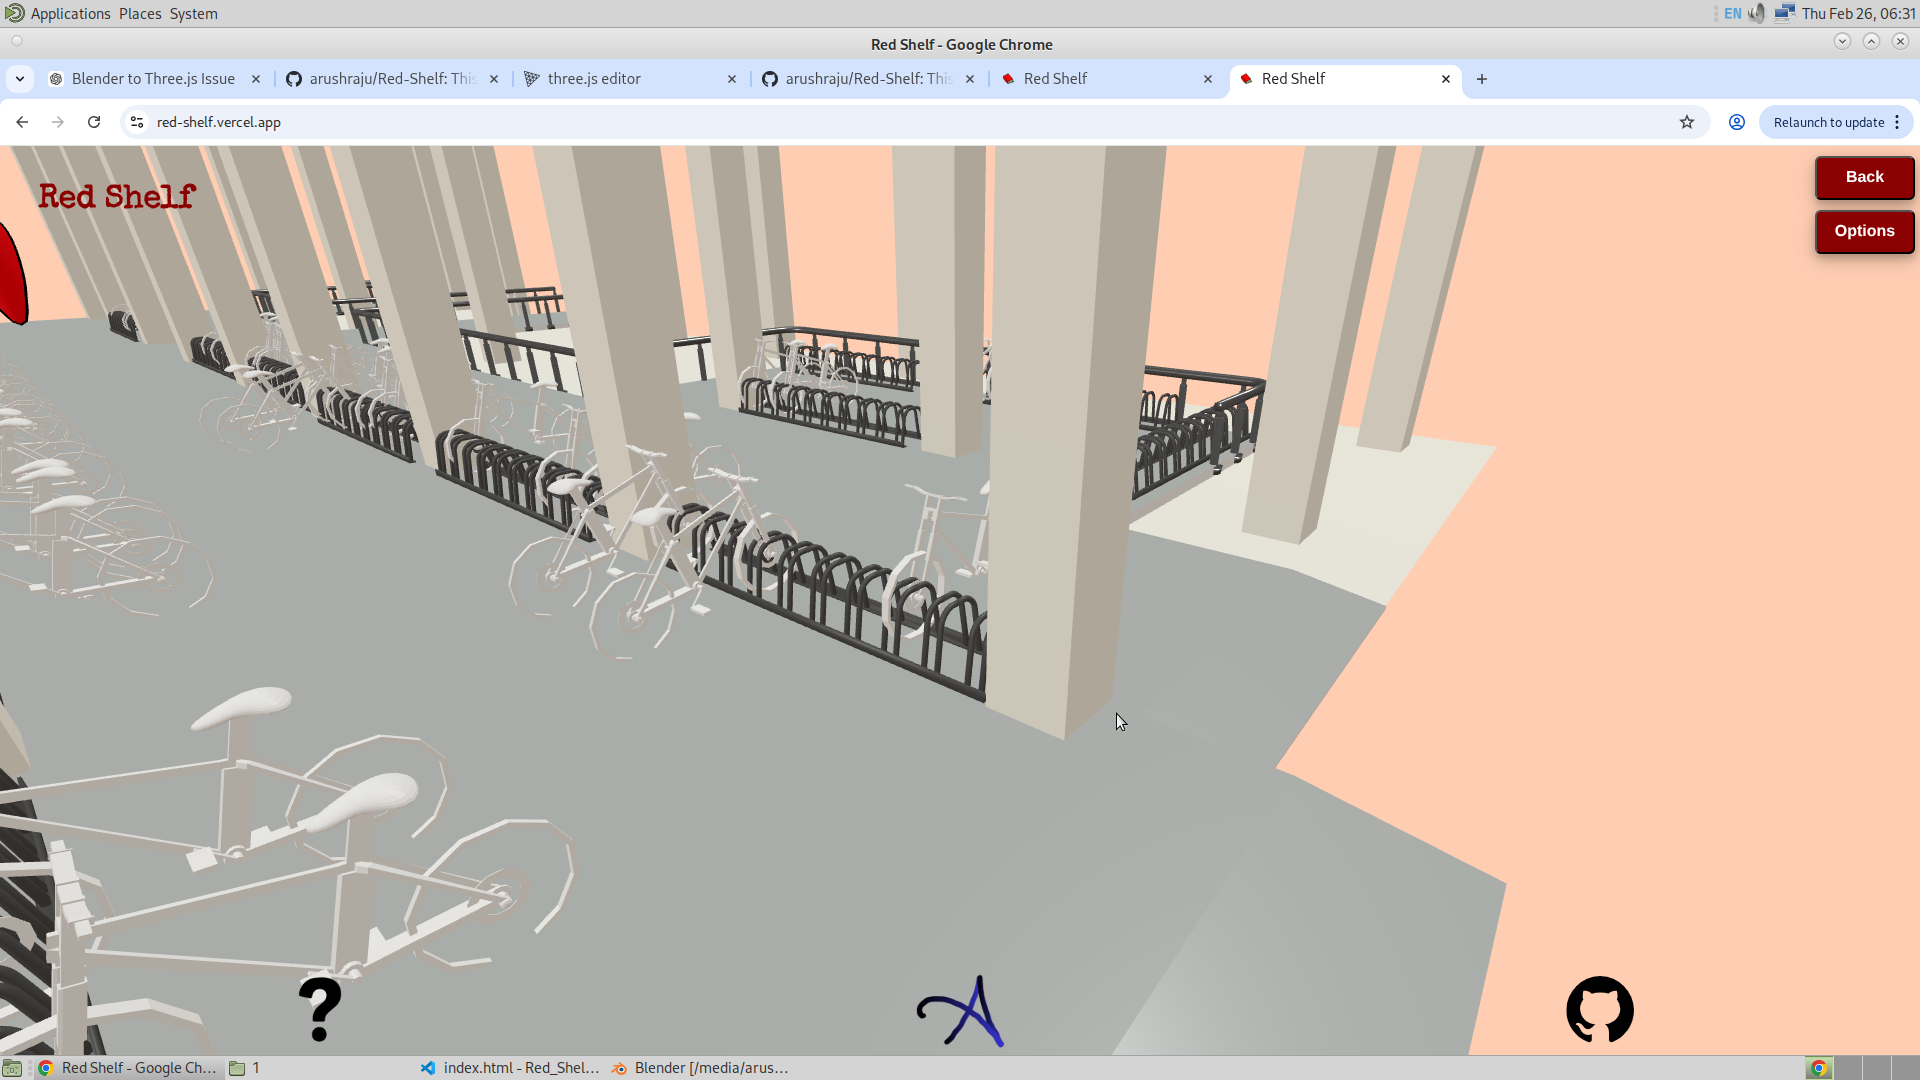
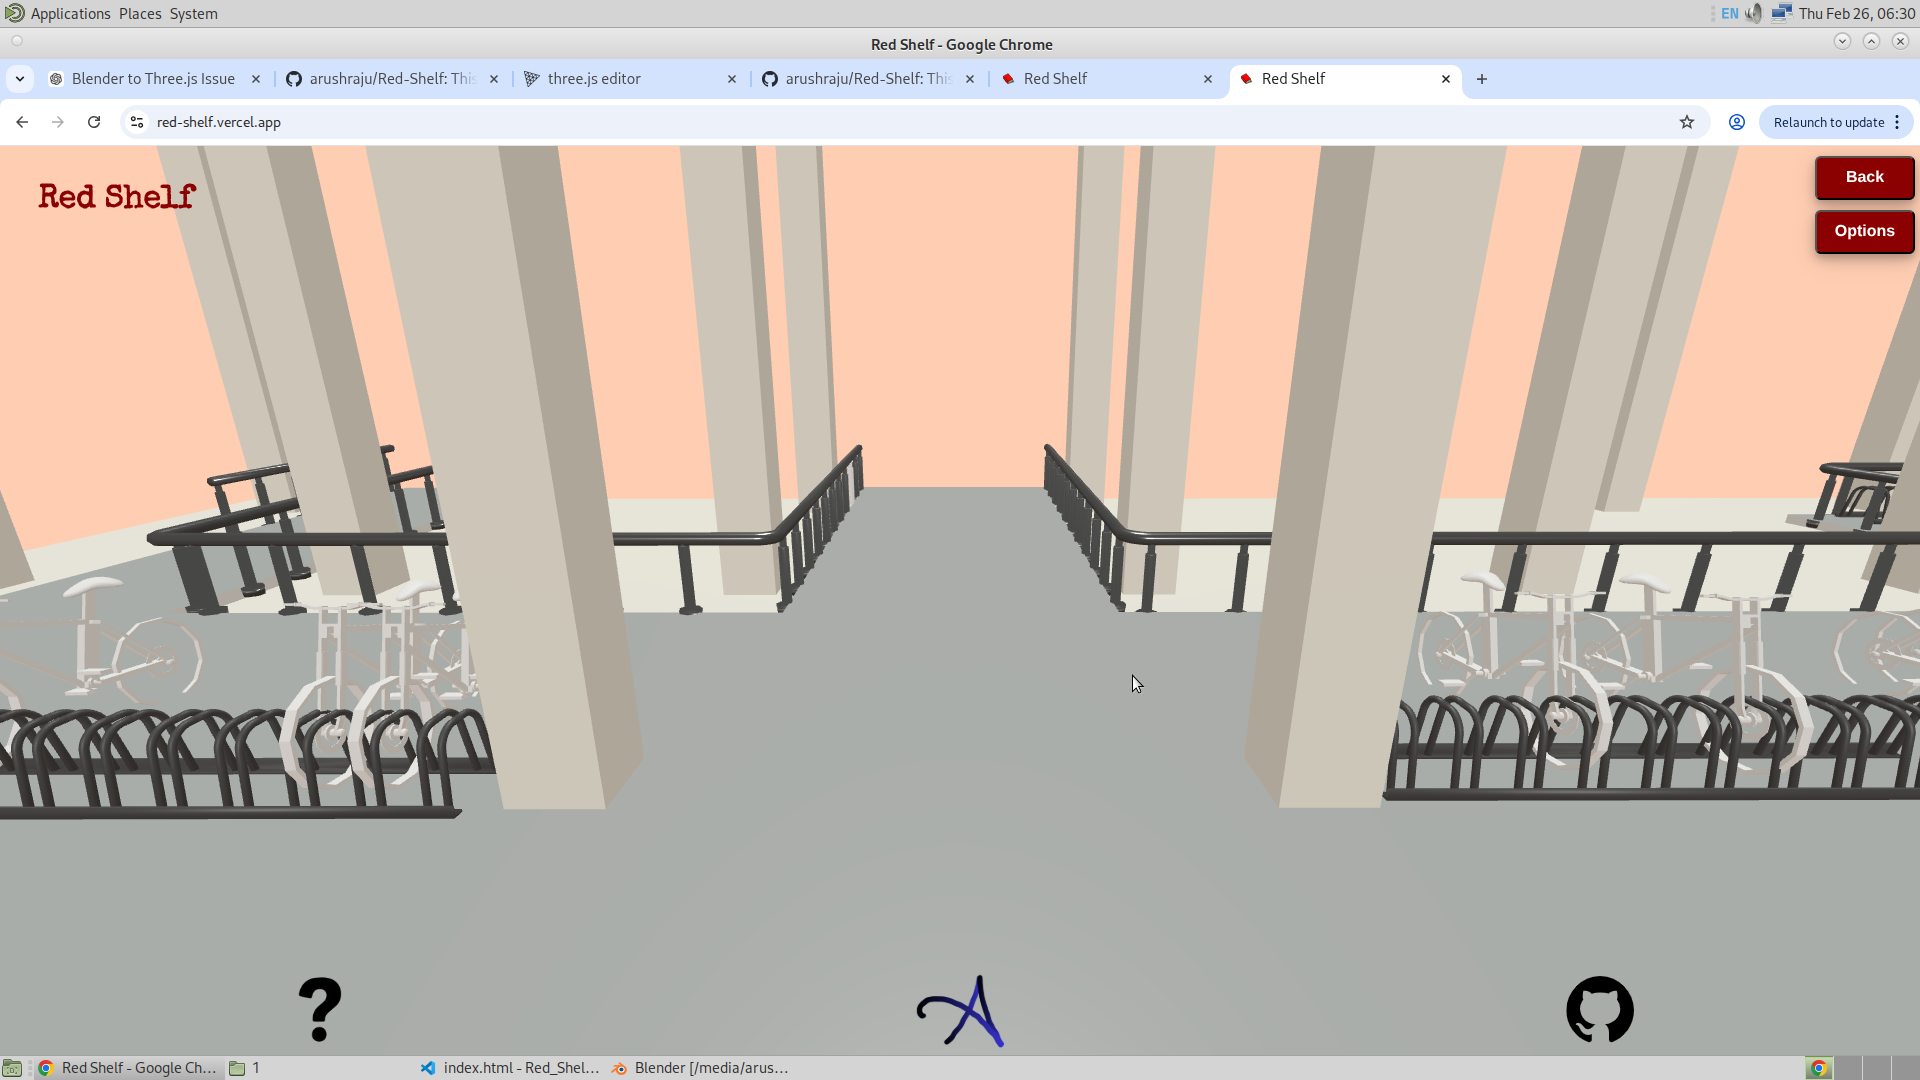
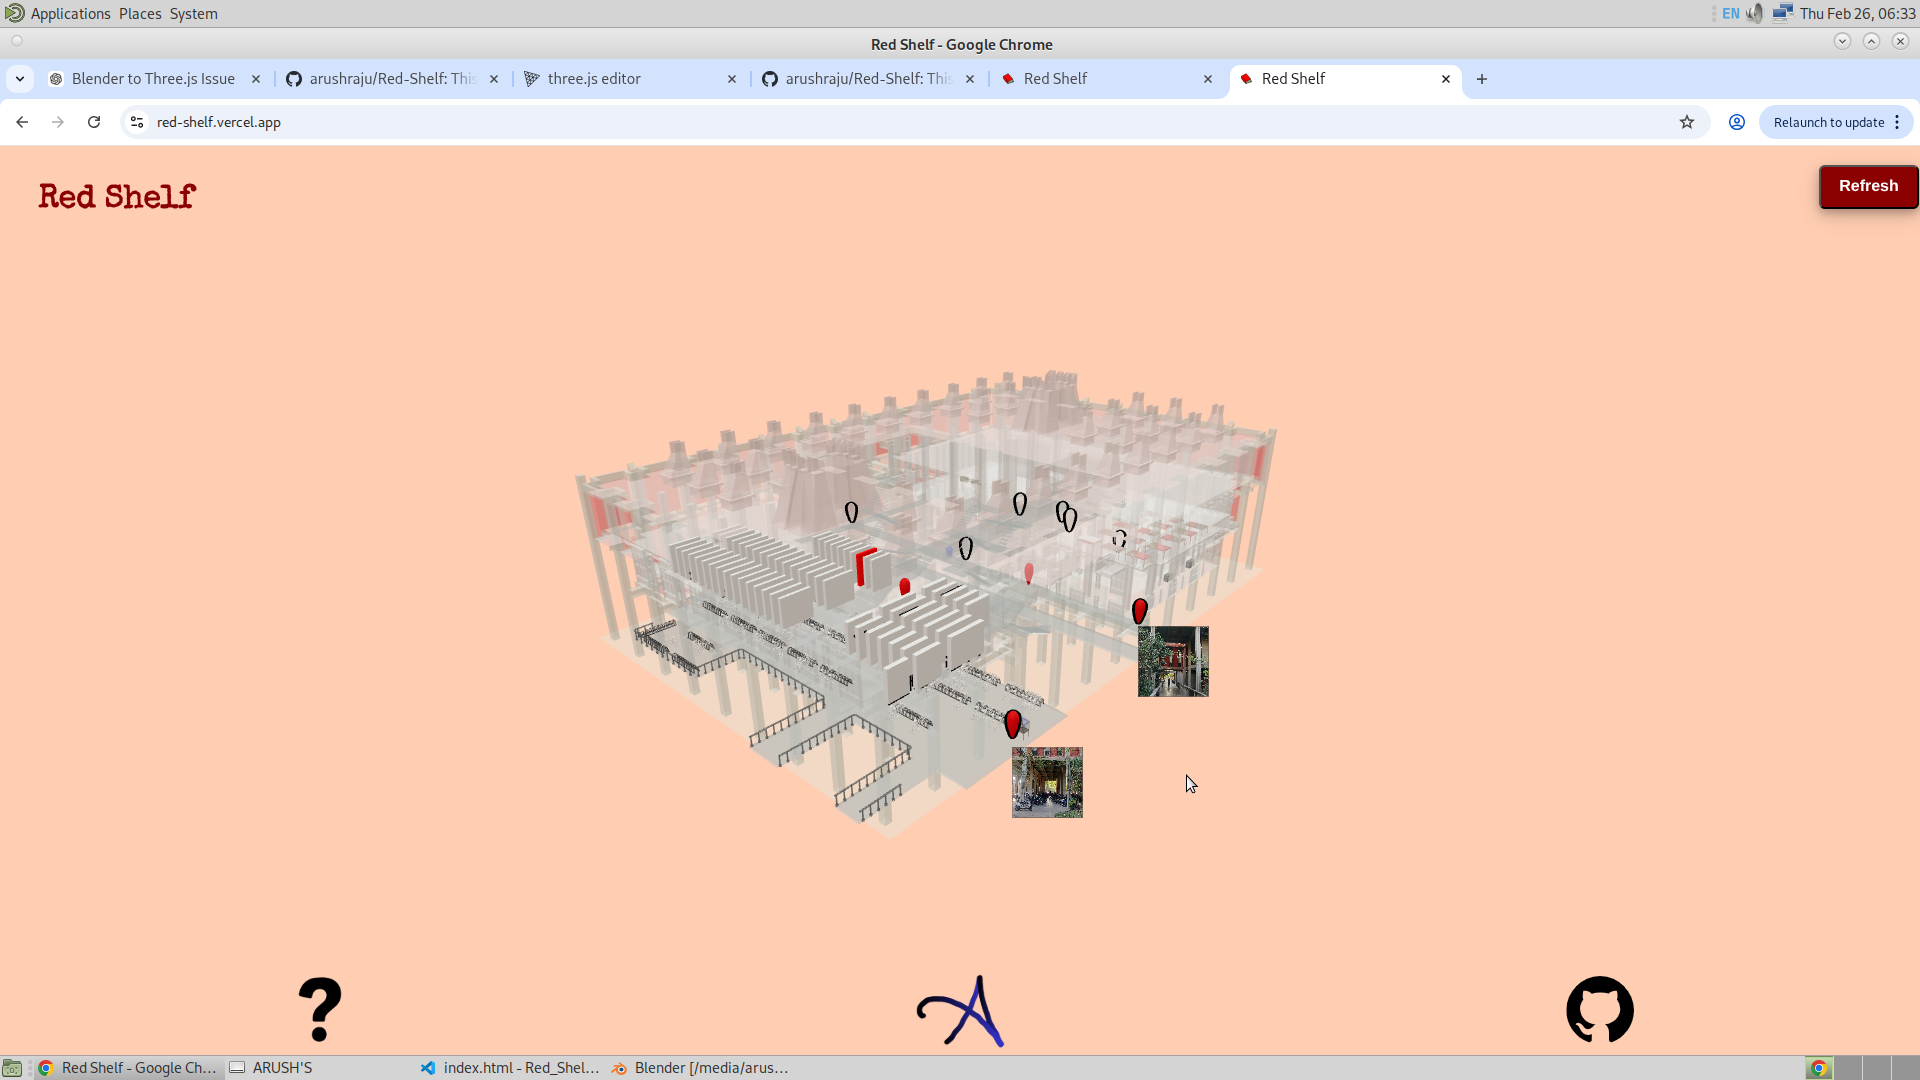
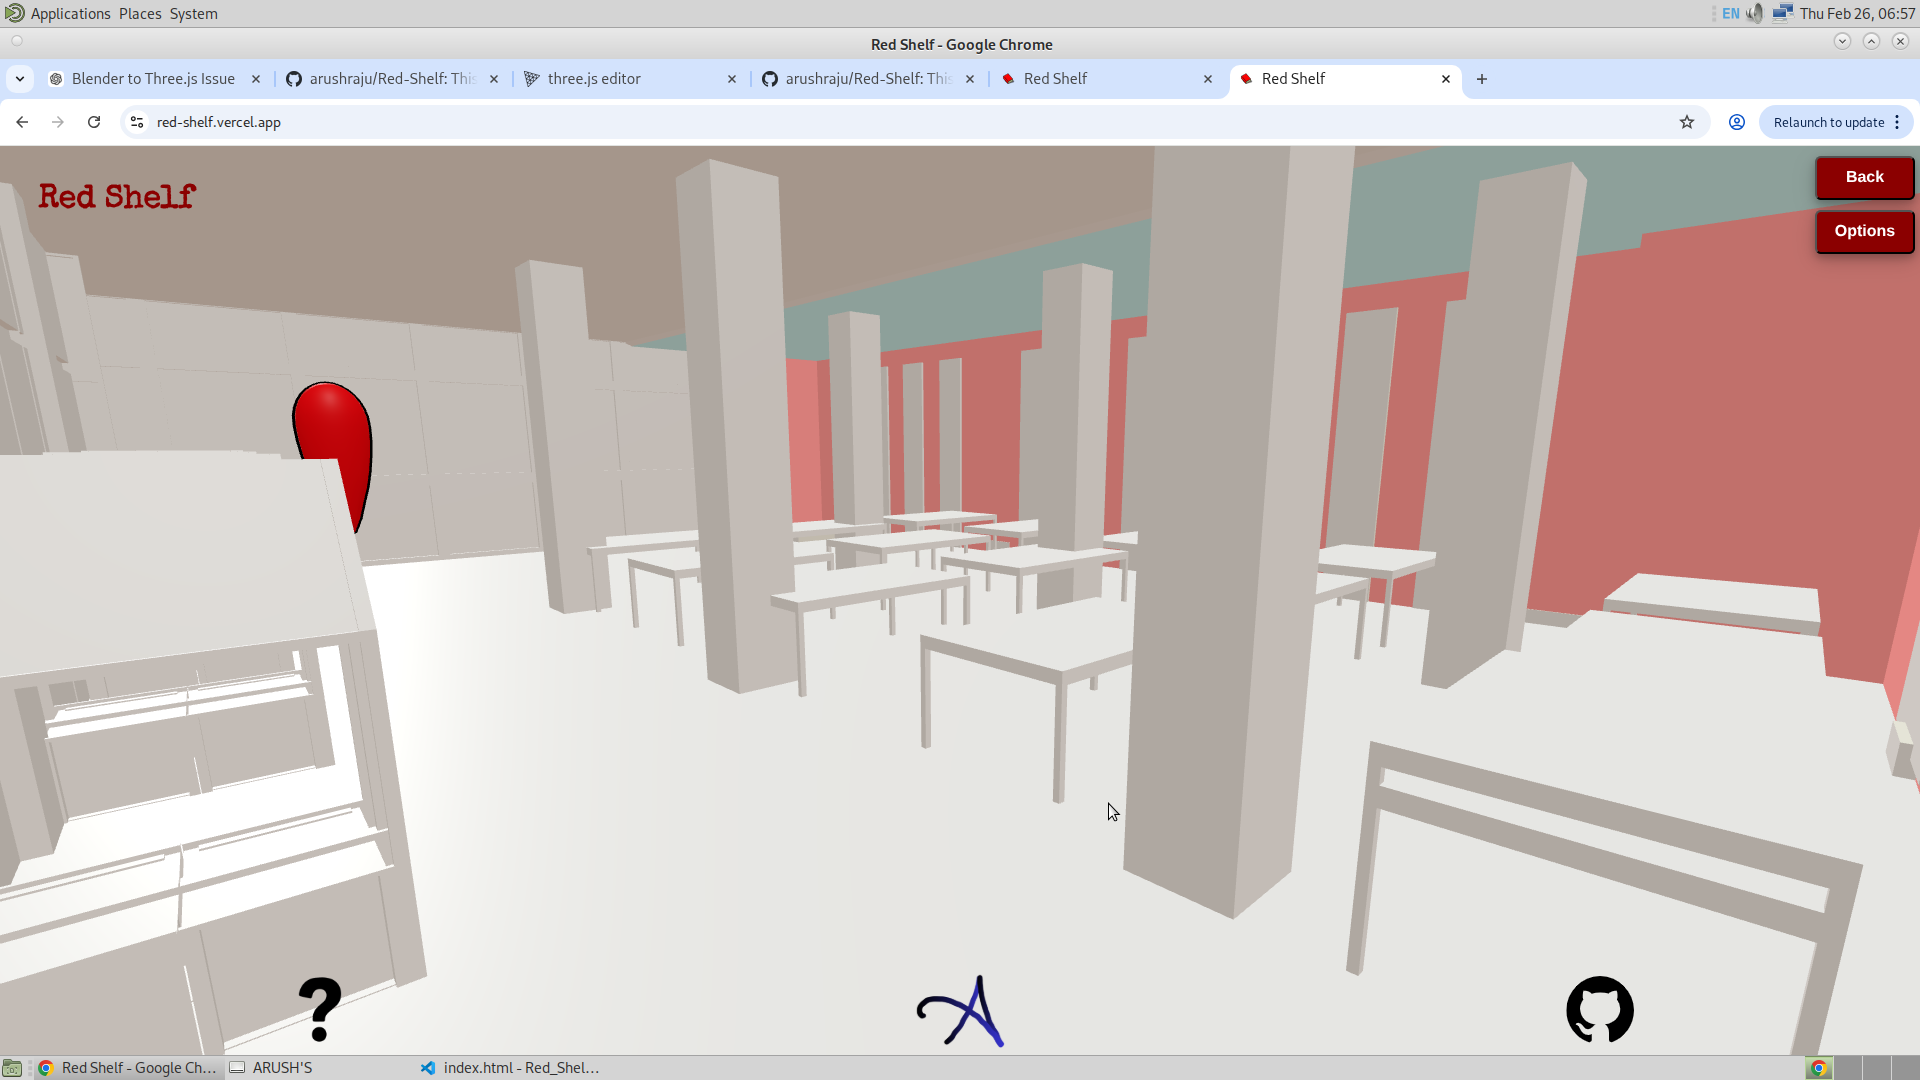
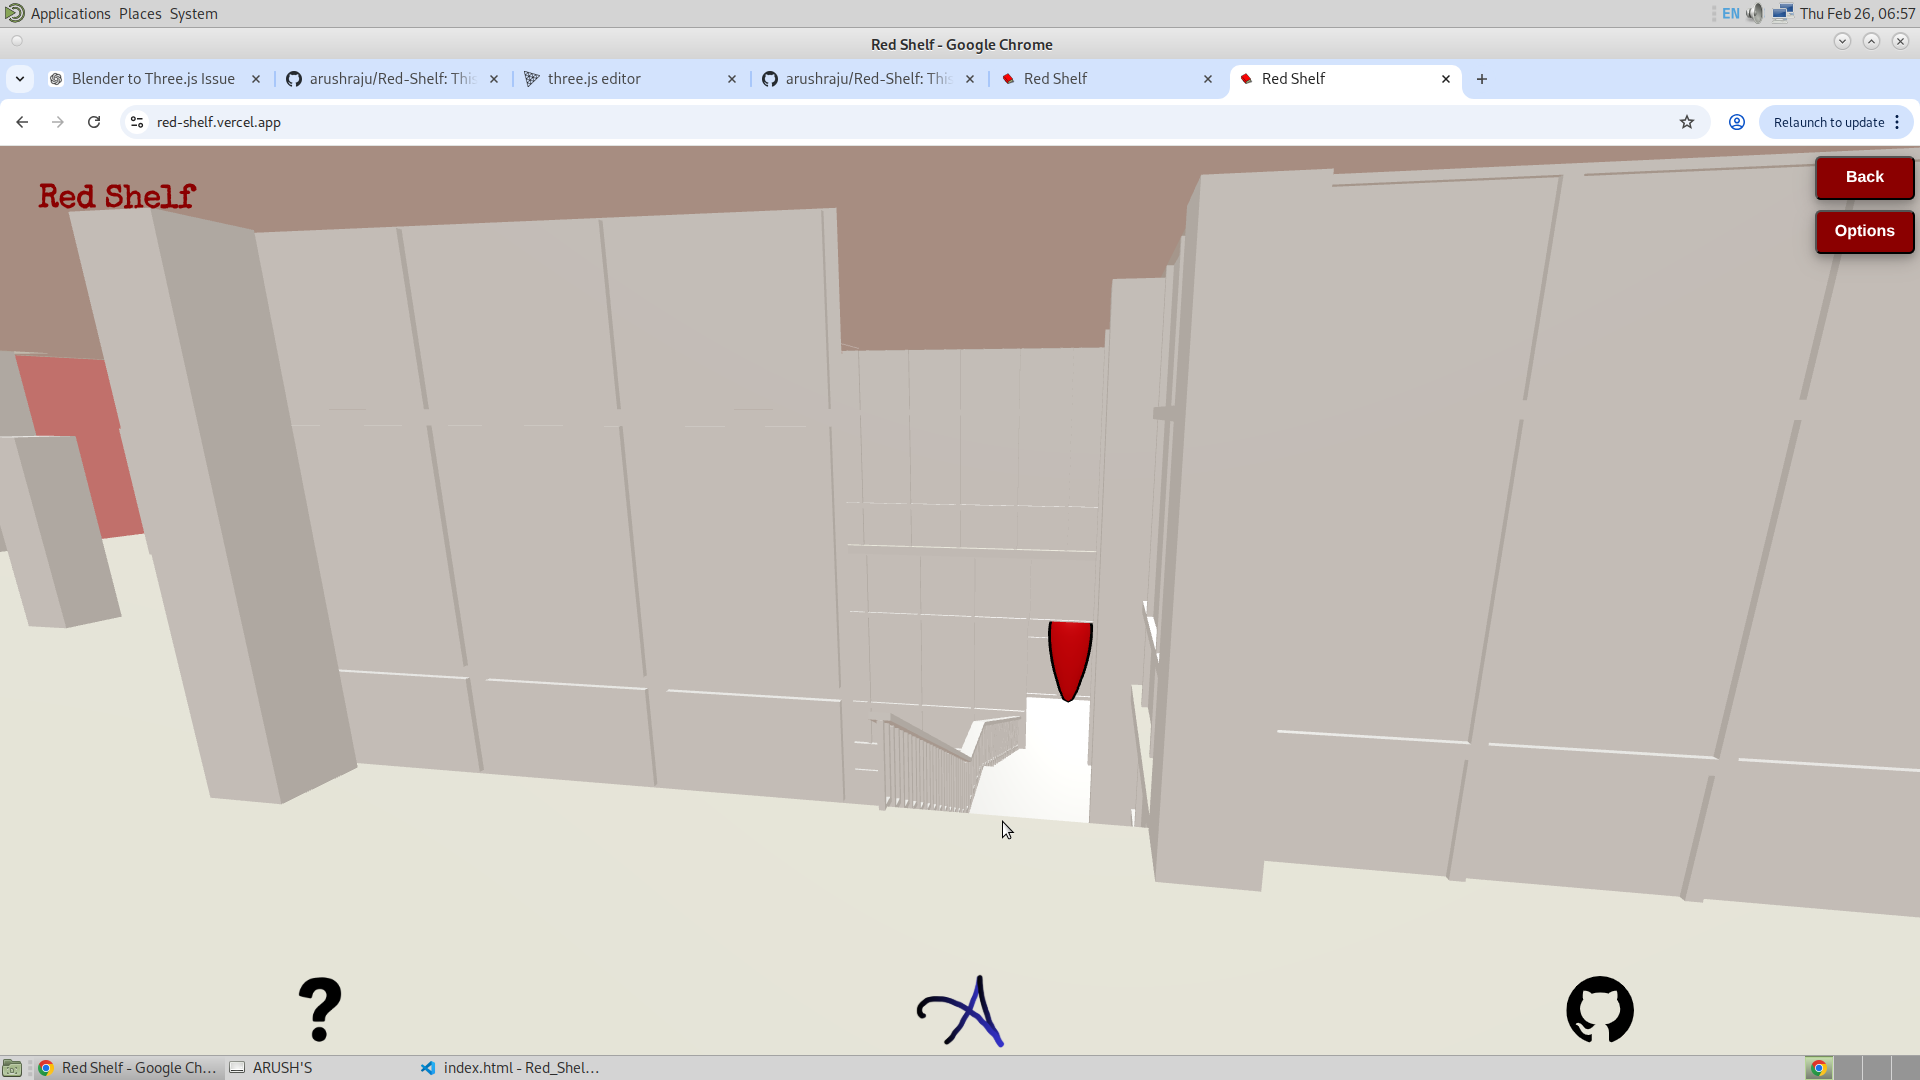
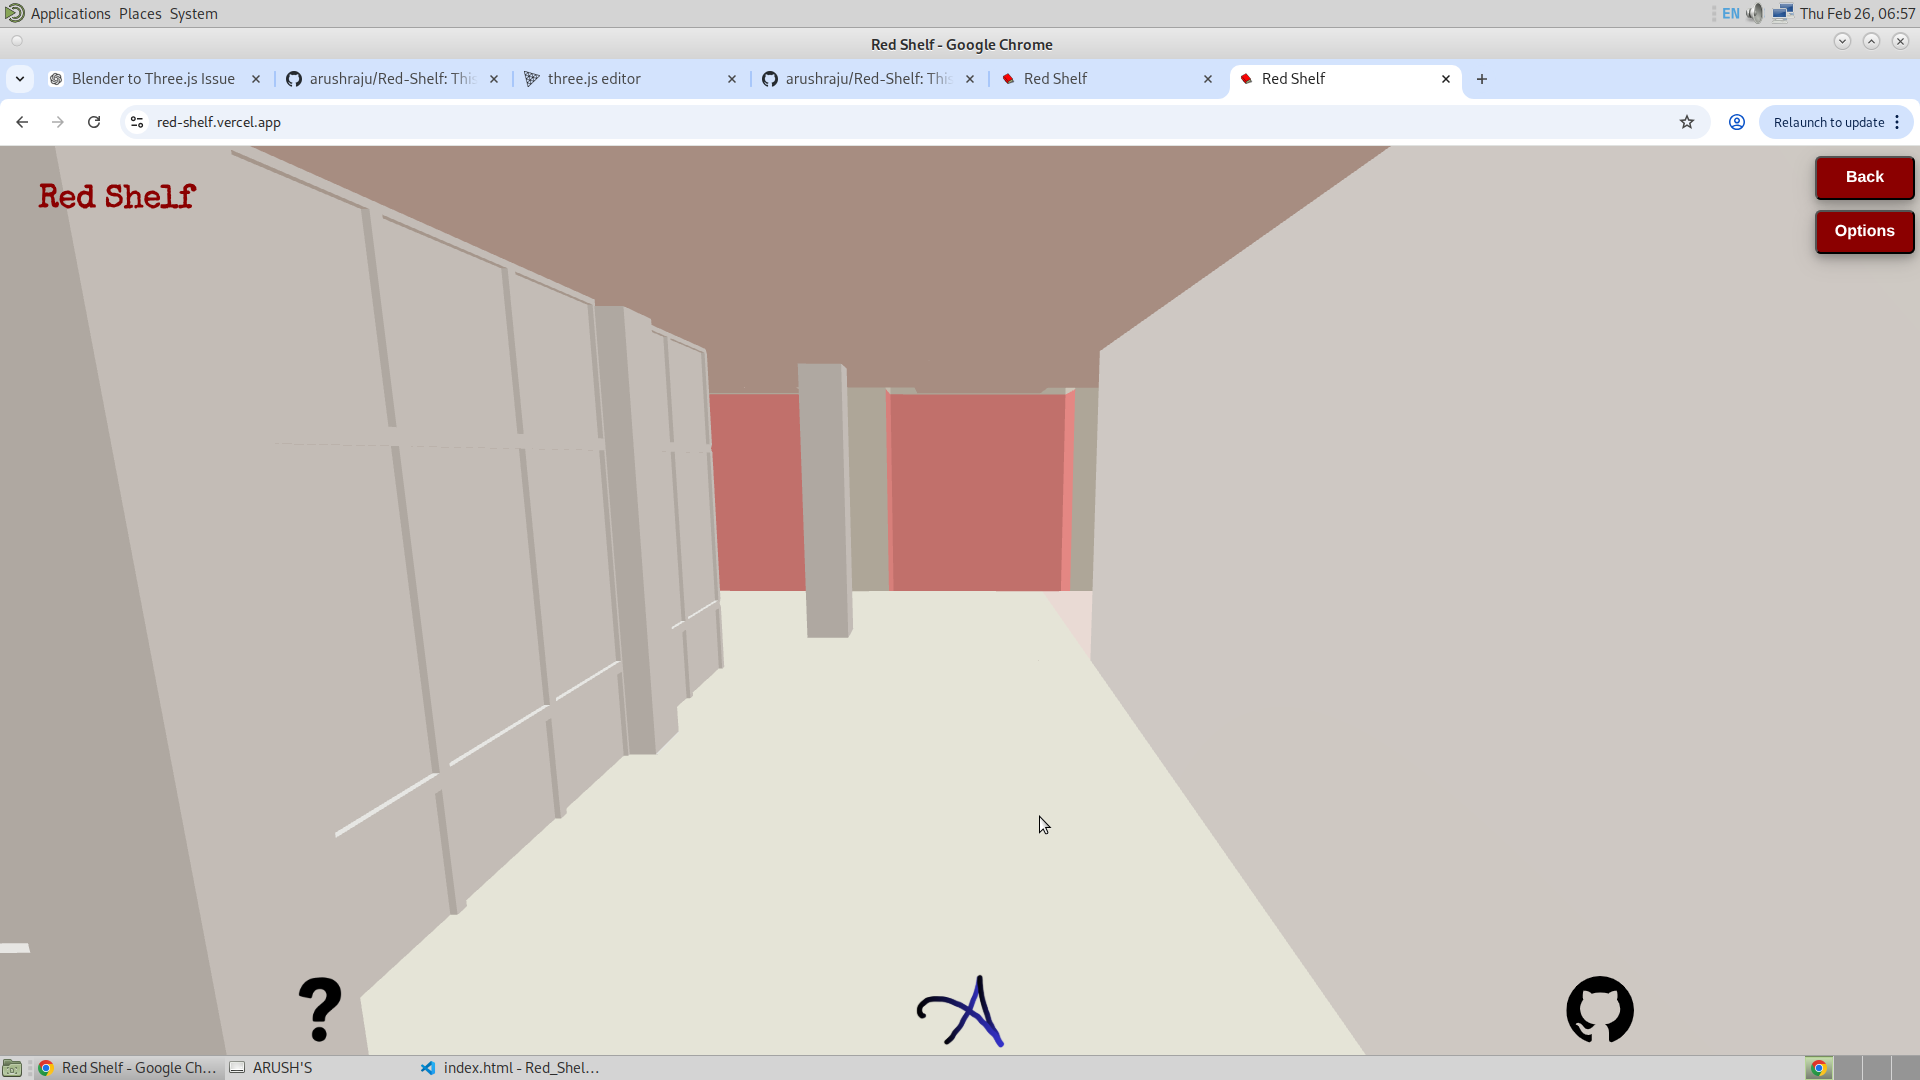
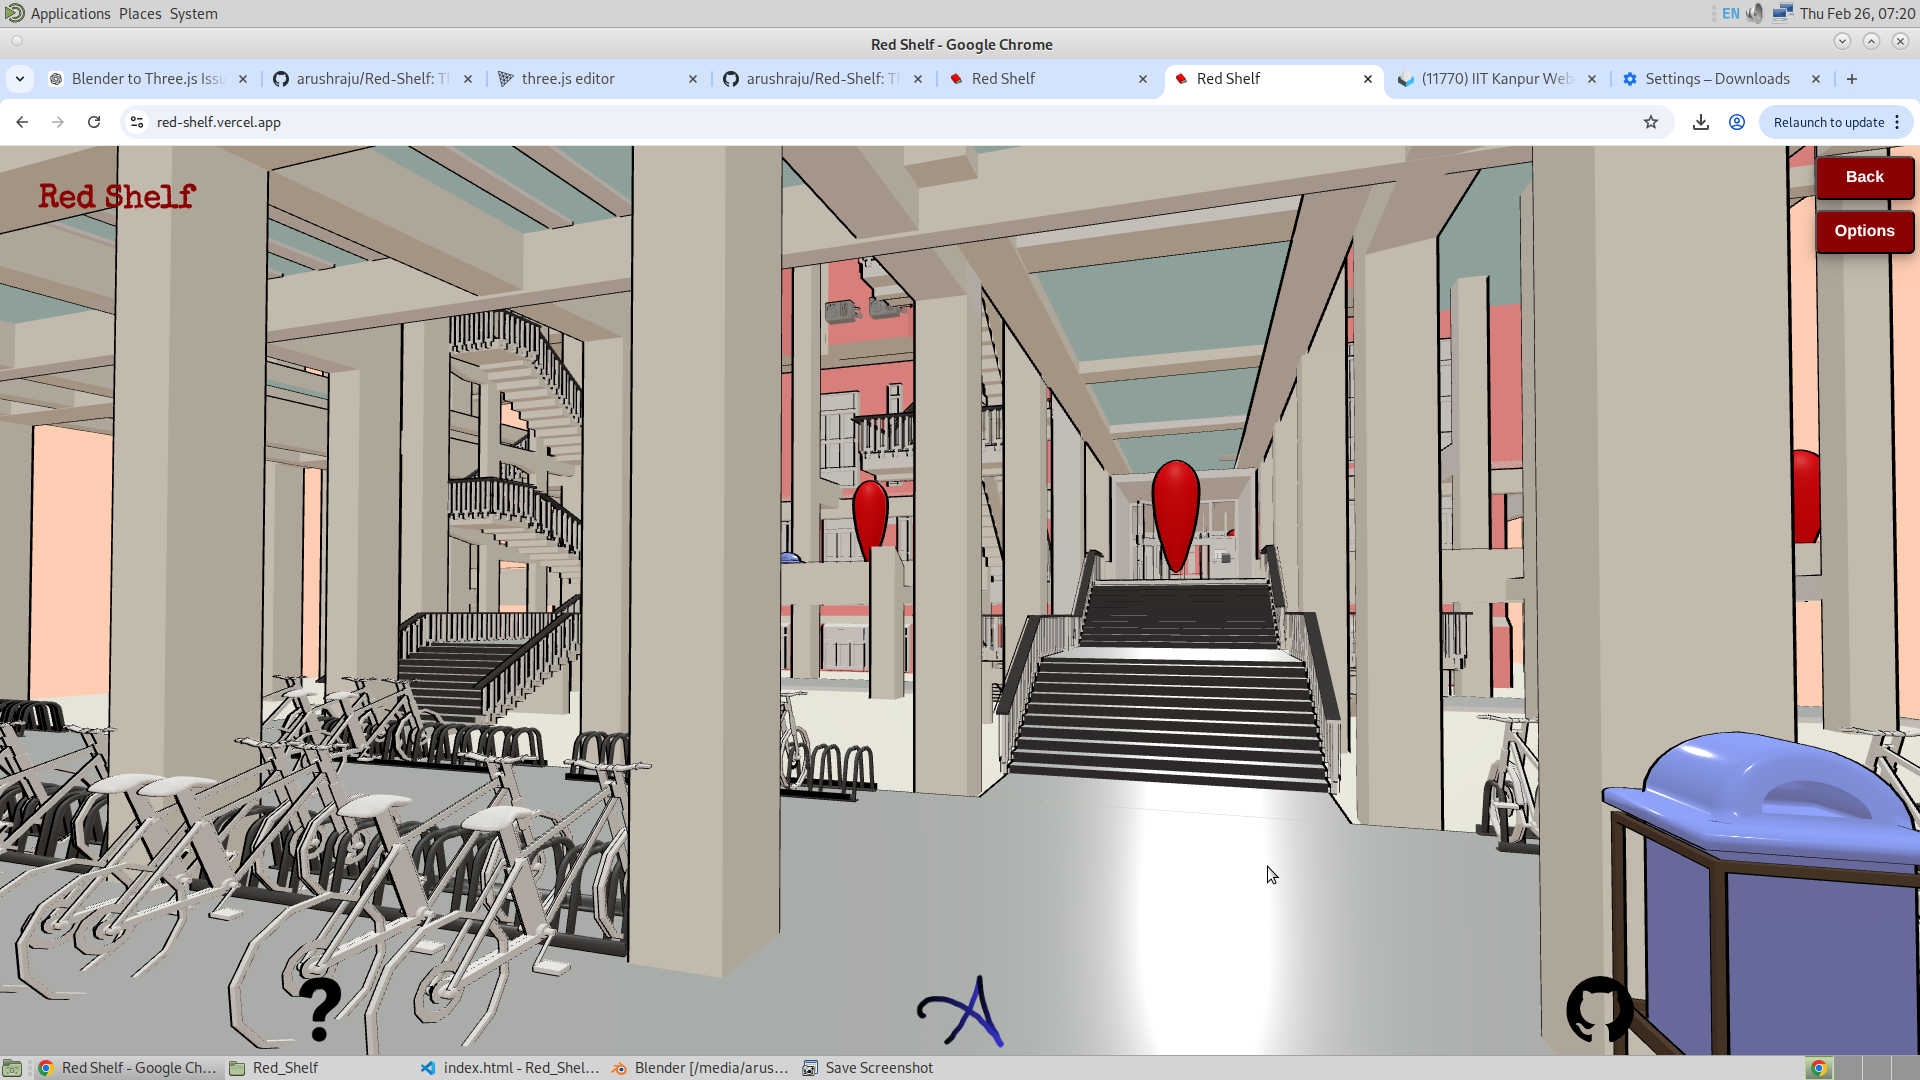
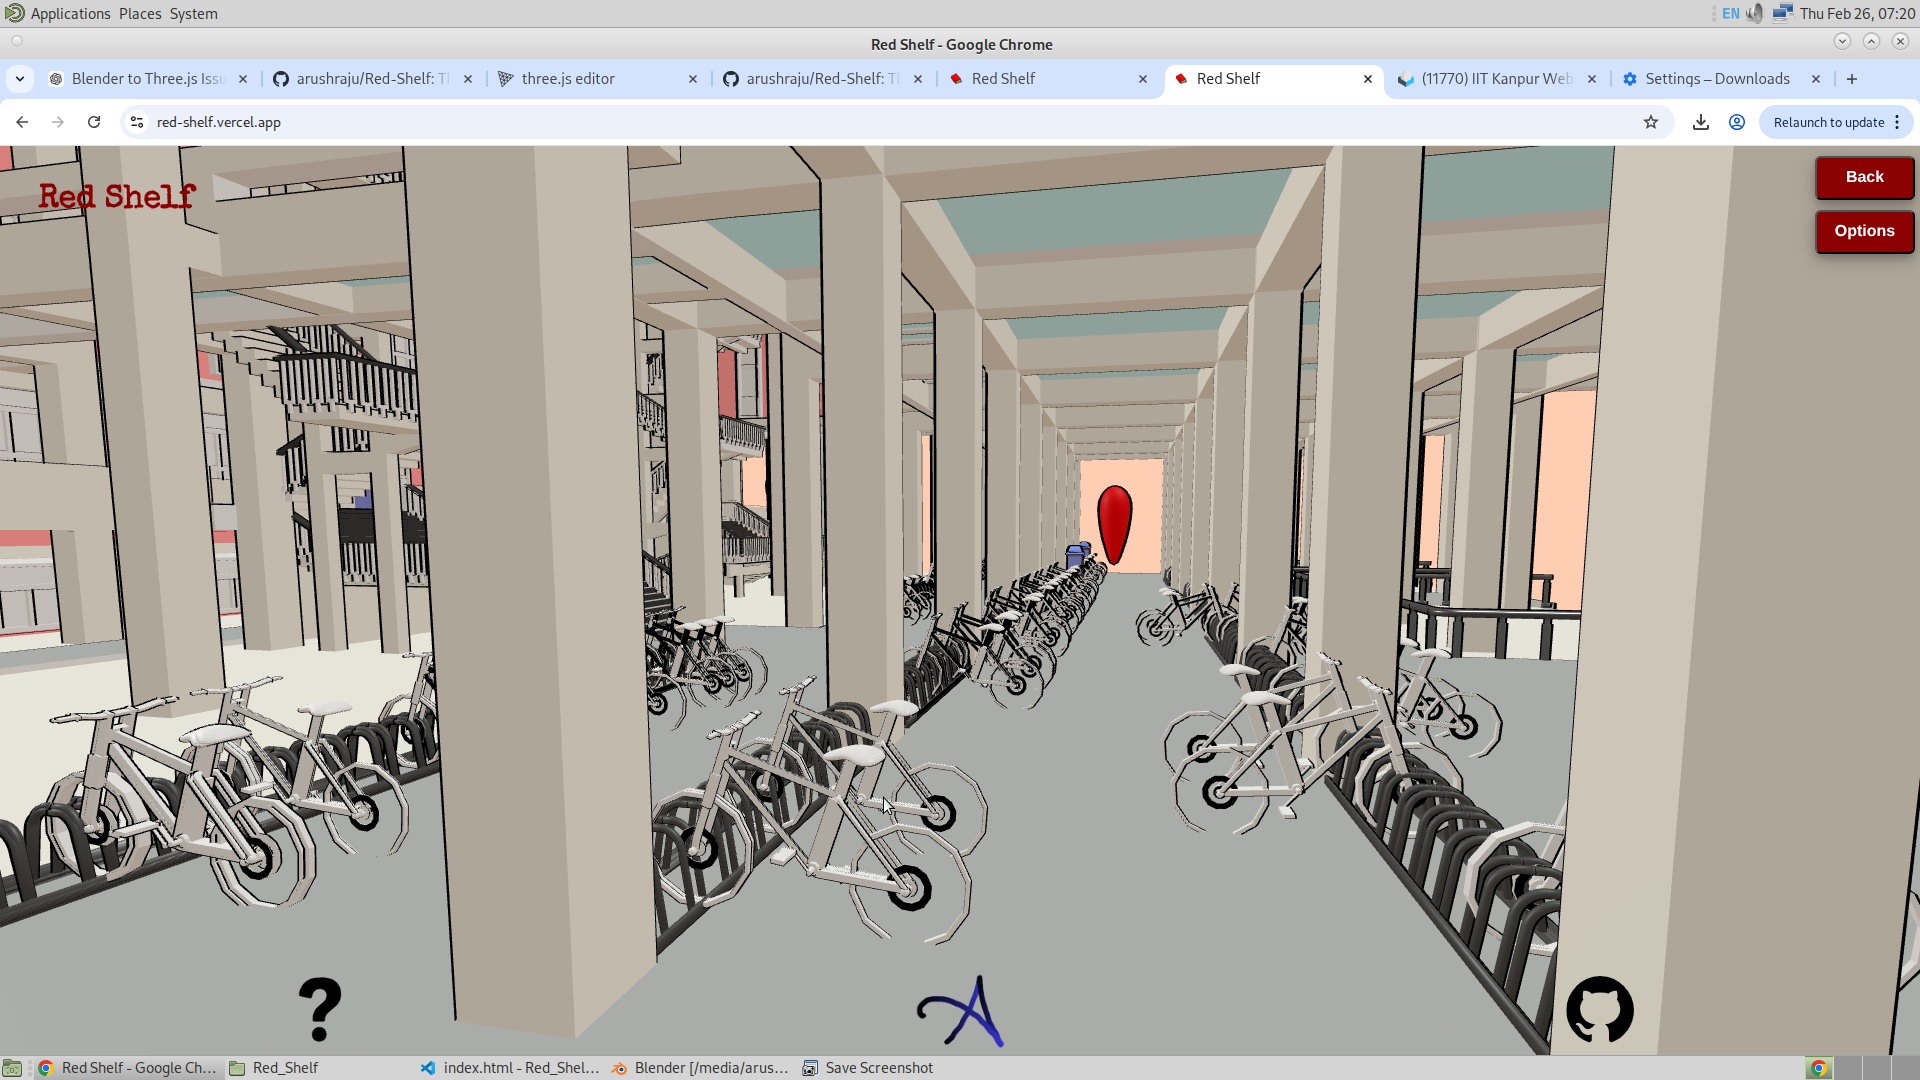
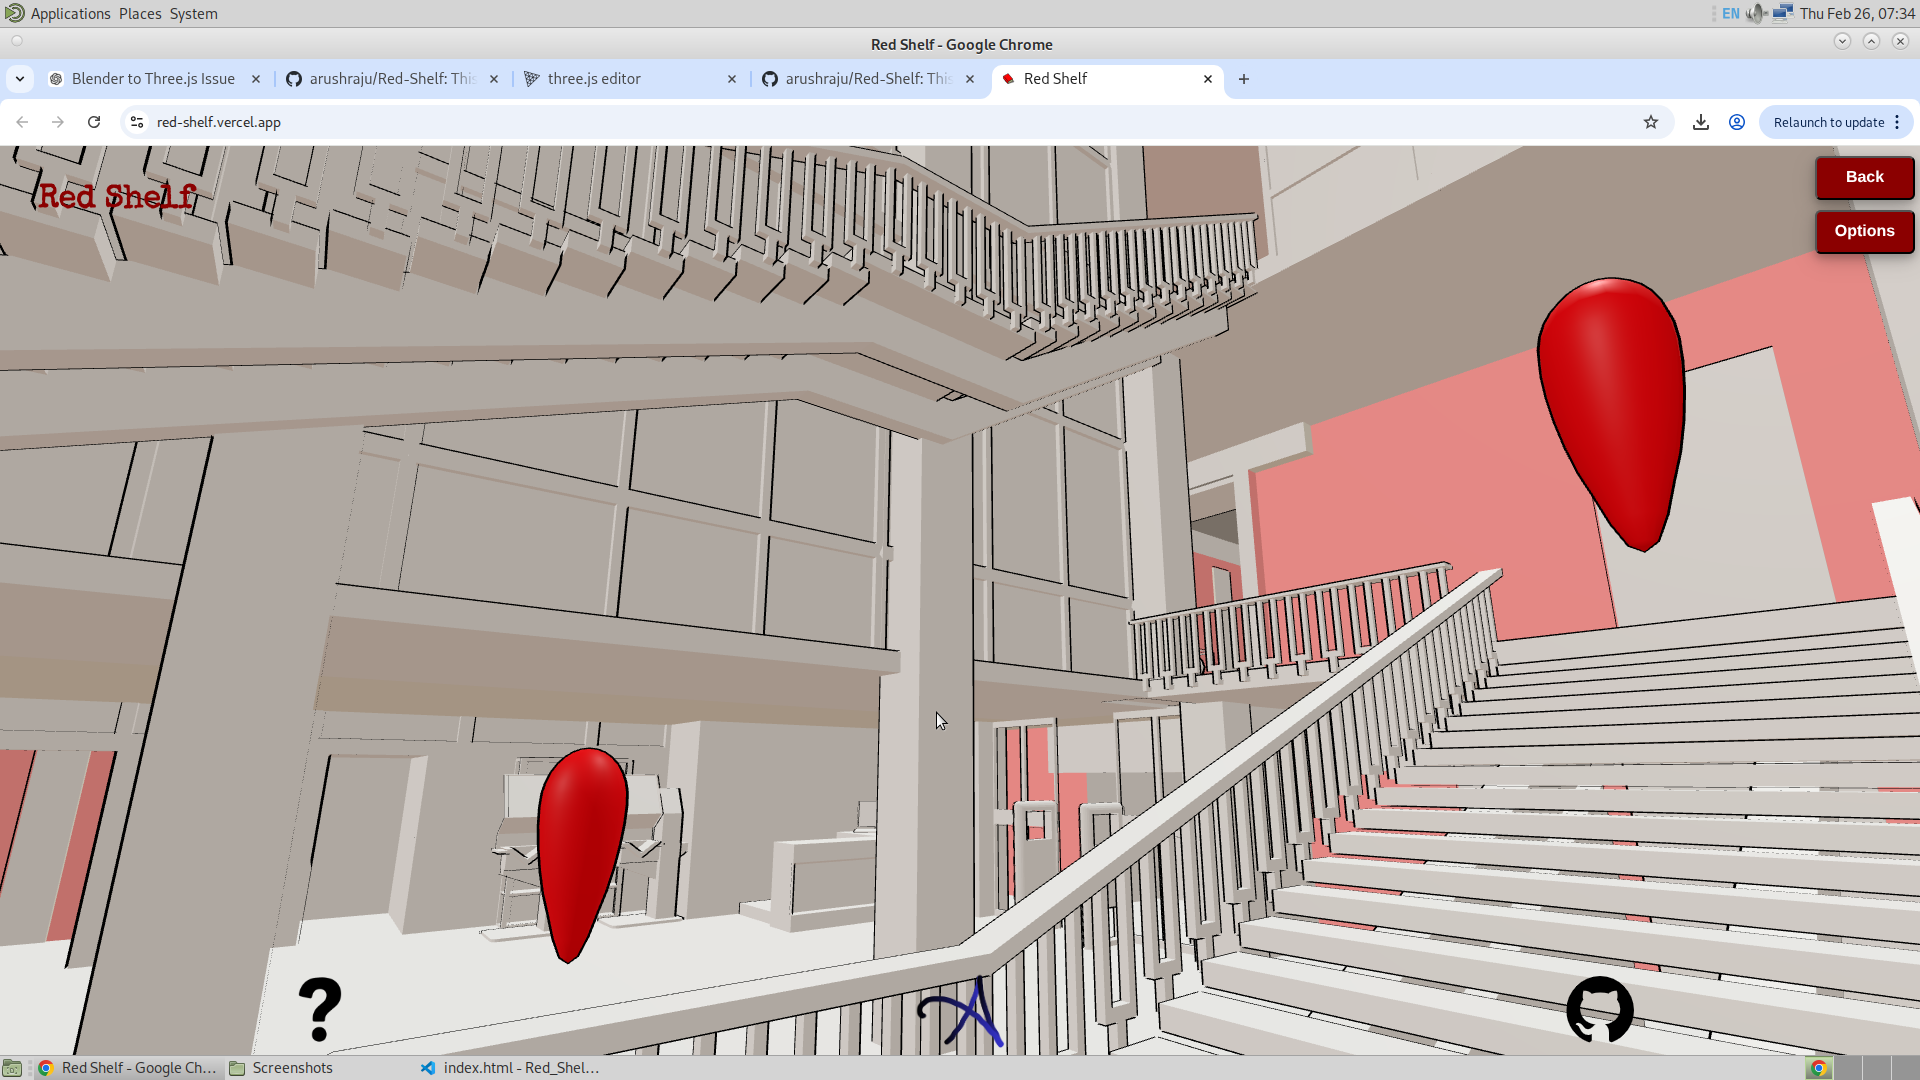
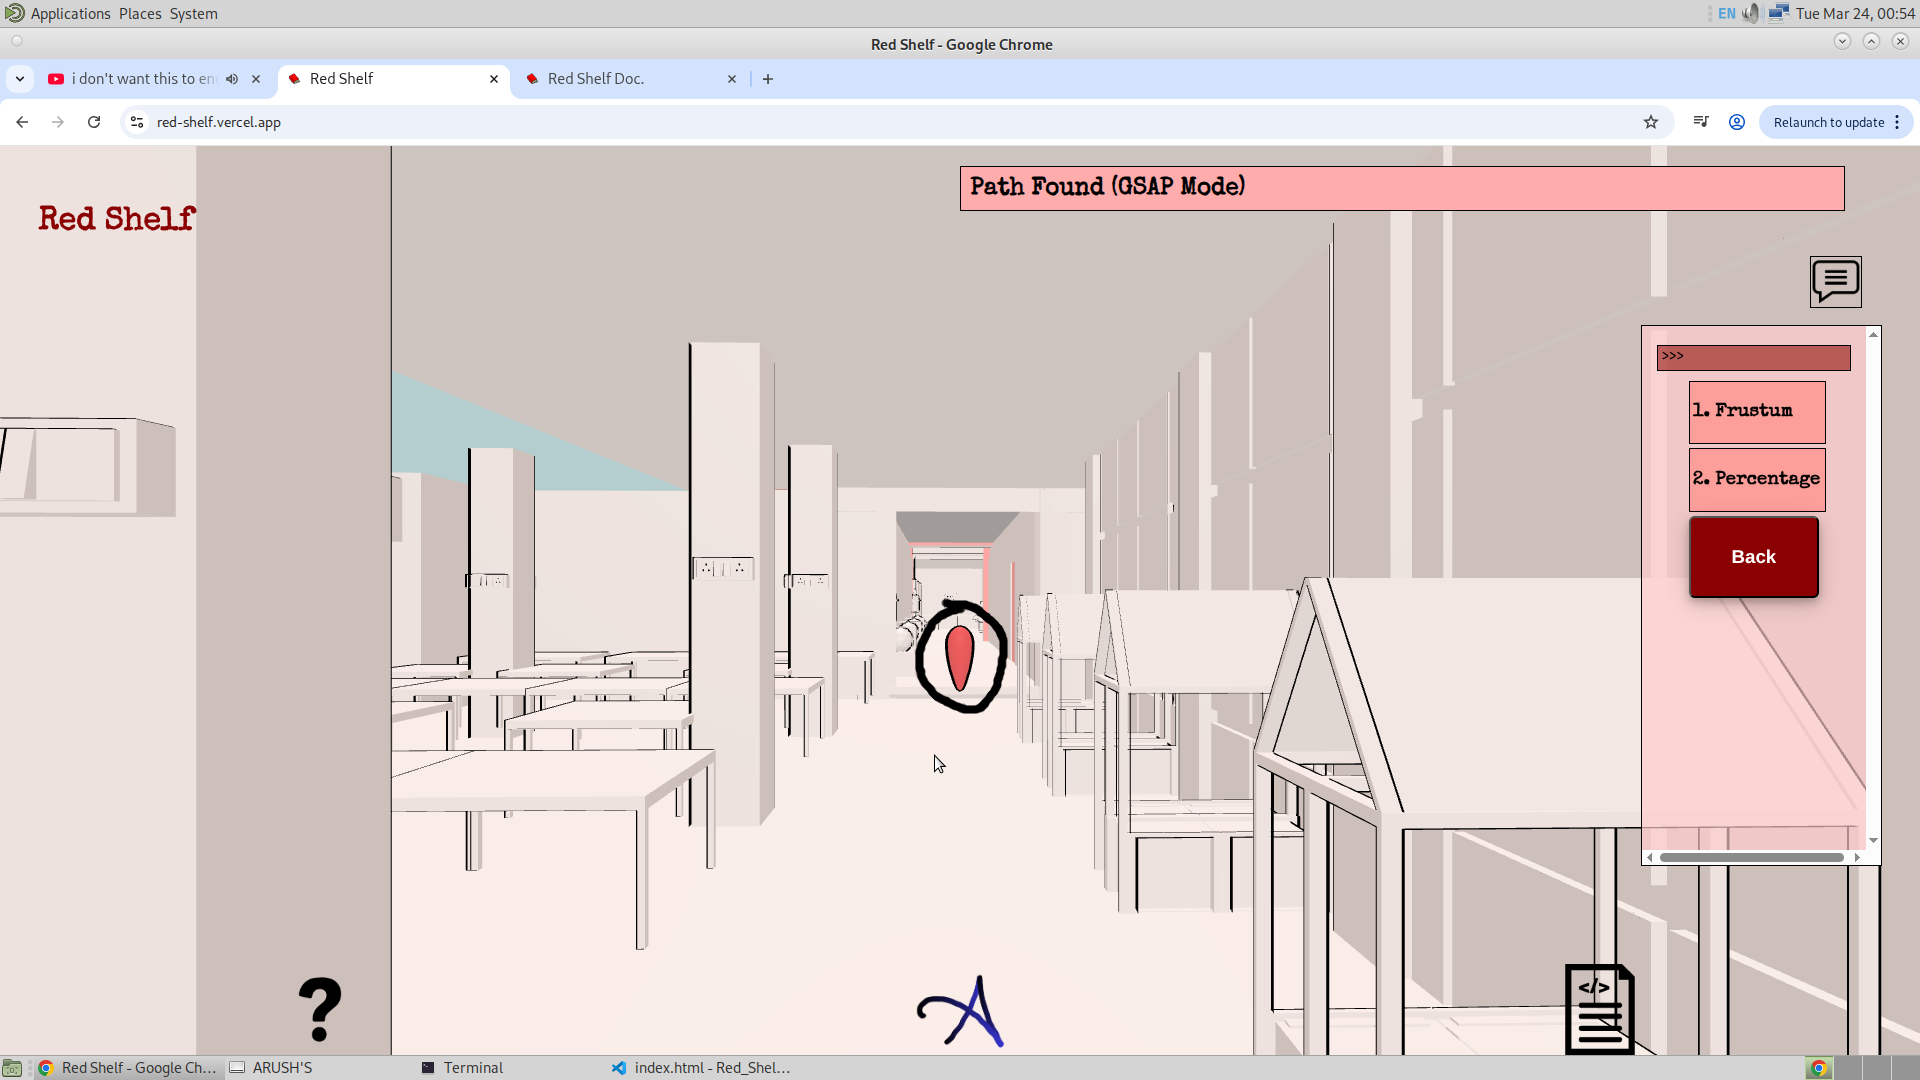
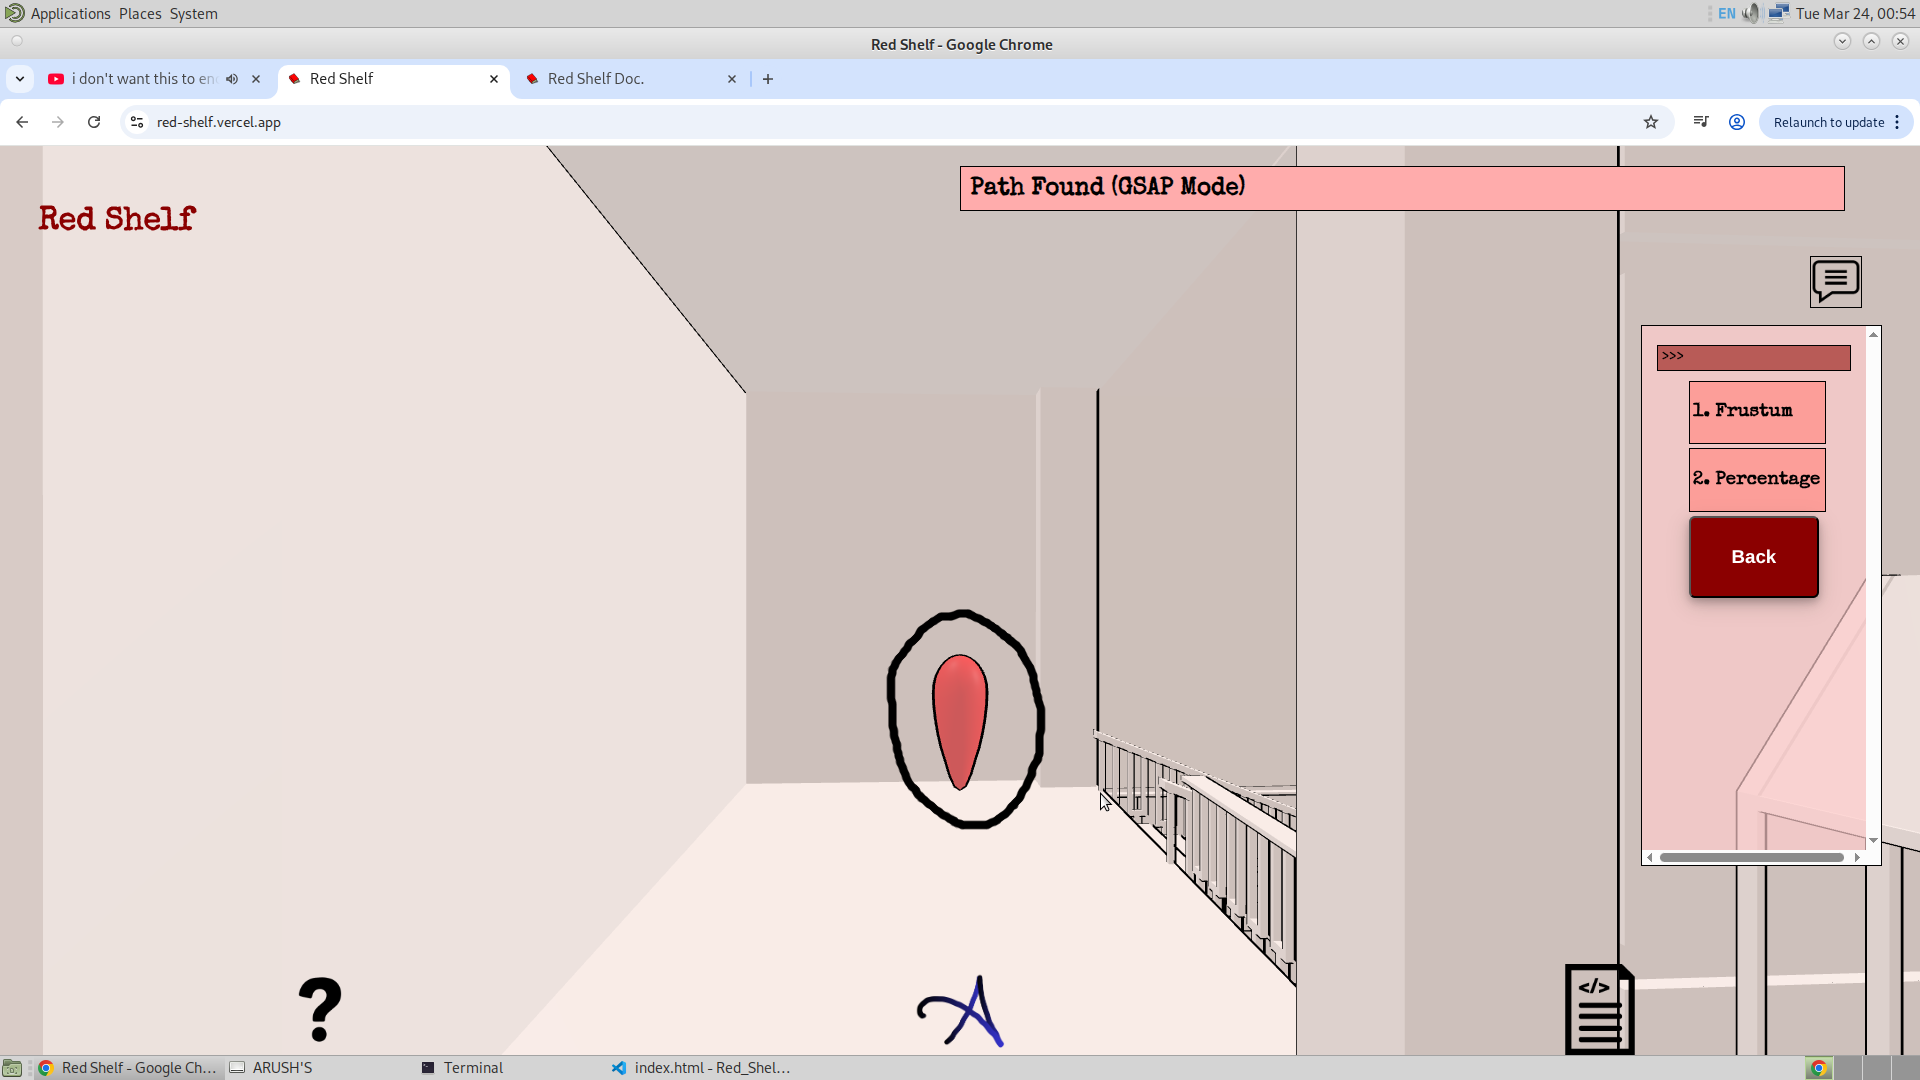
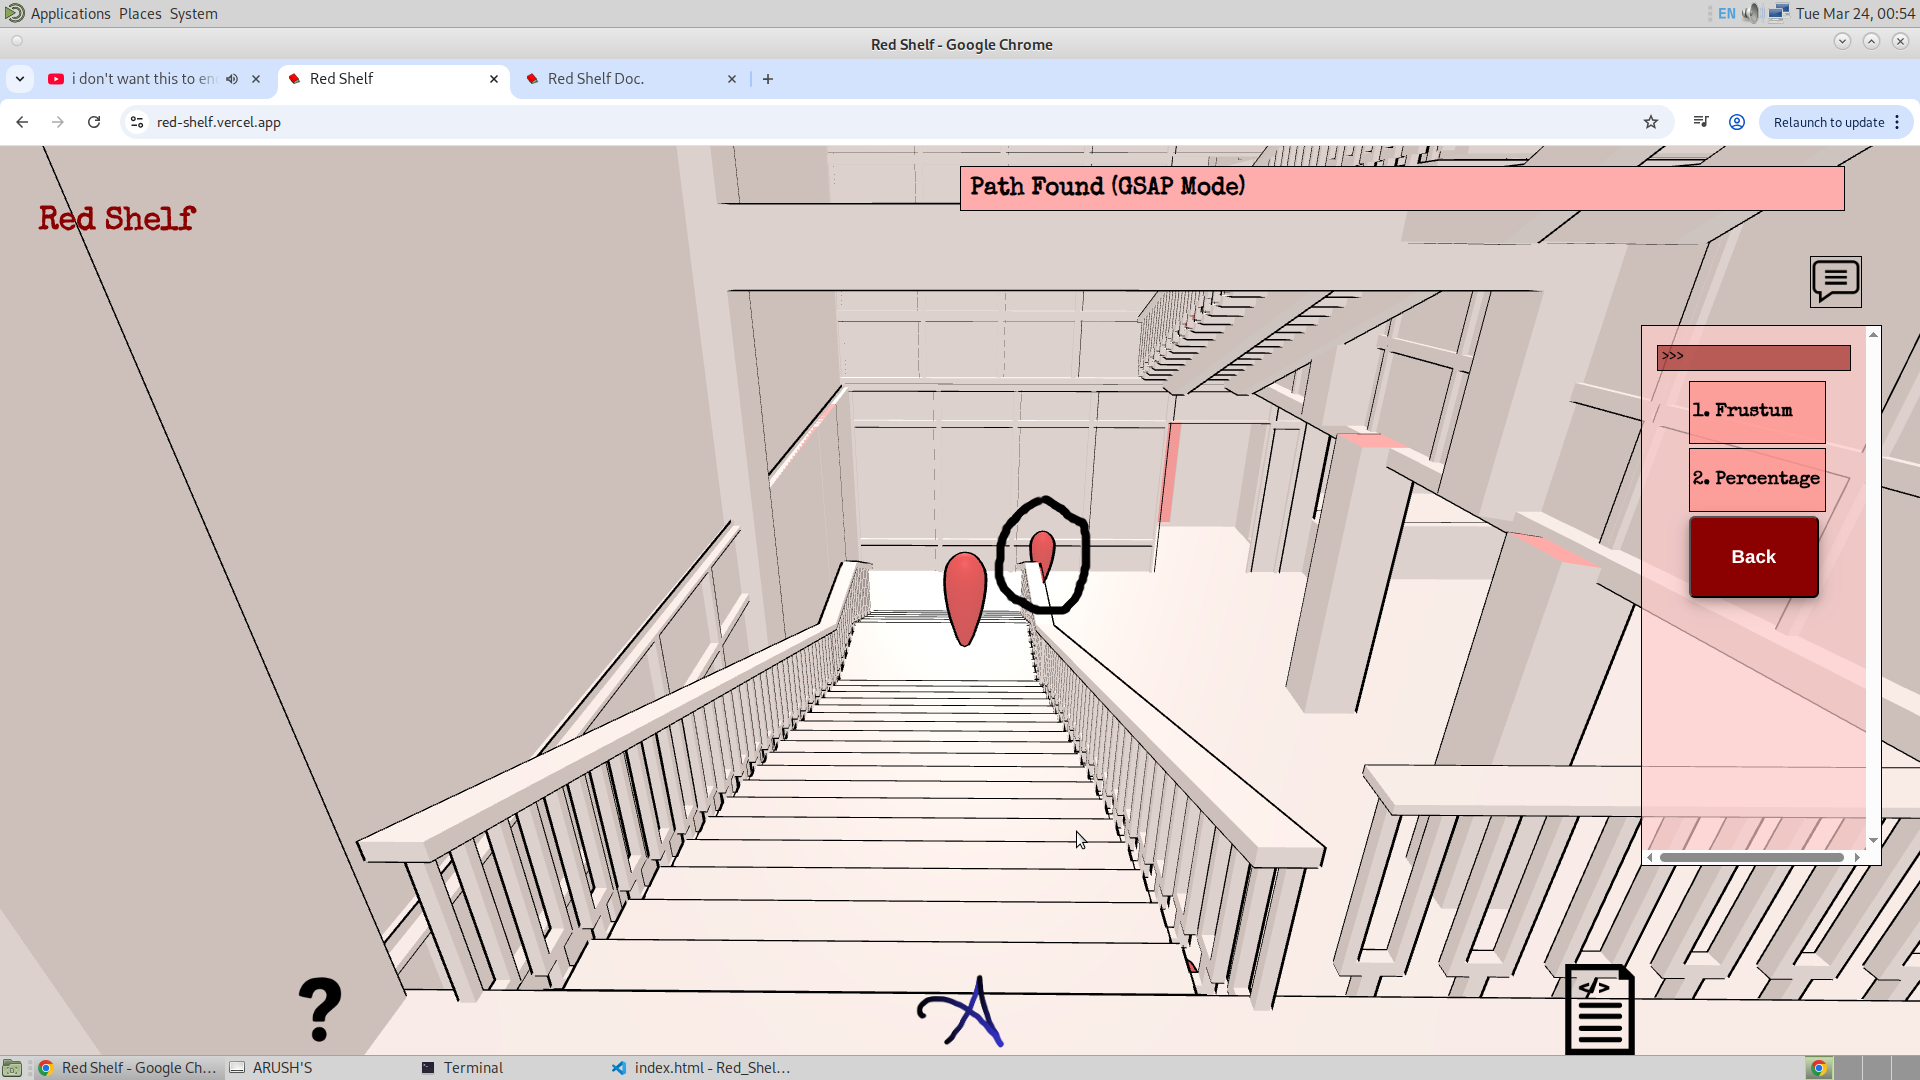
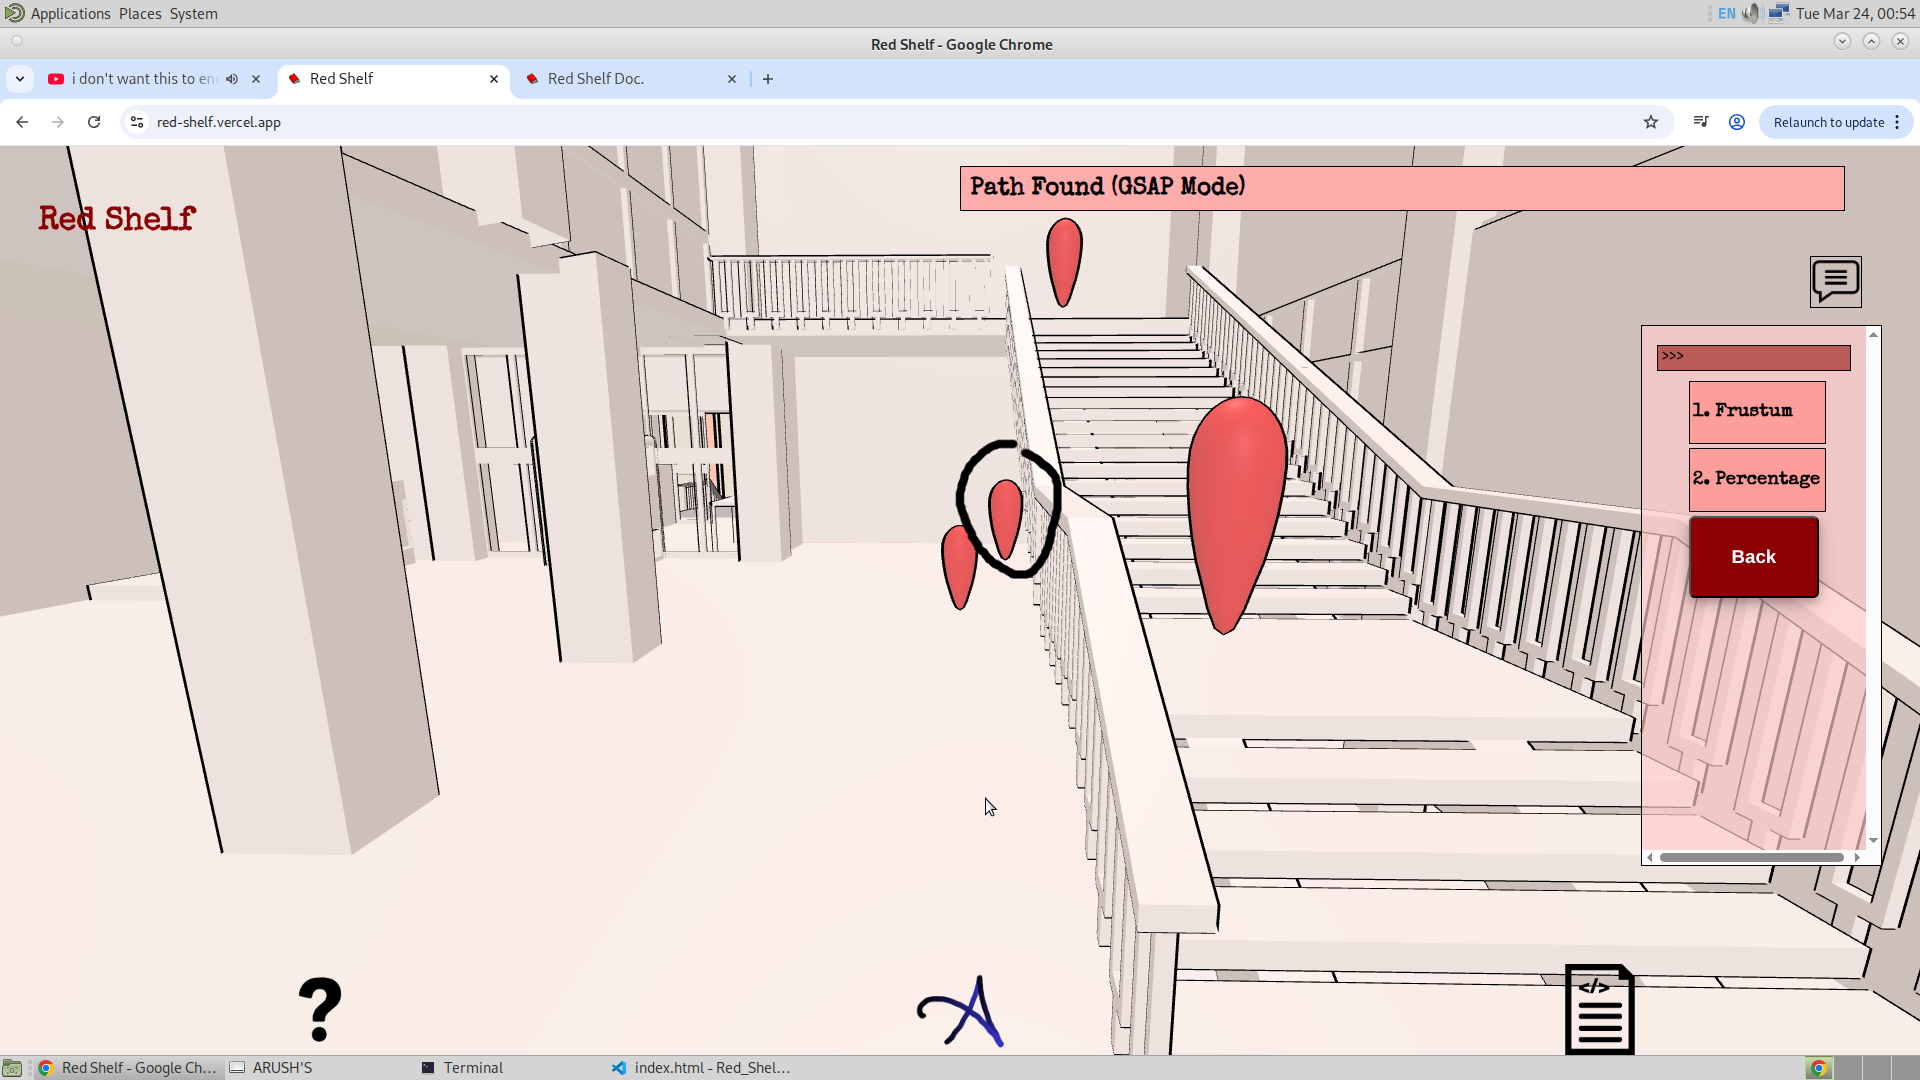
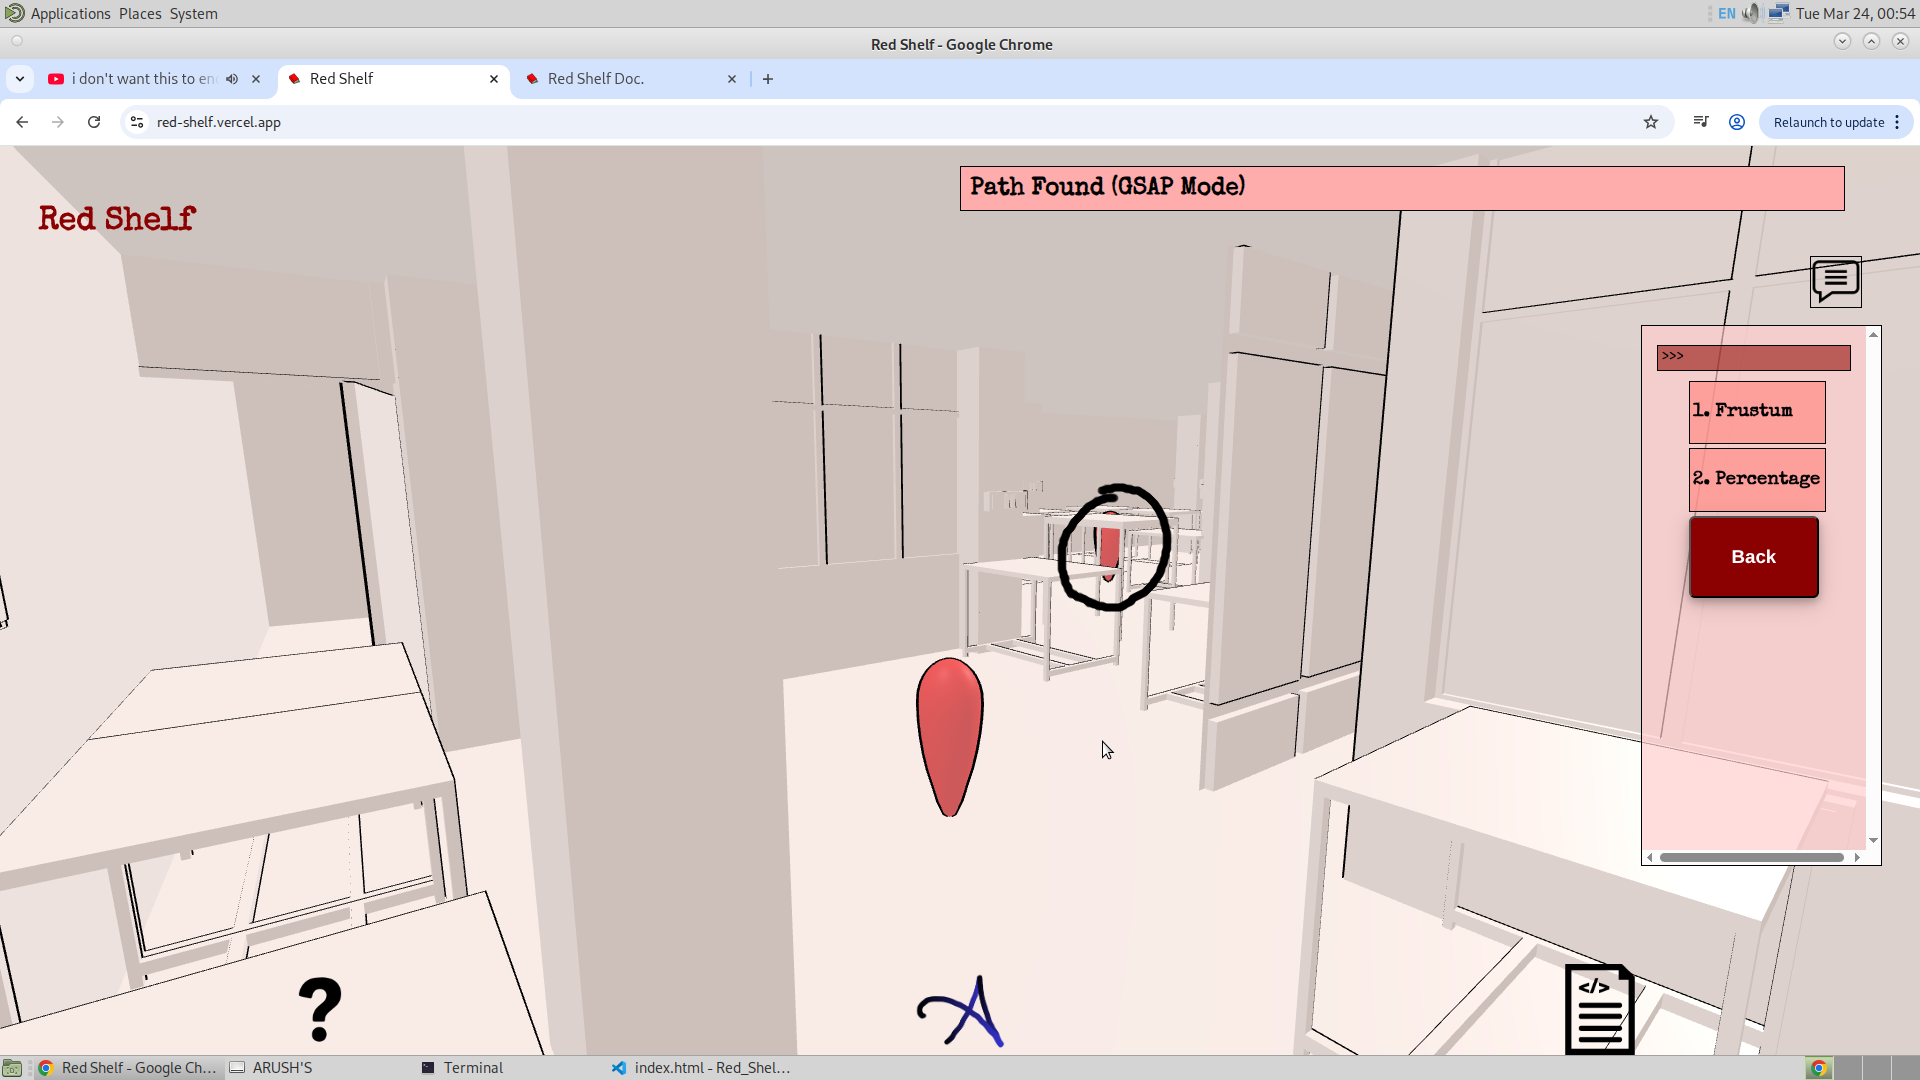
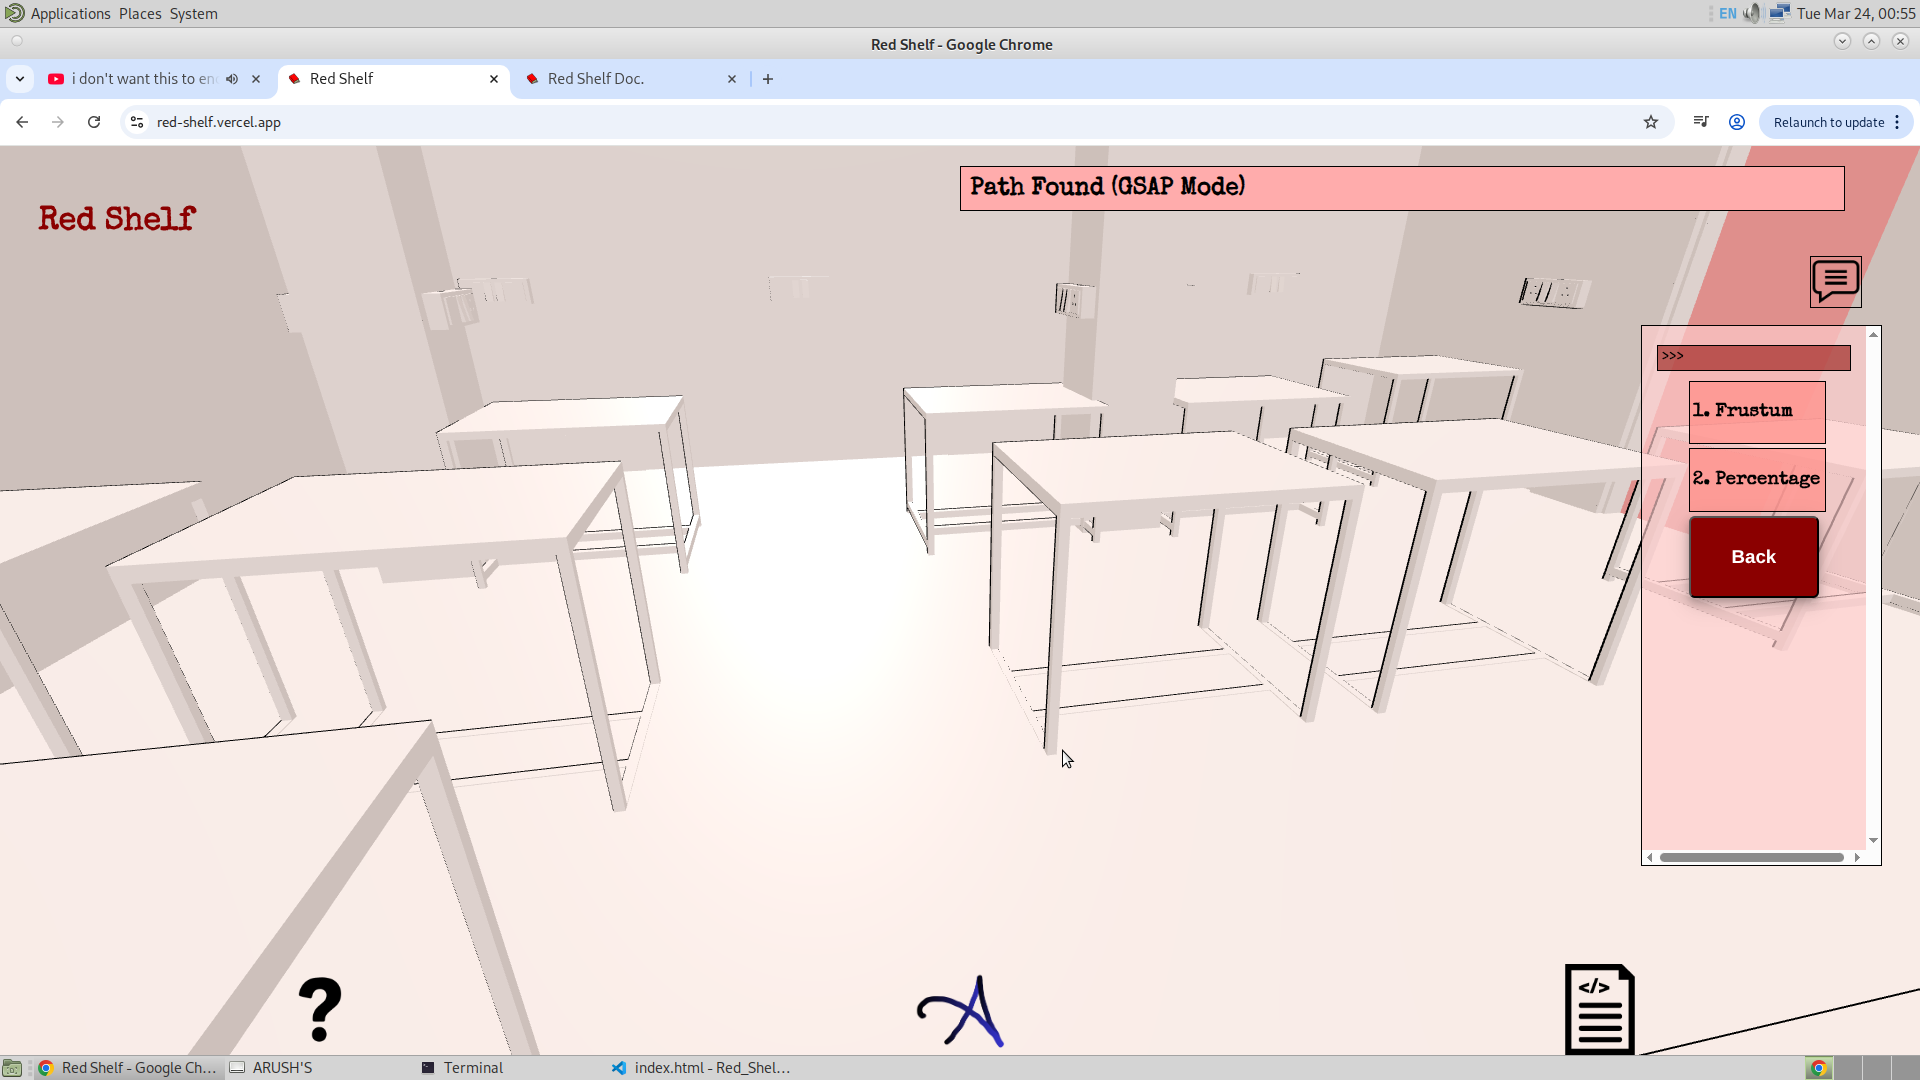
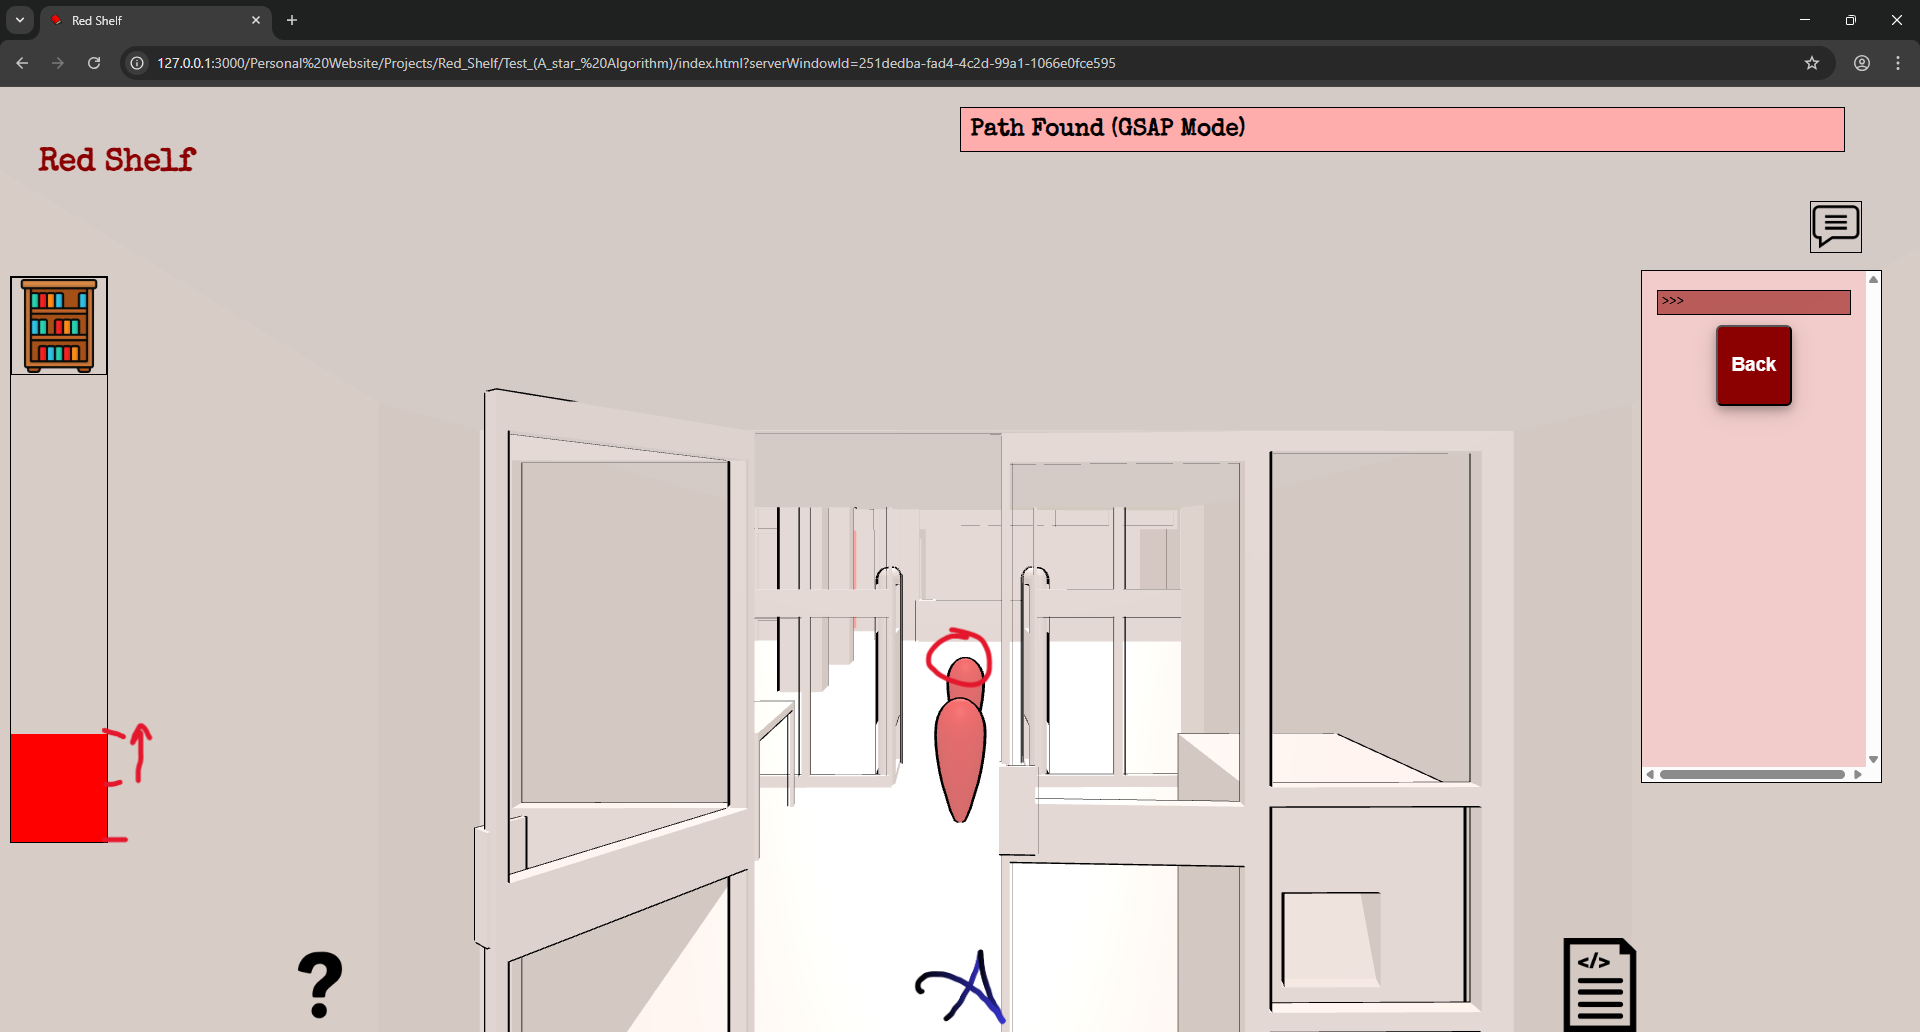
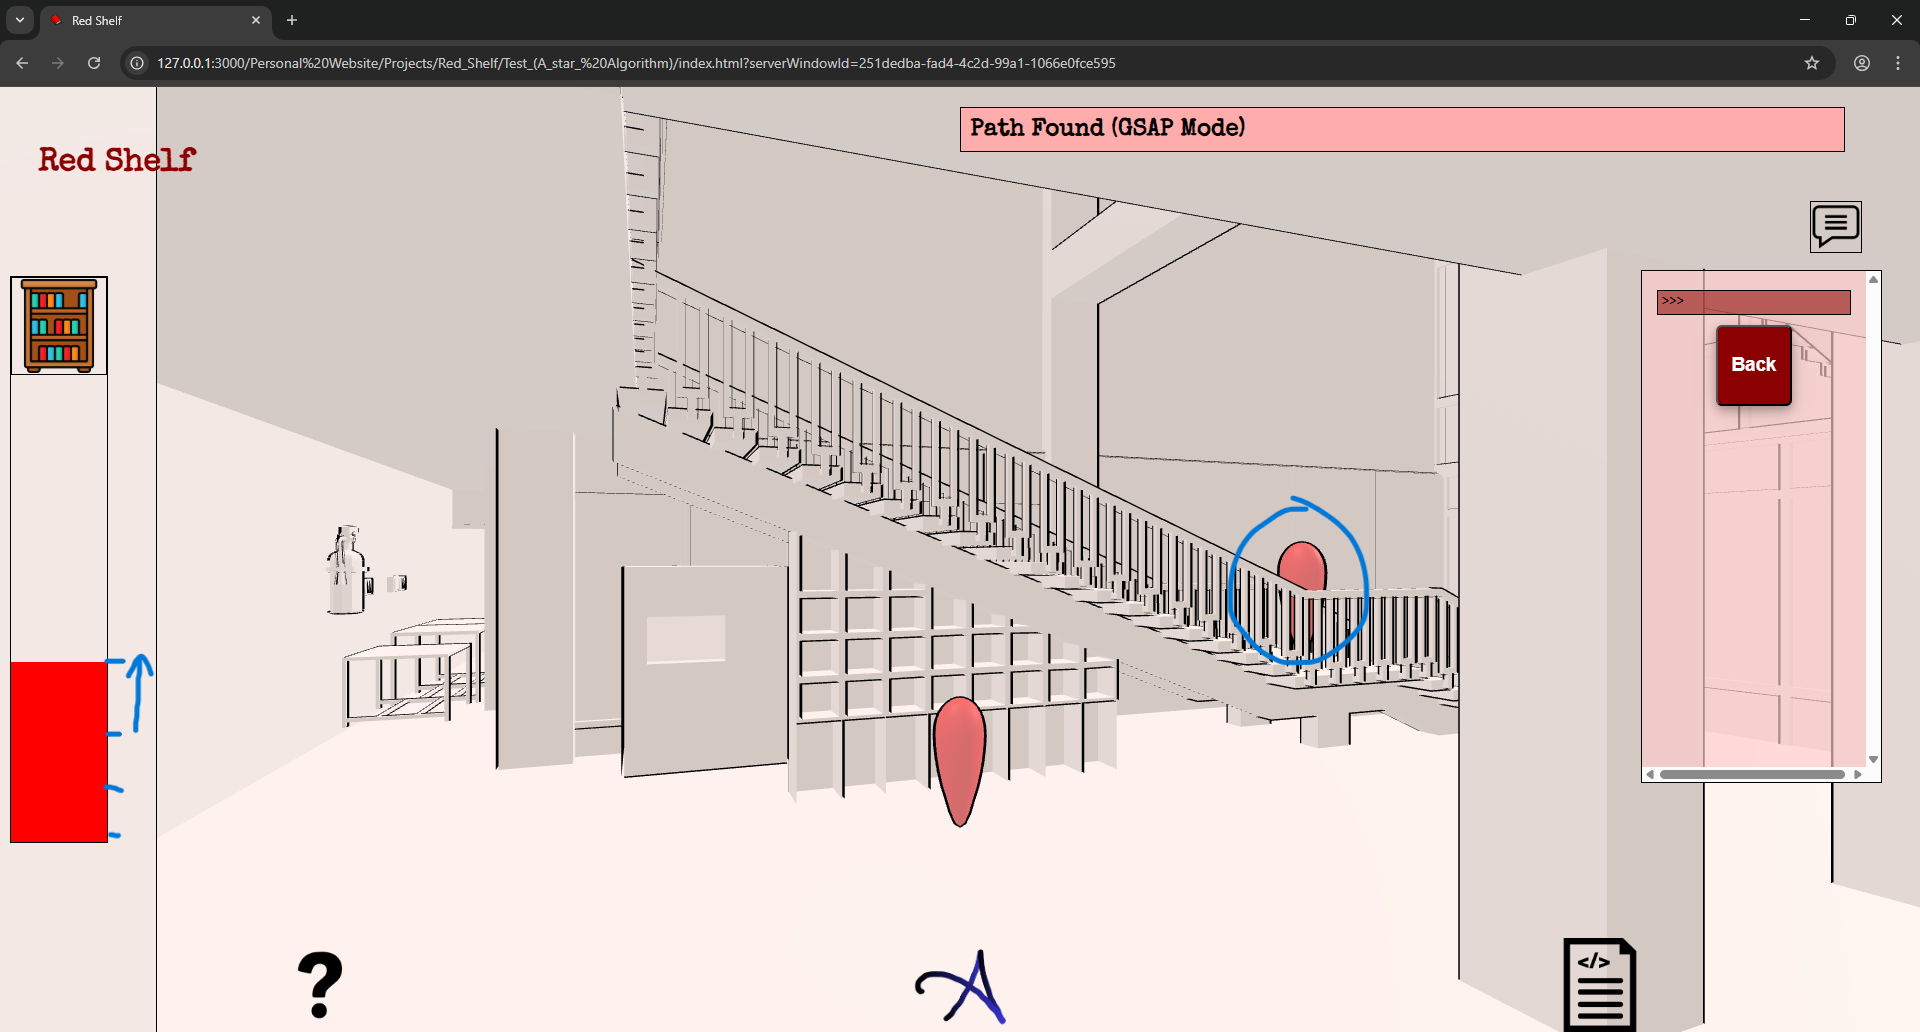
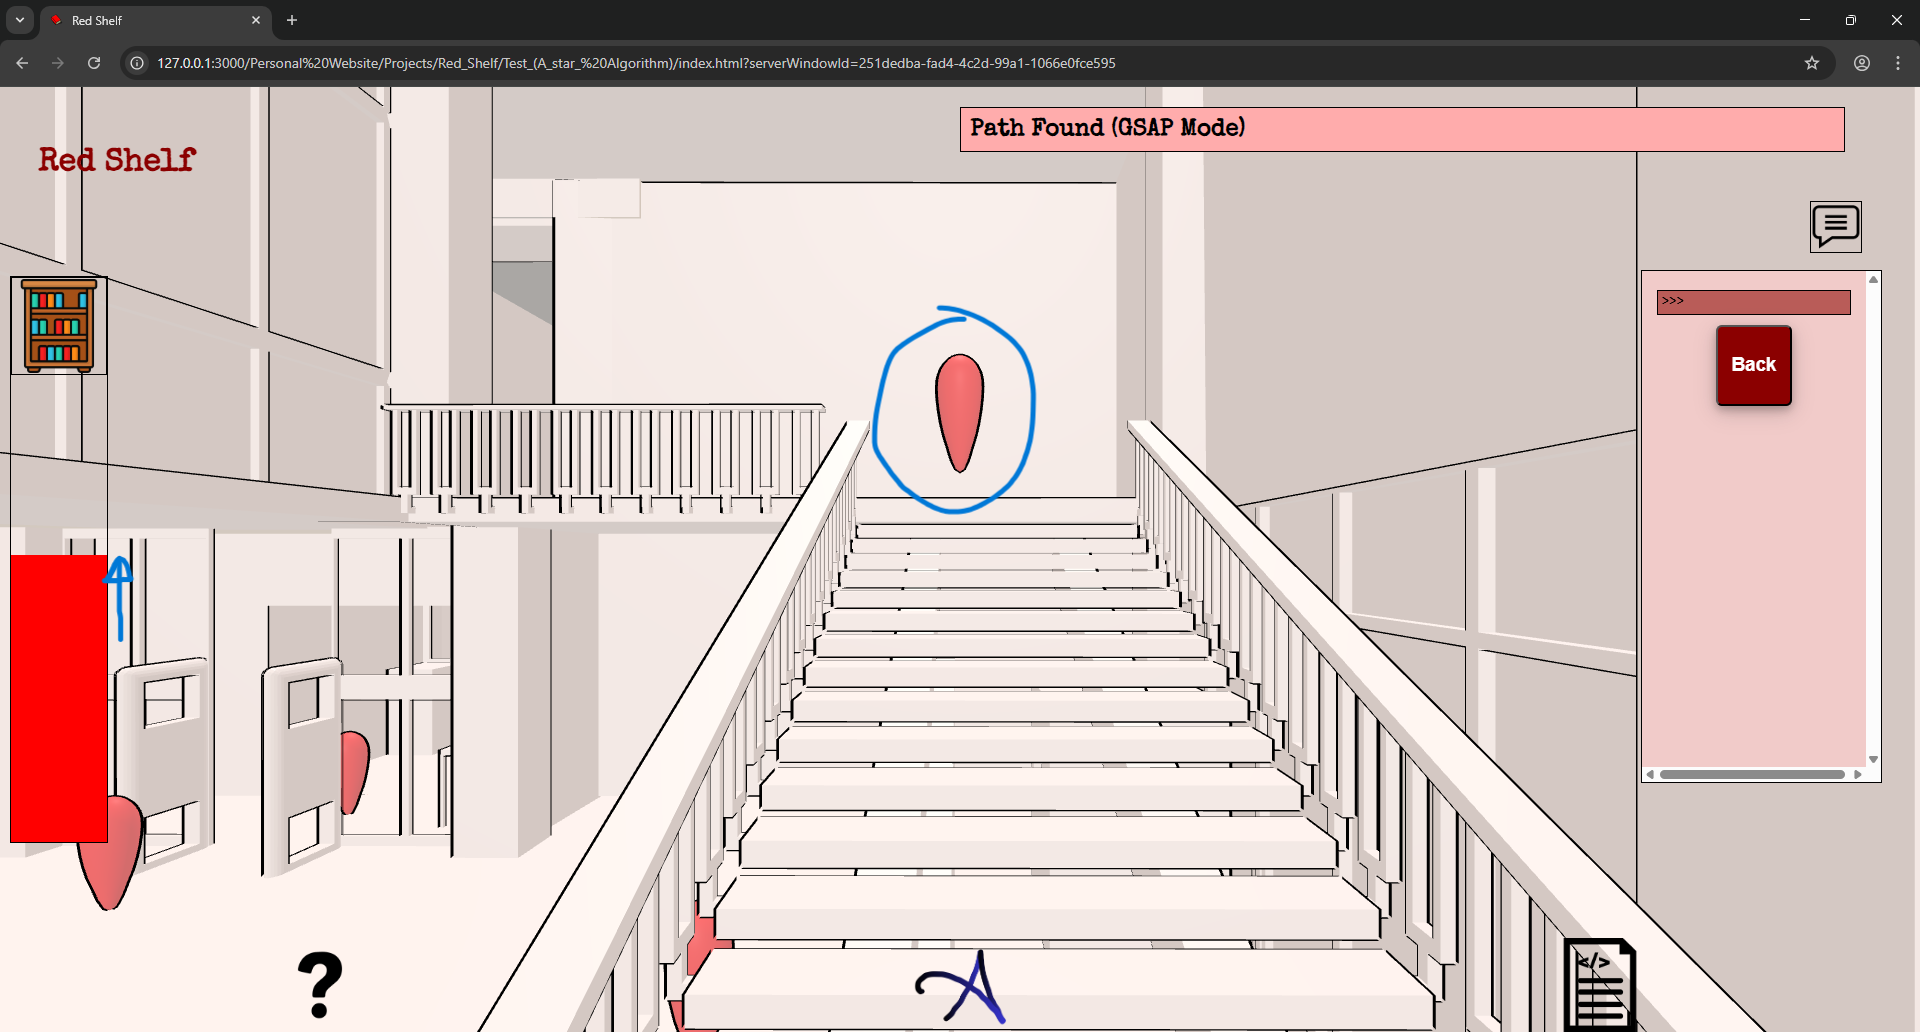
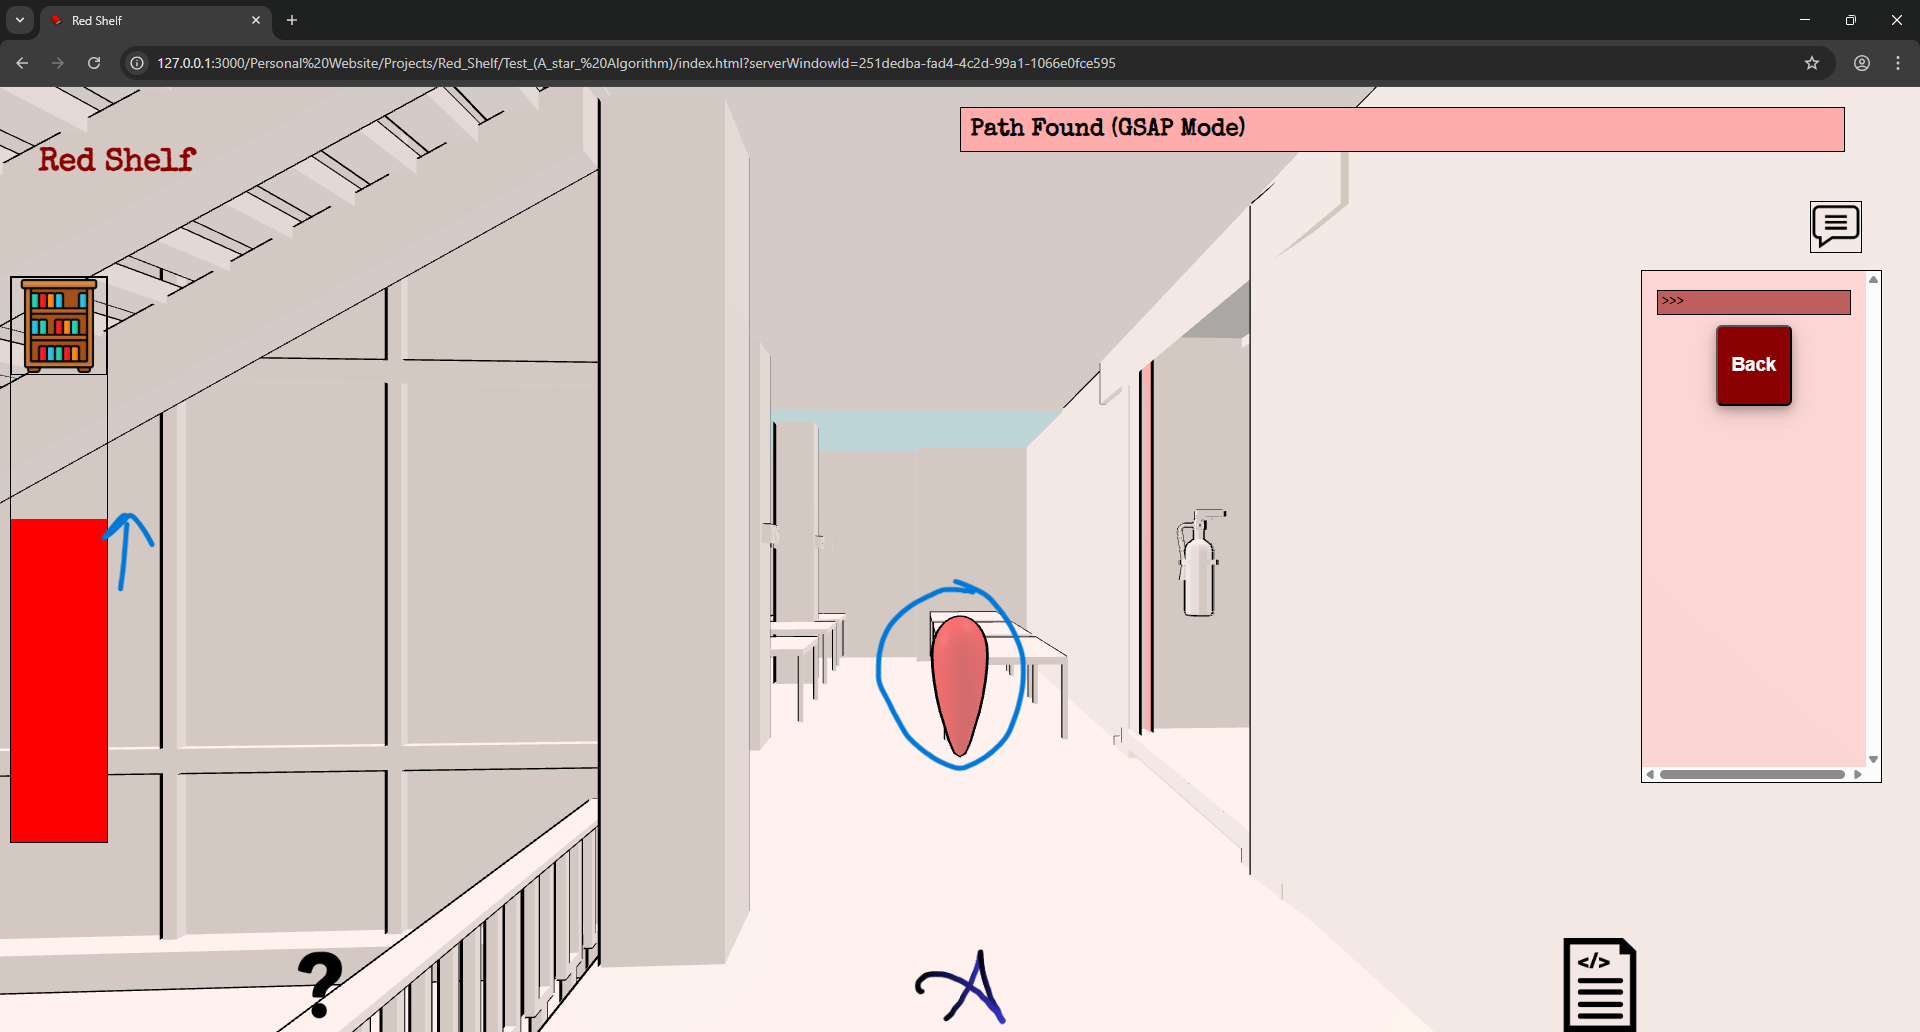
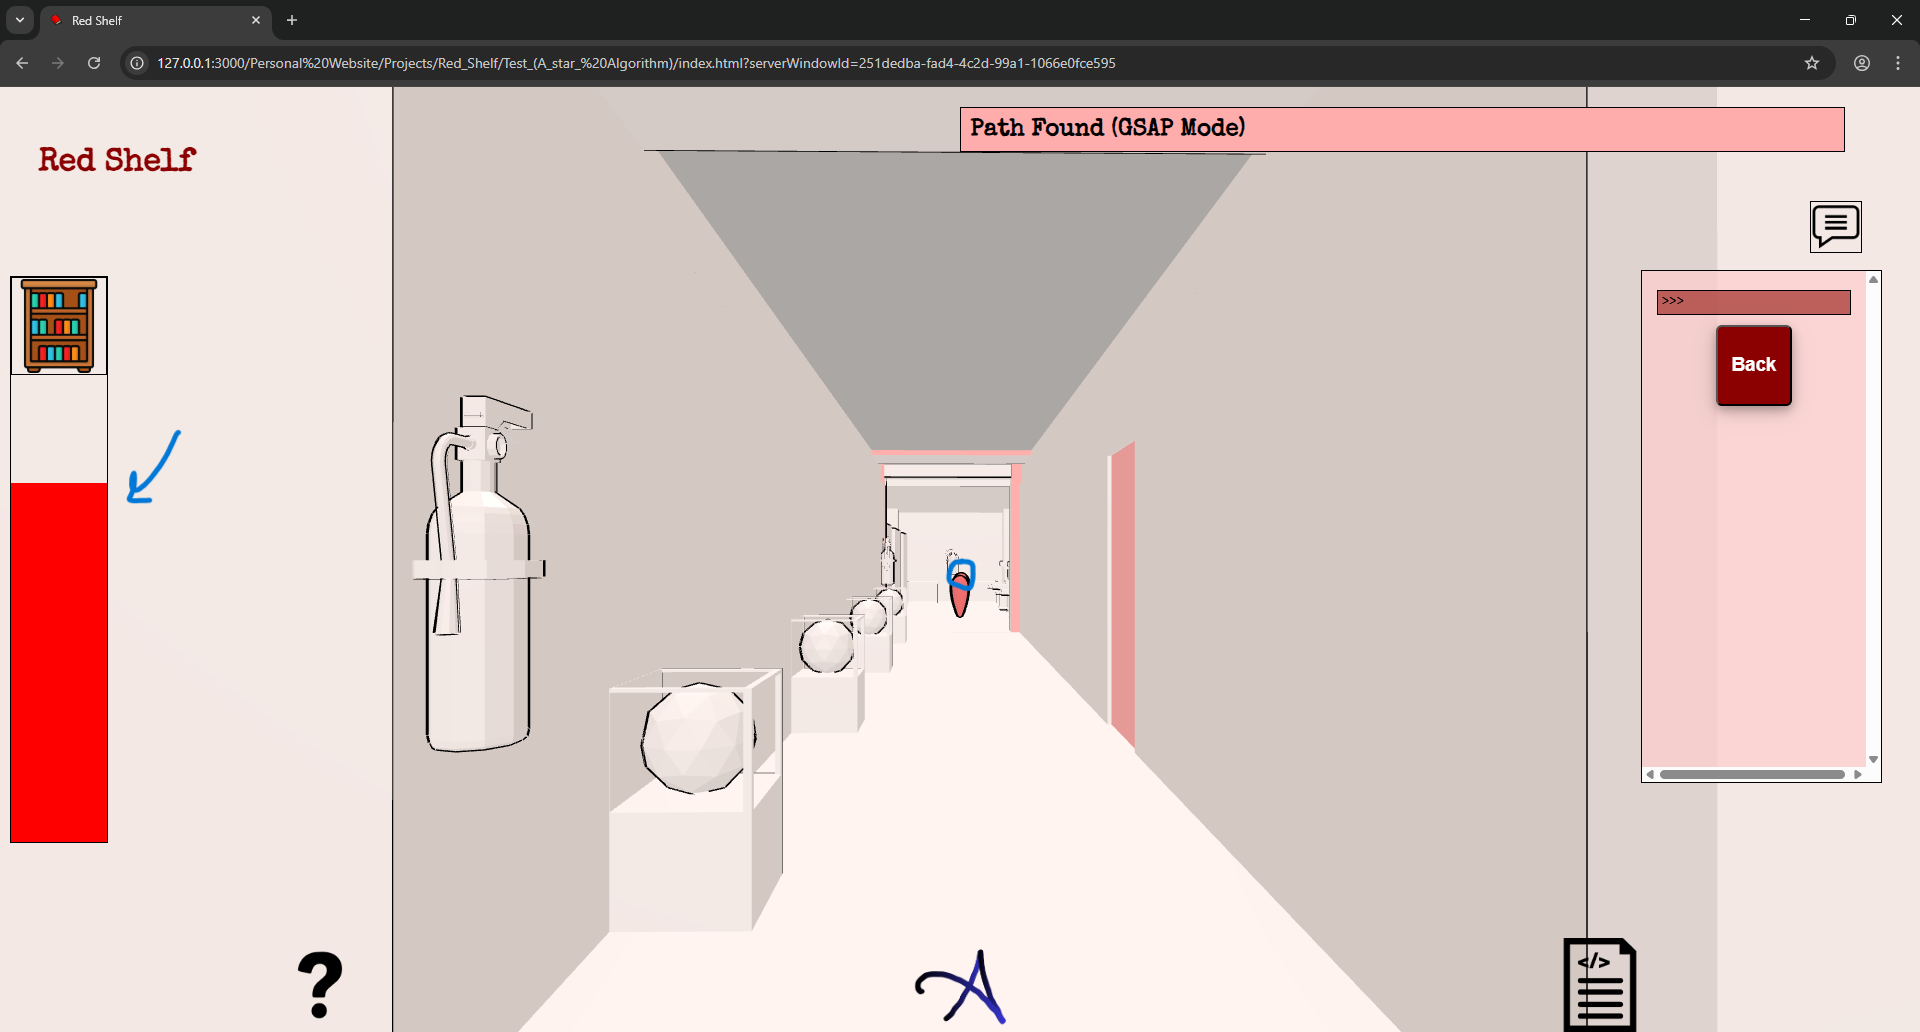
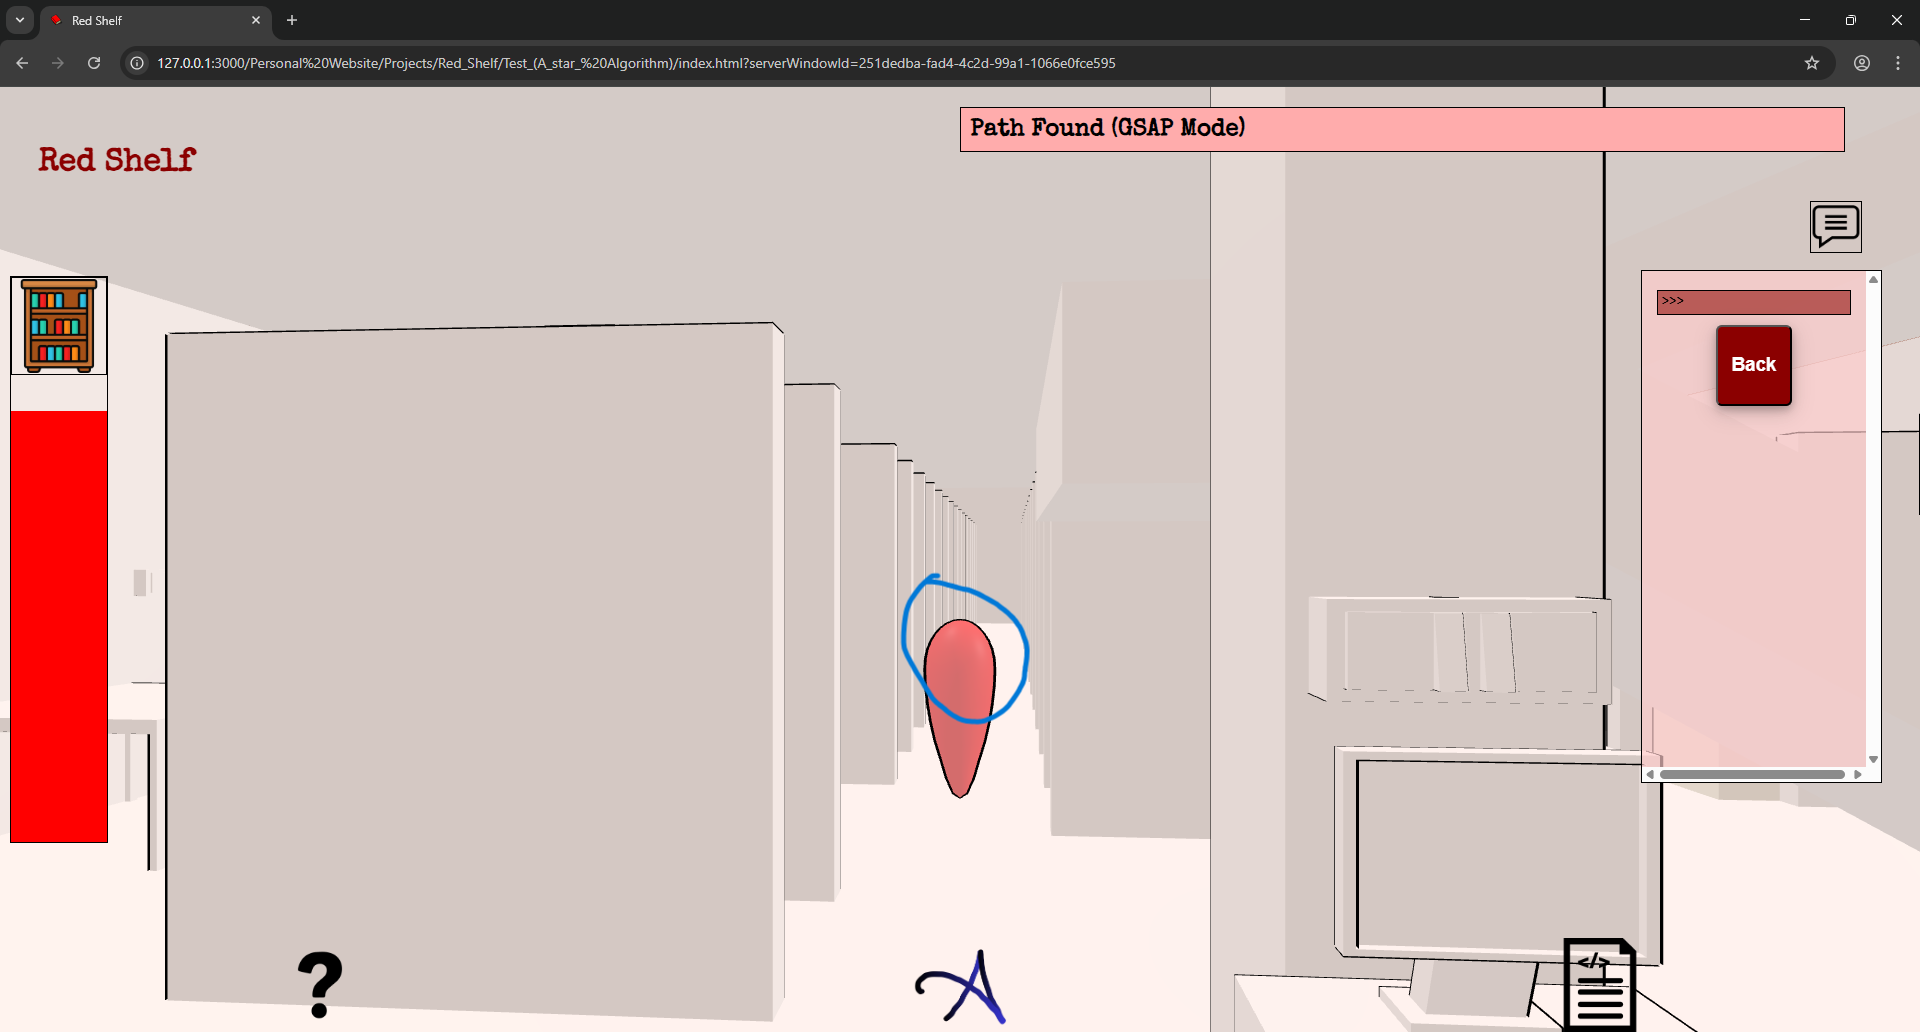
Another feature I have added is that now the user could actually navigate itself to the bookshelf, and for that I used the GSAP locations placed inside the library to guide the user. I still had the feeling that this might be too complicated, since the user might not have much patience to tap onto each of the points and so on. But I will take a look at it some other time. Here are the pictures of me navigating myself to some bookshelf.

Another feature that is added is the refresh button. So now that I have added the search, going into the GSAP mode and coming back, I don’t want there to be the search button, since there is already a book to be found. And also I don’t want the user to not have the option to search another book. Actually, I could have kept the search visible, but that would mean that the library could never come back to its opaque state after the first search was made, since every time the user comes back from the GSAP mode, it will make the library translucent. And since translucent would mean more parts of the mesh have to be rendered, this actually makes the application slower. Considering that this also has to be run on smaller devices, I had no other option but to give the chance for the application to again show the opaque library. But I will think about this problem.
And then finally, I would like to say that I have used the GSAP library a lot this time. Whether it is to change the opacity of the library, camera movement, or the movement of other HTML elements, all are animated using GSAP, which has made the work easier.
And lastly, I have seen that having the controls with damping, made the application slower. And my experience with the three.js editor said me that it is better to have the orbital controls with no damping. And thus I disabled the damping.
            //Reset the Controls
            //controls.enableDamping = true;
            //controls.dampingFactor = 0.05;
            controls.screenSpacePanning = false;
            controls.enablePan = false;
            controls.minDistance = 0;
            controls.maxDistance = 900;
            controls.maxPolarAngle = Math.PI / 2;
And now the controls might seem to be sudden, but it has definitely saved the application from lagging to some extend.
29/1/26
So the task for today is to make the camera face the right side. So the thing is, when a user clicks a GSAP location, he should be facing the next GSAP location. And this is the aim for today. I will have to change the location of the camera such that it faces the next GSAP when aiming at the target. Which means to play with the offset. The way I have done this is given in the following example:
            if (selectedObject.name == "GSAP1") {
                //console.log("Do what you want to with GSAP1");
                animate_Selection(selectedObject, 18, -0.5, 1);
            }
I wish to make the loading page and the complete first floor today. This will increase the vertex count, and for that I will aim to make just the library transparent but not the rest of the assets, since that will make the app very slow otherwise.
3/2/26
So today, and also some days ago, I have made even more responsive. And this time the icon of the app will change into the text when using ont he desktop and it changes into the icon when using on phone. media query is used to attain such response from the website. When I had the meeting last time, i was said to have some more feature. And here is the next step that i thought the website should implement. And that is to have a real time location indicatior, just like in the game of GTA. And the second thing to have is the percentage bar which tells the user how much percent of route he has covered. Lets keep it till there for now. And i will think about the rest of the feature later.
So the feature will be as follows. The user enters the location of the bookshelf, and then when it enables this 2D map feature, he/she will be able to see the projection of the library from the top view, and along with that he/she will see the red location like those rings of lights as in GTA, and this will also be reflected on the 2D map. And as the user reaches those points, he/she will be able to see the red point disappearing. This is very close to VR tech. Hopefully it works out.
As of now here are the updates:
18/2/26
After a long time I have returned and added three major features in the app. One of them is still not complete. So the features (as I call them) are:
- Geo Location
- Percentage Bar
- Frustum Pop Ups
1. Geo-Location :
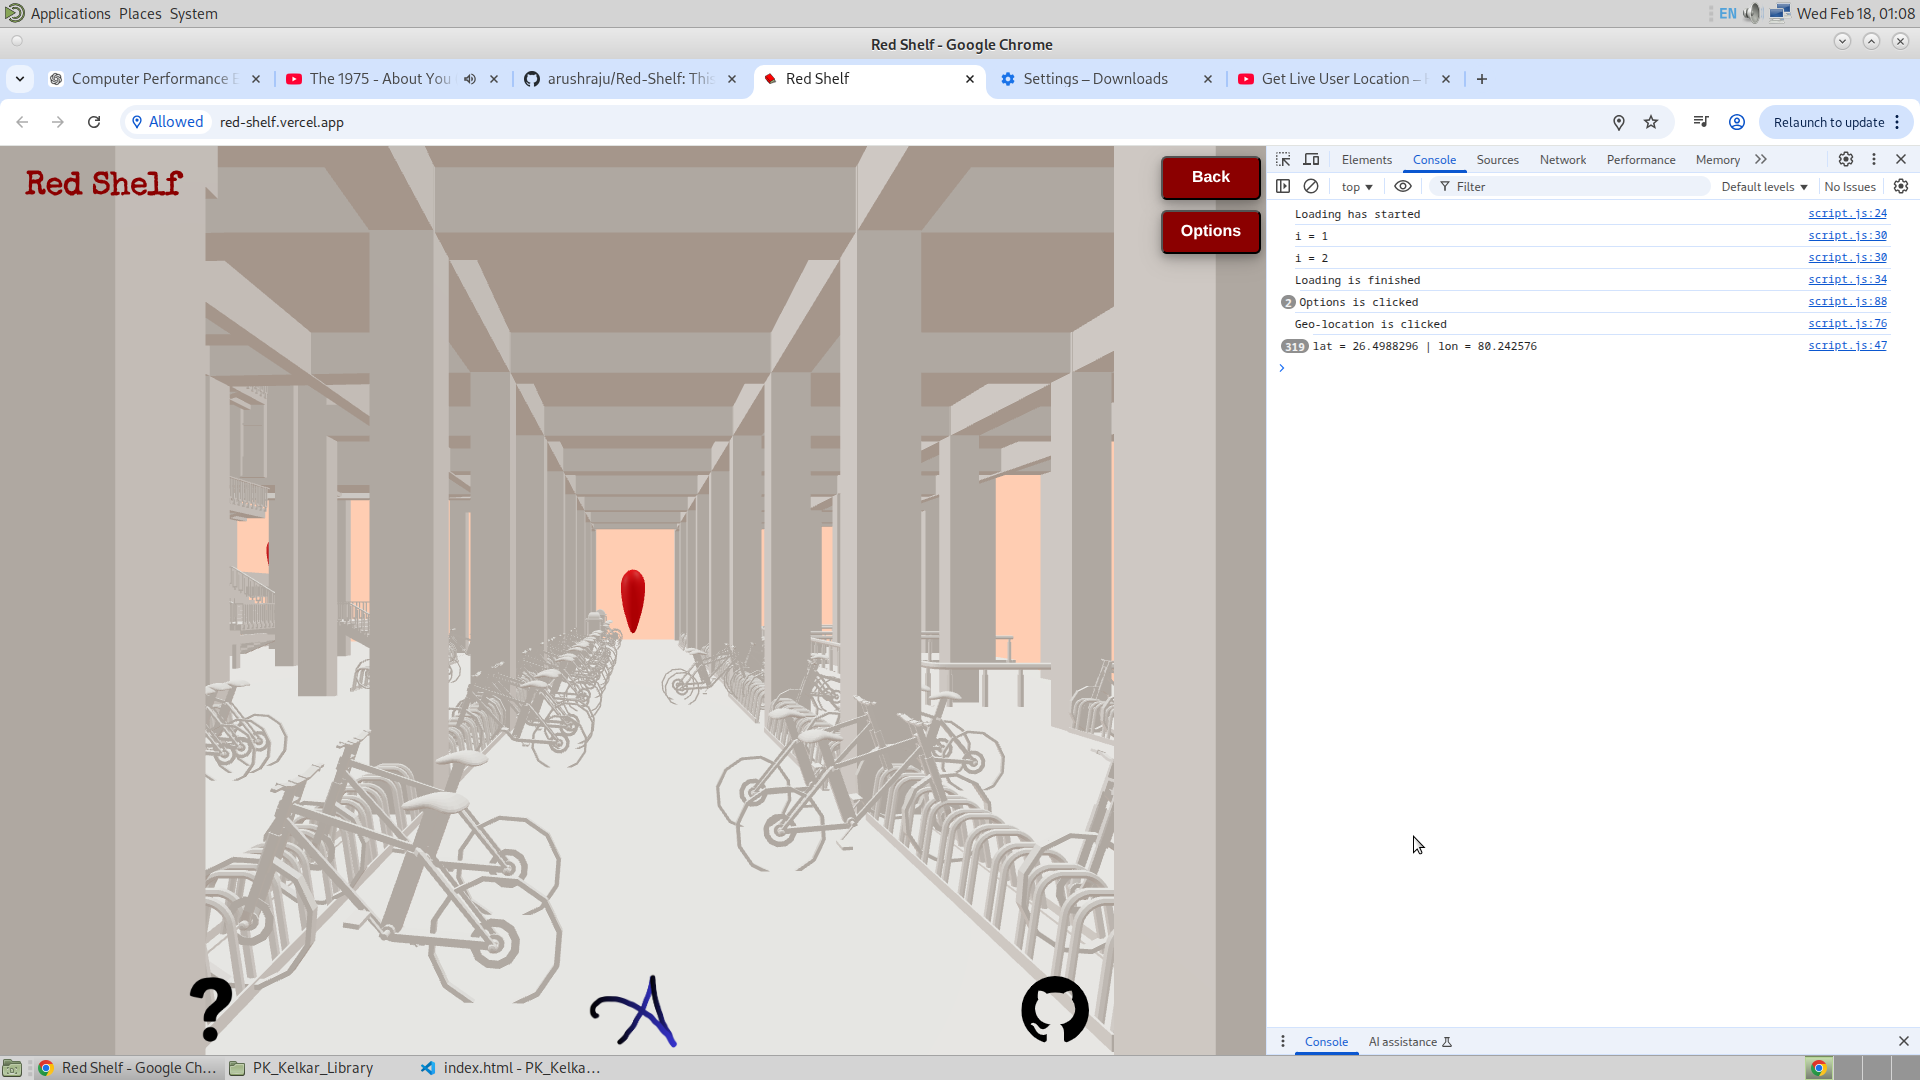
This feature is like Google Maps, where the user will be able to see from the top where he is and where he has to go. This will allow the user to visually see where he is with respect to the nearby GSAP. But for now, I have seen that from the desktop where I am developing this app, the accuracy of the browser is about 186m, which is huge. But nevertheless, I will still implement this feature and see how useful it turns out to be. The figure below shows how the position coordinates are seen on the console using the Geolocation API.
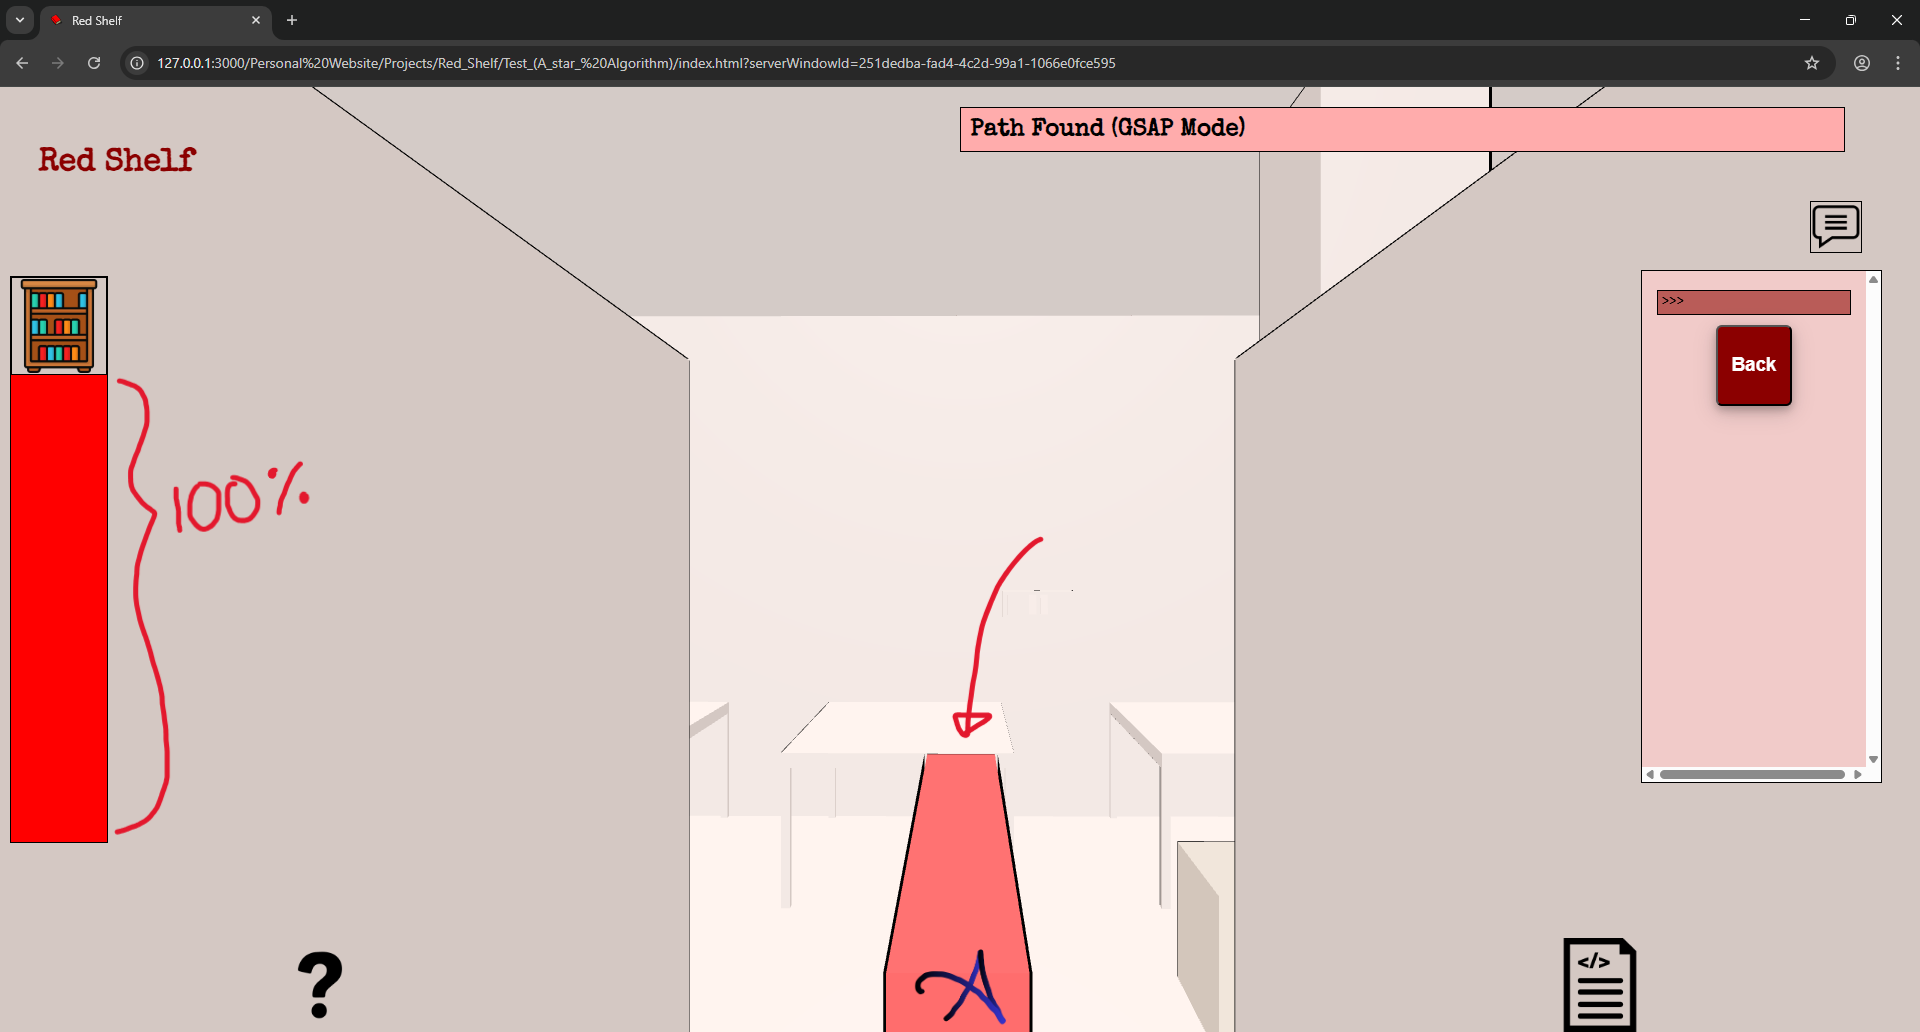
2. Percentage Bar :
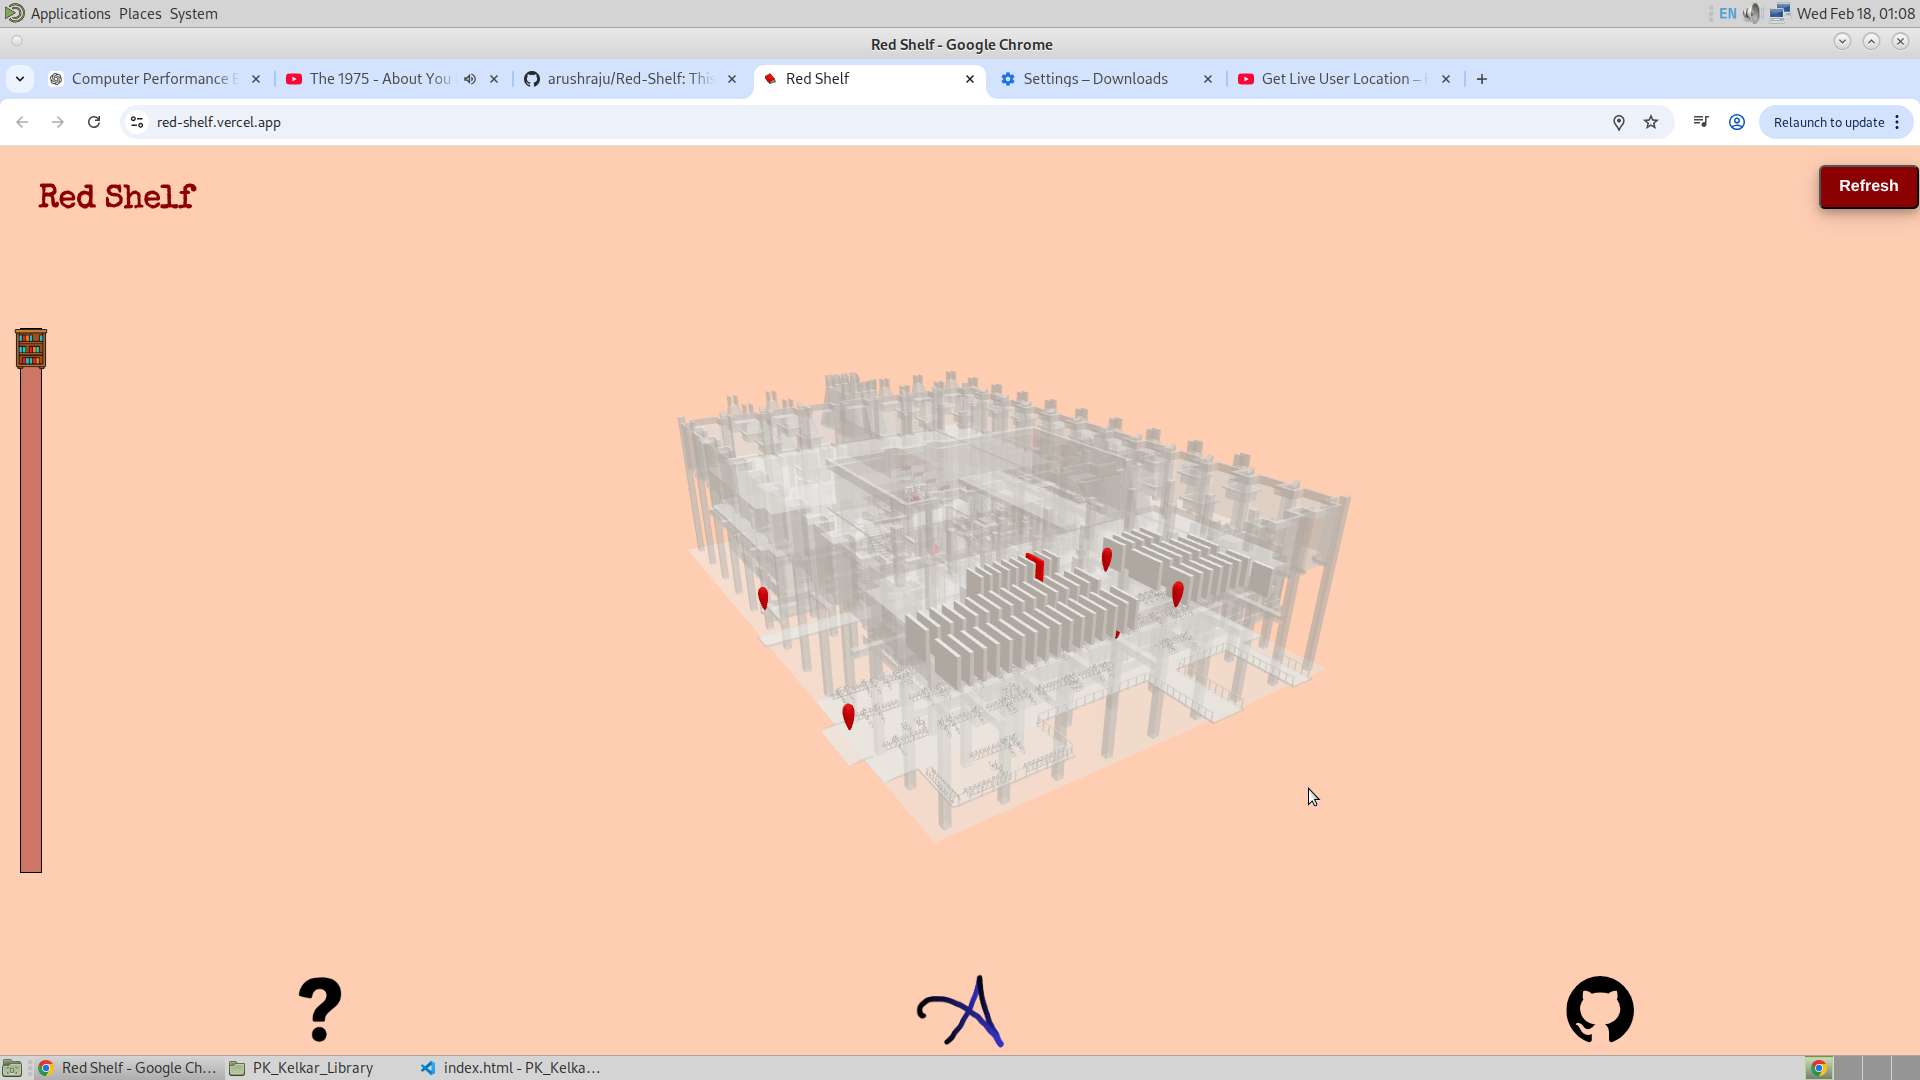
This feature was not very hard, comparatively speaking. And this is inspired by how we all appeal to visuals of our progress. Be it a loading screen or any task that wants us to see how much we have done. So this idea came from that. This is somewhat hard coded till GSAP9, which is at the entrance of the front gate. The figure below shows how the progress bar changes its scale from 0 to 100% as the user moves to the respective bookshelf. After pressing the back button, the scale exactly turns to zero, and for the first GSAP it turns to 1%.
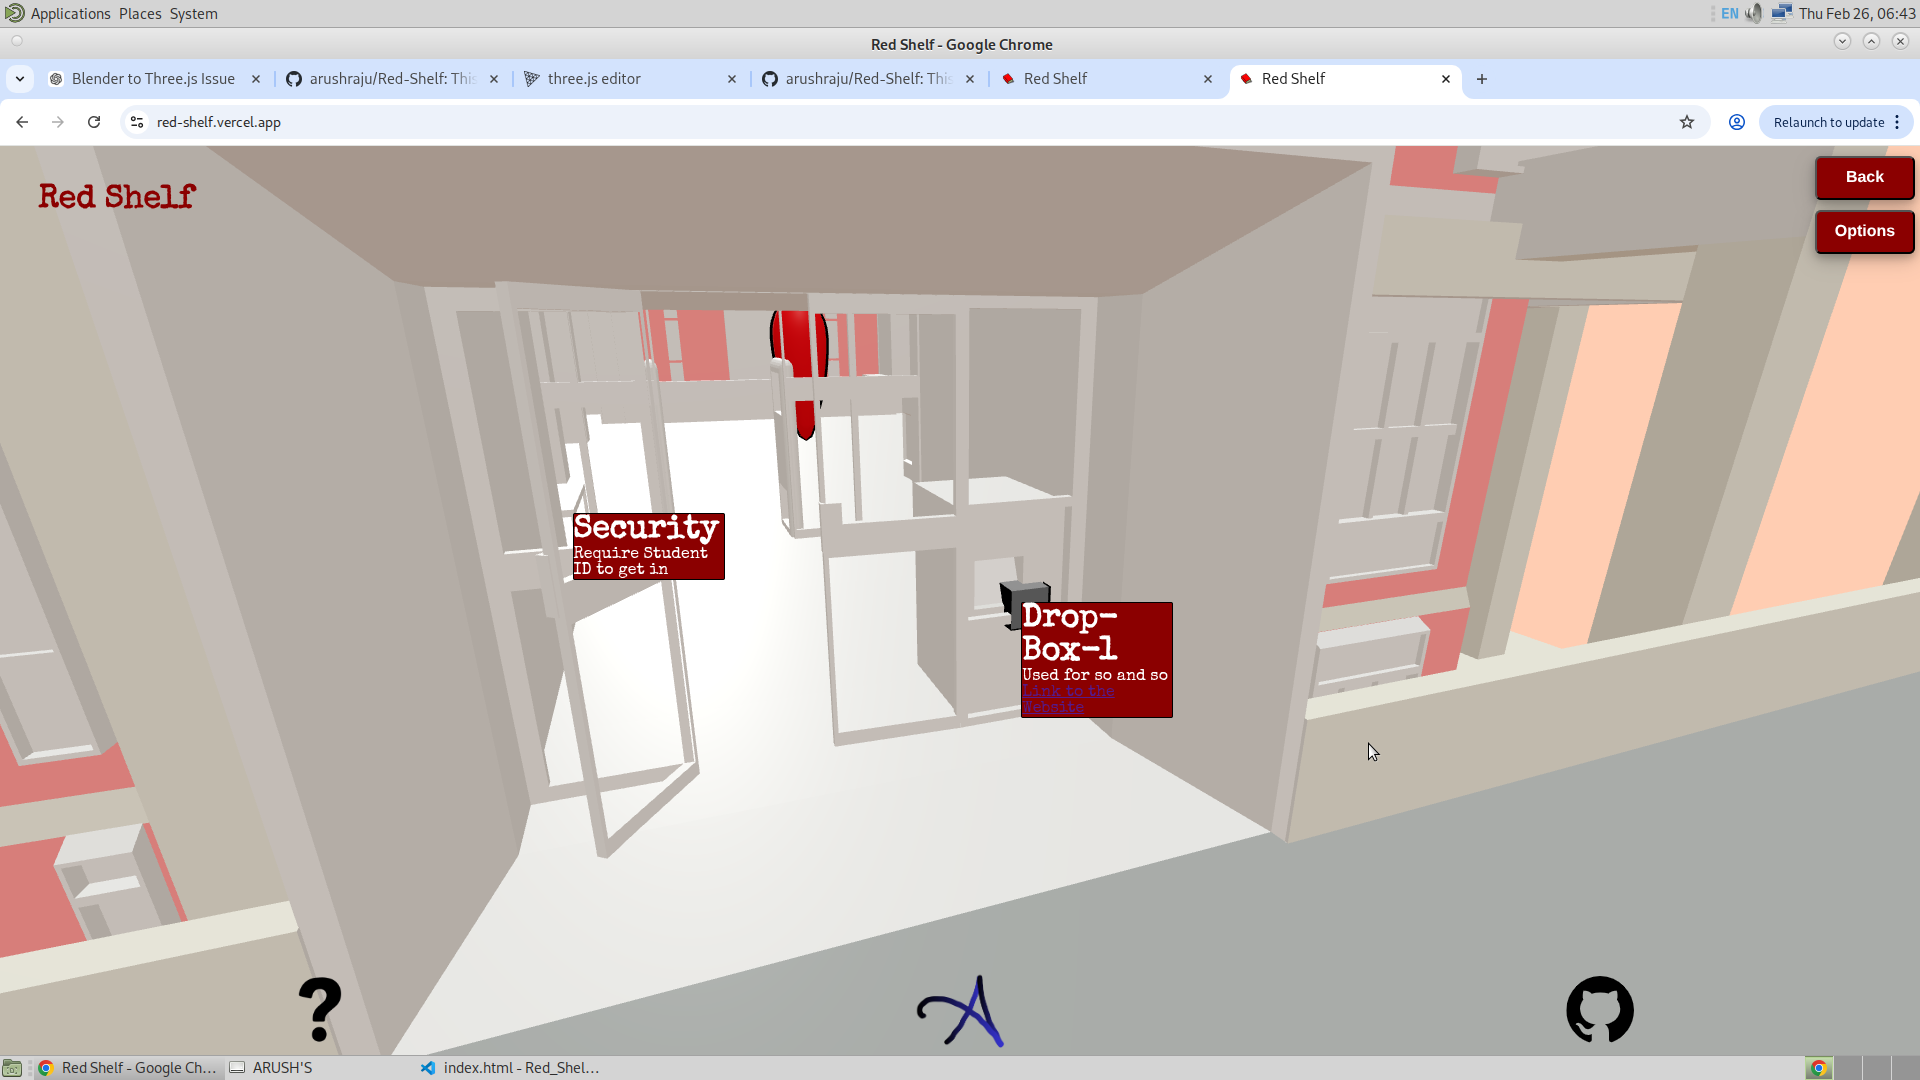
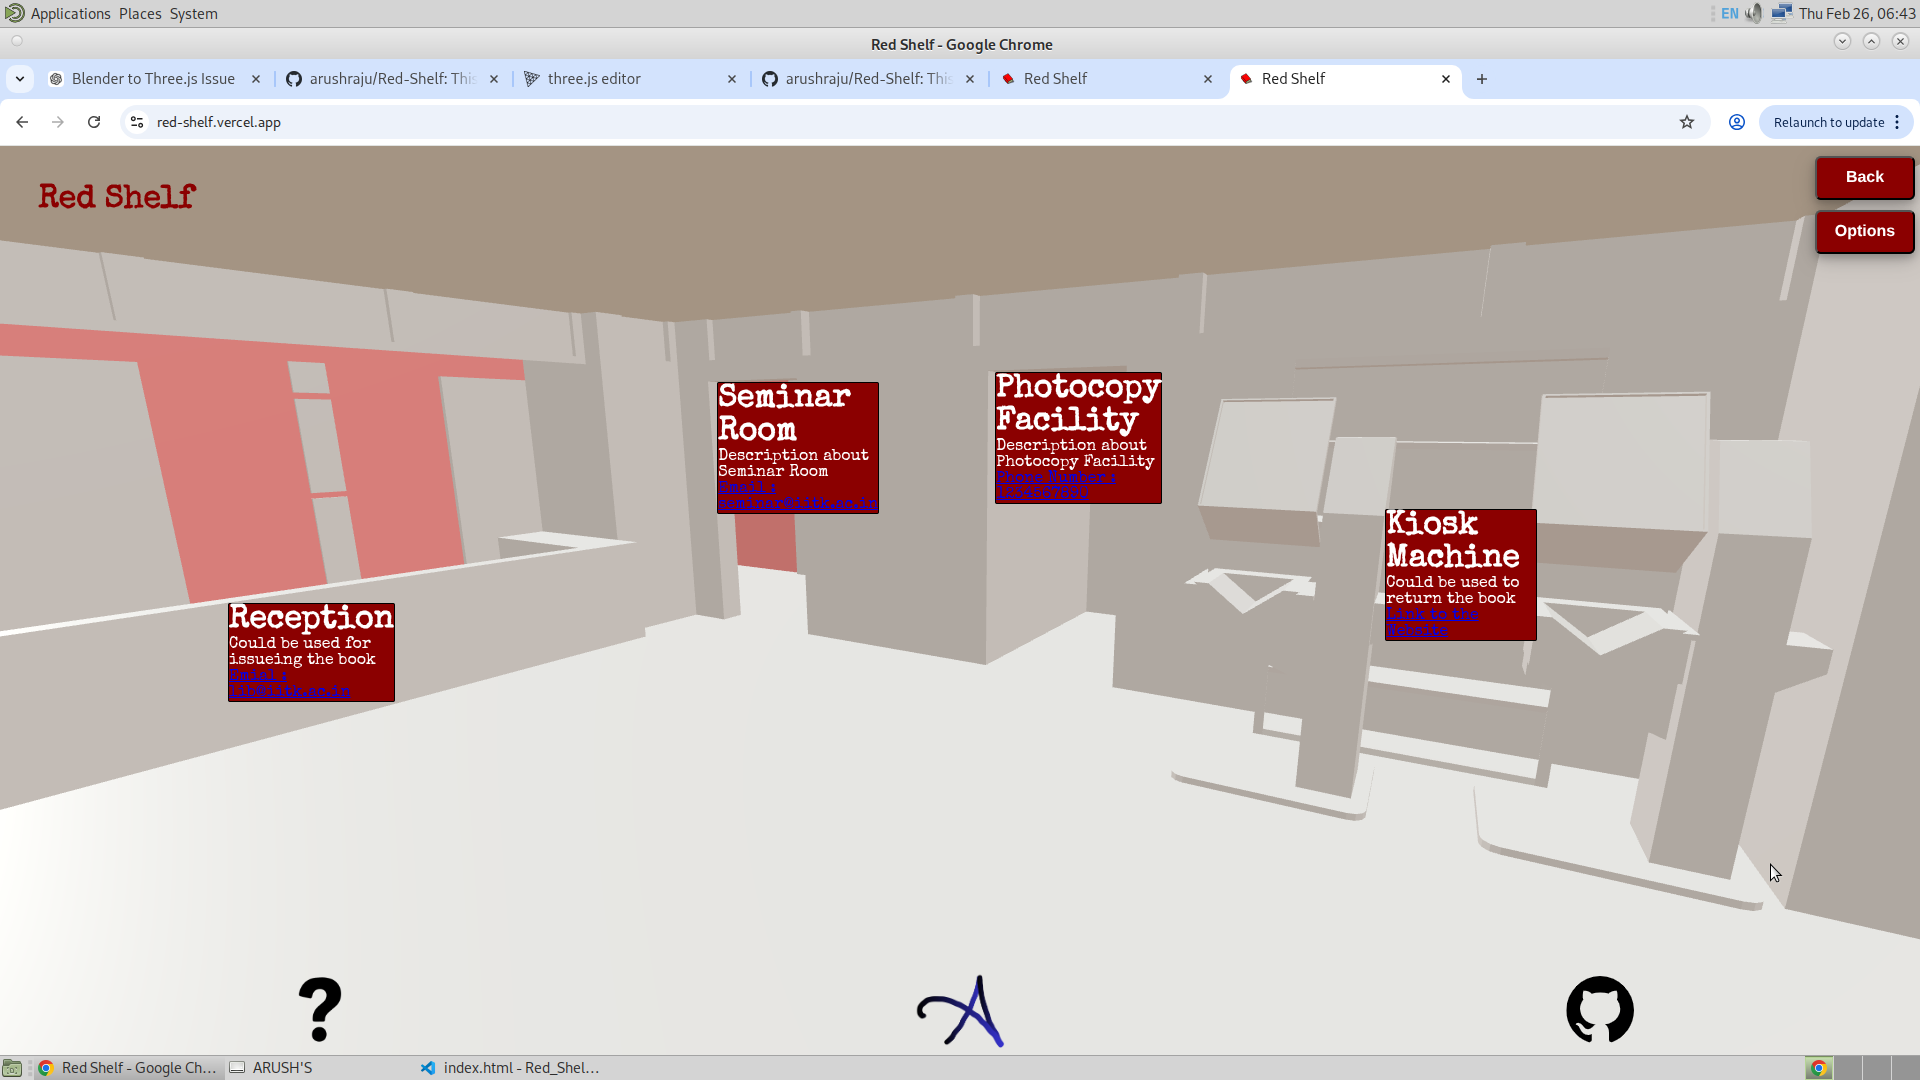
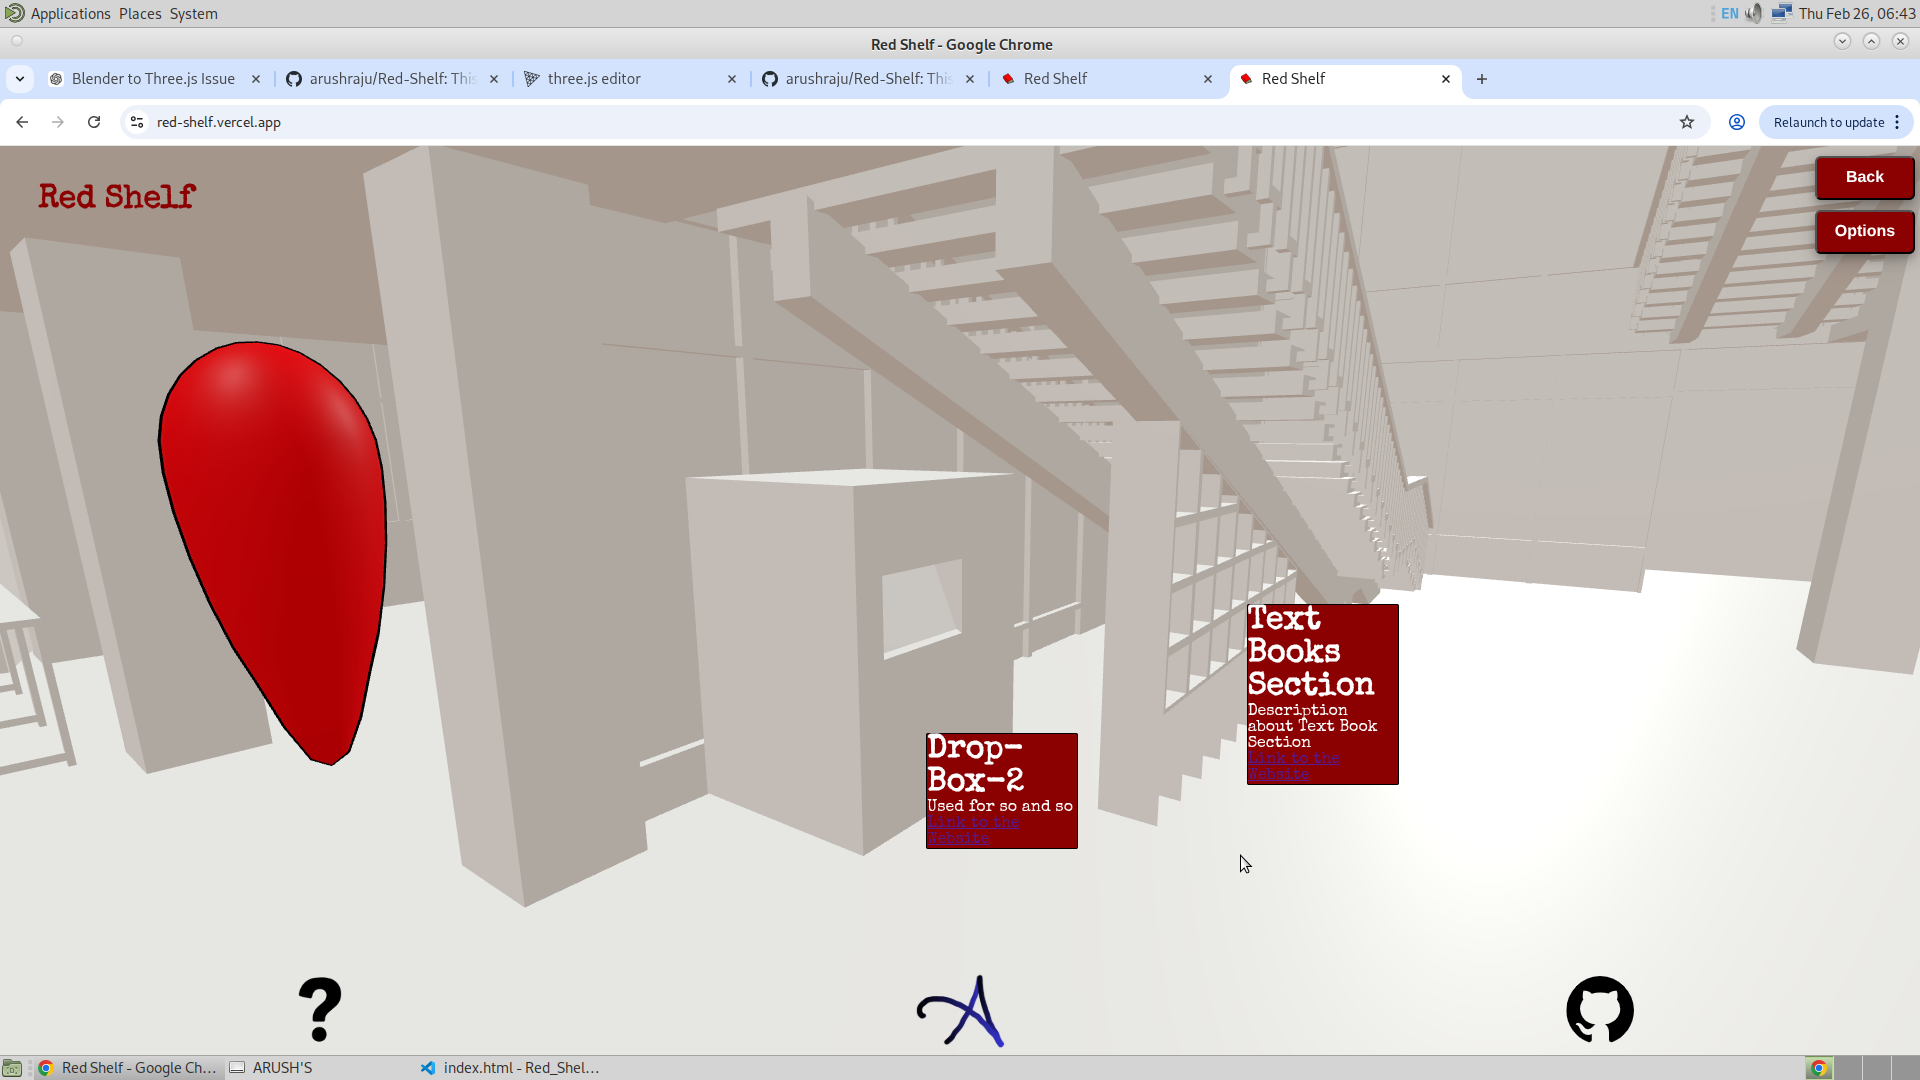
3. Frustum :
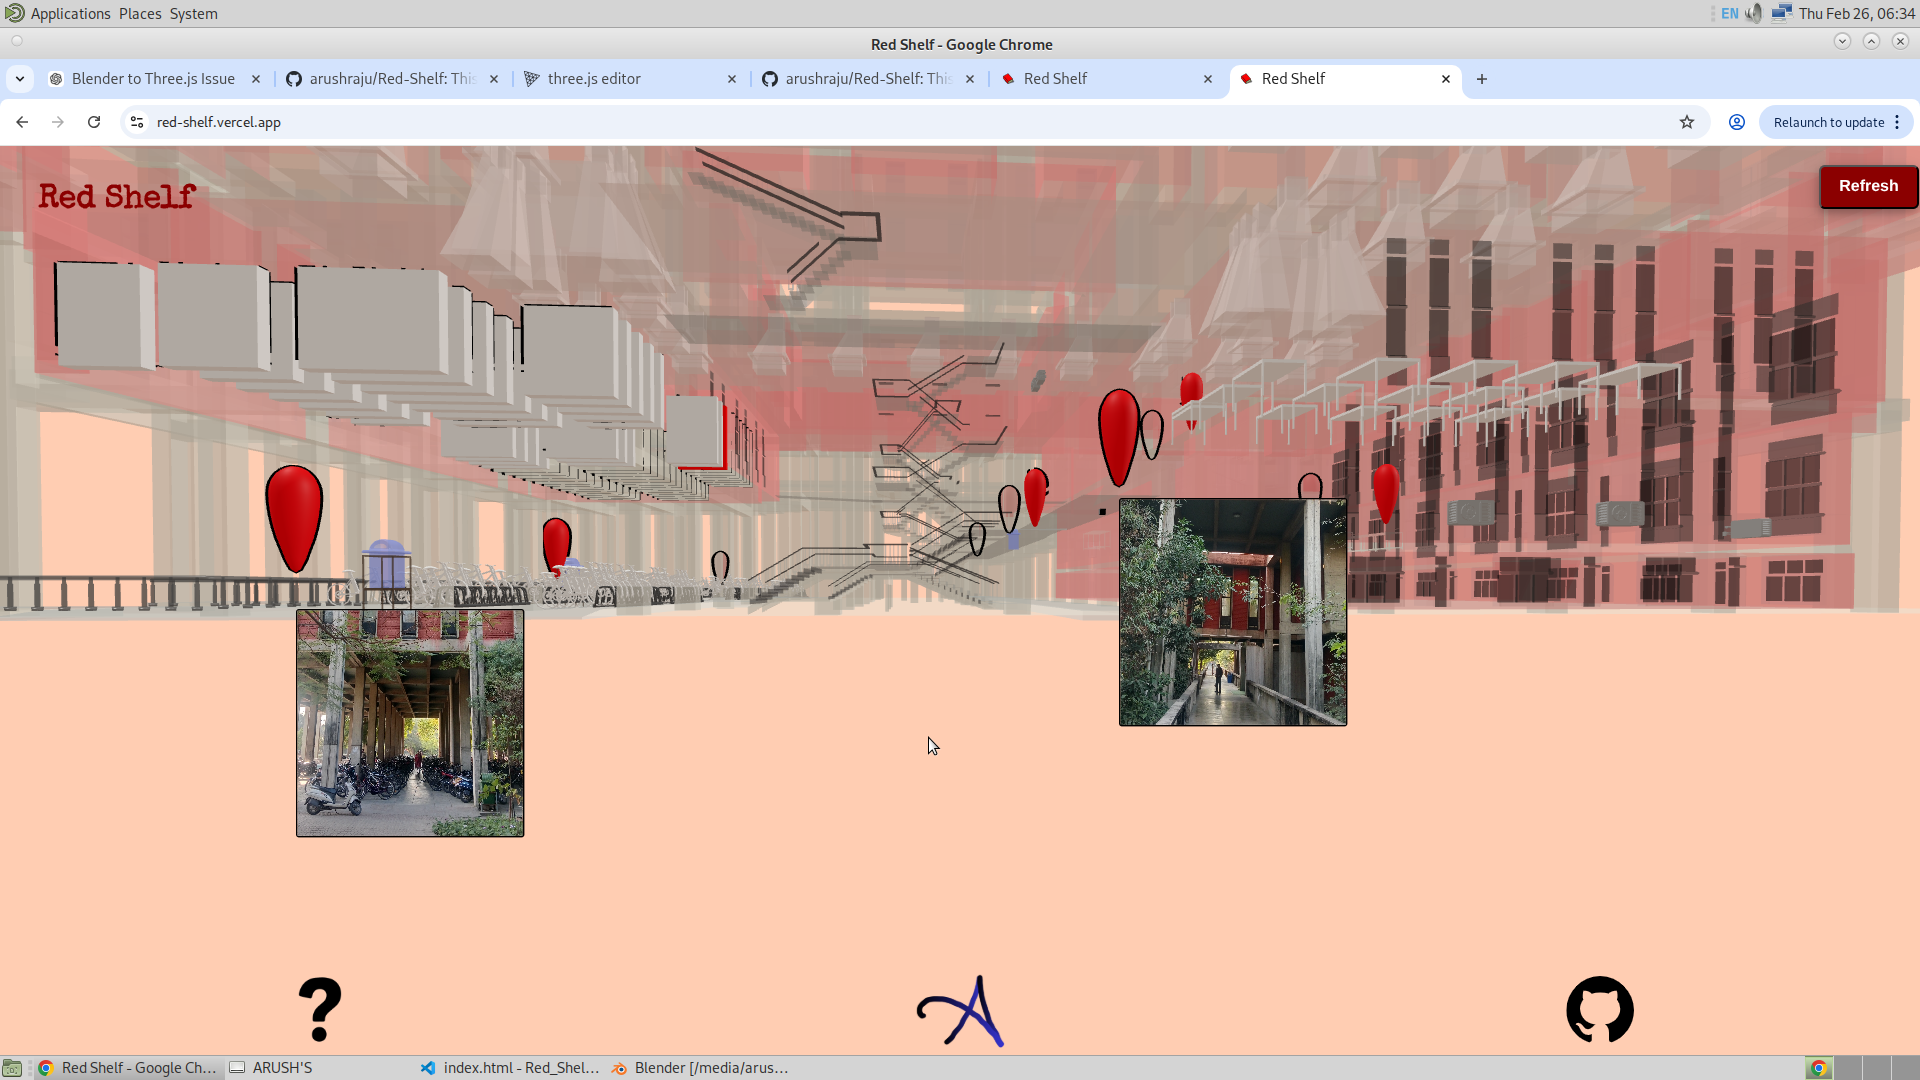
This is one of the coolest features I have found in Three.js. Frustum is the feature that could be used to see which object is completely in the screen. This allows me to use the coordinates of the object and project it onto the 2D screen, and then position the frustum pop up at the same location, giving the illusion that the pop up is actually attached to that object. This has to be one of the most important features in Three.js. Given below is the picture of the frustum working as expected.
22/2/26
Lately, I was thinking about some other ideas related to the website. I will now be listing them.
The first plan is to use geometry instancing and make the bookshelves as instances. This will allow me to use the advantage of having a lesser number of meshes, and this will surely make the app faster and also give me the ability to change the properties of the mesh on the go. Also, with the help of Geometry Instancing, I will be able to make the target bookshelf more detailed, letting the user know in which row or which side of the shelf they can find the book.
And then the next thing to work on is adding a way to change the location of the bookshelf by the staff. That will make it easier for the admin to change the location of the bookshelf, change the name of the bookshelf, or just add or remove a bookshelf. Thinking about this, all that I have to do is give the admin the ability to change the JSON file that stores all the transforms.
And lastly, I have to say that adding the feature of Frustum was great, and I will surely add this feature of frustum extensively throughout the library. I have also thought of adding images of the library entrance to make it easier for the user to navigate themselves at the entrance of the library. Important locations like the dustbins and washrooms can also be marked, by red color if needed.
I am currently working on adding the bouncy pop-up feature, which will allow the user to see what’s the next pop-up to click from their current location. And I am also working on a cartoon version of the library, maybe to change the theme of the app. And for this, I am thinking of going with Grease Pencil in Blender.
23/2/26
I have been seeing the reaction of the people when they use this app, and I have seen that they find it interesting, but with that I have also seen a common pattern in the users. After reaching the bookshelf, they tend to click the red shelf. And this means that something must happen when the user clicks the bookshelf. And then some said that the library must be colored. And some found it hard to find the search bar. Also, some found it hard to click on the Entrance GSAP.
- Now the problem of people finding it hard to click on the first GSAP could be solved by creating a pop-up on the Entrance GSAP. And since clicking the pop-ups is simpler than the GSAP initially, when clicked I will ask the user if they want to go to that GSAP.
- And when thinking about the color, I would like to add color to the library such that it is plain. And then on top of that I will add the grease pencil art. This would be killer.
- And in the case of the search bar, I will make it more like how we see it in Google. With two semi-circles at the ends. And with a larger width. Making it easier for the user to identify it.
- When the bookshelf is reached, I can show them pictures of the actual bookshelf maybe. And for this also I will use frustum.
26/2/26
It’s 5 AM and I haven’t slept. Since yesterday, I’ve been continuously working on adding feature after feature, and there has finally been huge progress that I would like to share. Below is the list of updates that I am going to discuss:
- Added colors to the mesh
- Entrance Frustum Pop up
- Developed the model even more.
- Added Some more additional Frustum
- Bouncing Next GSAP animation
- Oultine Feature
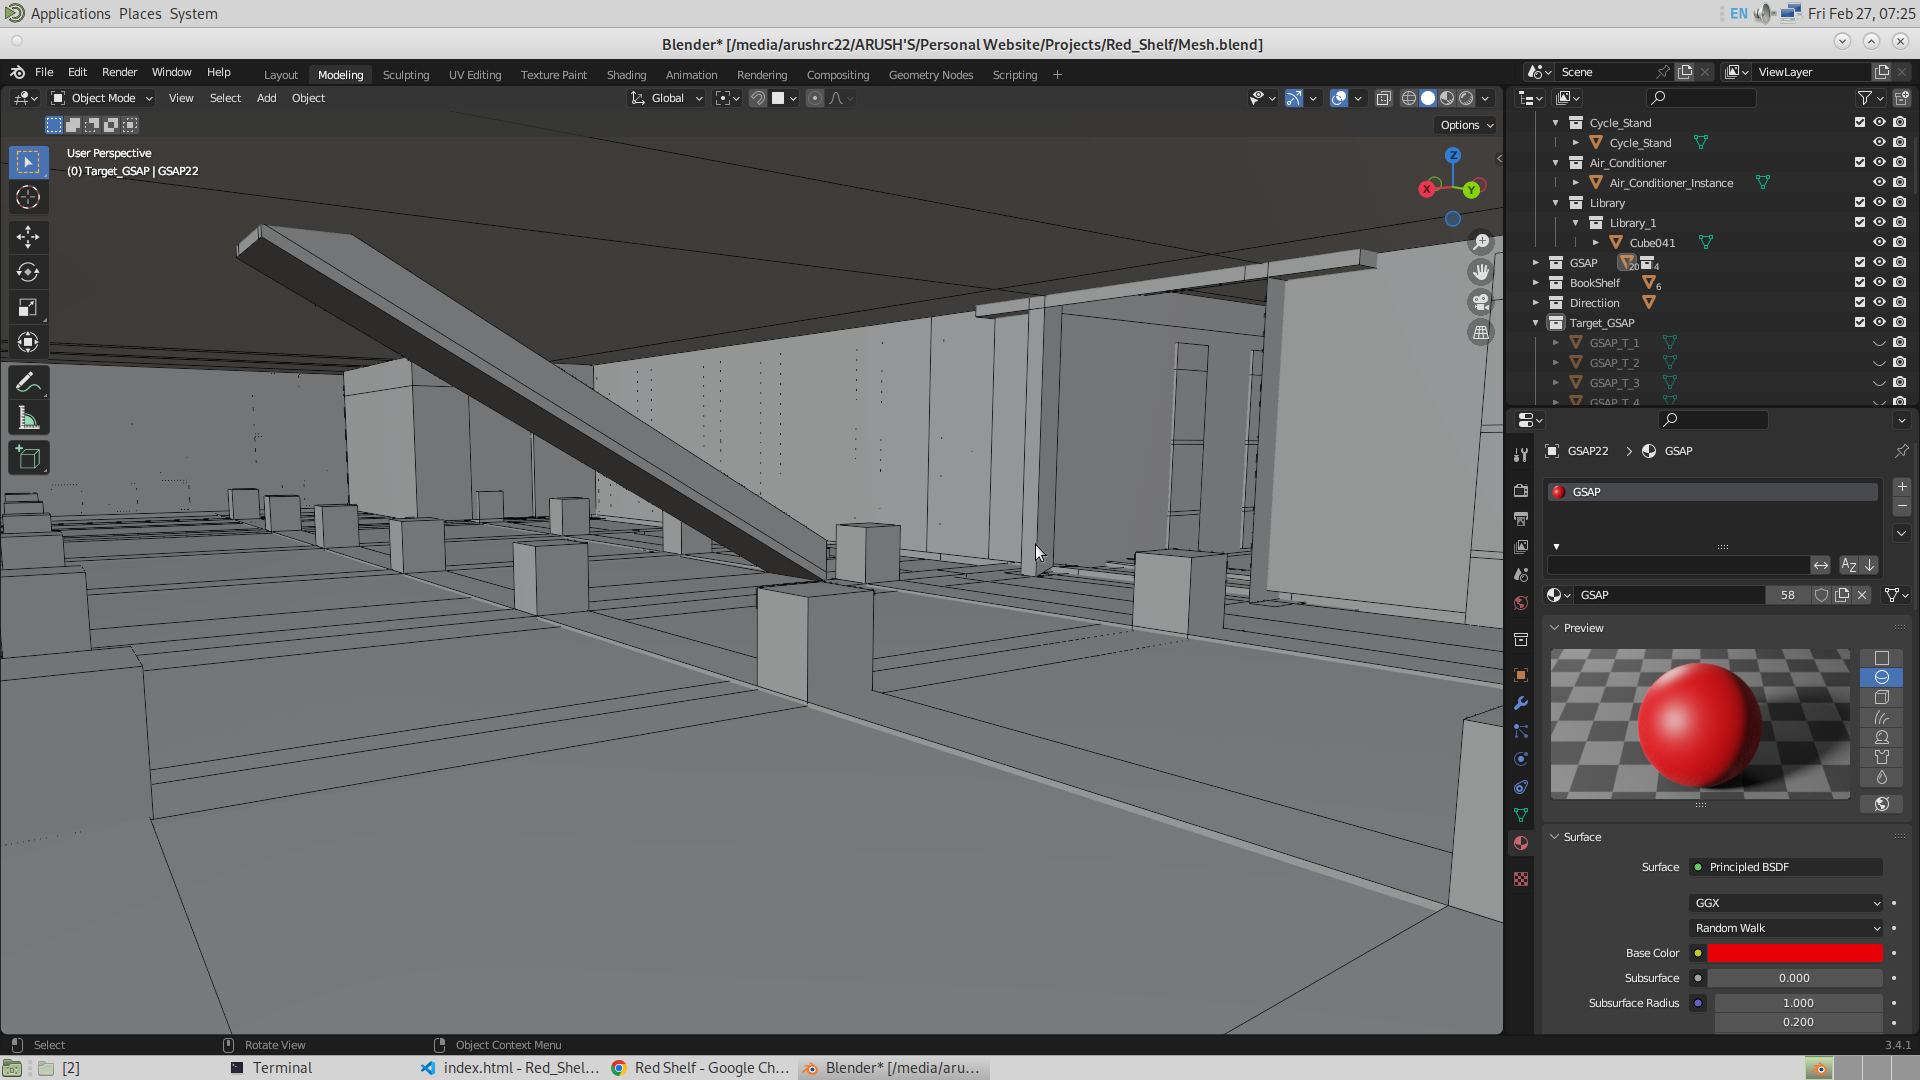
Added Colors to the Mesh :
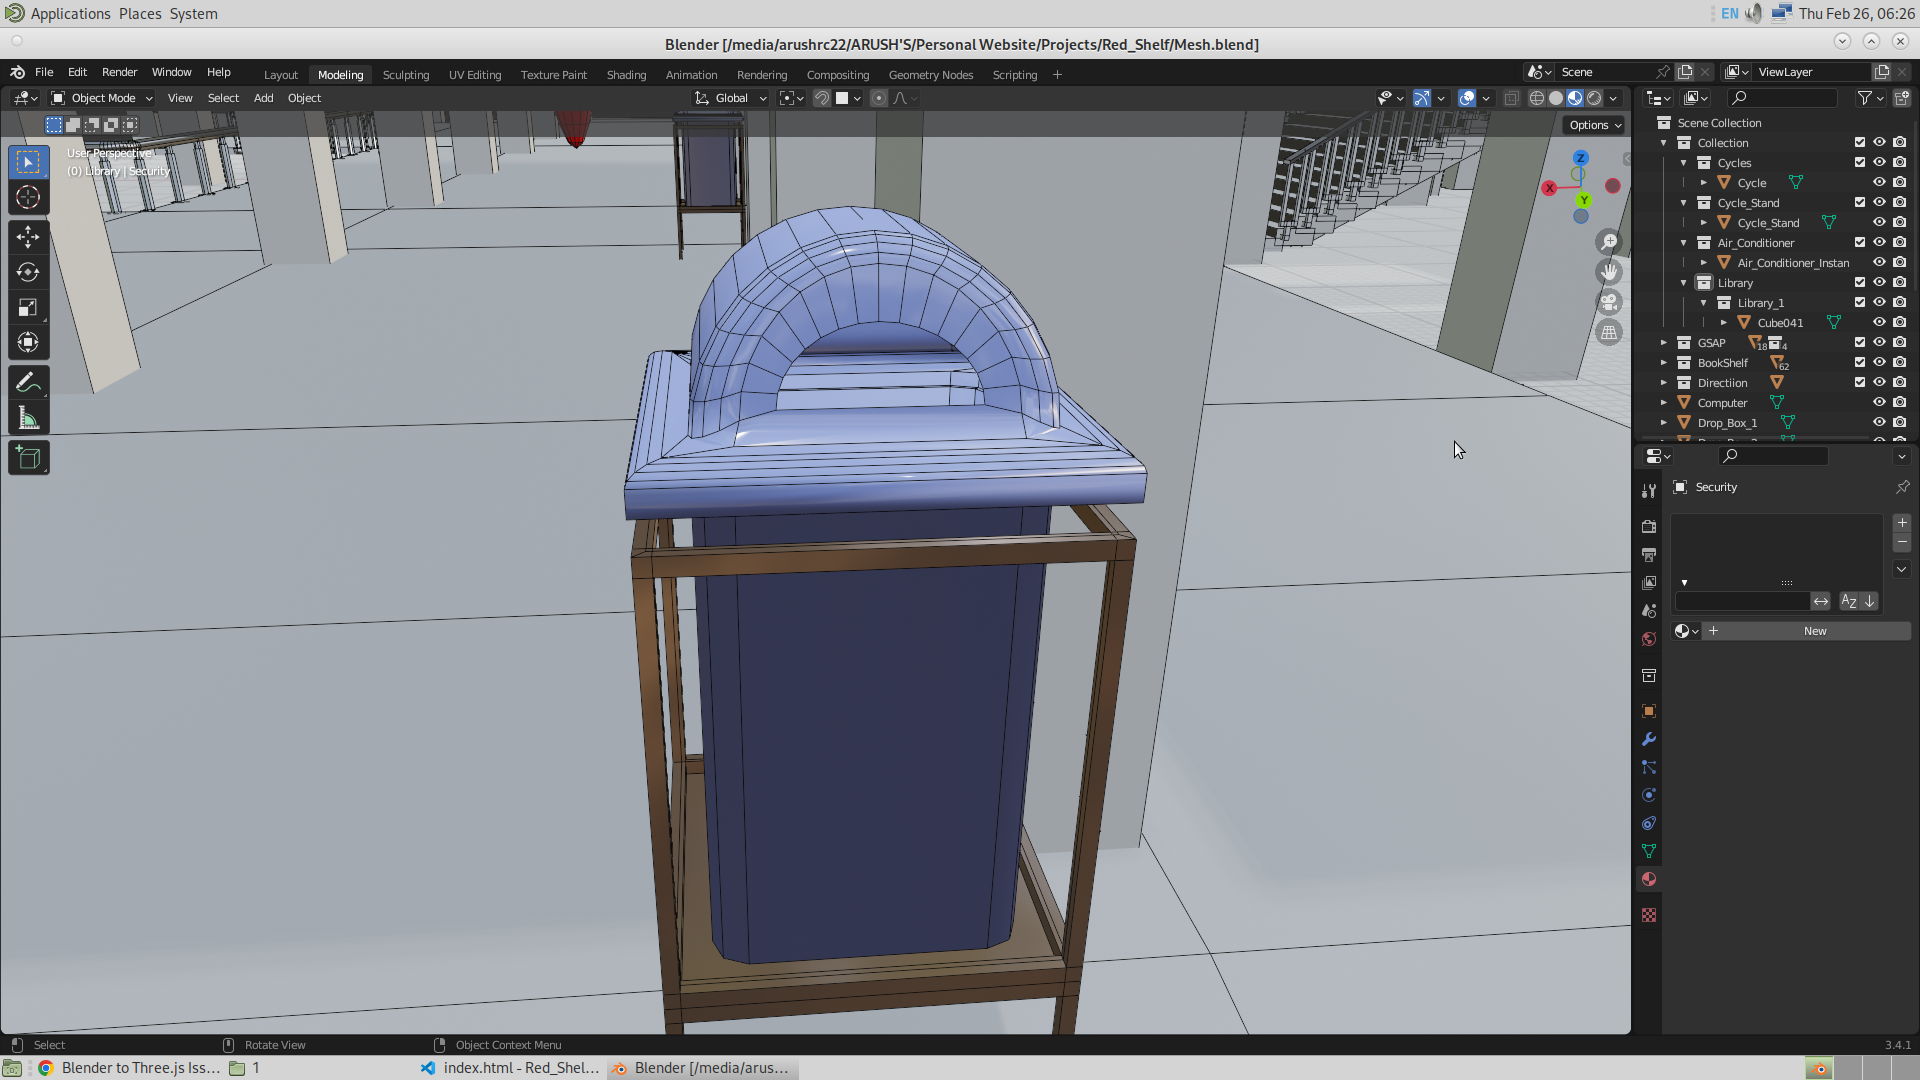
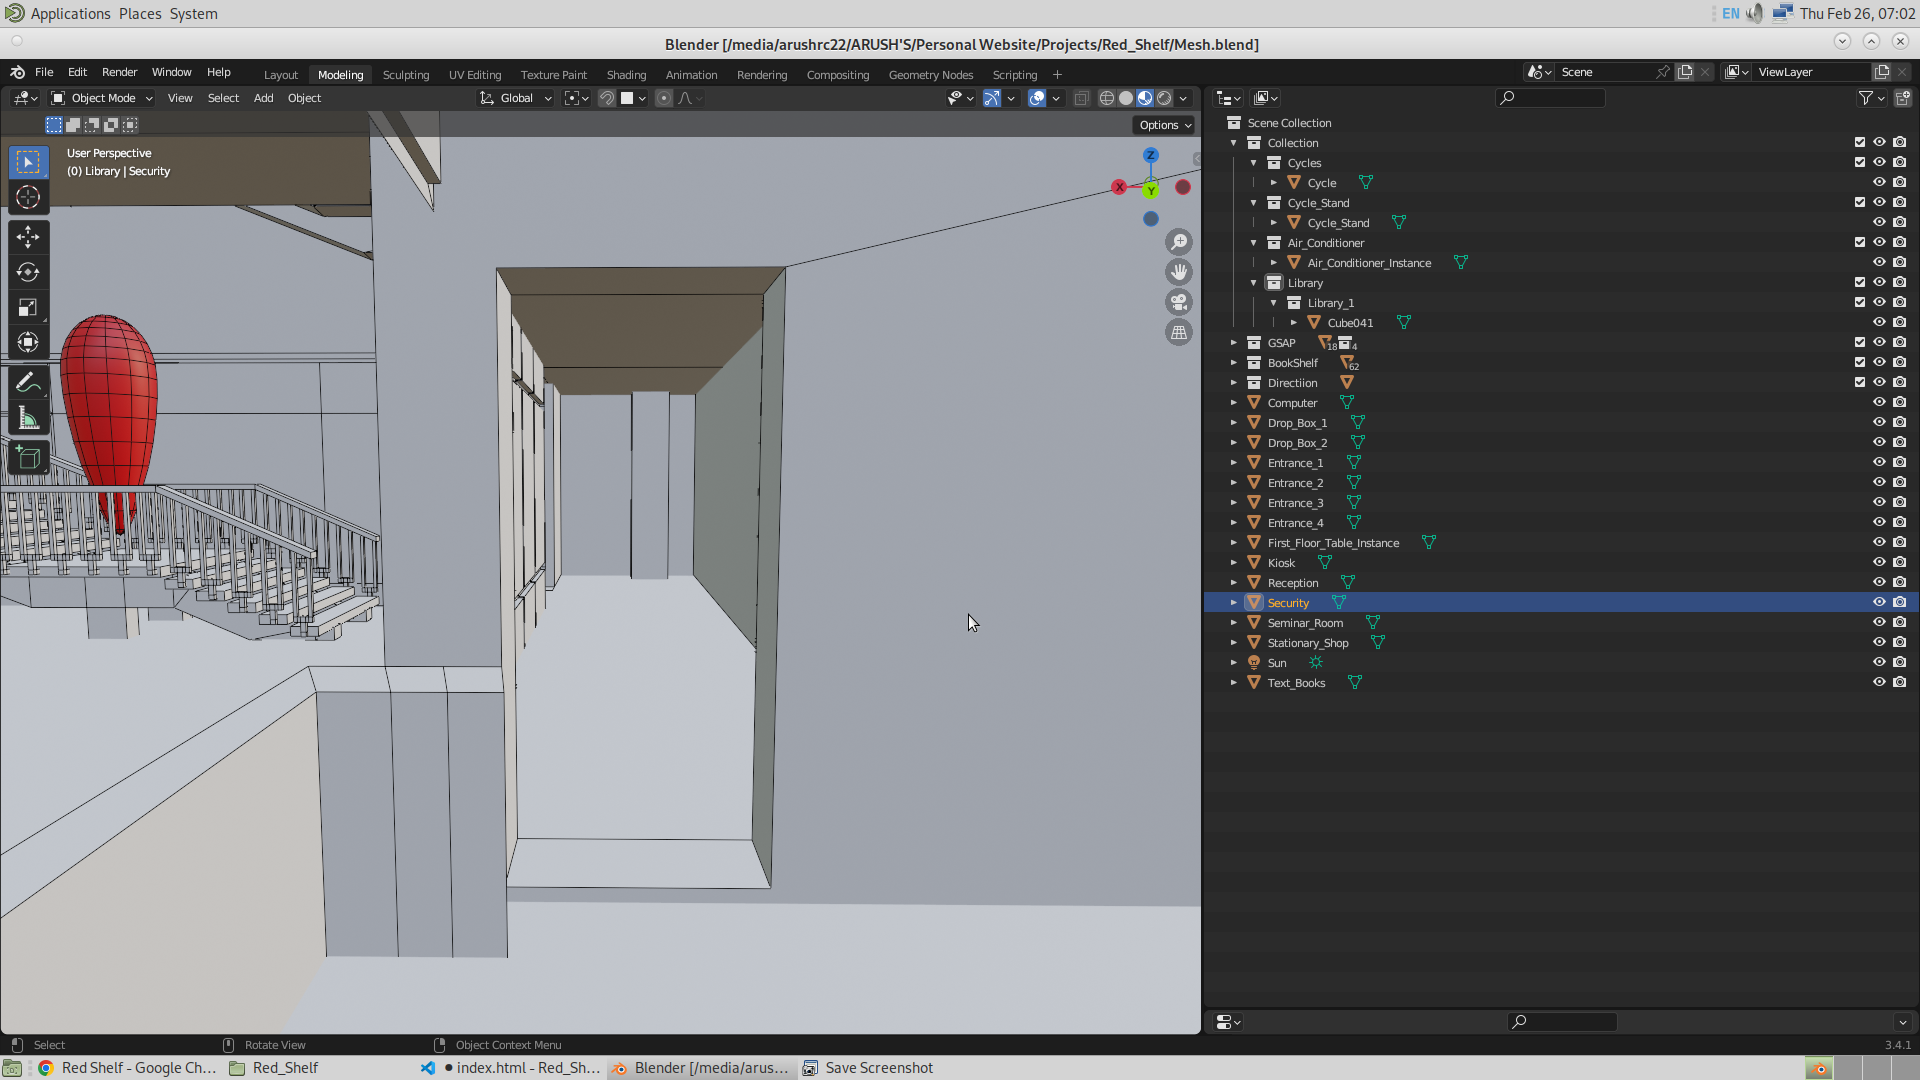
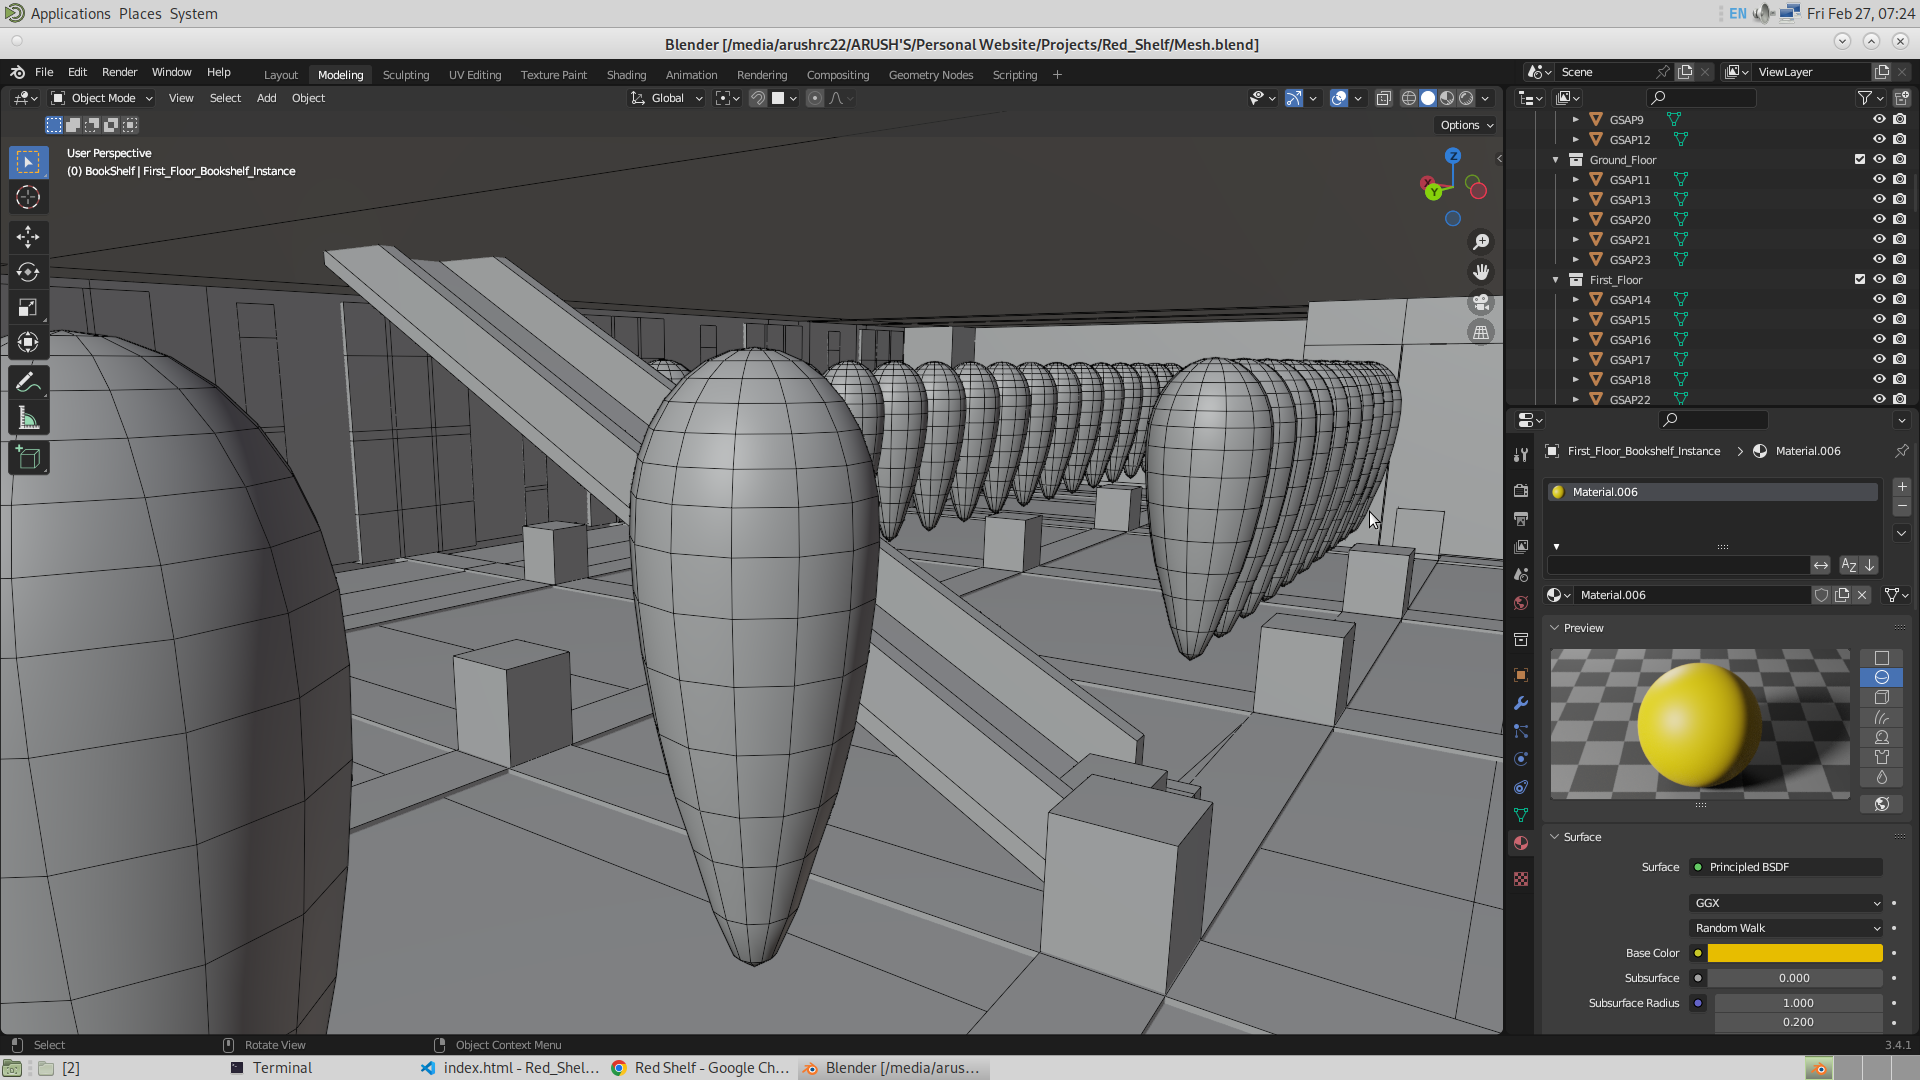
It took me about three hours. I started adding different coloring materials in the scene. The materials were added to the library to make it look more accurate. And not just the color, but I also tried replicating the roughness of the mesh as much as possible. Given below is the model in Blender. You can see the dustbins and the glass materials, where the attribute of roughness being changed is clearly visible. Shade Smooth was applied to the dustbin and the cycle stand to make them look smoother rather than more like polygons.
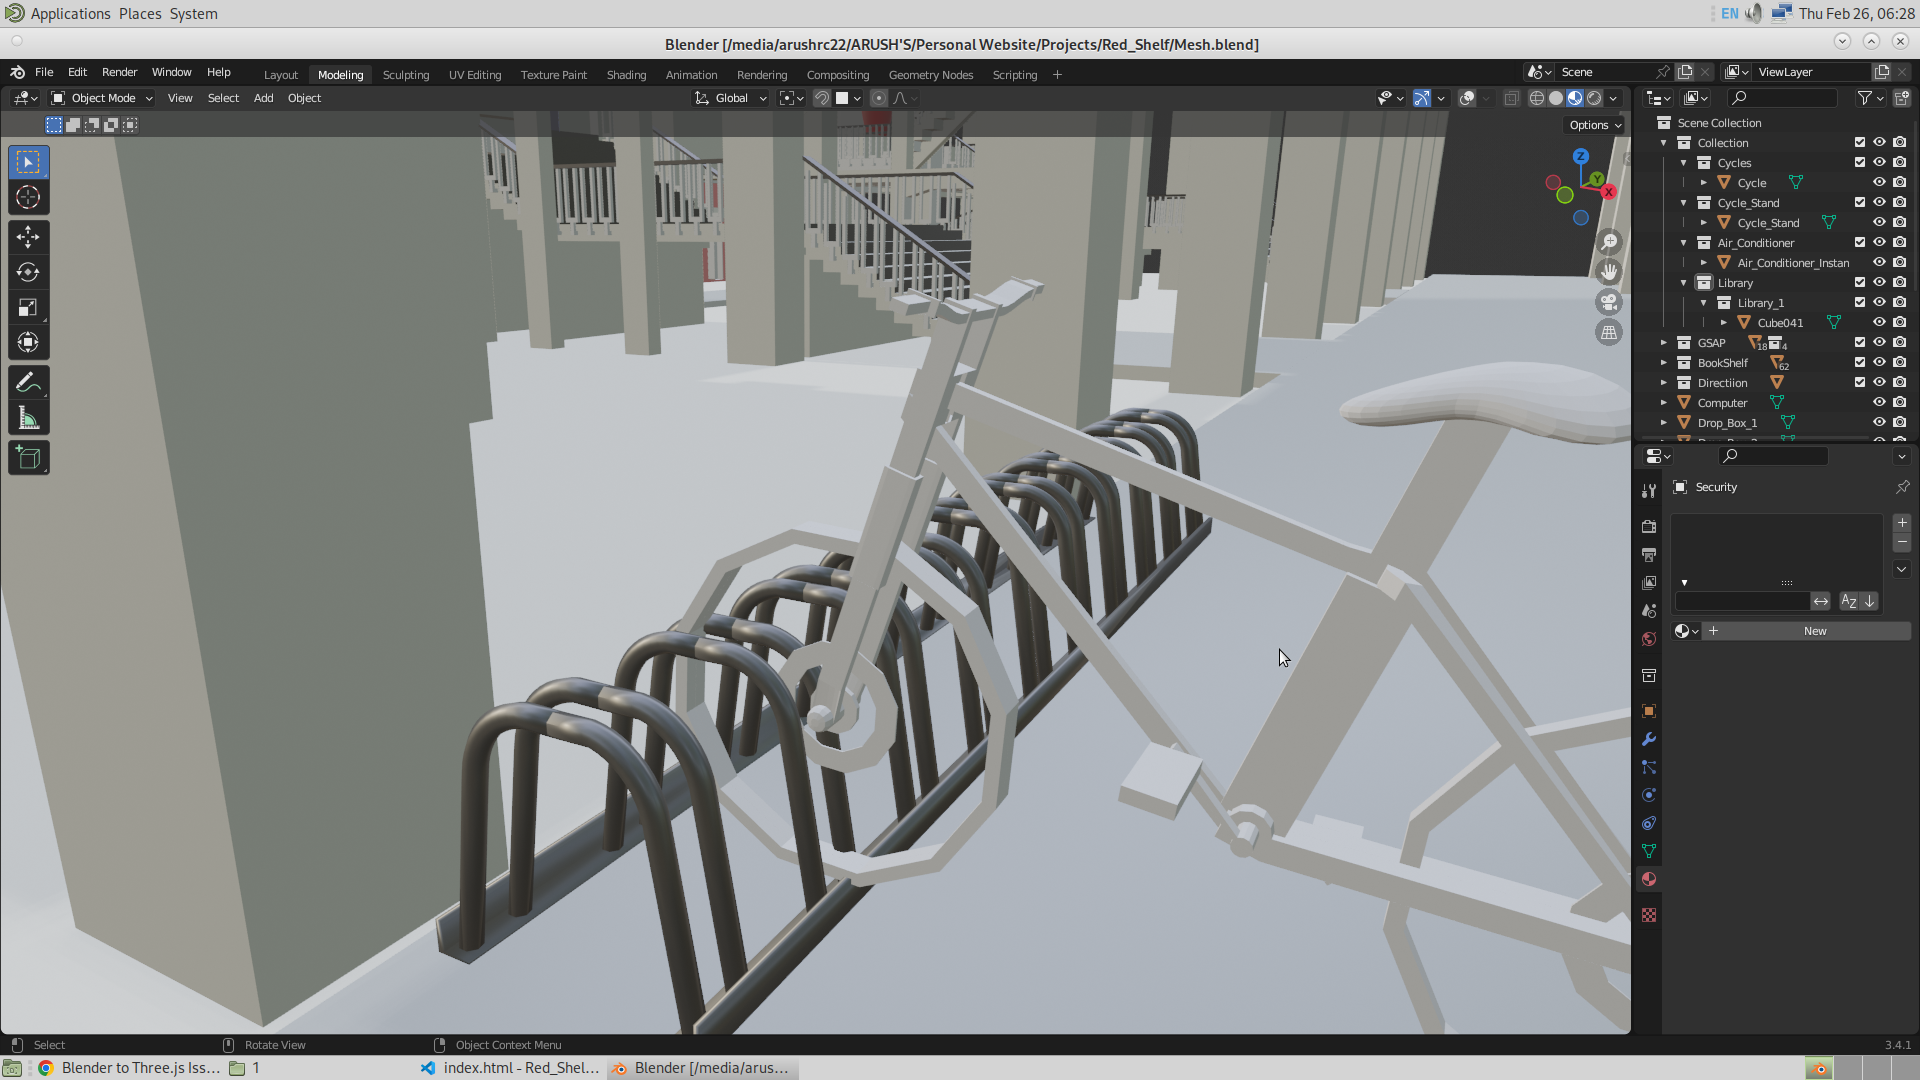
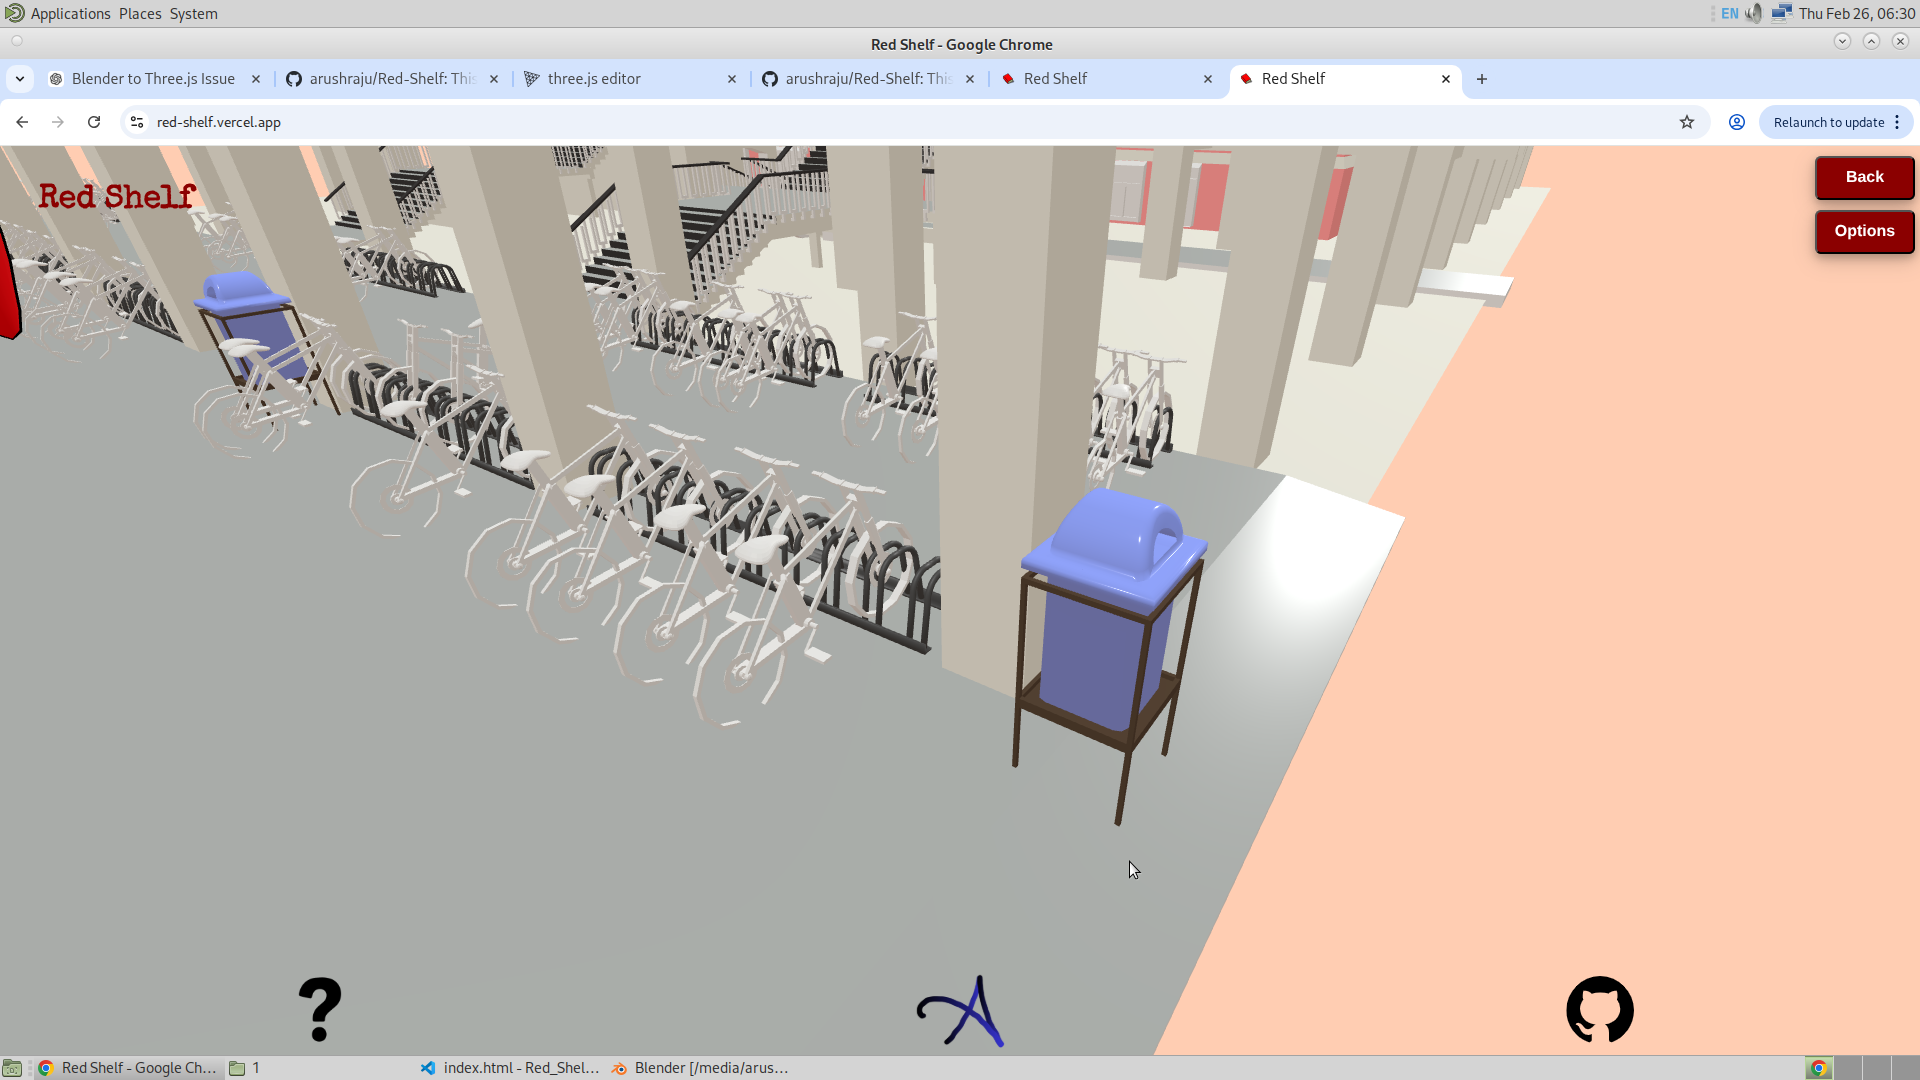
For some reason, I am able to see the shine on the dustbin, cycle stand, and also the fence at the front of the library, but I am unable to see the shine of the glass window when I import the model into Three.js as a GLB file.
And finally, here is the complete colored model in Blender and in Three.js (Red Shelf).

There was also a strange problem I faced. When joining two objects into one single mesh in Blender, if both objects had different materials, I noticed that the joined mesh becomes a group, and the individual children of the group become separate objects with just one specific material. Also, the names of the children are randomly assigned. I do not understand why this happens. I have somehow handled this in the code. Wherever I am required to work with the mesh of the complete library (which contains individual child meshes with particular colors), I use every child of the library to handle the logic.
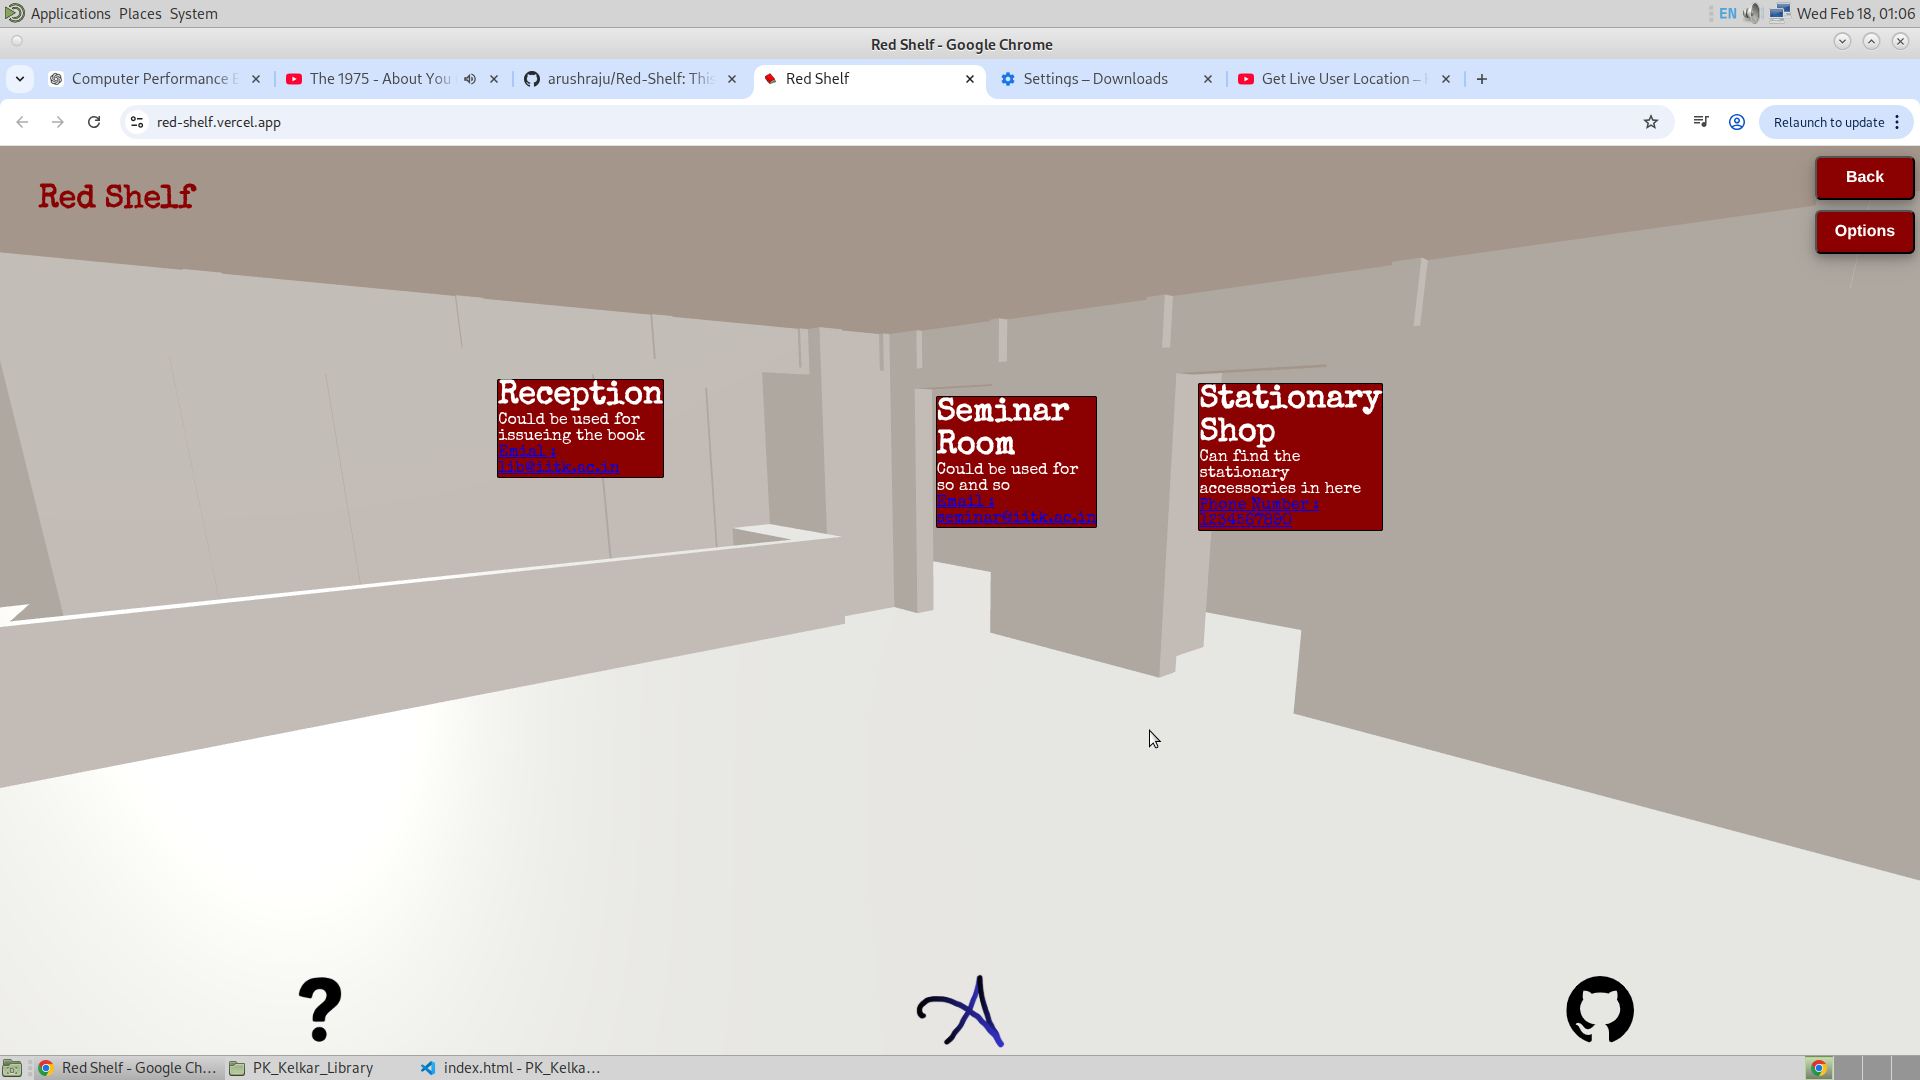
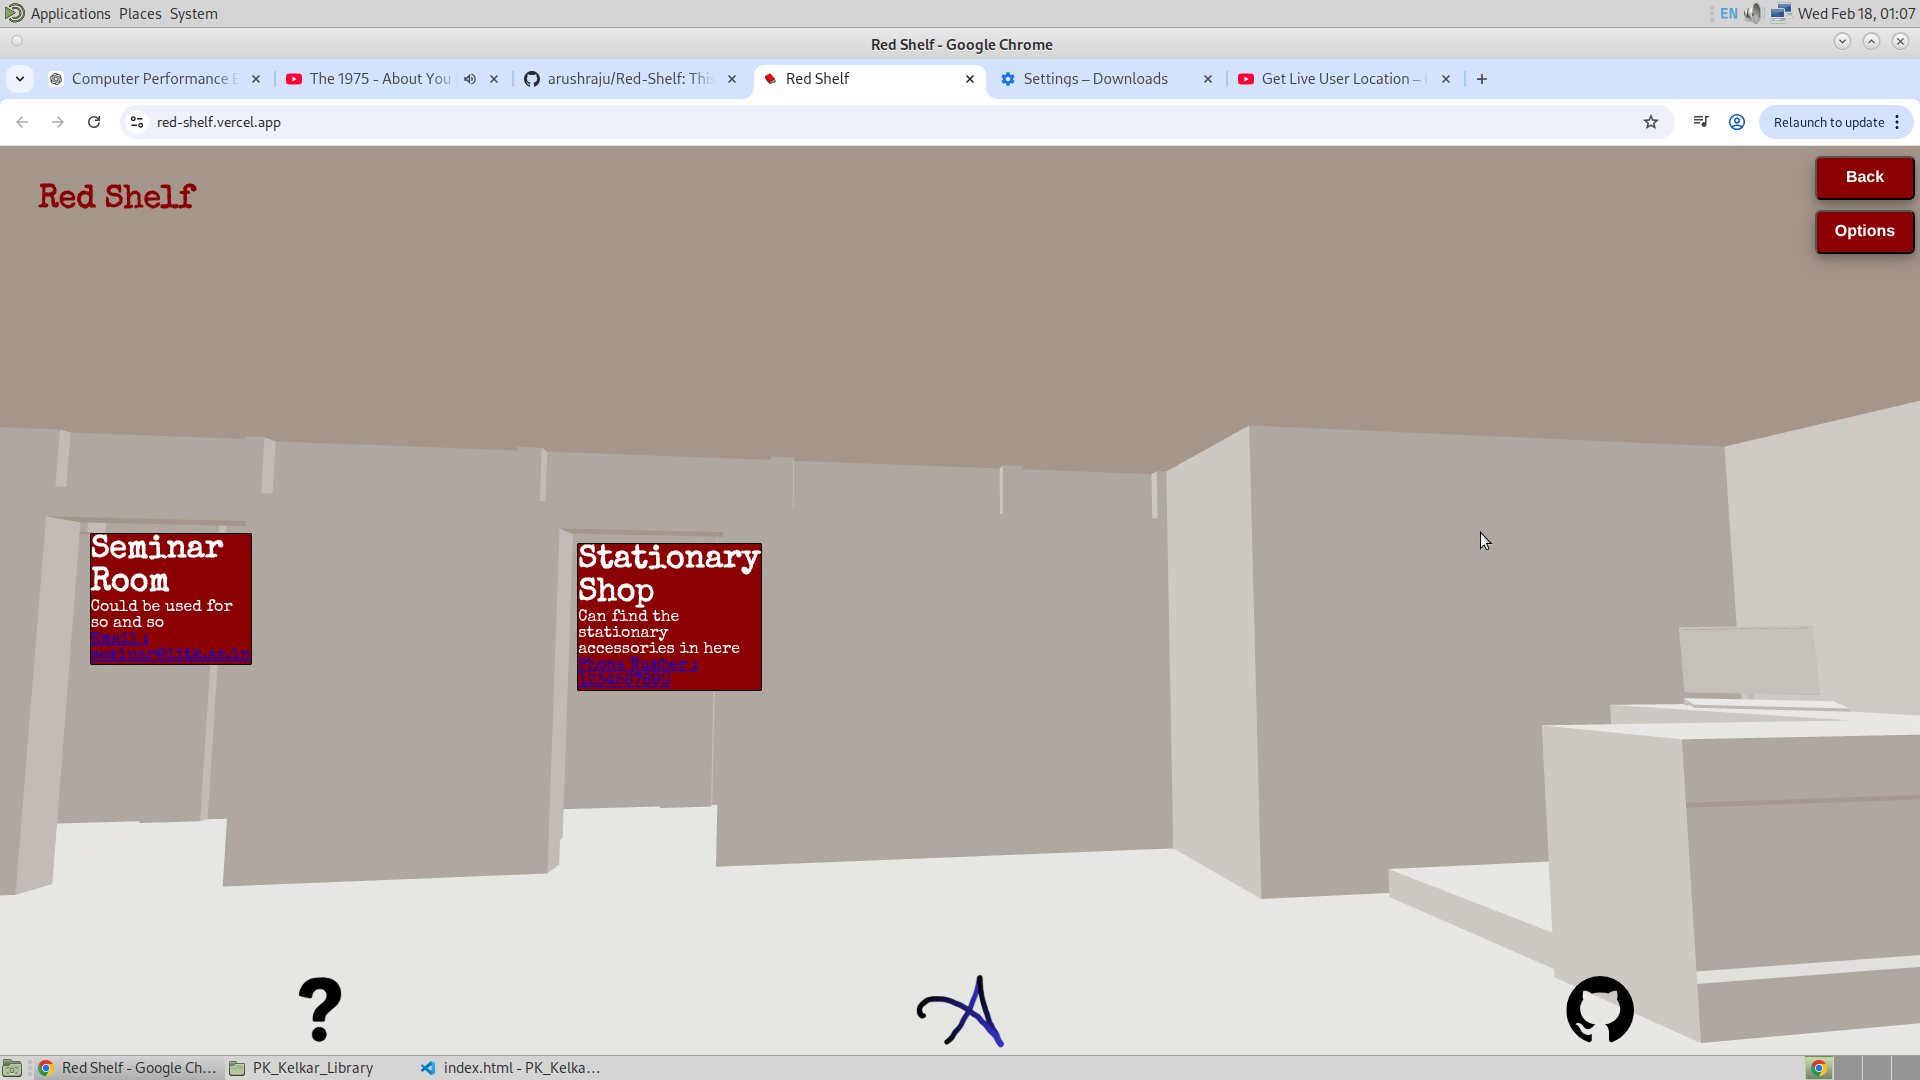
Entrance Frustum Pop Up
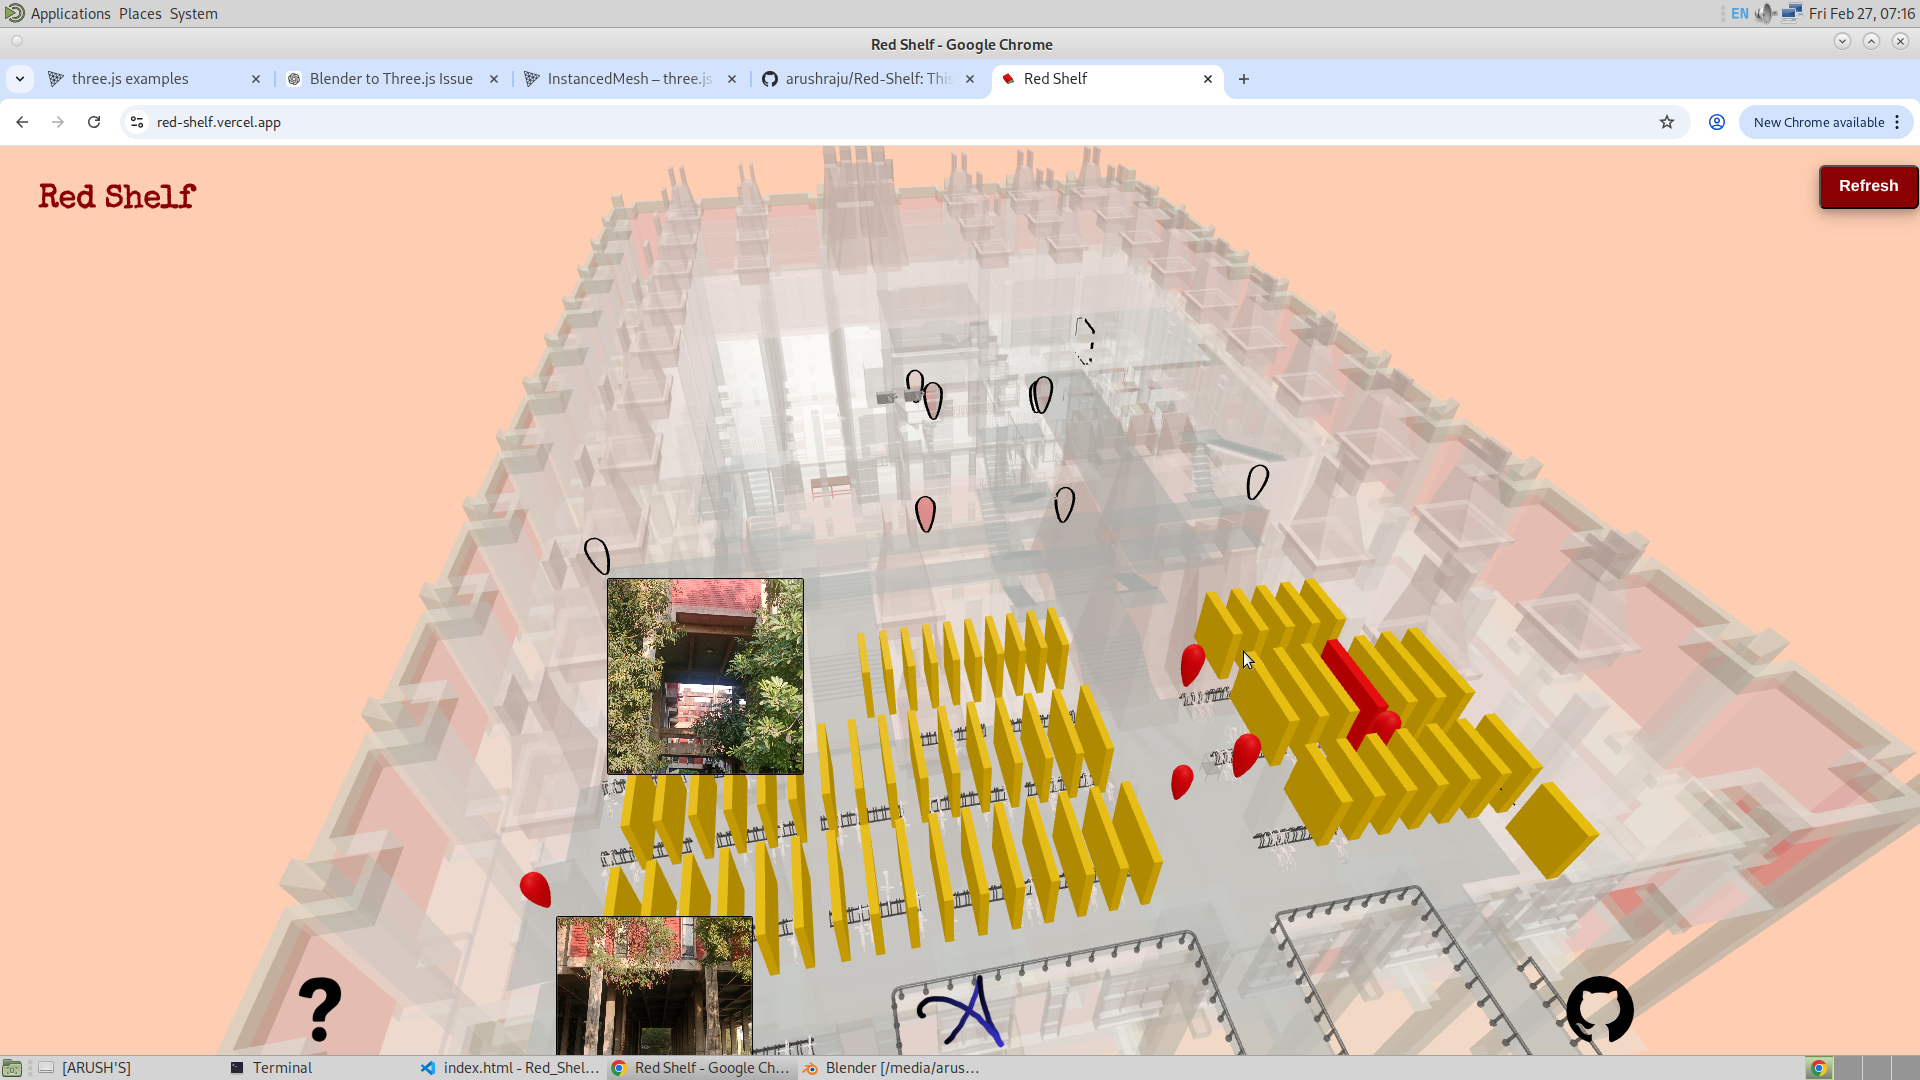
In here I have used the concept of frustum and created an entrance frustum that makes it easier for the user to understand where to start. I understand that even though the model is made to replicate the actual library as much as possible, it is still possible that the user might be unable to find themselves inside the app. So for that, I have added these entrance pop-ups with actual pictures of those locations. This allows the user to understand exactly where to begin.
While making this, I realized that having all four pop-ups appear at the same time would make it messy. So I used the coordinates of the camera to determine which side of the library the user is currently viewing. The Z-coordinate of the camera (which divides the library into two halves) decides which pop-ups should be shown. If the Z-coordinate is positive or negative, it determines whether the pop-ups on this side or the opposite side should be displayed.
I also realized that if the pop-up is too large, it can cover almost the entire screen, especially on smaller devices. To handle this, I controlled the size of the pop-up depending on the zoom level of the camera. When fully zoomed in, the scale of the pop-up increases up to 1.5, and when completely zoomed out, it scales down to zero. The scale is then linearly interpolated for any given distance of the camera from the orbital controls target. I have also added he event listeners ont he pop up, so if the entrance pop isd very small, one can also click on the pop upmto go that respective GSAP.

The origin of the scaling is also checked to prevent the pop-up from deviating from its location due to scaling offset. Similarly, additional adjustments were made to ensure the pop-up remains visually stable and aligned during interaction.
Developed Mesh :
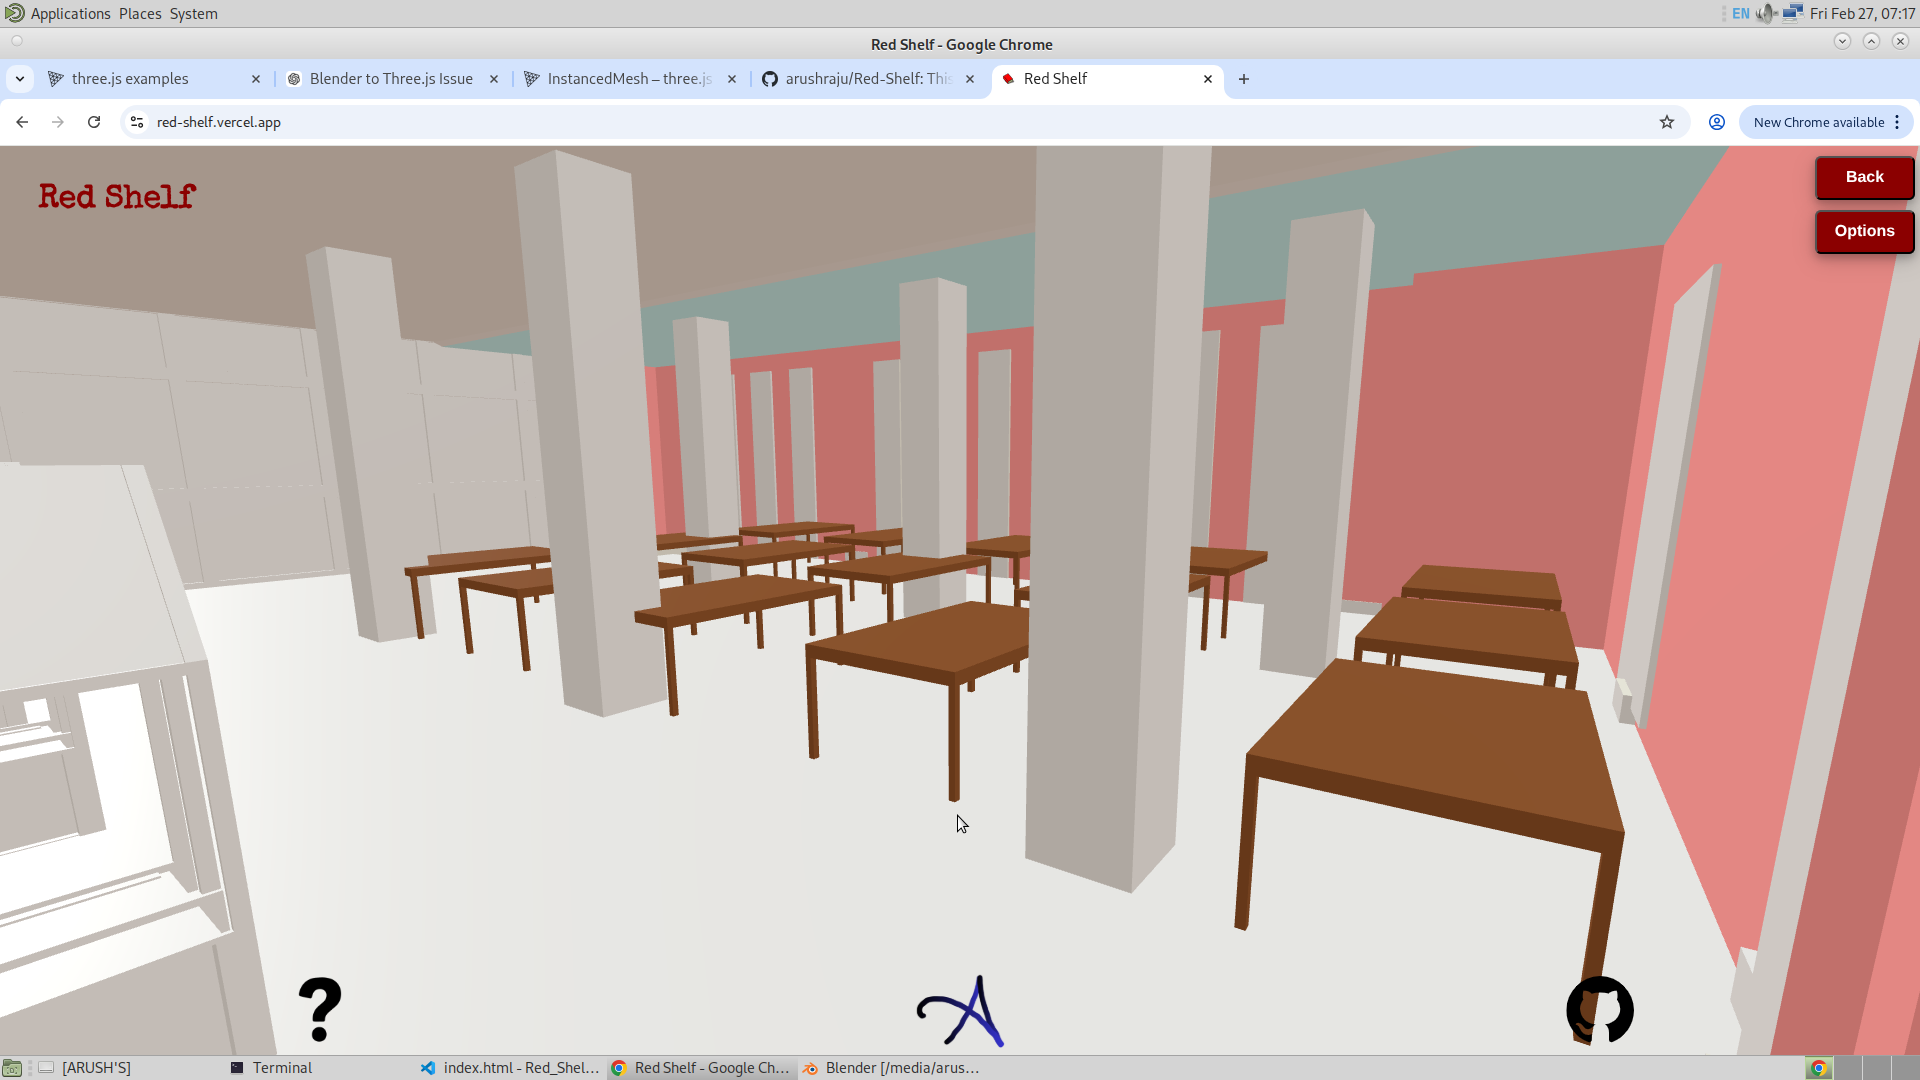
I have also developed the mesh connecting the first floor to the second floor and down to the ground floor. On the ground floor, I added the washroom section, the kiosk machine, and the reading room. For the tables, I used instancing.

Similarly, for the first floor, I used geometry instancing to create the tables. The glass door near the washroom side of the first floor has also been modeled. Both of them could be seen in the image beow
Finally, the second floor has also been created — not with many details yet, but enough to make it presentable.
Additional Frustum :
This is not the beginning. I am planning to add even more frustums along the way so that everything can be clearly defined and nothing remains under the hood. I have added the following frustums just to demonstrate the potential of this feature.
I would also like to note that this frustum feature sometimes fails on mobile phones but works completely fine on desktop. It might happen that the GSAP at the entrance of the library and the first one inside the library disconnect from each other (no back-and-forth traveling possible) when the frustum is turned on on a smartphone. However, this issue does not occur on desktop.
Bouncy Next GSAP
This still requires some refinement, but it is working. It makes the NEXT GSAP bounce according to the ID entered, indicating which pop-up the user needs to click. This took quite a bit of time to implement, but in the code section, I will explain how I finally managed to do it. Here, I learned about gsap.killTweensOf(div), which stops the GSAP animation that was previously applied. It is quite useful.
With this, I also realized that it is not necessary to explicitly tell the user to click the GSAP. The entrance GSAP will naturally be clicked since the pop-ups are visible. However, to help the user identify the next GSAP, making it bouncy should be sufficient. I do not think anything more needs to be added to this feature in the future.
Now to make this, I have actually mapped all the GSAP and have programmed the route, could be considered as hard coded. Given below is the image of the map
Outline Feature :
This has to be one of the best things that happened while developing Red Shelf. I am using the outline function in Three.js, which creates a mesh outline through post-processing. Along with the added colors, it has made the app extremely beautiful, I would say. However, with the added benefit of the outline, I also noticed that it significantly slows down the application.
Because of this, I initially disabled the outline feature and instead provided an option to enable it. If a user feels their system has enough power to run the app smoothly without lag, they can turn it on. Shown below are some images of the library with the outline enabled.
27/02/2026
So fimaly today, I was able to put some important features in the app. I will discuss about each of these feature. Here is the list of features that were implemented today.
- Complete Instacing of the bookshelfs
- Introduction of Target Bookshelf
- Availability of Seats in the library
- Complete Instancing of the Bookshelves :
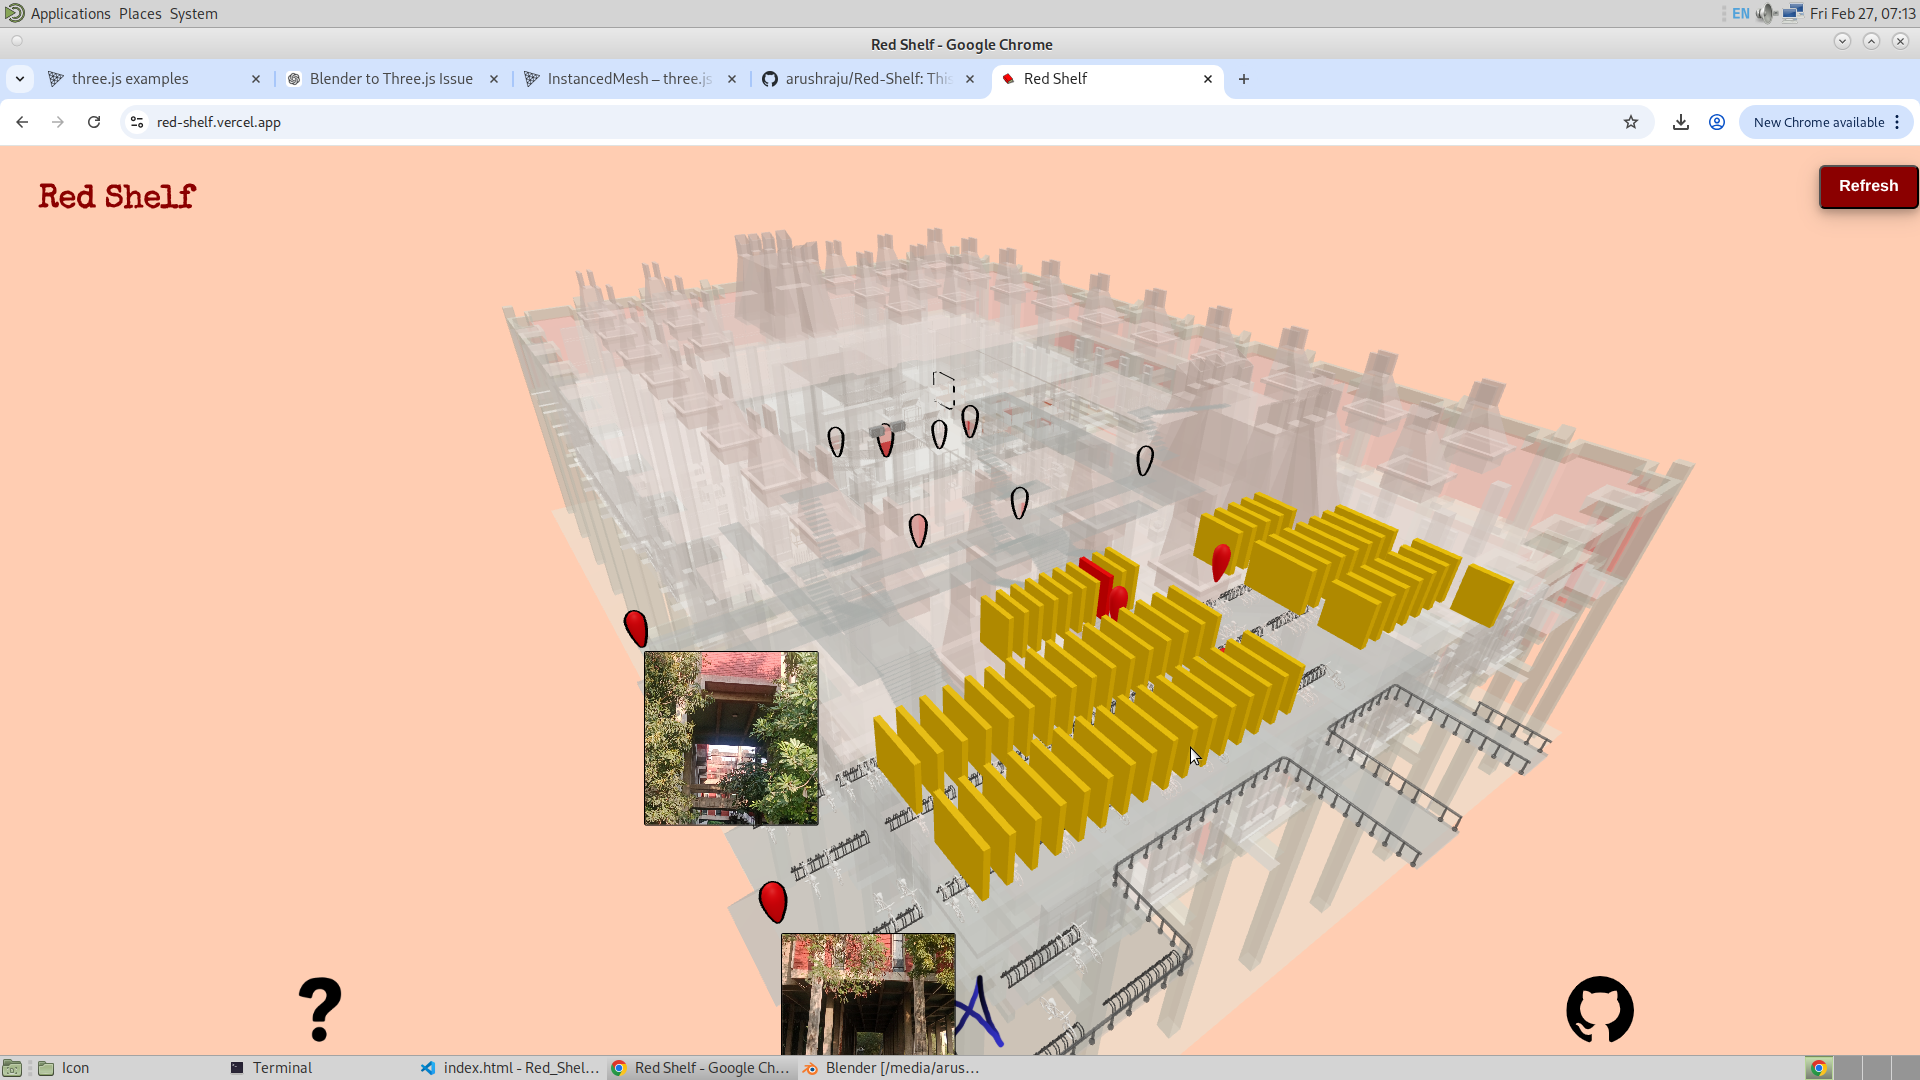
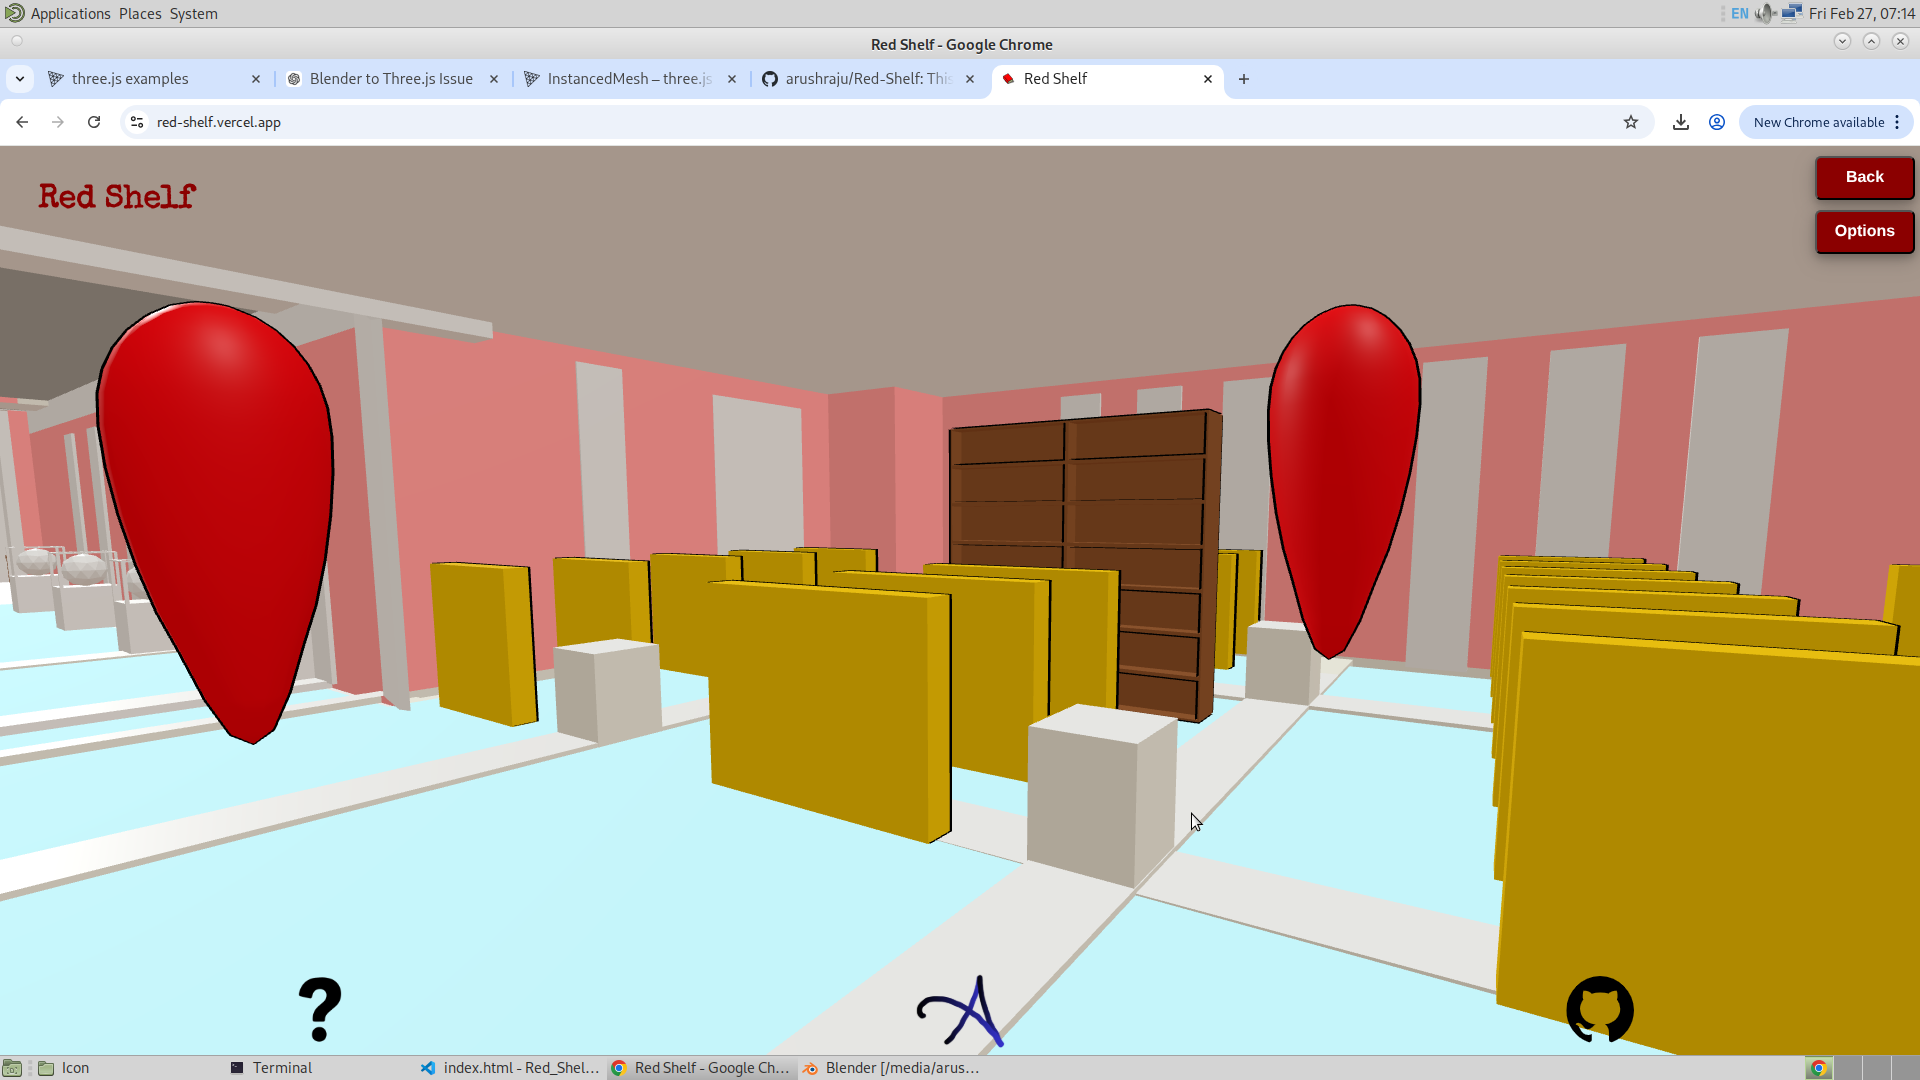
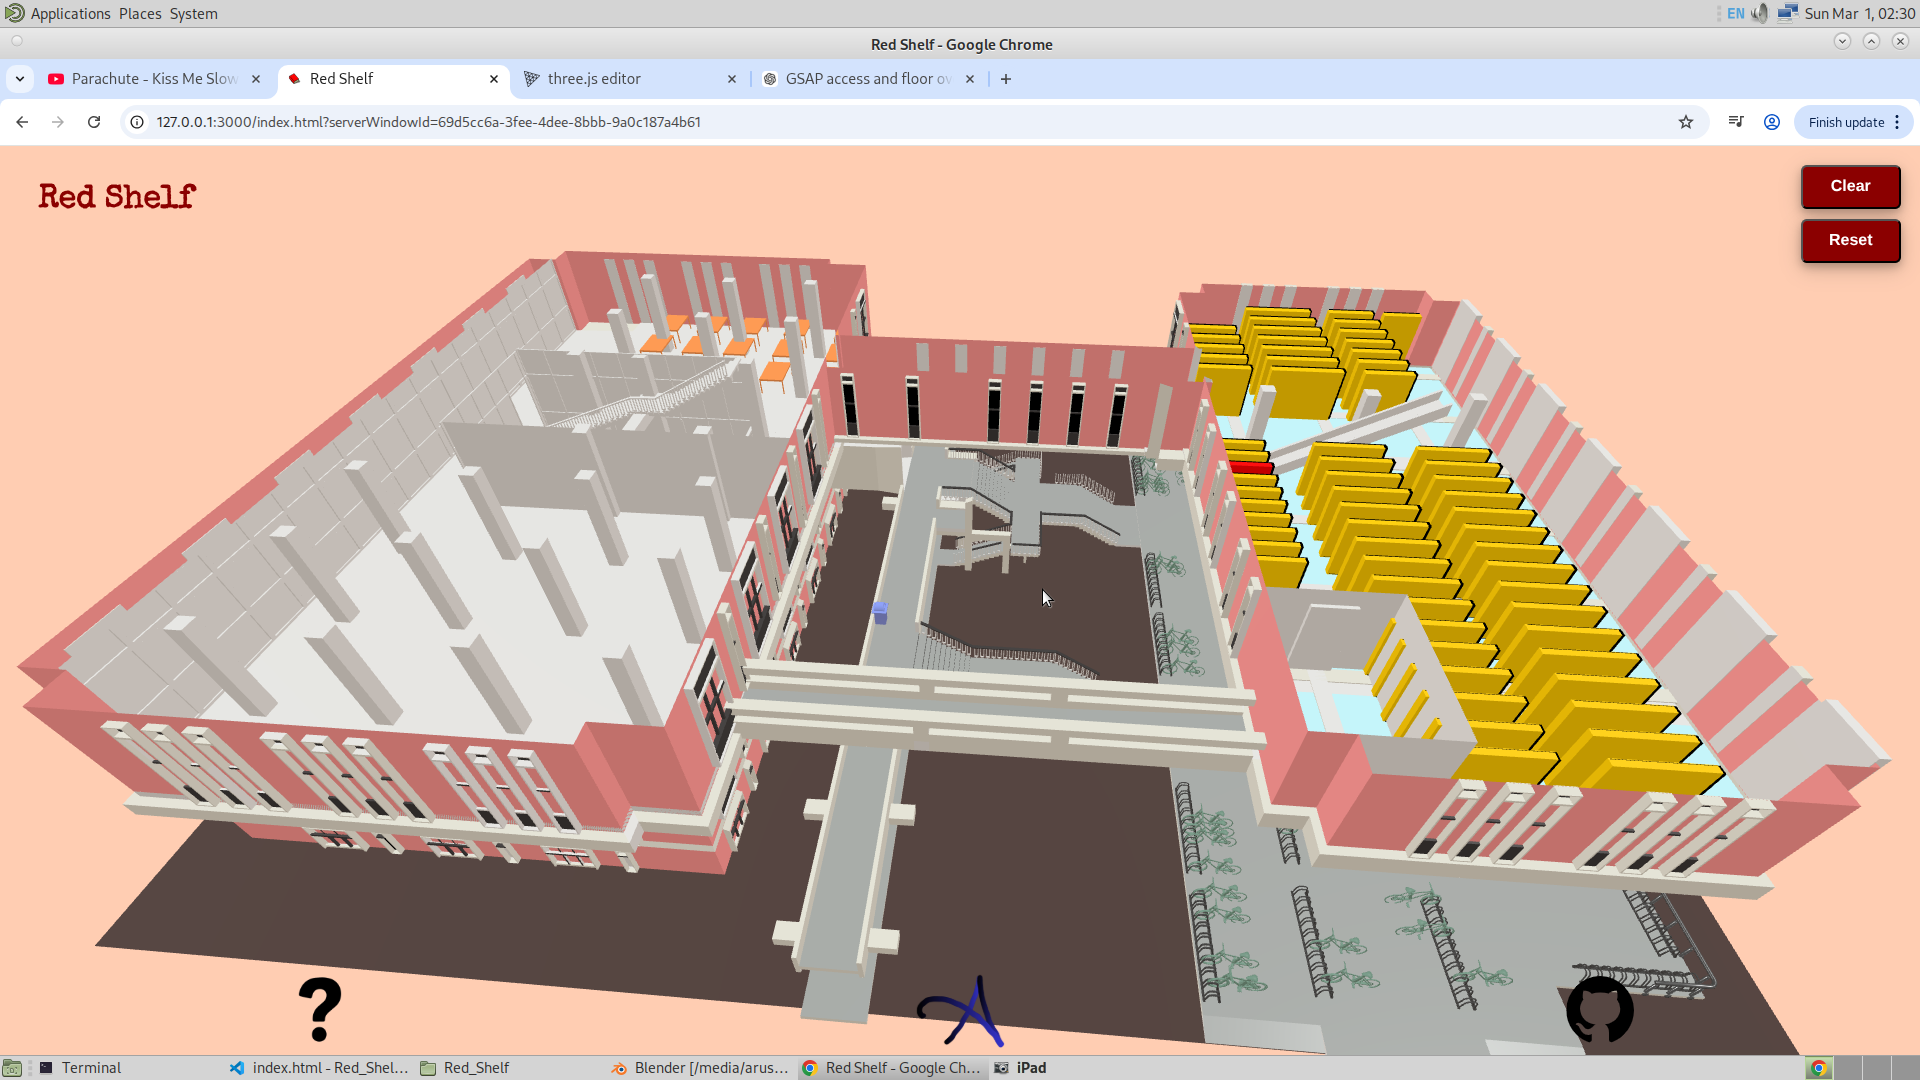
This is what took a large portion of my time. Here, I converted the bookshelves into instances, which significantly reduced the memory required to store them. One major advantage of this approach is that since I am no longer storing separate meshes, I can introduce more detailed geometry without worrying too much about the overall file size. I also redeveloped the entire logic that I had previously written for the meshed bookshelves, but this time adapted it for instancing. This gave me a significant advantage in terms of performance and flexibility. The file size reduced from 9.8 MB to 9.2 MB, which is a positive indication of optimization. Below is an example of a shelf turning red, similar to how it behaved in the meshed case. I would like to emphasize again that these are not individual meshes but instances of a single mesh, and their behavior is controlled using the instance index. Additionally, along the way, I realized that it would be visually better to keep the other bookshelves in yellow.
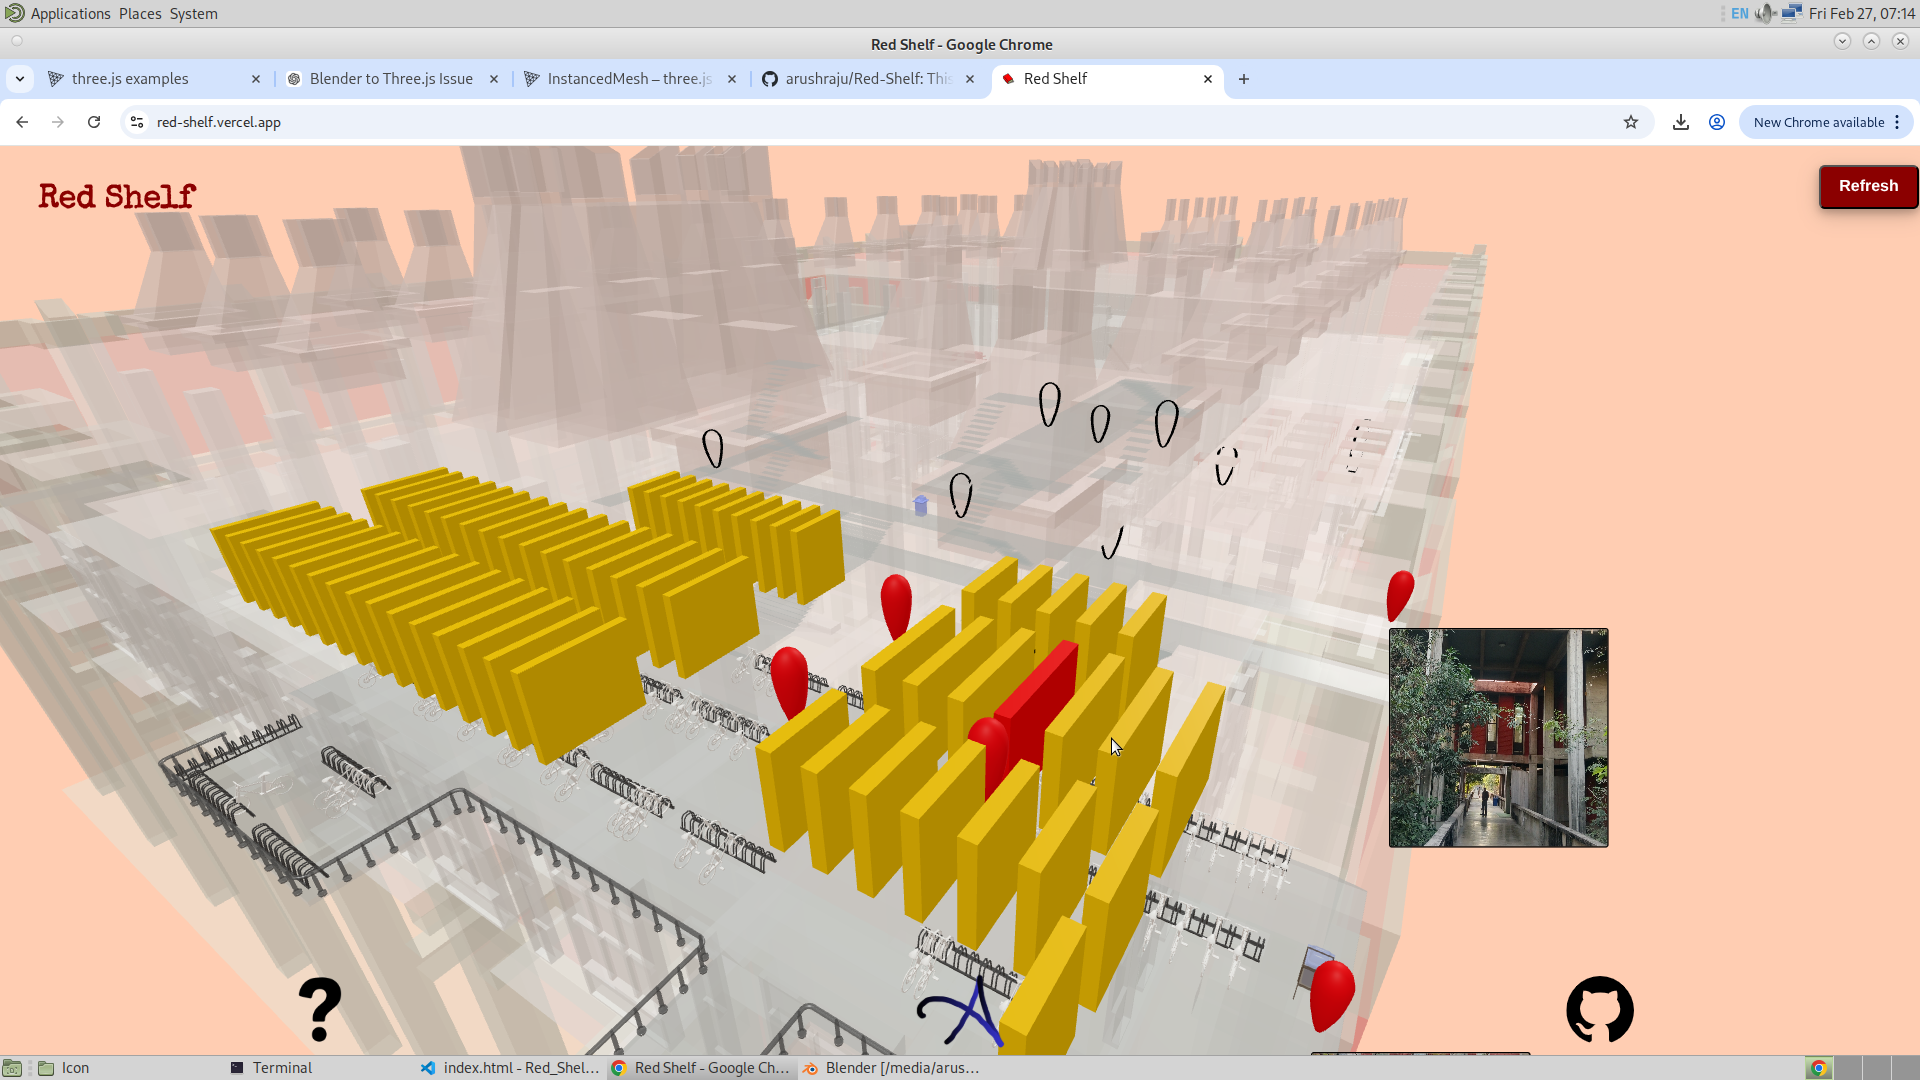
- Introduction of Target Bookshelf :
As mentioned earlier, converting the bookshelves into instances saved storage. Because of that, I was able to create a more detailed bookshelf model specifically for locating books, with full access to all the racks inside it. This allows the user to navigate to a specific section of the bookshelf. This detailed bookshelf is an actual mesh. Its position is set based on the corresponding instance at that location. When the user navigates to a bookshelf using GSAP, the instance at that position scales down, and the detailed mesh (the target bookshelf) is moved to the exact position of that instance. When exiting GSAP mode, the instance is scaled back up and the detailed bookshelf is scaled down. Below is the detailed bookshelf view.
Availability of Seats in the Library :
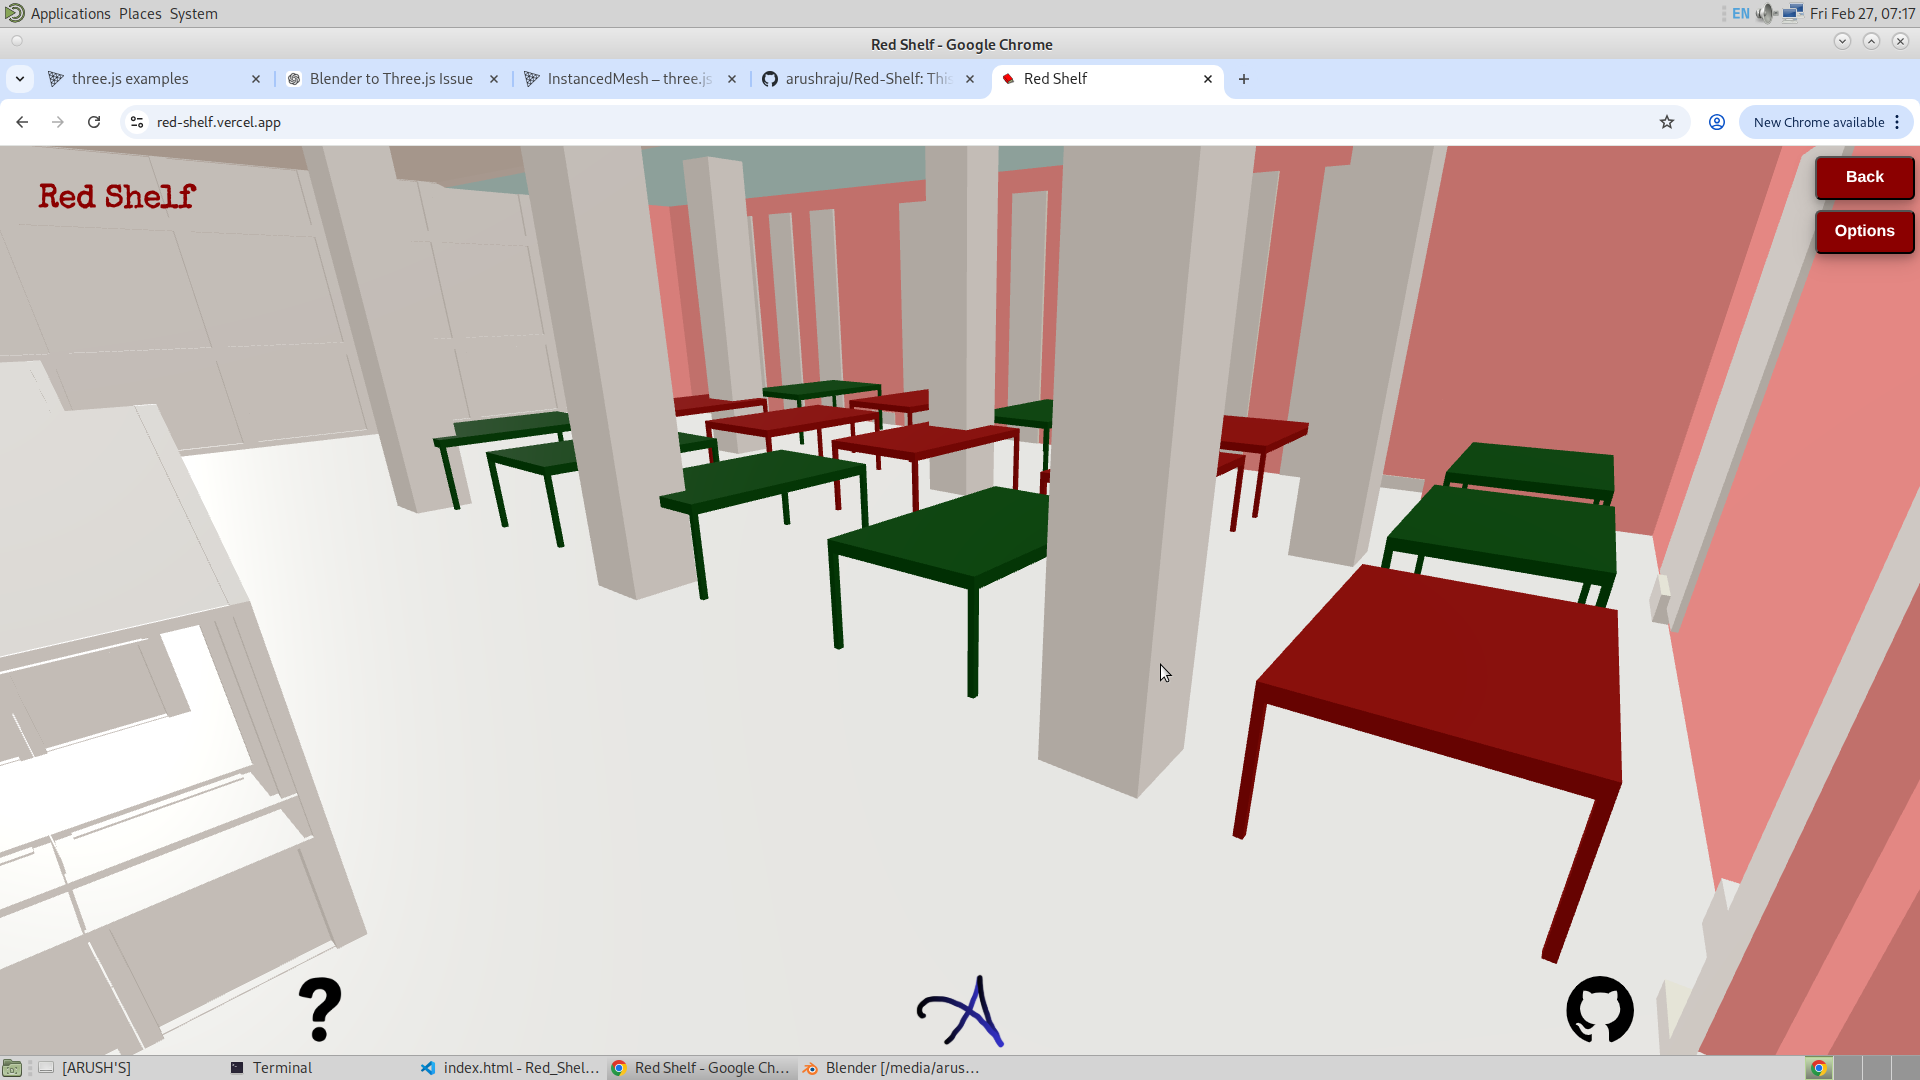
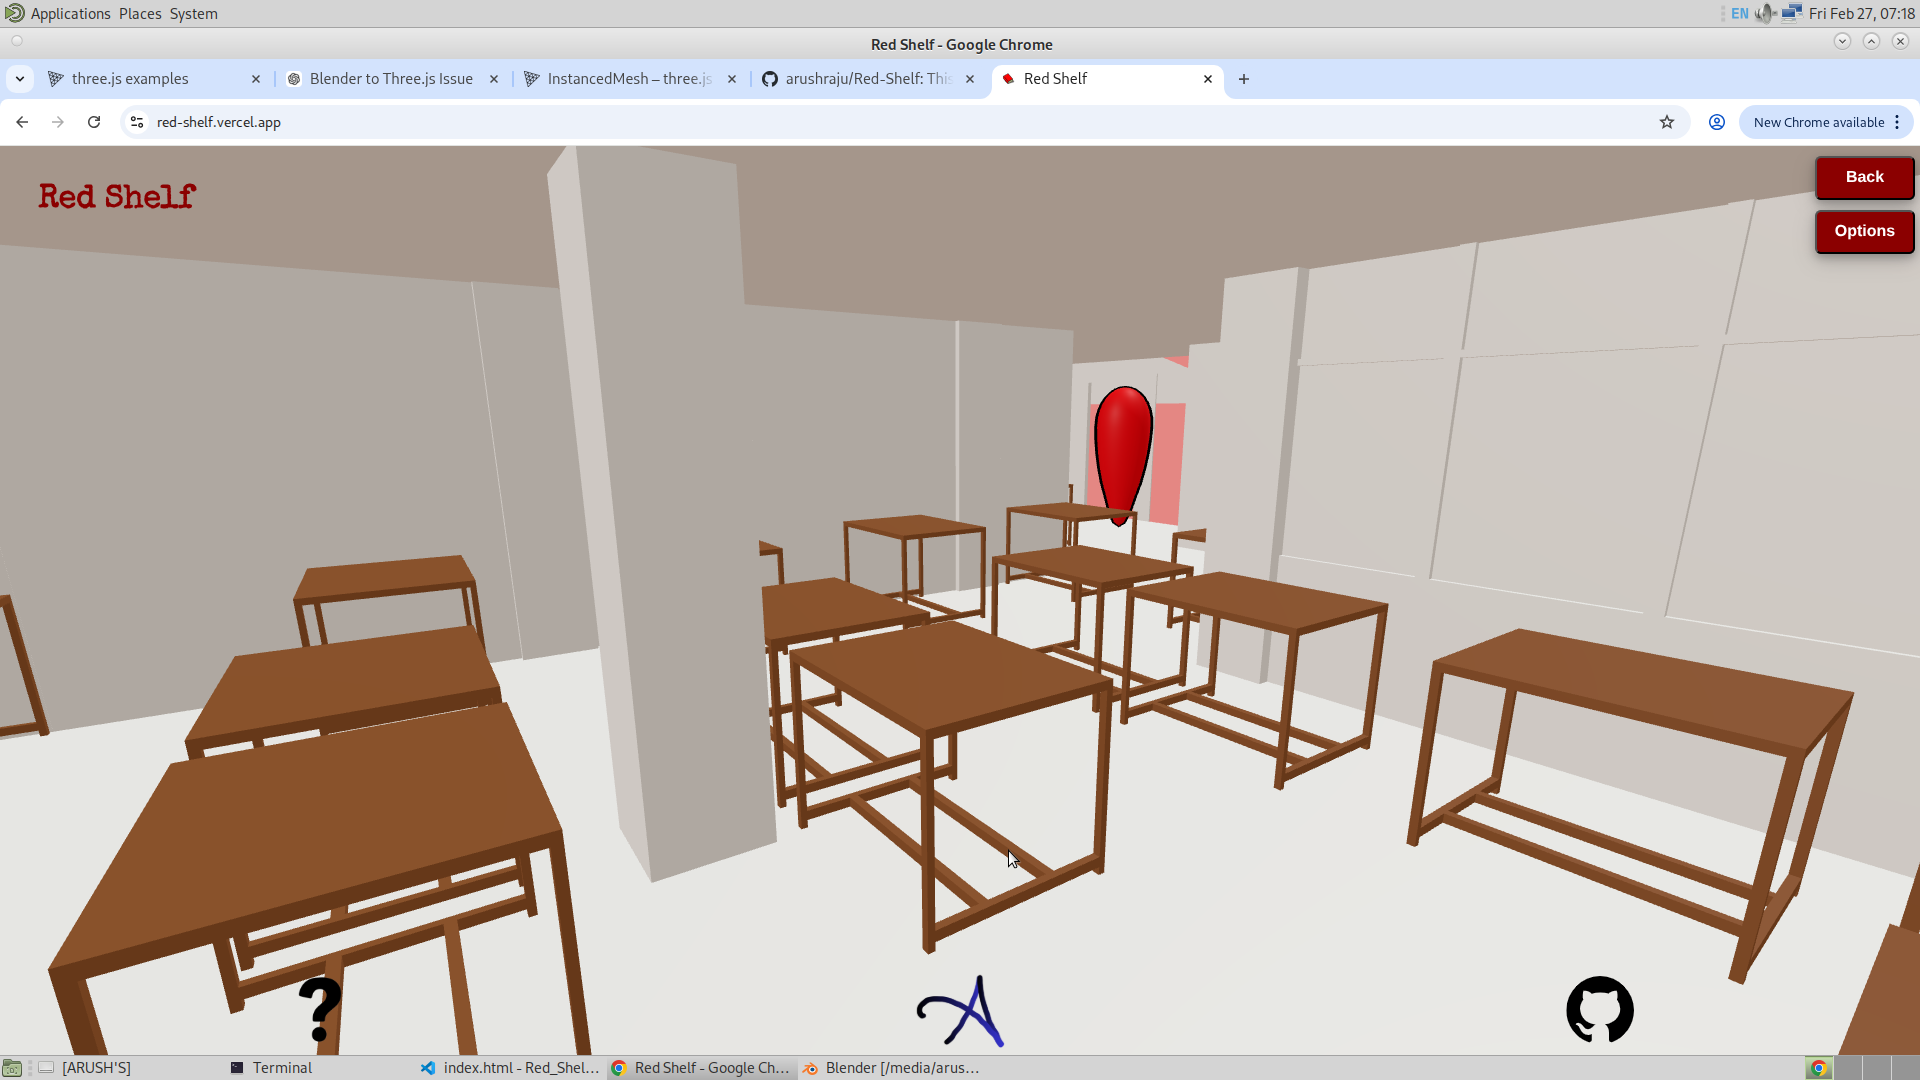
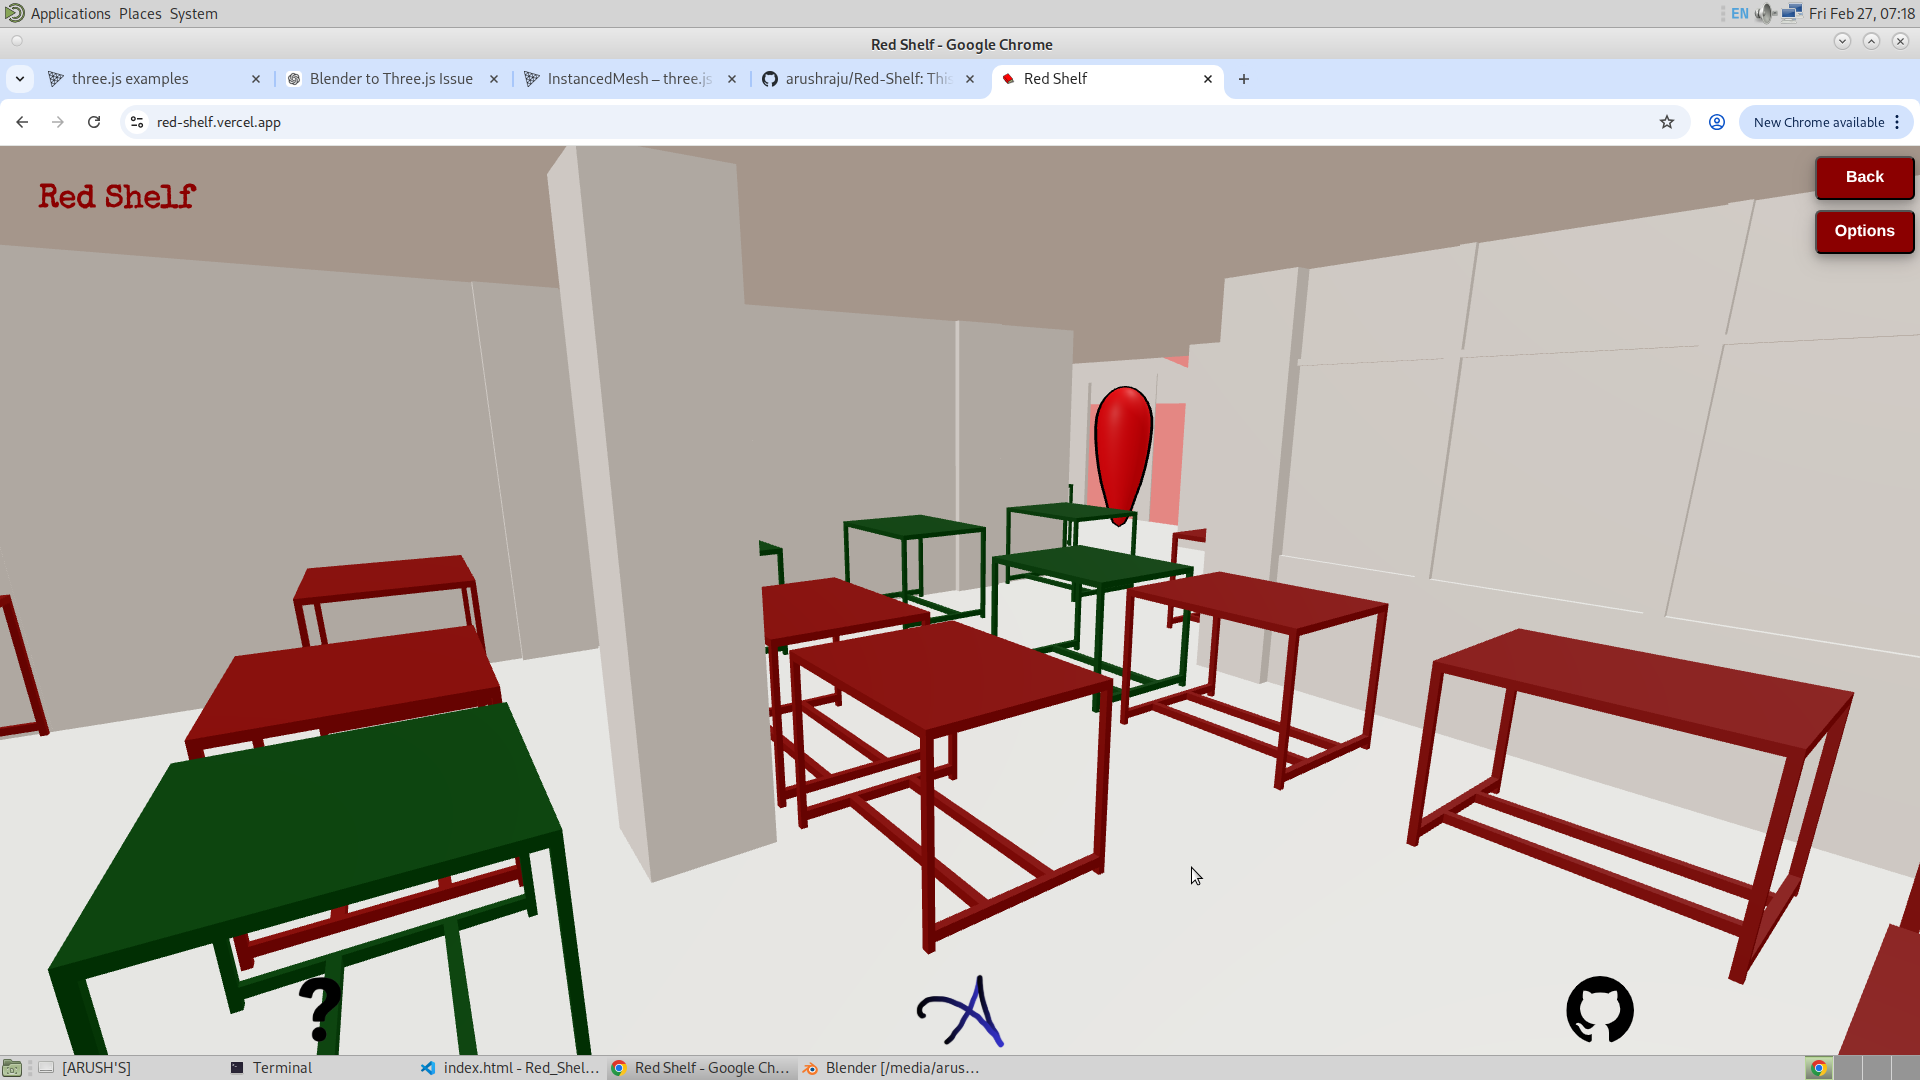
Finally, a feature that I consider just as important as finding a book — checking seat occupancy in the library. If the data is provided accurately, the application can now display which tables are empty and which are occupied.
This is implemented by controlling the color of each instance, which makes it a practical feature, especially during exam periods. Below are images showing the tables before enabling seat occupancy, followed by views of the feature enabled in the reading room and on the first floor. I also added one more GSAP point in the reading room to provide a better view of the tables. The table with green color are those that are vacant and those with red are occupied.

1/3/2026
So, some other cool features have been added to the app to make it more useful. I will first list the features below and then discuss each of them in detail.
- Direct access to any GSAP using the percentage bar
- 2D floor overview of any floor in the library
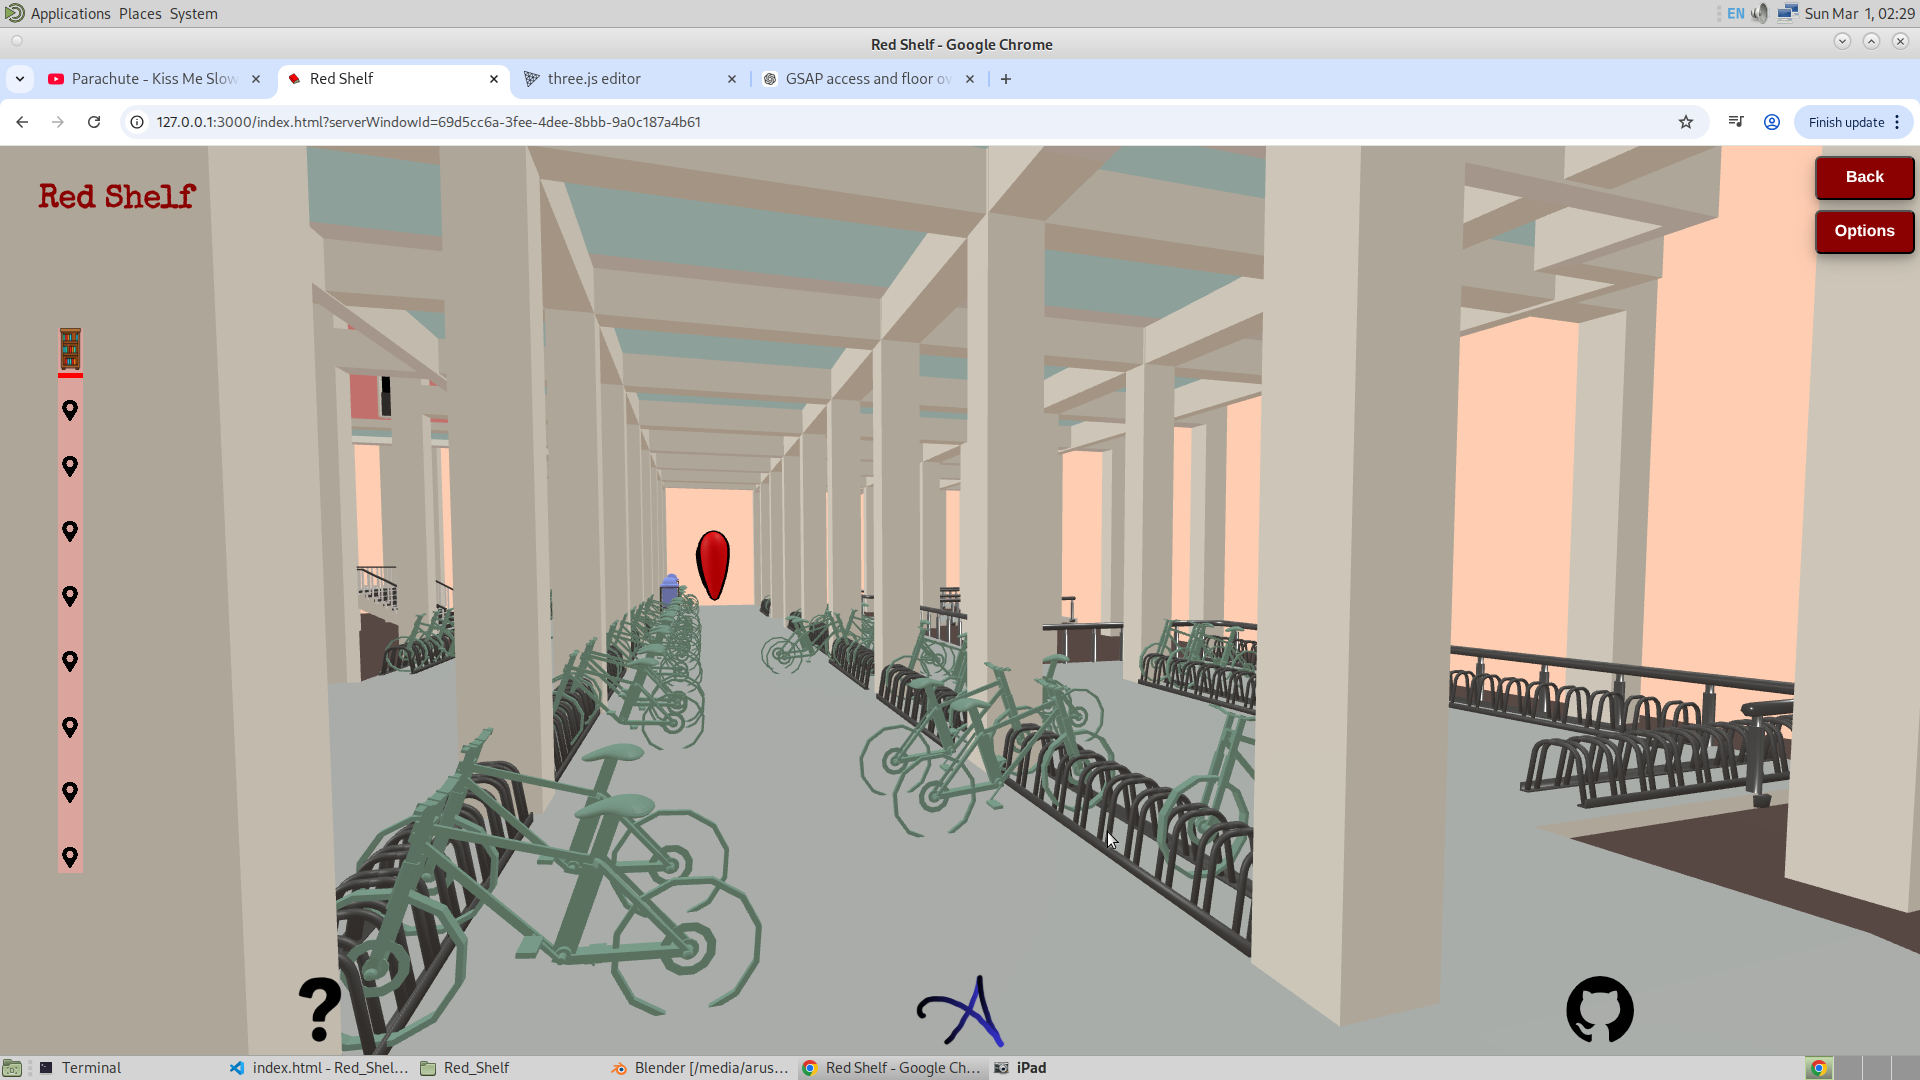
Direct GSAP access using the percentage bar :
Here, I have added GSAP icons on the percentage bar that allow the user to directly go to a specific GSAP. This comes from the understanding that a user might not have time to go to each location one by one, especially if they are already familiar with the structure of the library. Therefore, I added these GSAP icons for quick access.One problem I am finding hard to solve is how to animate the path instead of directly making the camera move in a straight line from one GSAP to another through the mesh. Below is the image showing these GSAP icons on the percentage bar. I will explain how I implemented this feature in the code explanation. I am using class names to handle the creation of these icons and also adding event listeners to them.
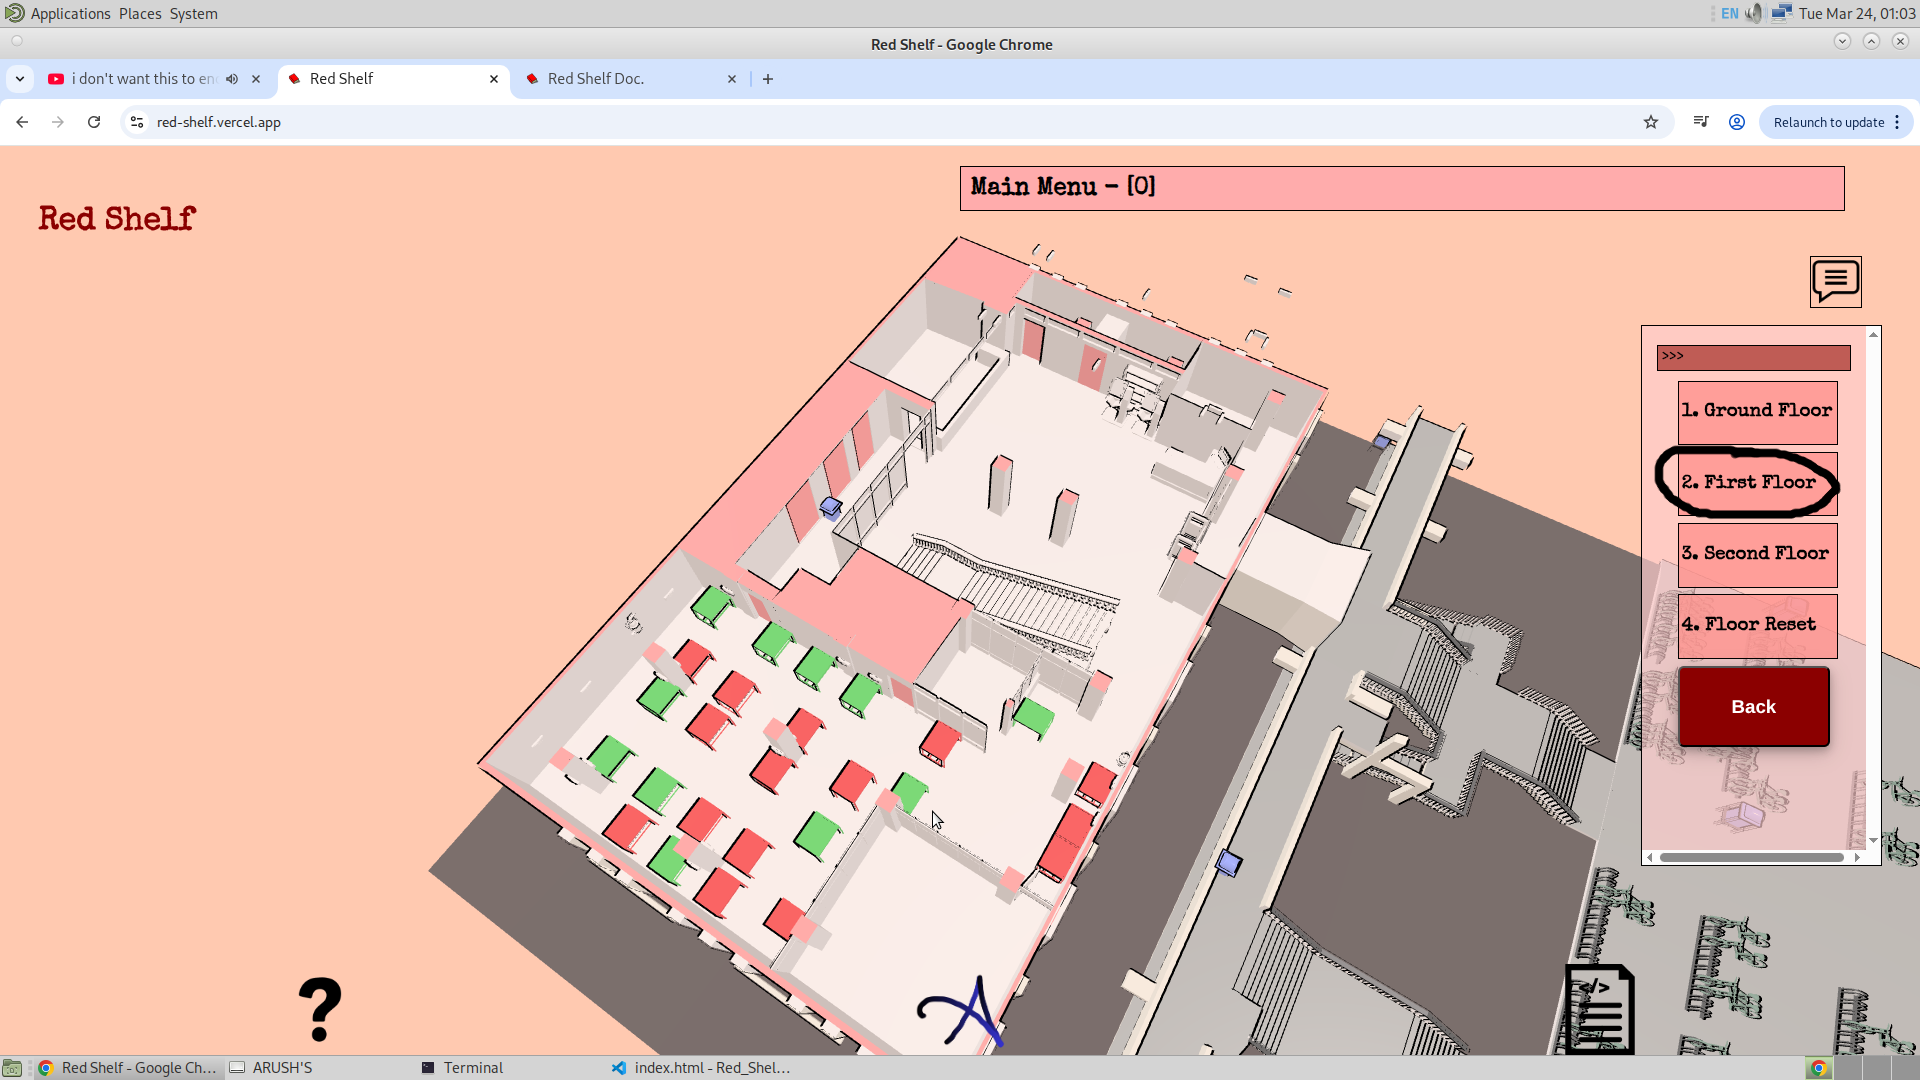
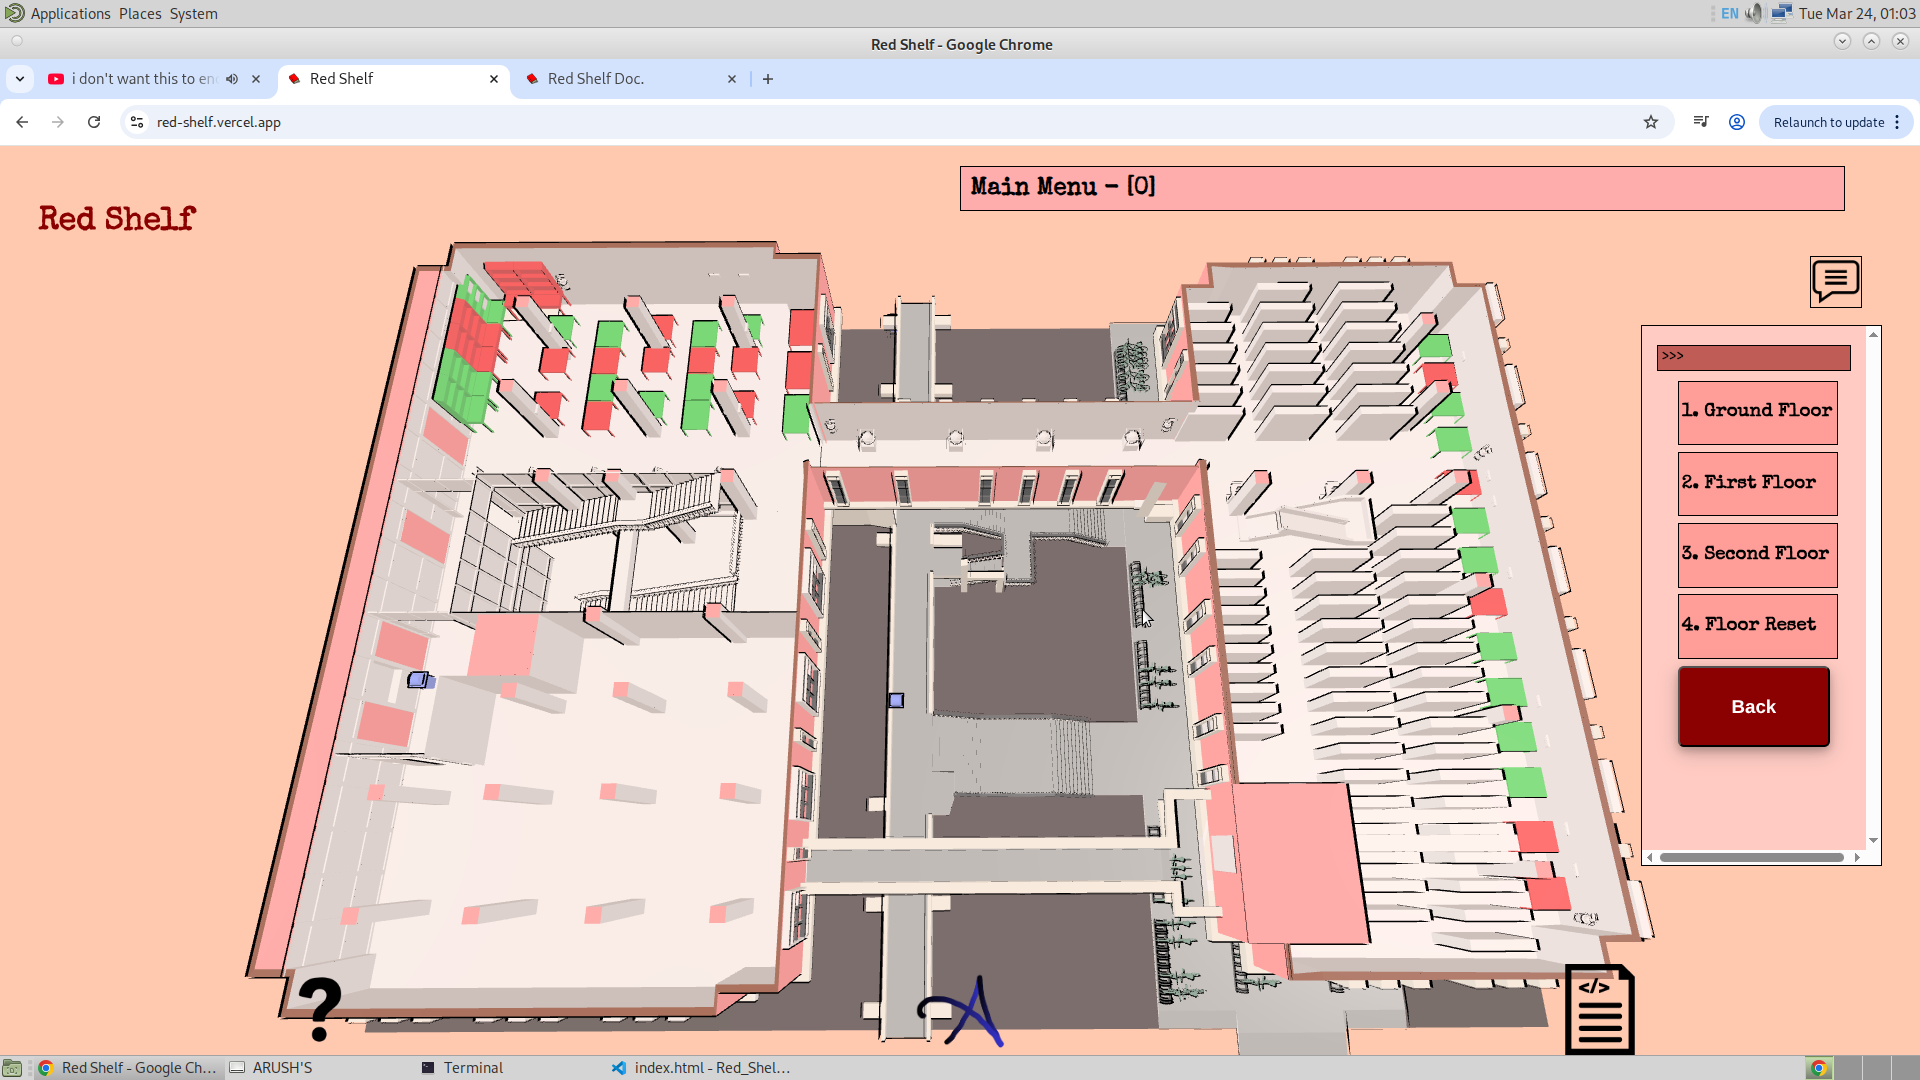
2D floor overview of any floor in the library :
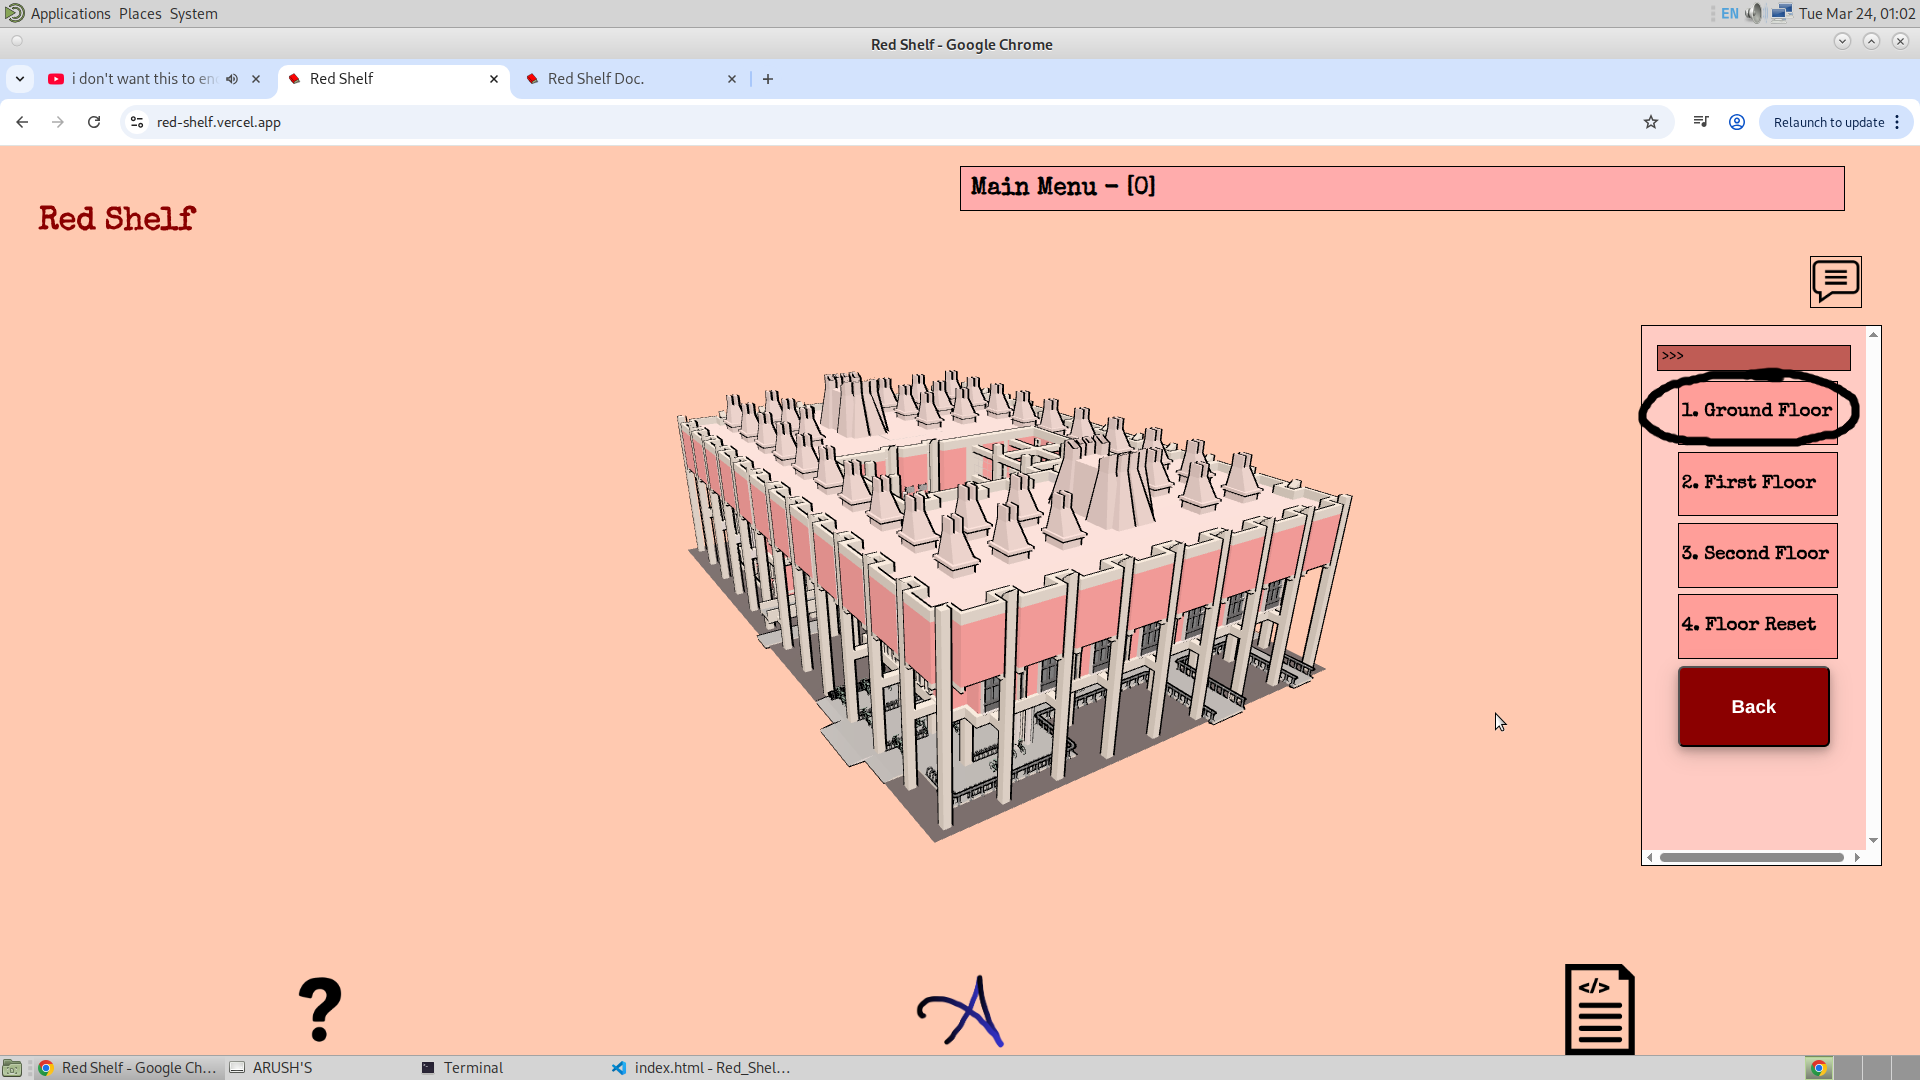
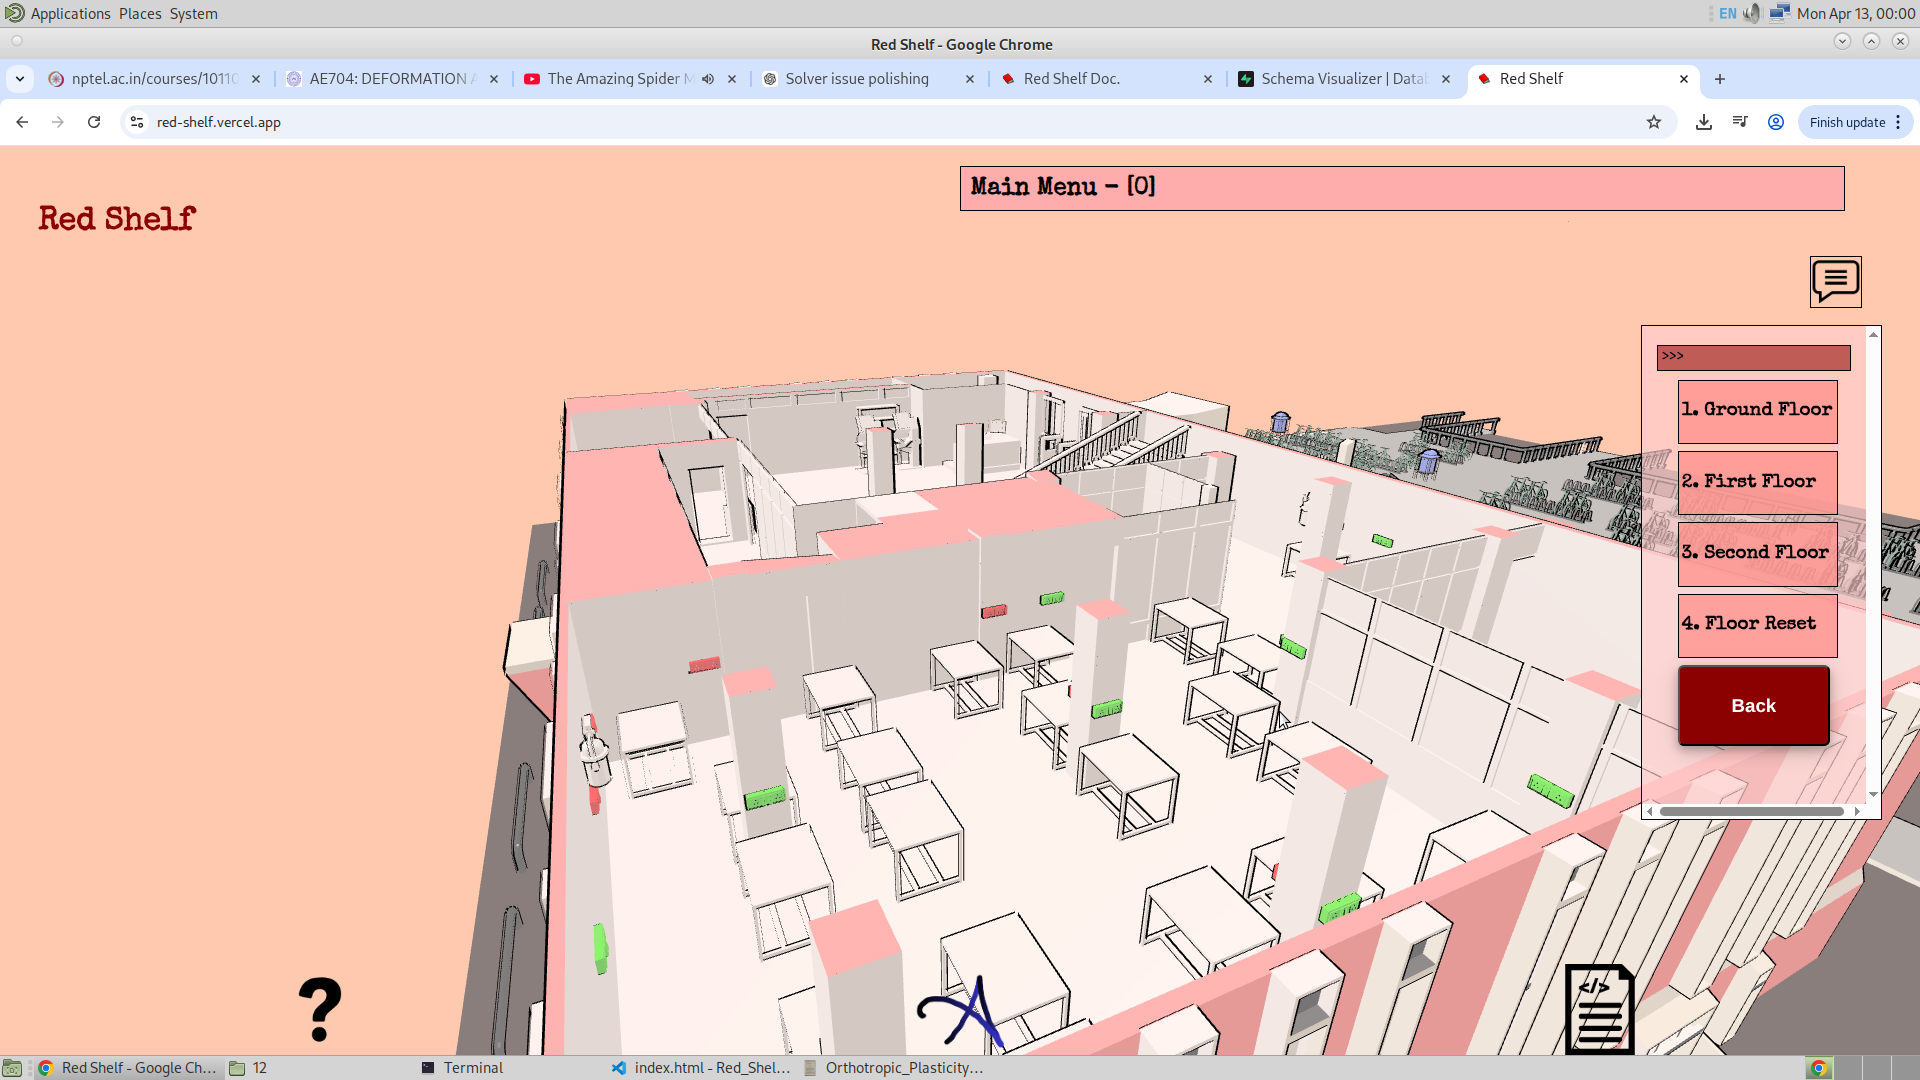
My aim here was to give the user a quick overview of the path they need to take in order to reach the target. To do this, I created a new option called "Floor," which allows the user to view the library and its floors from the top.
This feature can be used to find the path from a top-down perspective and also to see the total number of rooms, their purpose, and the occupied tables — all from above. This can be done for each floor, right from the basement to the second floor.

Now, here are some other features I have in mind:
- Location Sharing : A user could share the location of a table or a bookshelf with others through the app. The user could go to the app and then to the floor section. From there, they could place a GSAP icon at a specific location (for which I will use the Three.js example of dragging and moving an object) and then share that location with another user. The other user will see the icon moving on their phone in real time. This feature could be quite useful. Thanks for the idea, Aseem!
- Game : A game where the user has to guess the book and the shelf where it is located. Depending on how close they are to the target bookshelf, they will be rewarded. This is inspired by a game I saw where the user has to guess a location based on a picture of a street or a place, and depending on how geographically close their guess is, they are awarded points. However, this is not really a core feature, but rather a possibly unnecessary way to make the app more engaging.
2/3/26
So today I didnt do much. Just fixed the color. And minor chnages in the app.
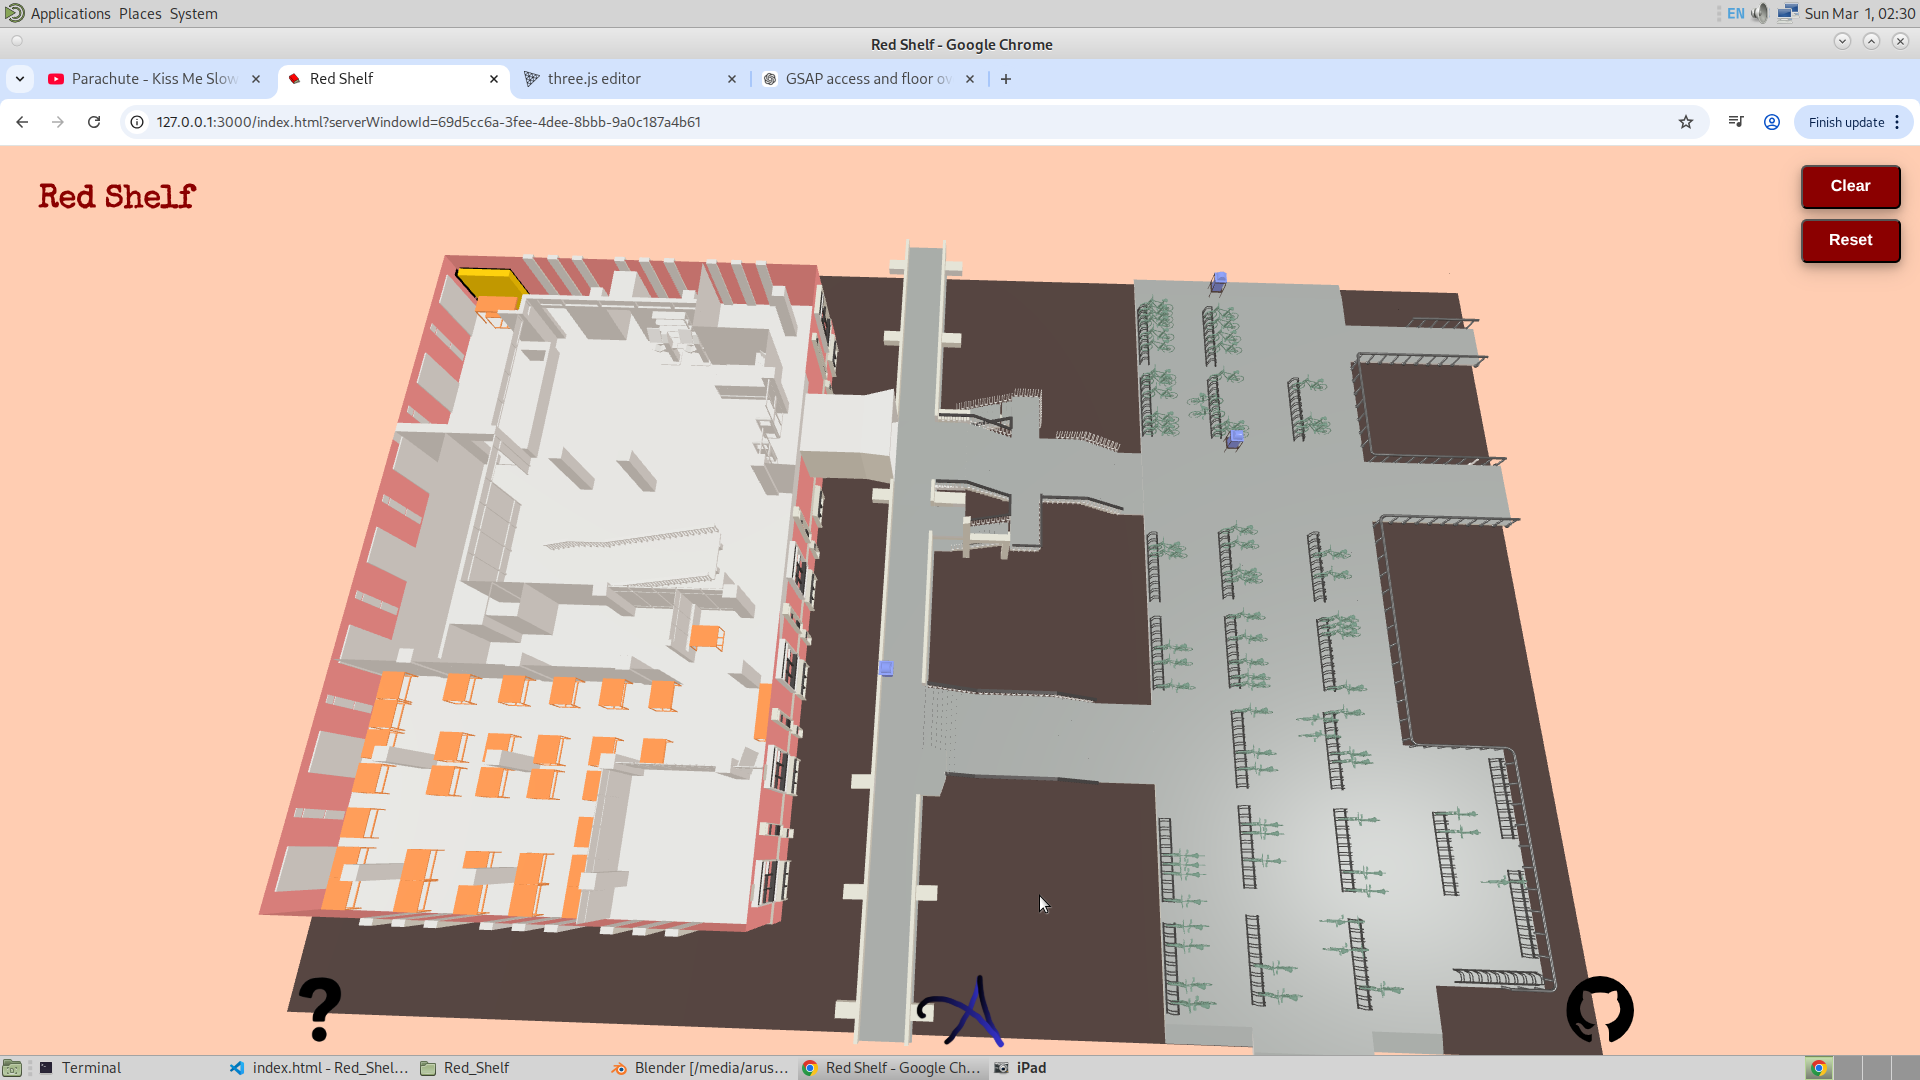
I made the color of the library a bit more light and bright. For some reason, I felt that the colors of the library were dull. And just to increase the brightness of the library, I have made the color grade of the app lighter. Secondly, I have changed the flow of the app. Now, after submitting the ID, I will make the particular floor of the library visible where the book lies. And then the rest of the floor will be scaled down. This is, I think, much better than the opacity setting that I had initially made. Given below are the colors of the library now after making some changes.
3/3/26 (Version 2)
So this is going to be great. I had a meetign with some staff memebers of library, and they are now going to provide me with the data about the bookshelfs. Adftr which I can start filling the data. But meanwhile I have got another great idea. in the talk today, they have asked me if it is possible for the app to provided a way for the user to select the position where he is located at the moment which is the current location. And then select the destination location. And the app must be able to find the optimal path to reach there. This is going to fucking strech the graph search muscle. Amazing. There are few options. But I have decided to go with A* Algorithm and the reason is I have got an exellent tutorial that explains me about this algorithm. Here it is.
3/3/26
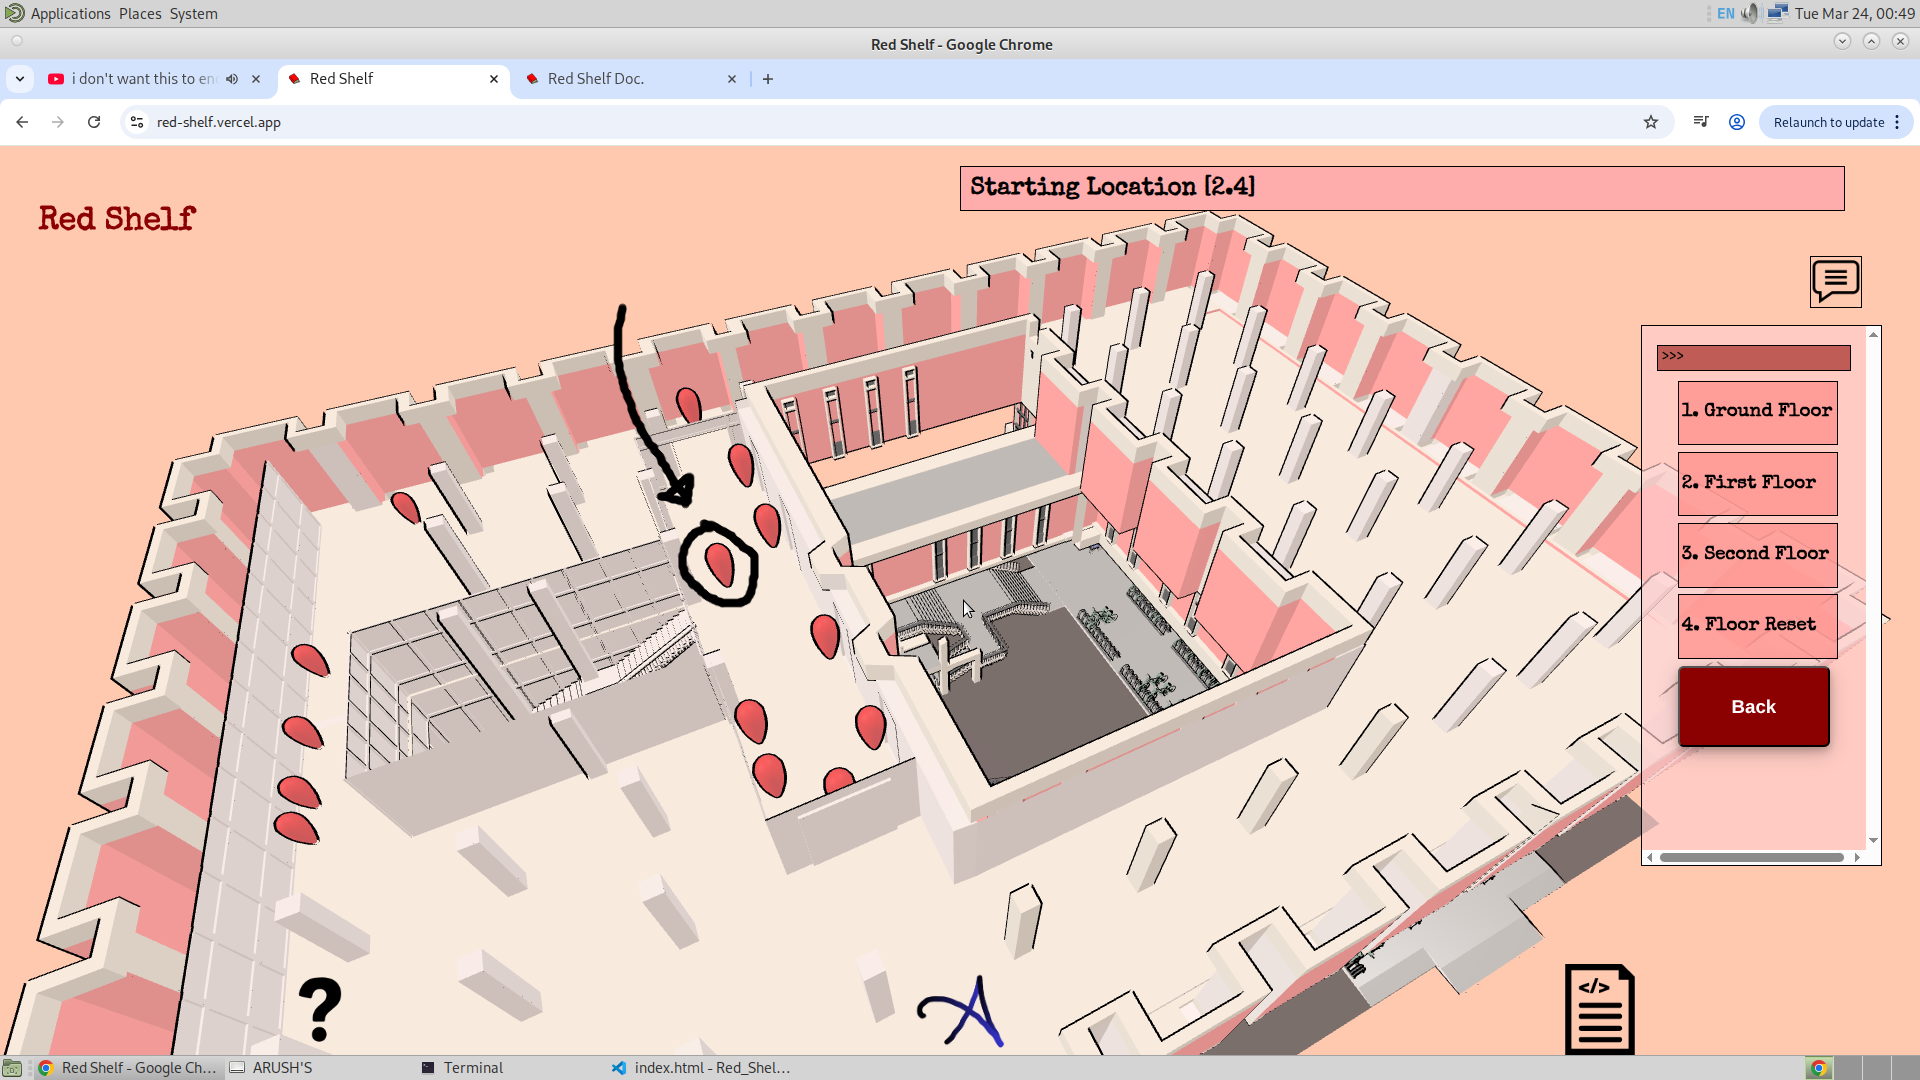
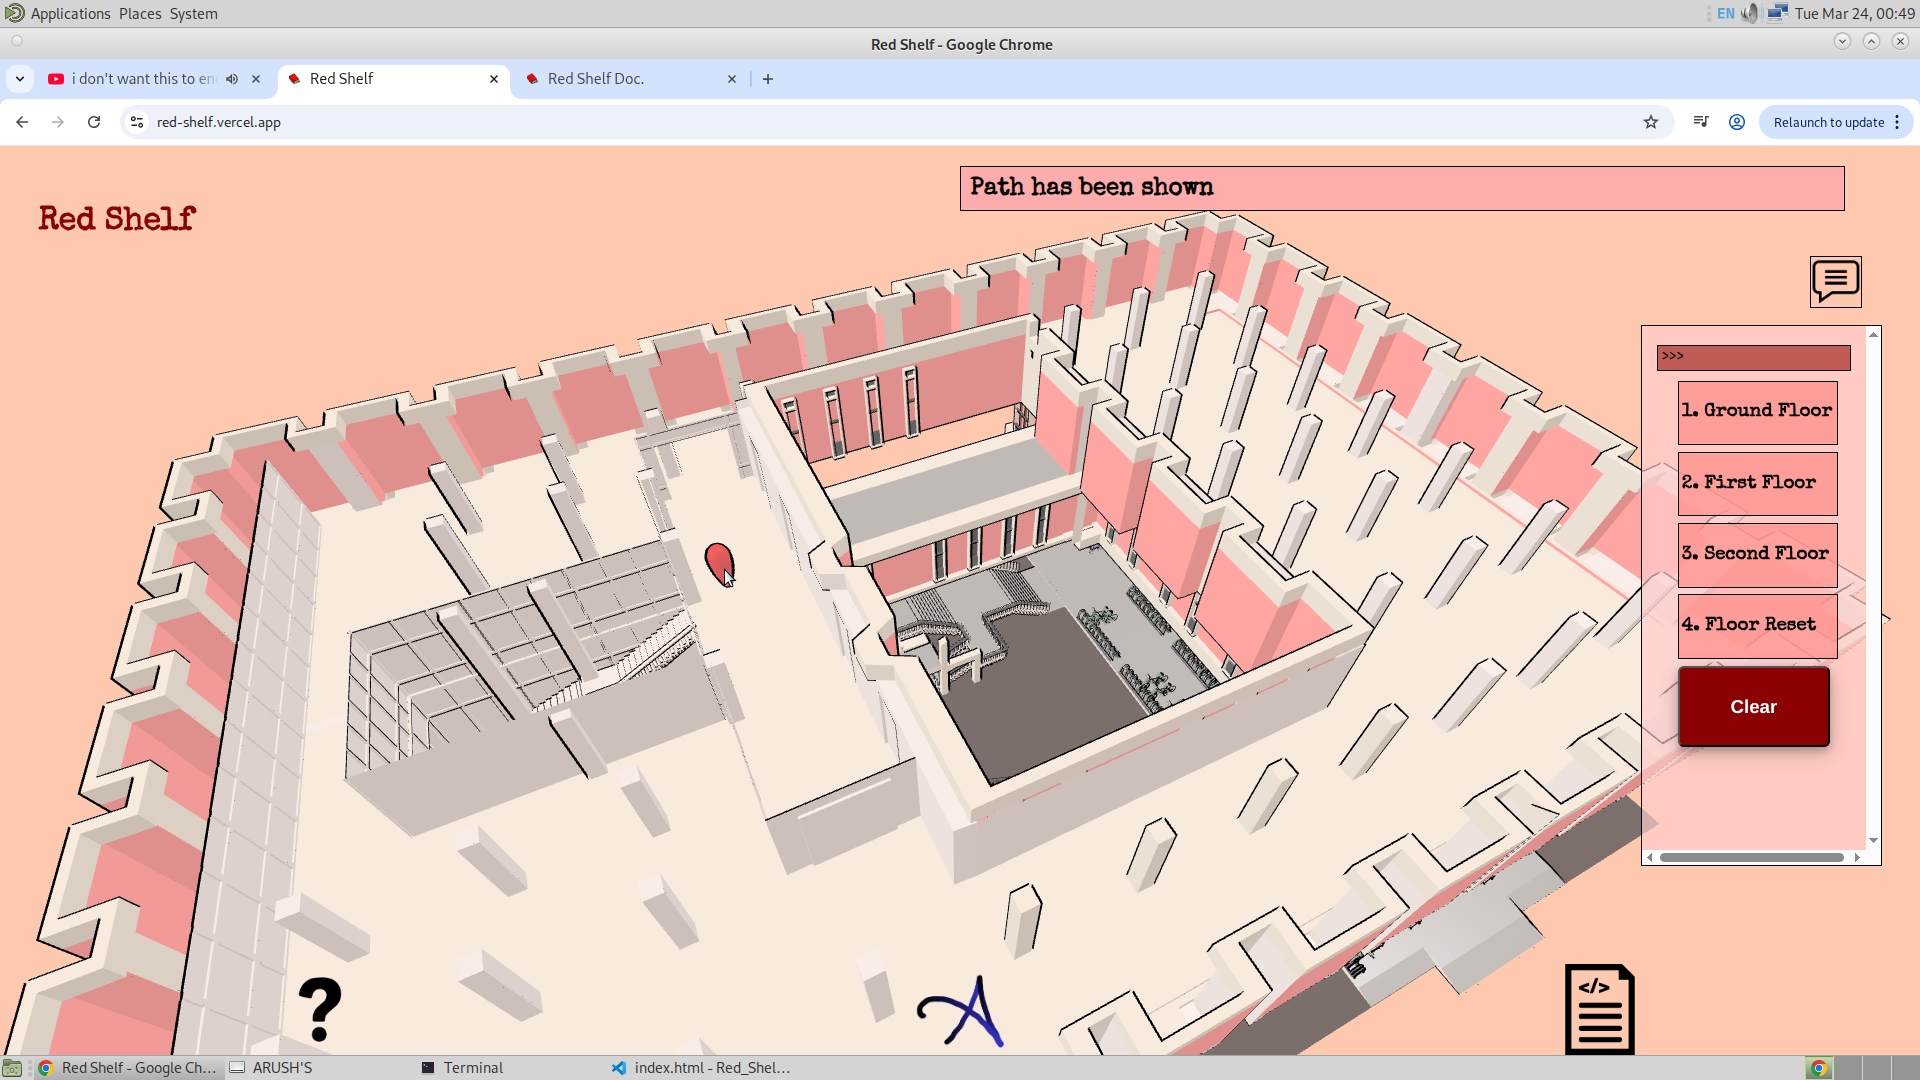
I have decided that it is no longer necessary for the navigation to begin strictly from the entrance. This marks a significant shift in the overall plan. Instead of assuming a fixed starting point, I will allow the user to choose both the starting and ending locations within the library. To support this, I have distributed several GSAP interaction points at different locations throughout the application. The updated workflow will proceed as follows:
The user will first select the floor from which they wish to start (for example, the Ground Floor). Once selected, the application will enter a dedicated navigation selection mode. In this mode, the frustum view will activate specifically for start-point selection. Unlike the normal interaction mode, this view will not display pop-ups for physical items such as books or shelves. Instead, it will present images representing the surrounding area of each selectable location. After the user selects and confirms the starting point, the same process will be repeated for selecting the destination (ending location).
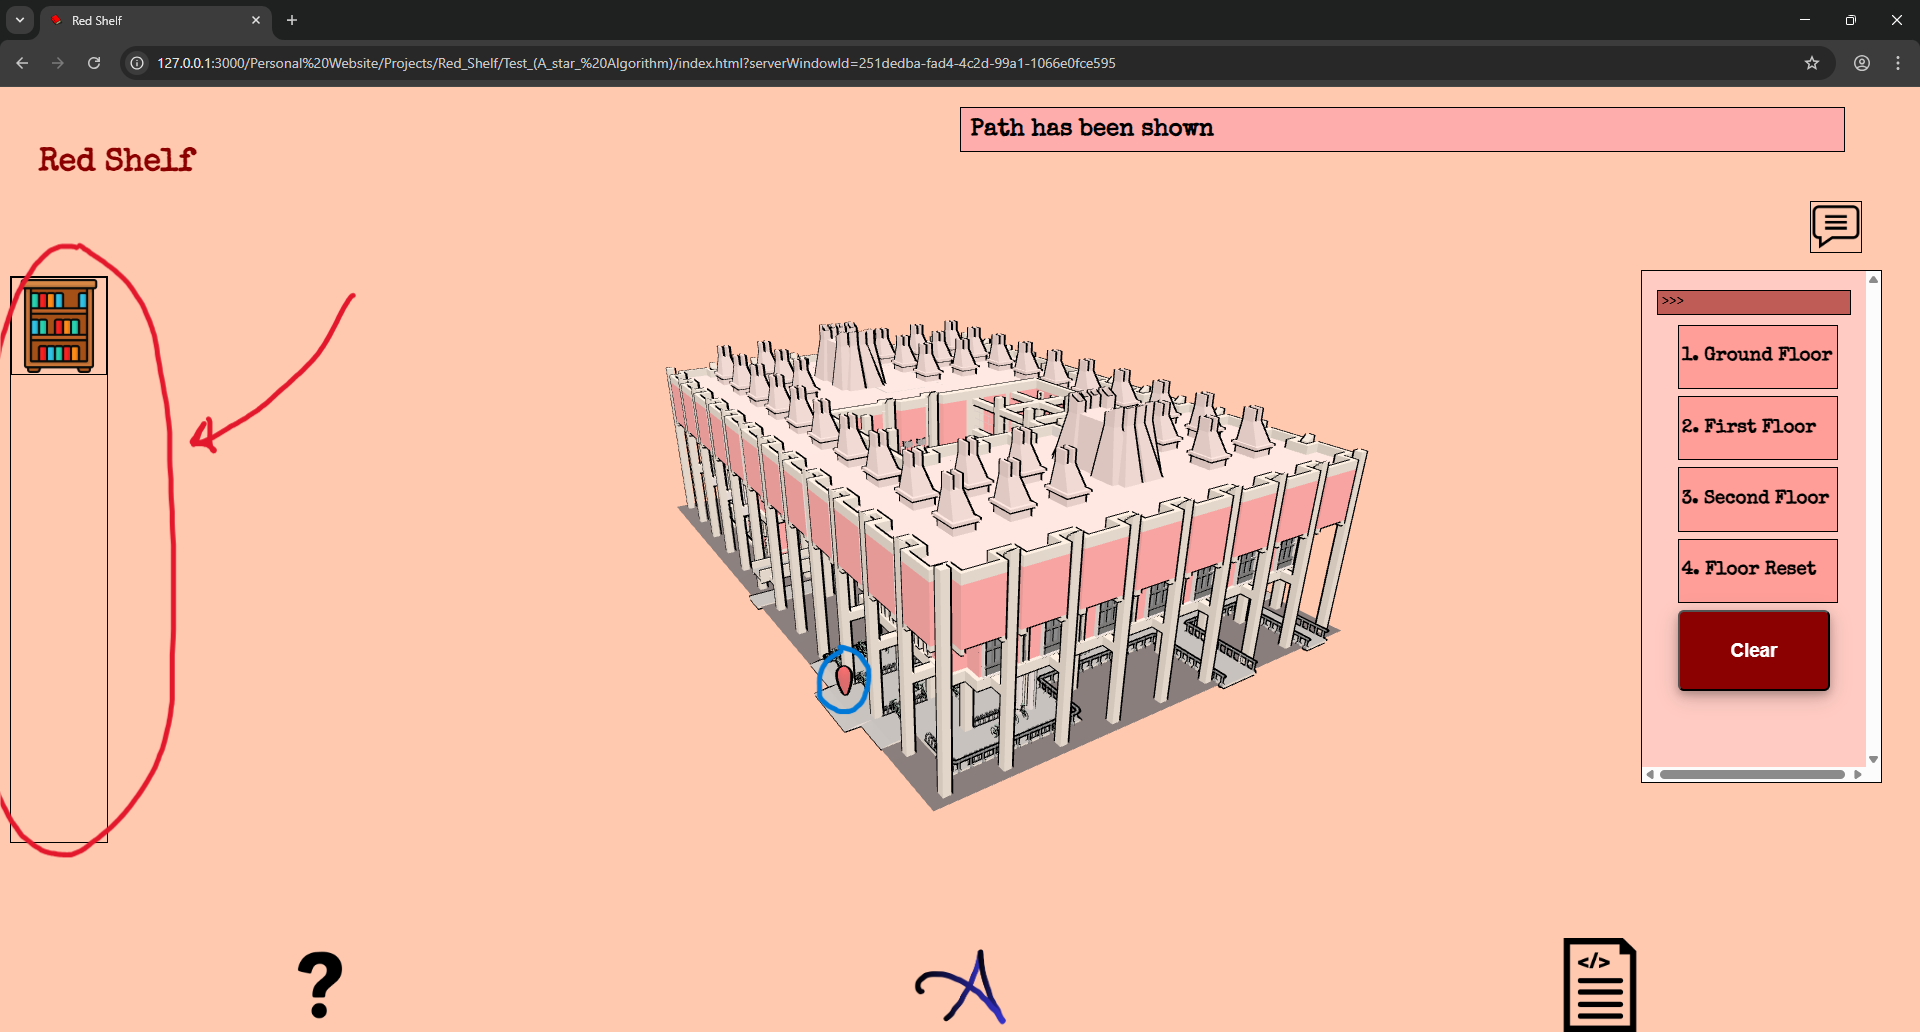
Once a floor is selected, its cross-sectional top view will be displayed. A navigation grid will then be overlaid on the floor plan. The nodes of the grid will be represented as reddish-black circles connected by black edges. When the user selects a node, a confirmation pop-up will appear displaying images of that location. Upon confirmation, the selected node will be marked as the starting point. The user will then select the destination node, which will be displayed using a different visual style (for example, black circles with straight connecting lines).
After both the starting and ending nodes are selected, the A* algorithm will be executed to compute the shortest path. The resulting path will be visually highlighted on the map, and the corresponding GSAP markers along the route will scale up to indicate the navigation path. If the user selects any of the location pop-ups, the application will transition back into the normal GSAP interaction mode, and the app will continue functioning as usual.
Implementing this change will require significant restructuring of the existing codebase. The previous concept of fixed entrance pop-ups will be removed, and the navigation logic will be refactored into a more flexible and modular system.
4/3/26
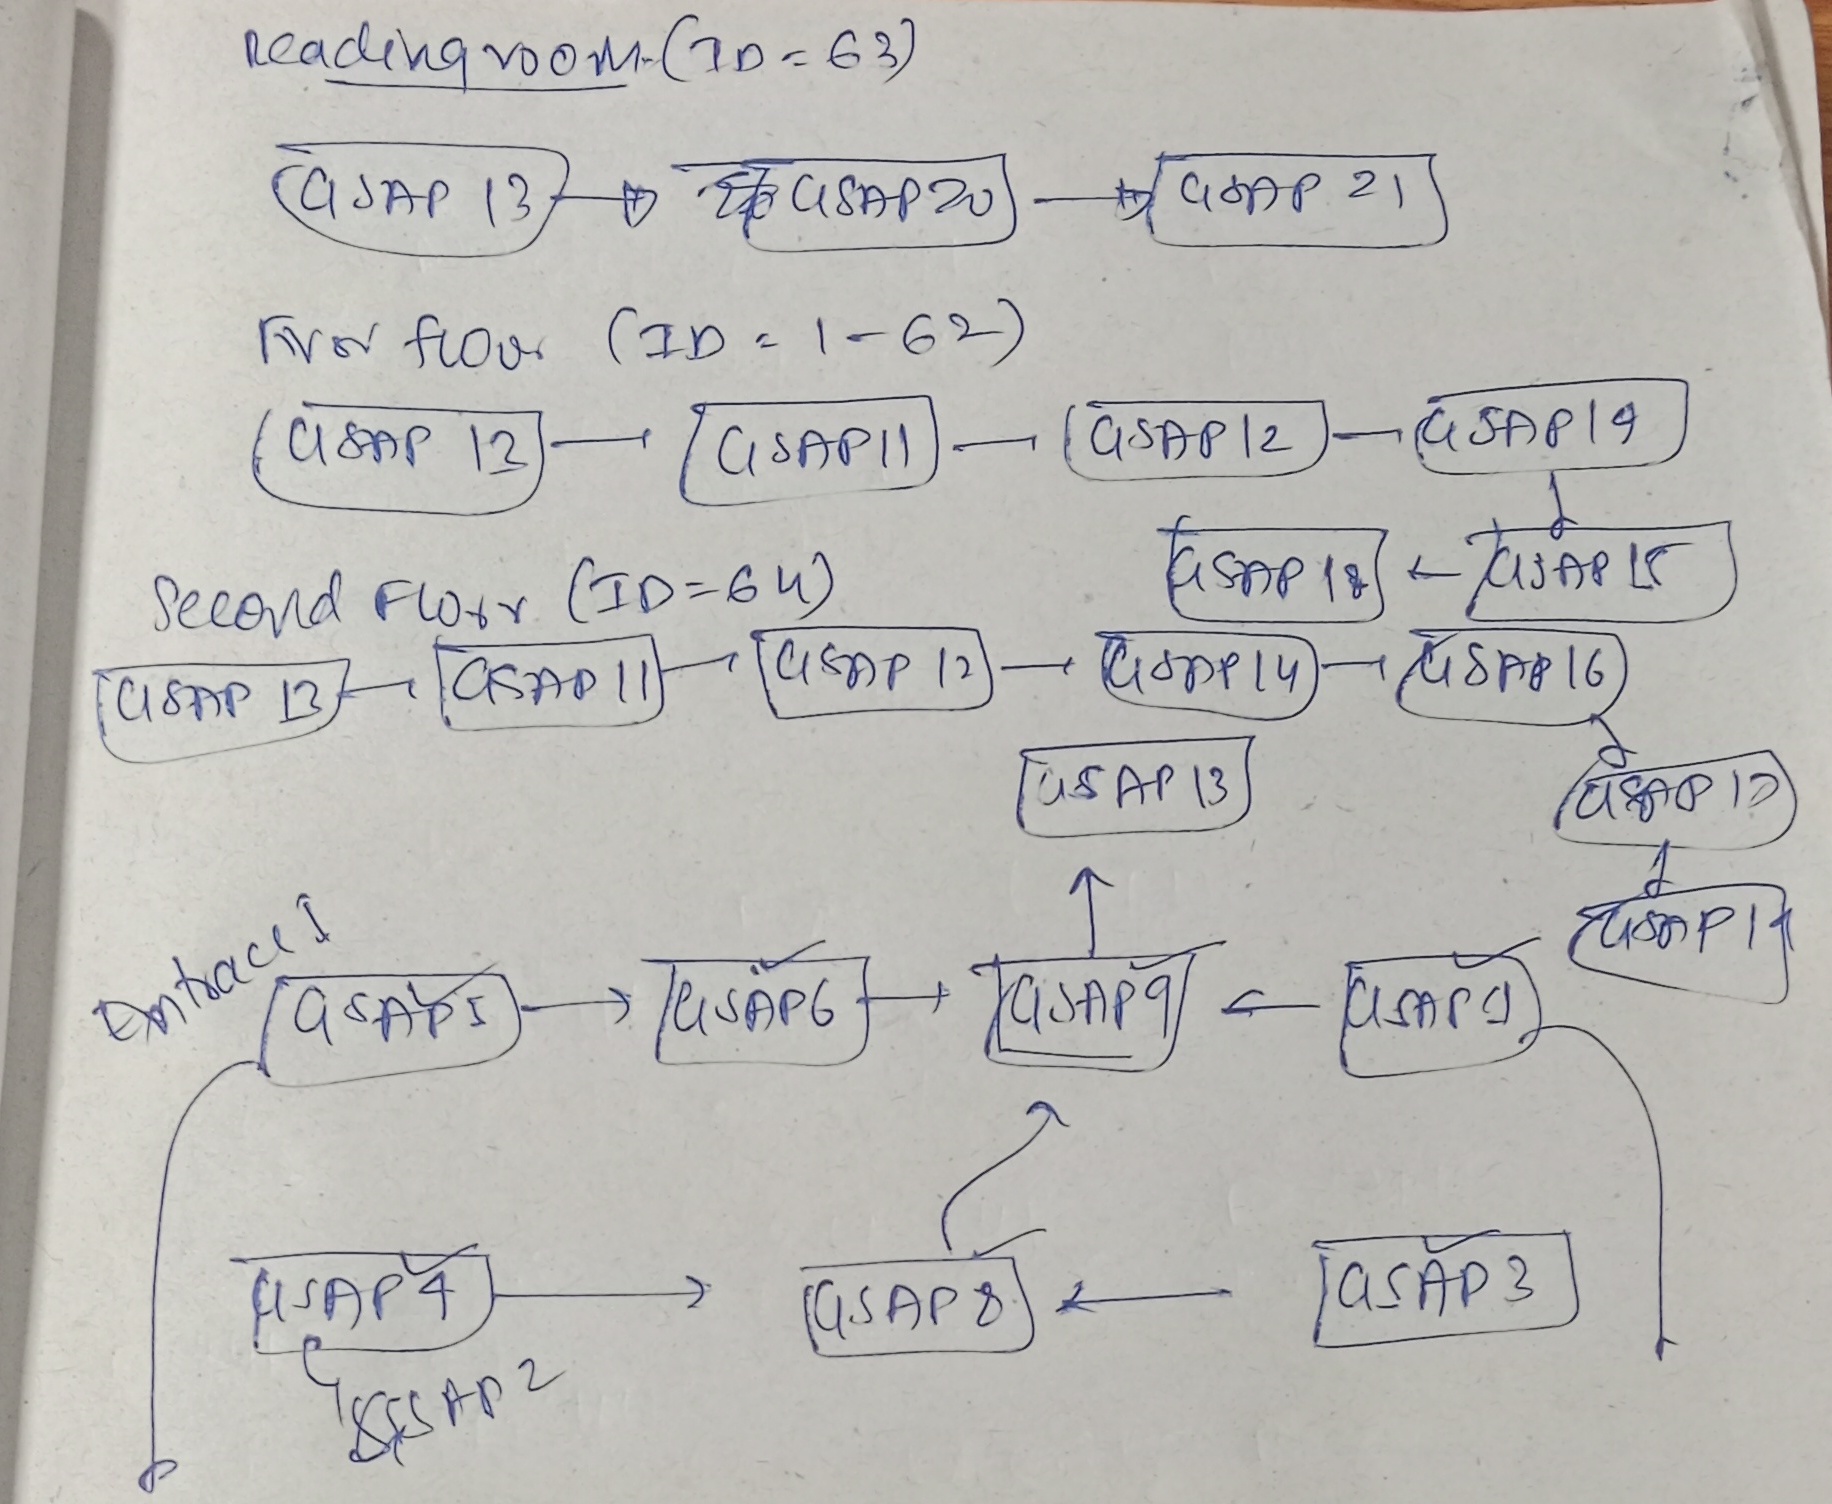
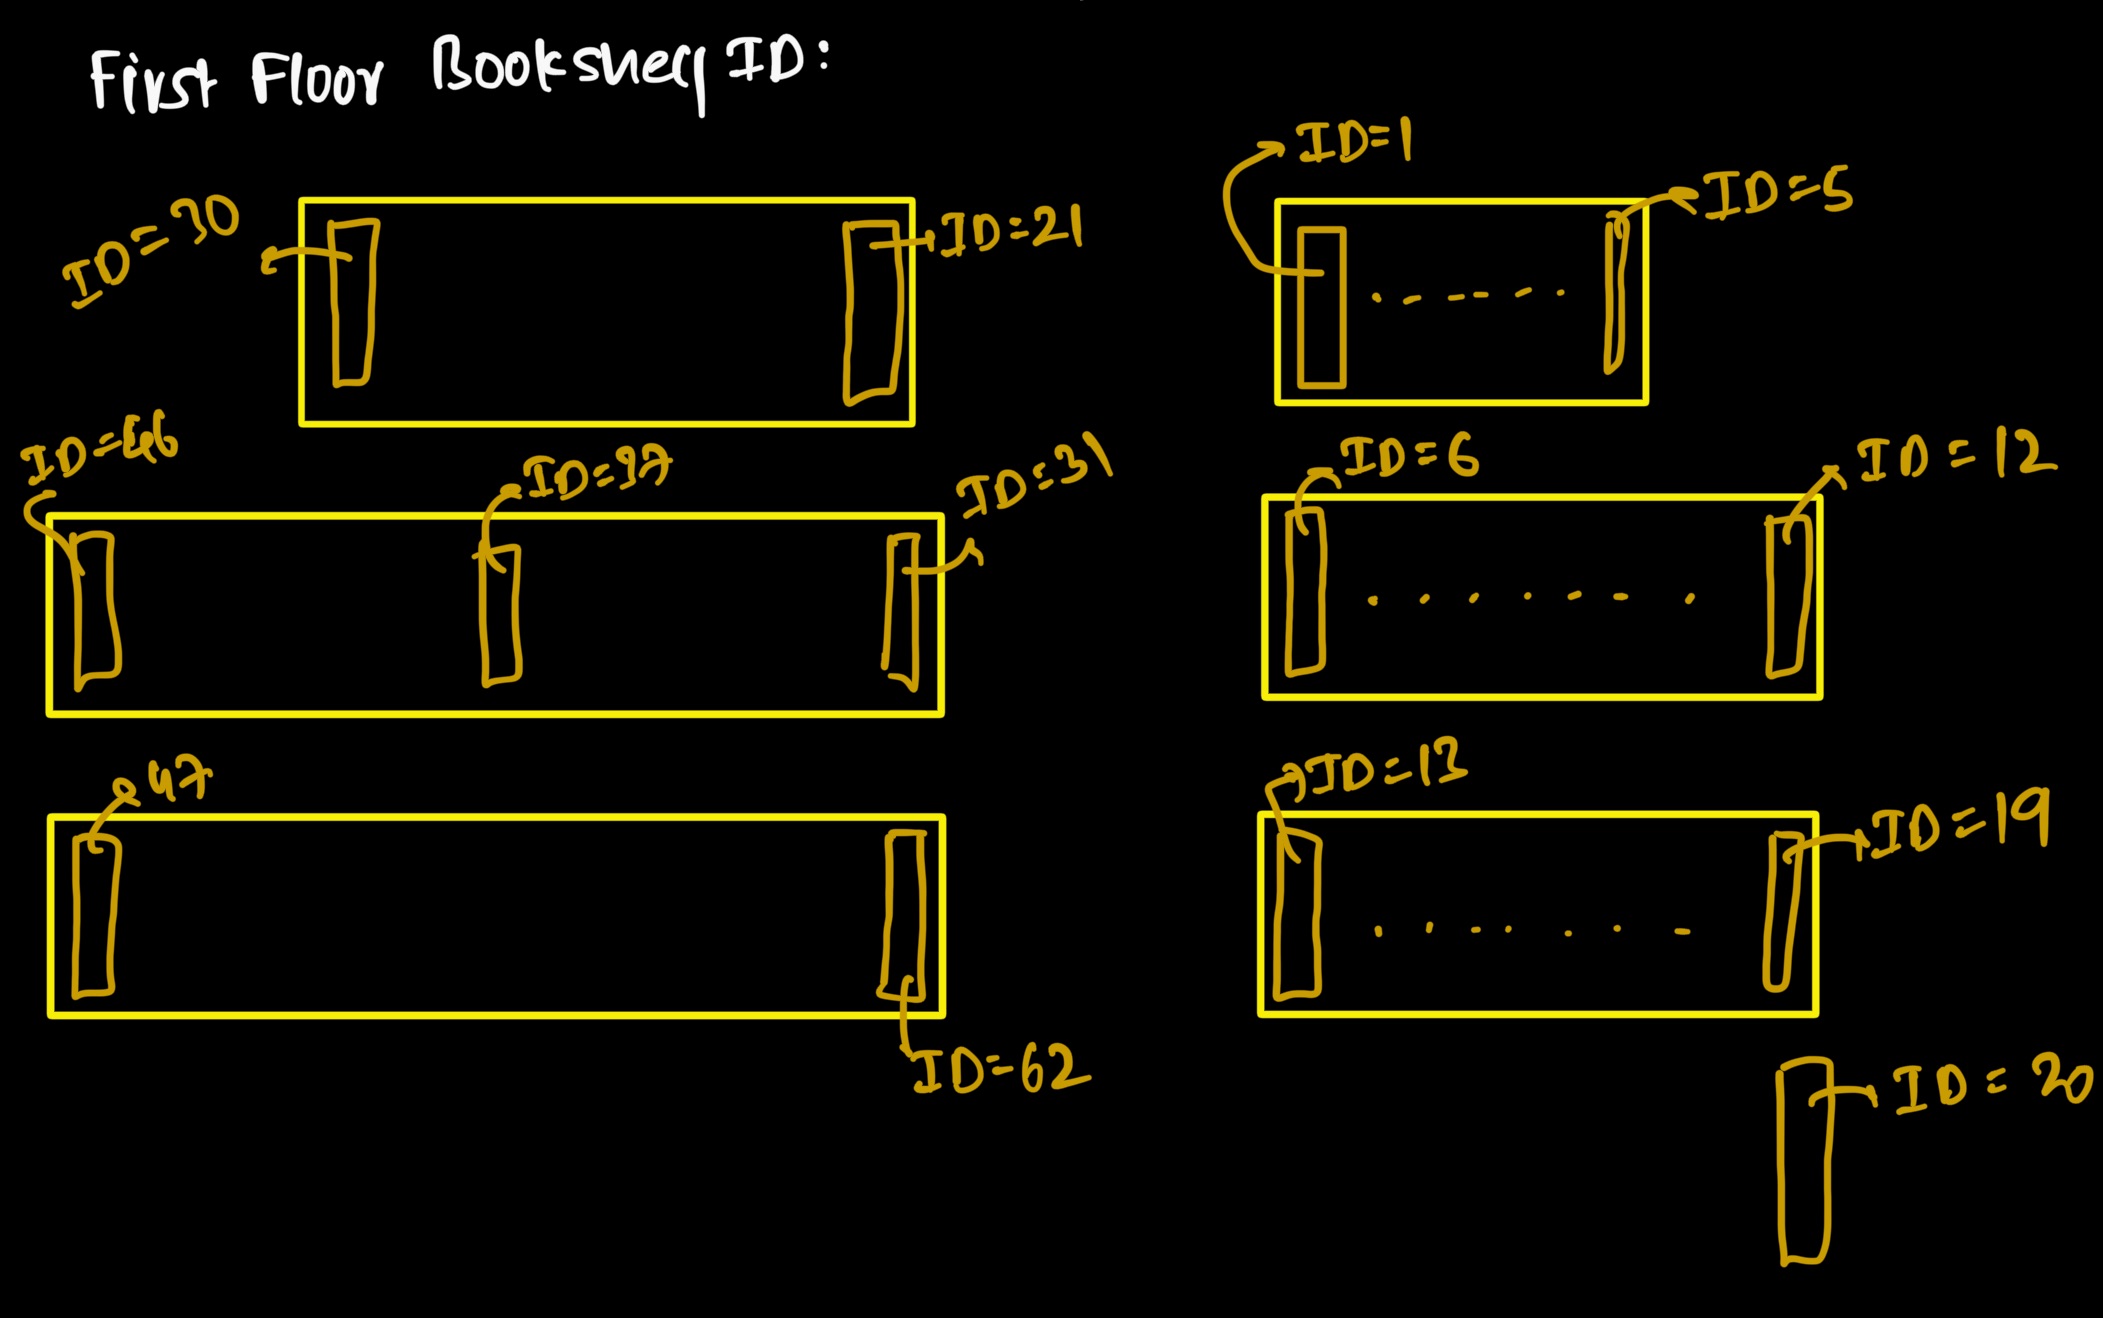
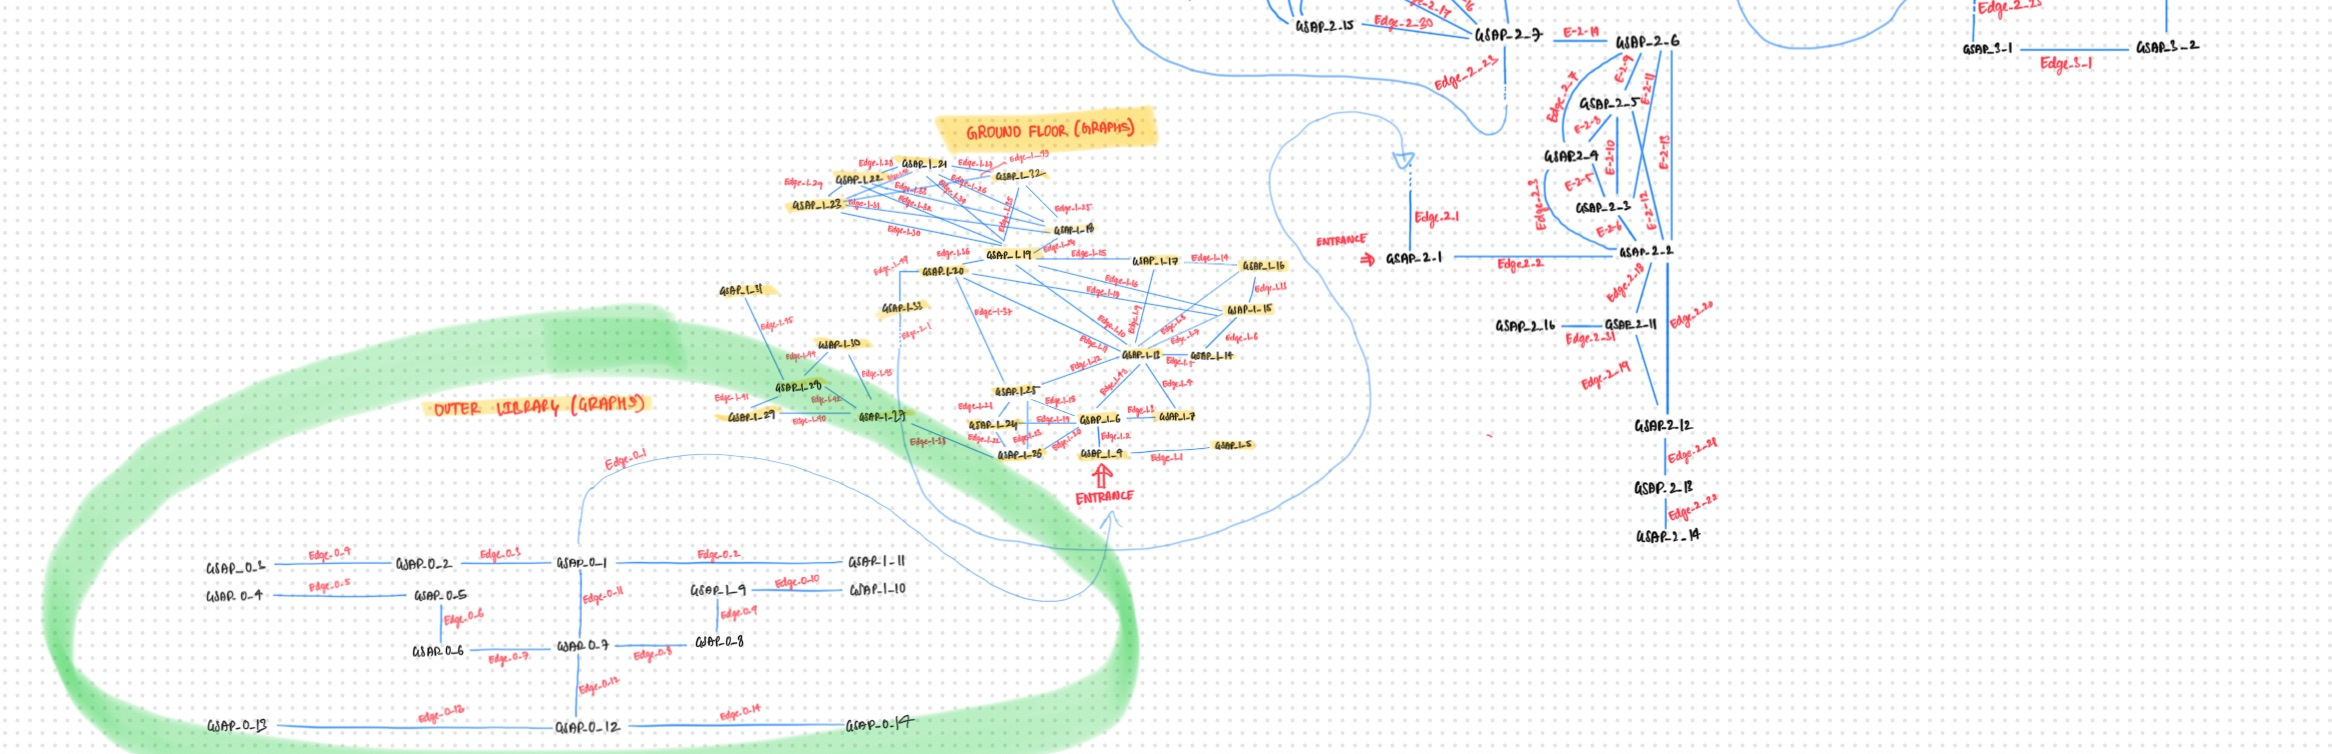
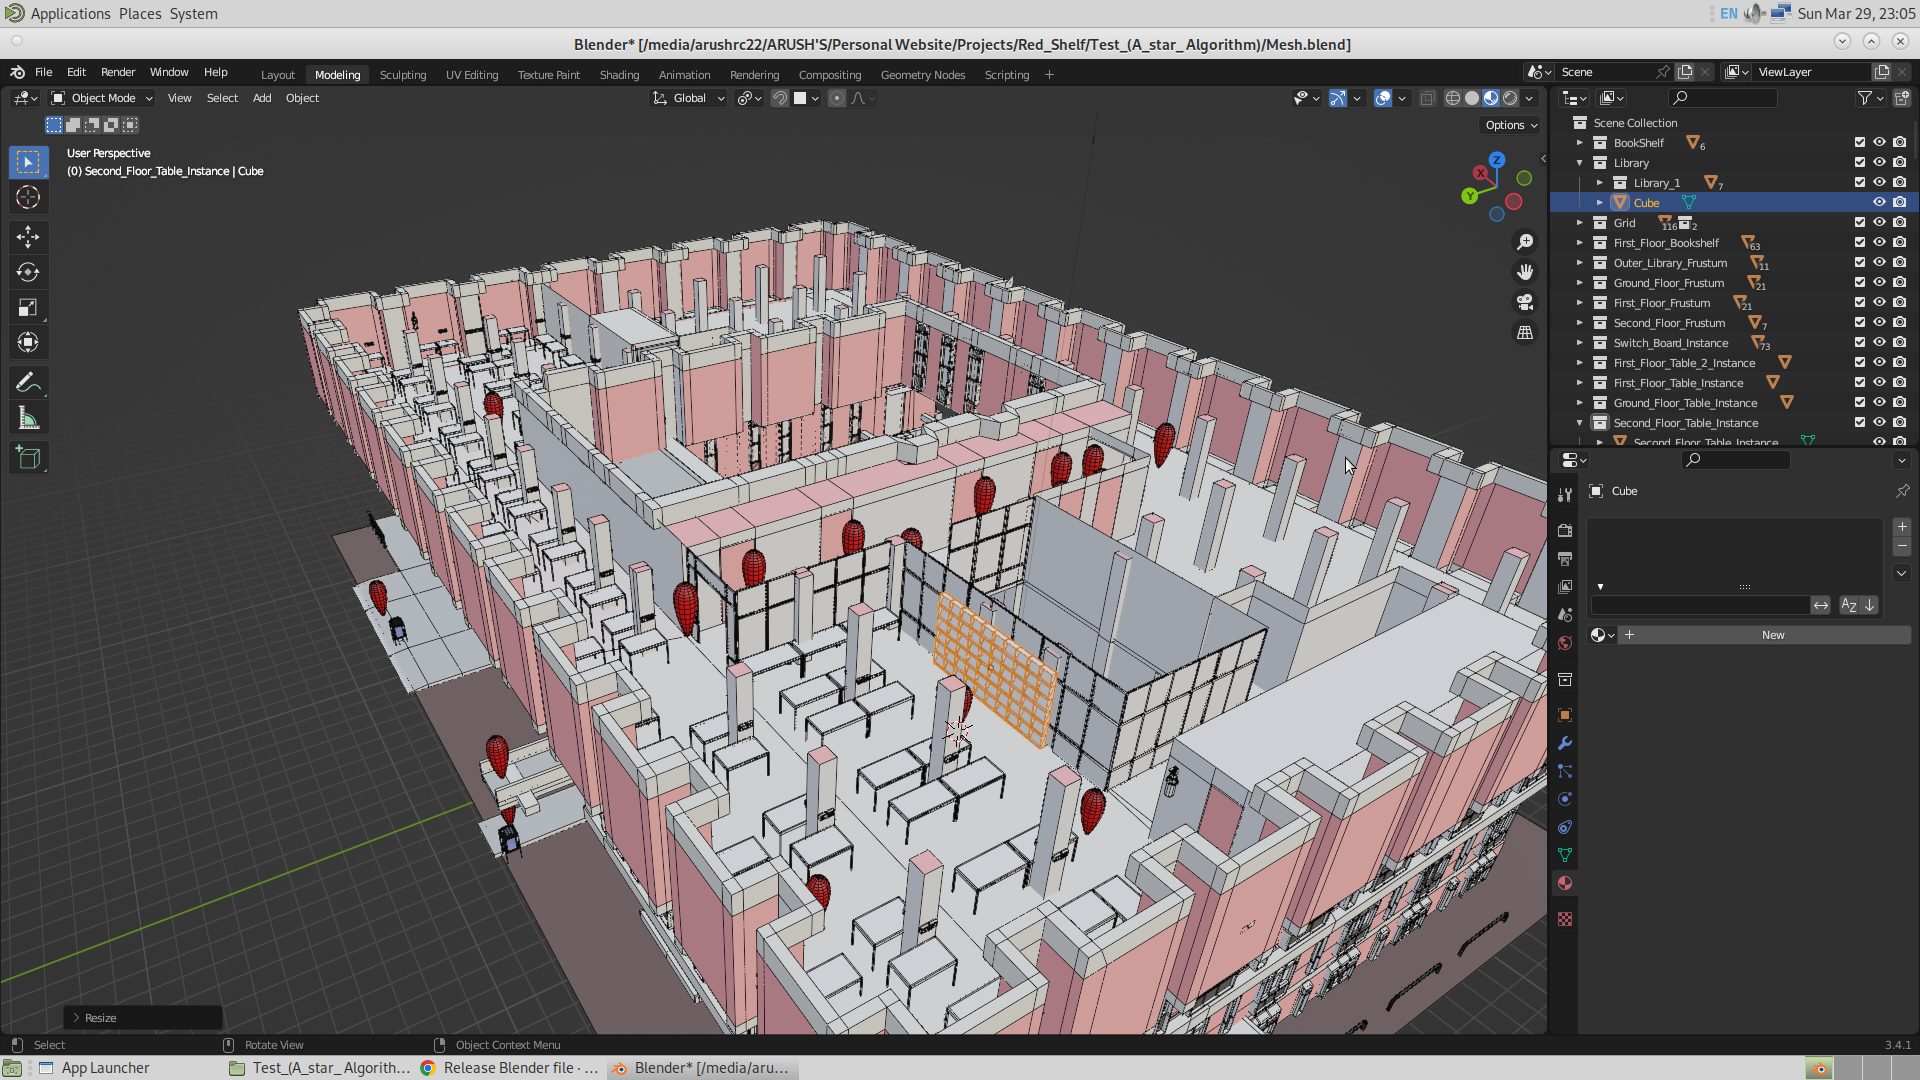
Today, I have achieved a big milestone. And it is that I am successfully able to implement the Dijkstra Algorithm, and this is the one which guarantees the path with minimum distance. I started making this algorithm yesterday, where I formed the graph with proper nomenclature, and the image of the same could be seen below :
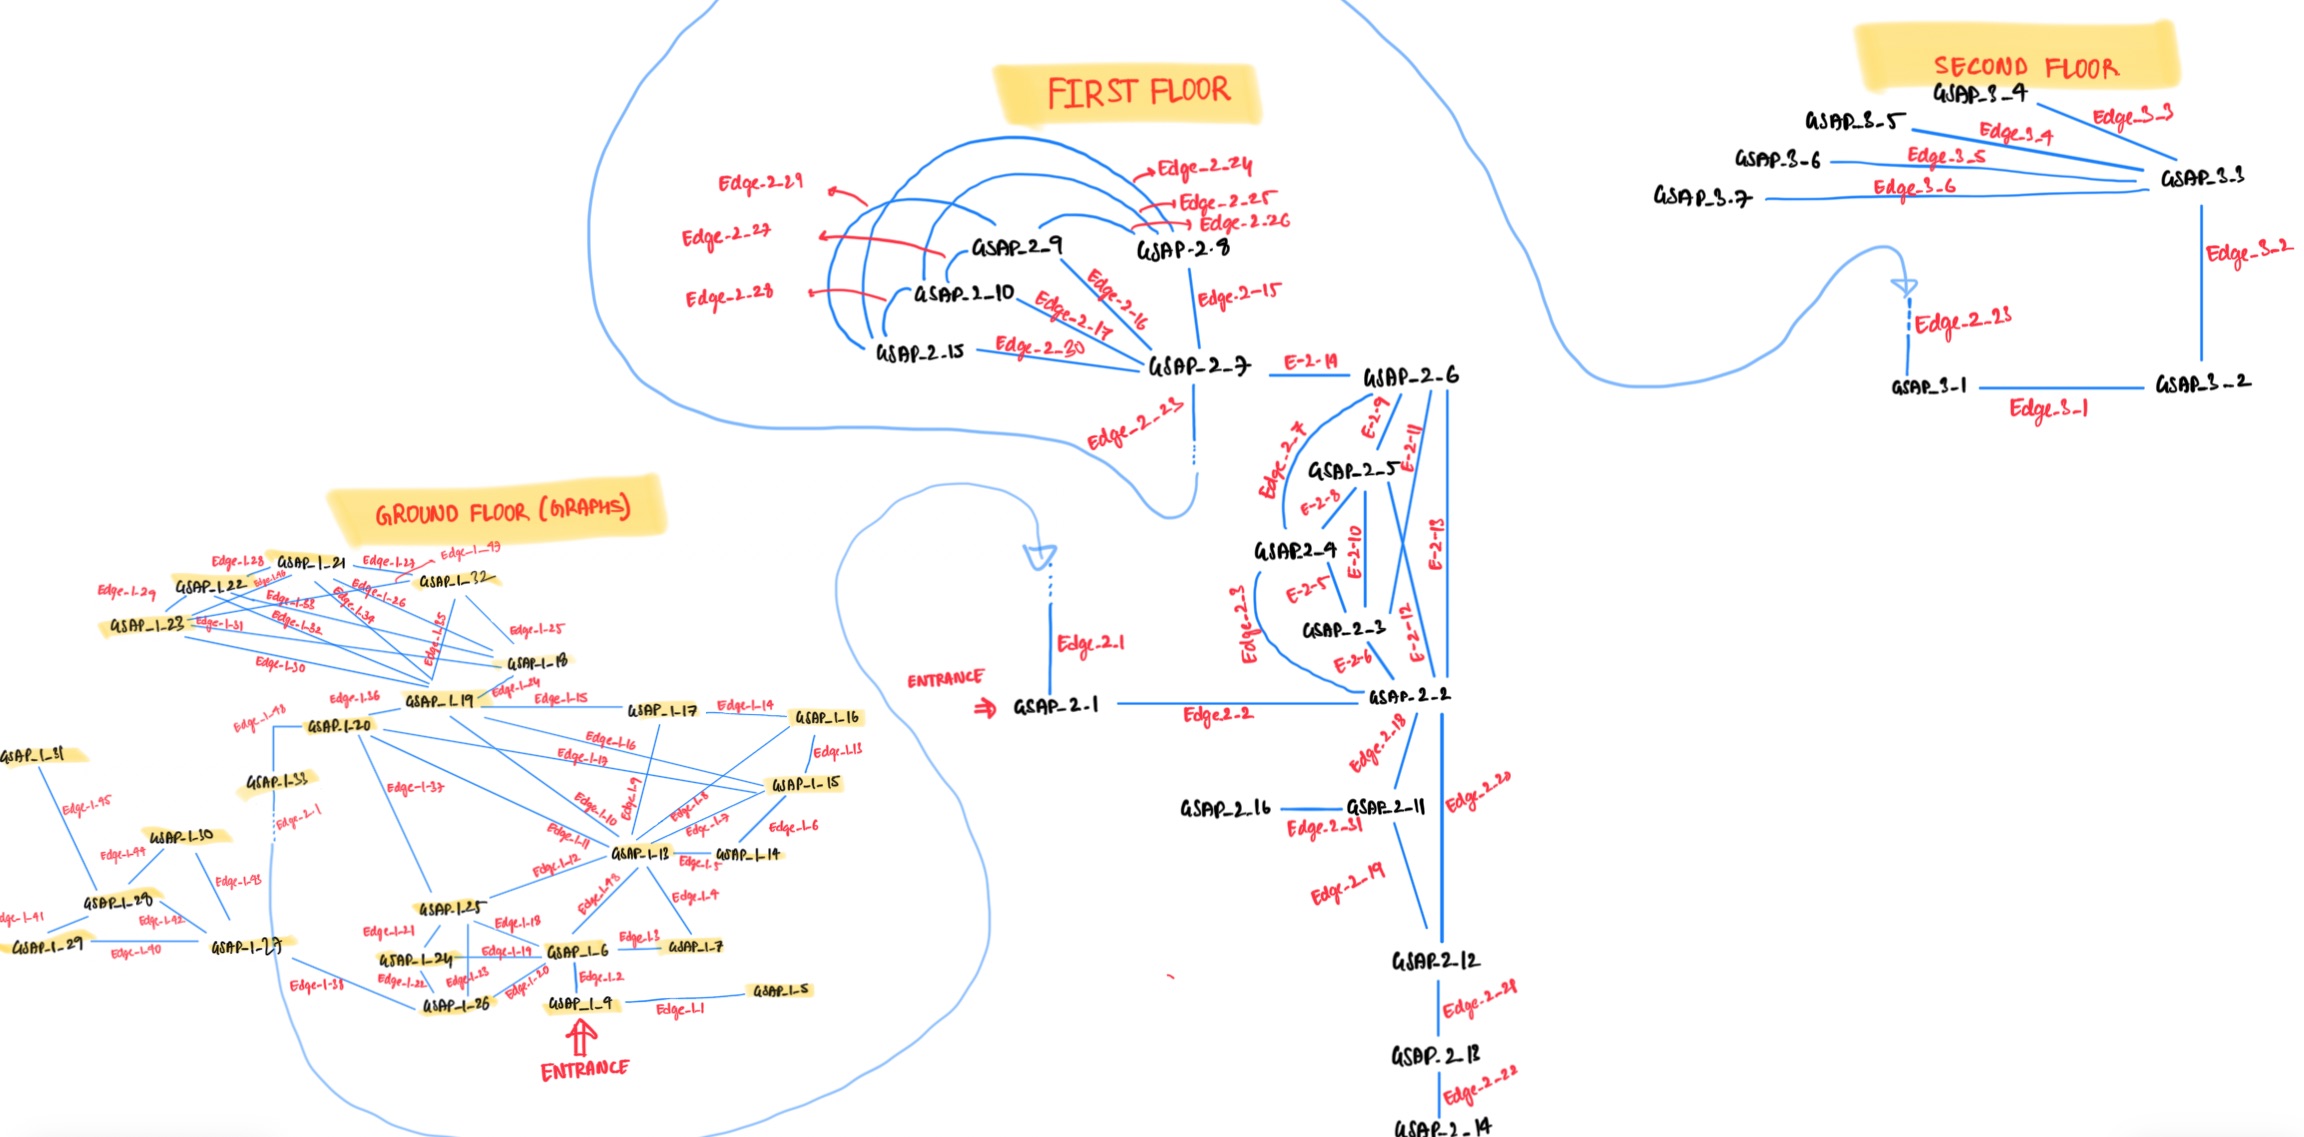
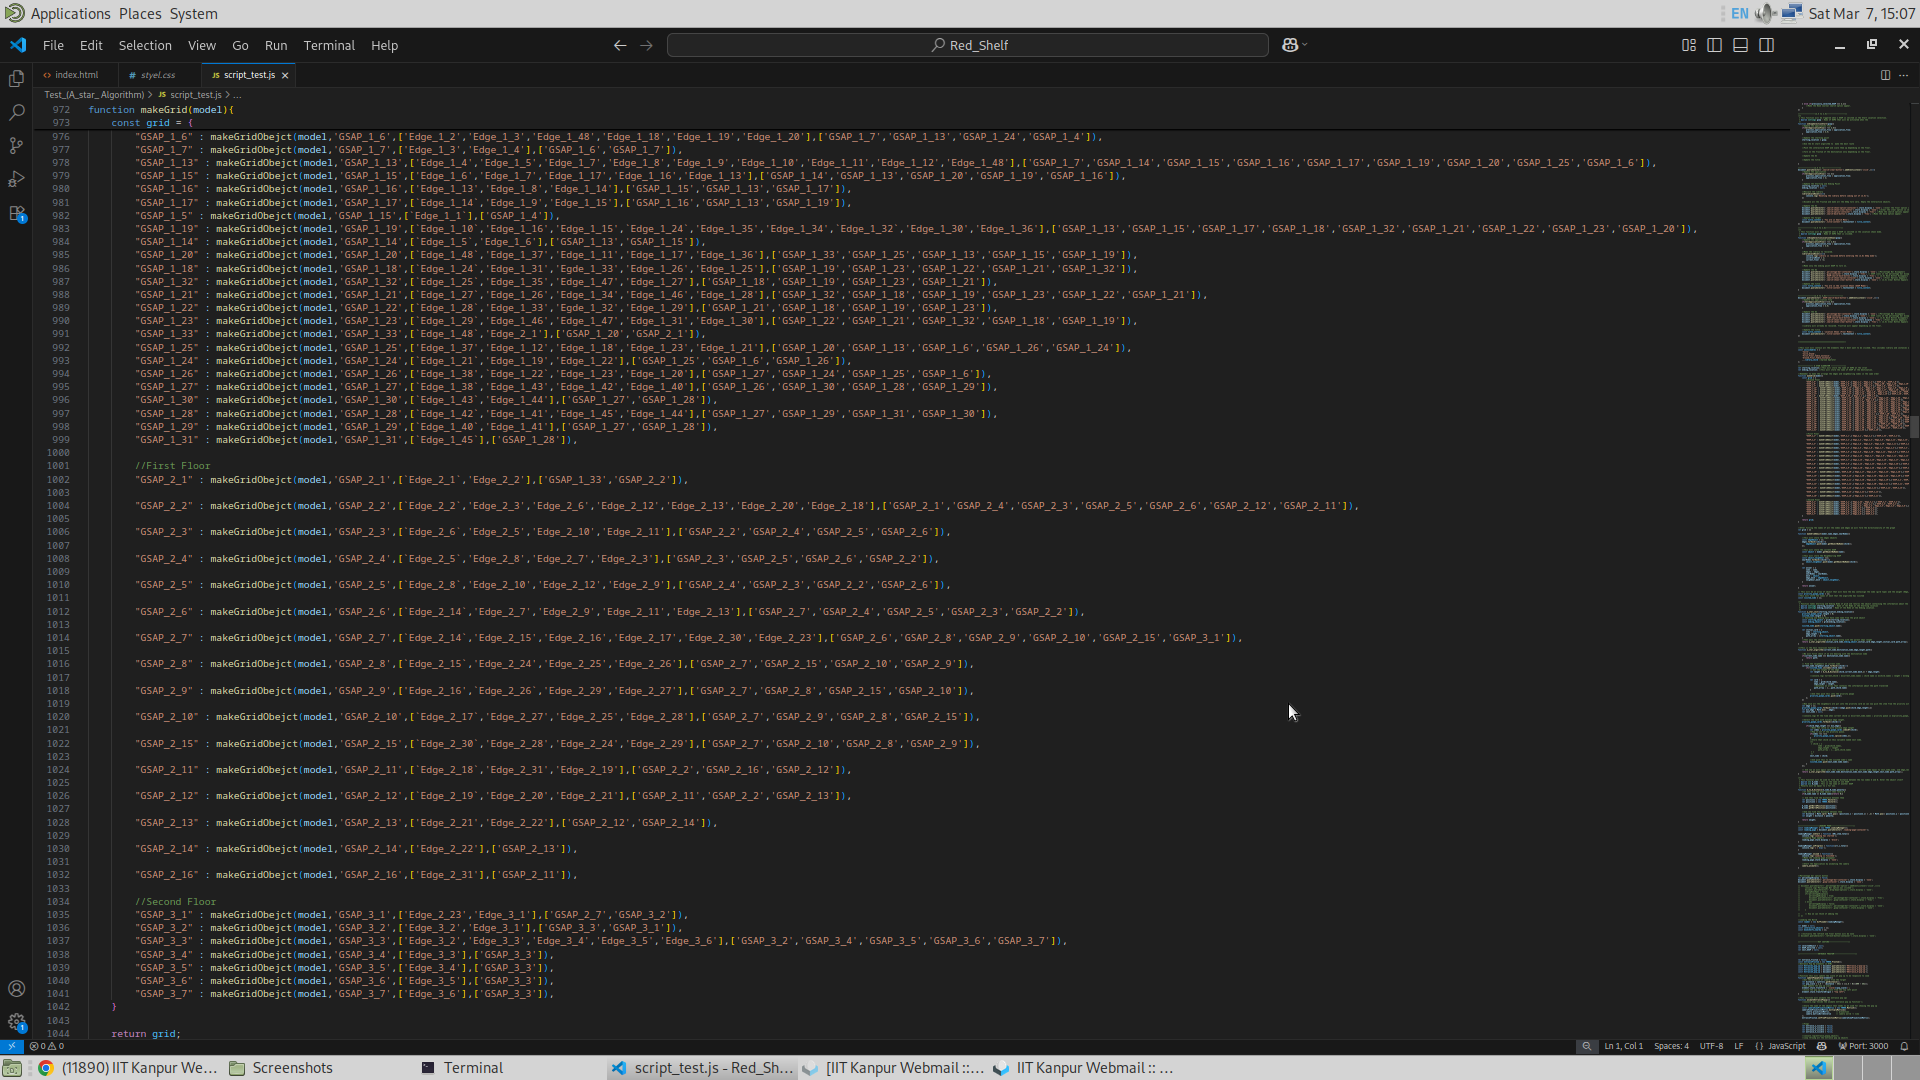
This is where I first named the GSAP, Nodes, and Edges of my graph. And later I named the objects in the Blender the same way. And finally I also made the array of objects with the same nomenclature, the image of which is shown below
And finally I implemented the code for the A* algorithm. From what I have learnt from the video, I see that A* is an improvement of Dijkstra Algorithm. A* algorithm is what takes the advantage of directionality of Greedy Search and the optimality of Dijkstra Algorithm. But in my case there is a bit of a problem with the greedy algorithm, and that is the existence of floors and stairs. Let me explain it from the below diagram.
So the A*, which I assume to be the combination of Dijkstra and greedy, works well and very effectively in the case of geographical maps. This is because there are no maps or worlds lying above another world. But in the case of the library, the geographical location of the nodes of the graph can also lie on top of each other (for example on the ground and first floor), and this means the physical distance between two nodes that are on top of each other (one on first and the other on ground floor for example) may have a very small physical distance, but there might be some other point on the ground floor that may not be that close to that target node on the first floor, but will surely take less time to reach the point on the first floor than the other. And this is because one point on the first floor will be closer to the stairs or lift than the other. So this means if we were to use the greedy search approach, we will first have to solve for the ground floor with the target being the stairs, and then have to solve for the first floor with the target being the original target but the starting point being the stairs. This might still look good, but the problem comes when there are more than one way to go to the next floor, and both of which contain different amounts of effort to move from one floor to another. Lifts and stairs. I will look after that problem later, but for now I haven’t dealt with the complication of distance between the current location and the target location (heuristics / Greedy Search Algorithm), and have stuck to Dijkstra Algorithm which does have the disadvantage of uniformity in its search, but for a small graph like in this case, I believe it doesn’t matter.
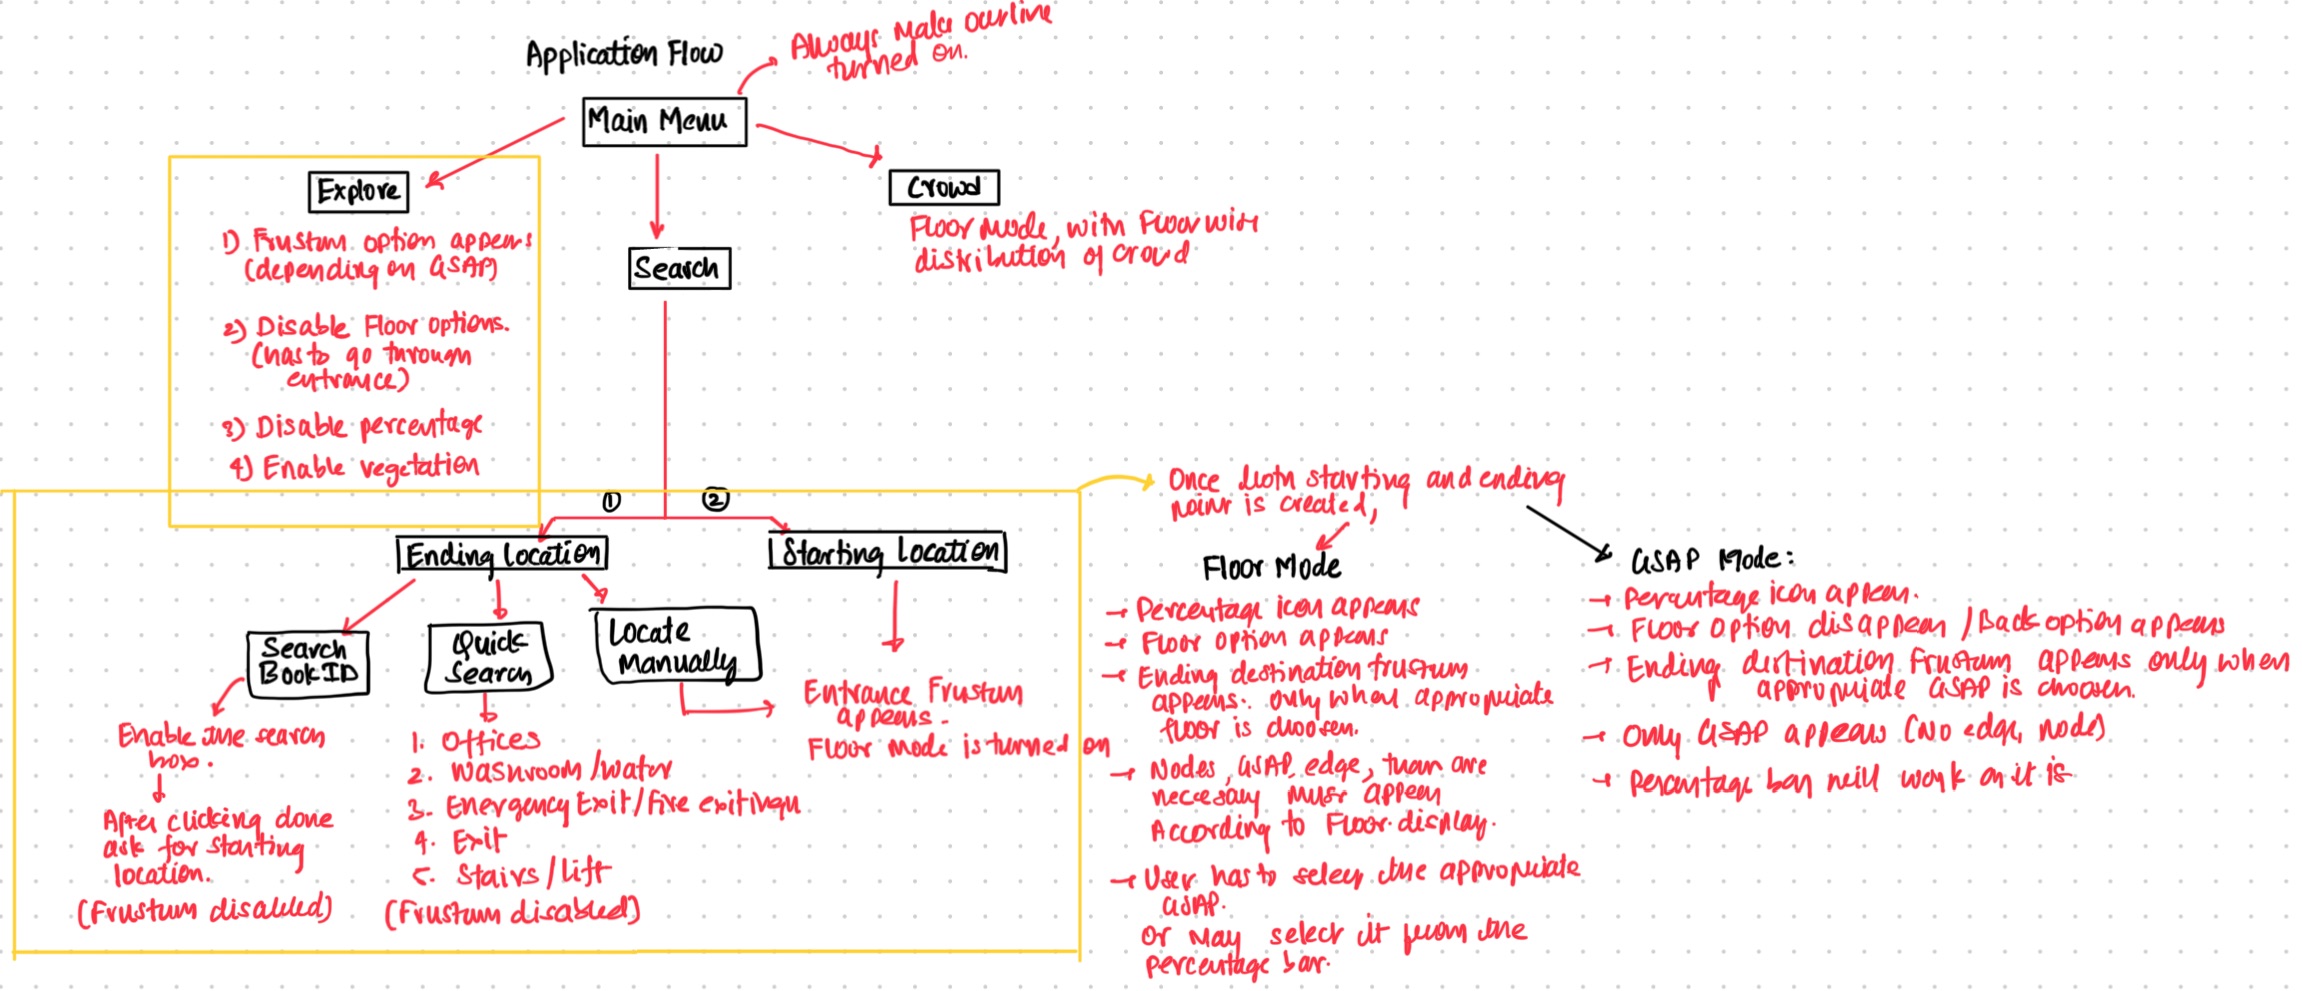
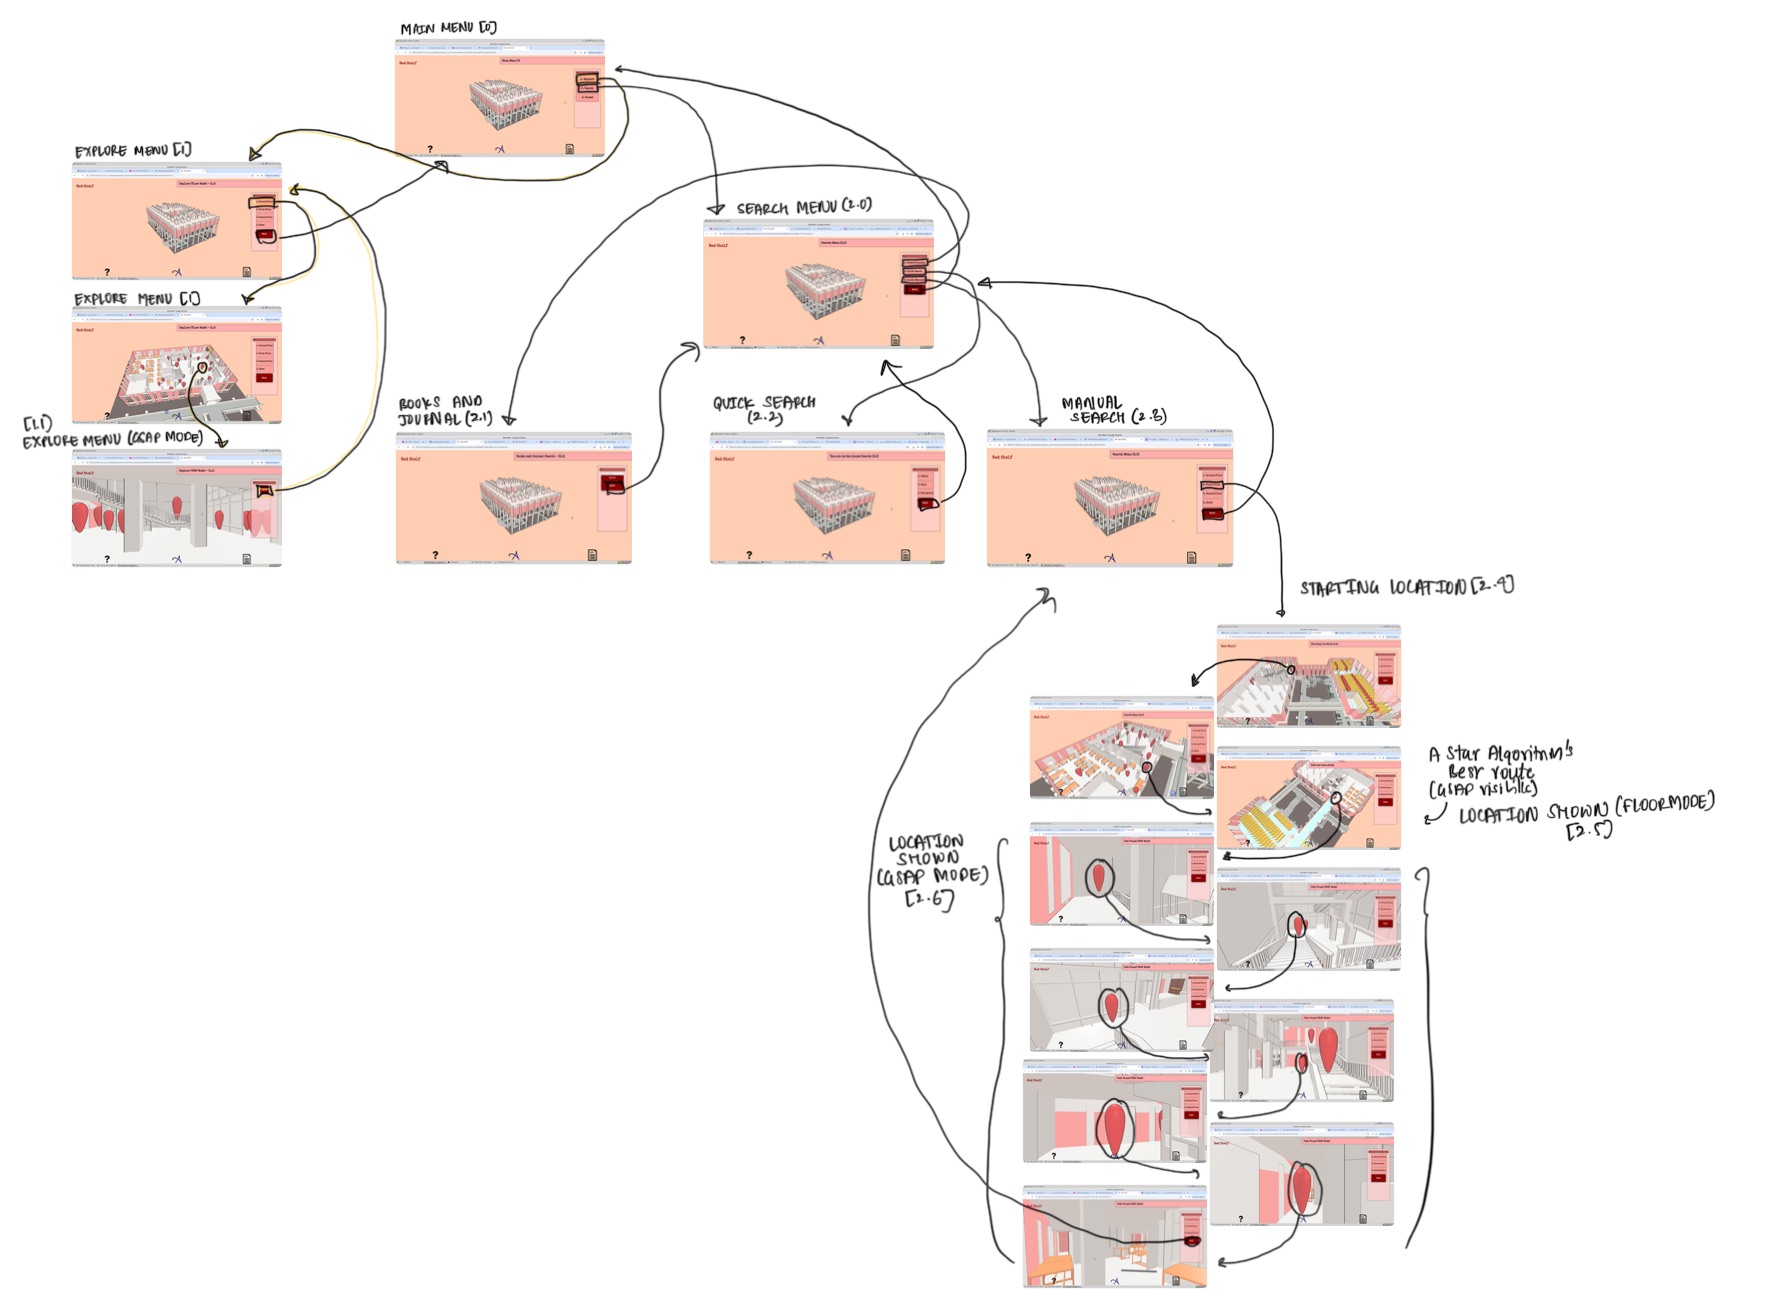
Apart from the Search Algorithm, I have also thought of re-designing the UI/UX of the application. The flow of the application specifically. And a mental map of the same is given below.
7/3/26
This must be the second time I am fucked up making this application. Yesterday, I mistakenly over written my entire code with what I was programming a day before yesterday. Meaning, I lost all the code that I had written yesterday. And believe me, these three days I have been re-developing the whole application. It is fuckingly annoying. Whoever made the feature to overwrite the code in VS Code should be punished. No disclaimer pop up before overwriting, nothing. Bloody idiot!
Anyways, I have been working on making the "application flow" or the UI design of the application. And the map below shows how the application will proceed. This is the map of the UI of the application (rough idea), and it also shows what each button would do in the application.
I have been working on the code in JS since the last three days. But due to that foolish carelessness yesterday, I lost my code yesterday. But the good thing is that I did not lose my HTML and CSS files. Which means I only have to re-program my JS file, and that too not too much. That's great. So today I wish to make the following:
- Adding and fixing the GSAP completely.
- Fixing the Frustum at various locations and floors.
- Combining both the things in the application and finally polishing the product.
By the way, there was a fix that was required in the mesh, since there was a region where two meshes were a bit too close to each other, almost overlapping, which created some problems in rendering. And thus I fixed it by just adjusting the position of the inner mesh. Given below is the image of it after and before fixing it.
Fucking hell, it's 20:35 and my Blender file got corrupted. This is the third time I am fucked up in making this fucking thing!!!
OK, so I have spent some more time and fixed the Blender file from what I had messed up. And now all the GSAP and edges are renamed. I have also had much progress that I would like to share here. They are listed below:
- The Application Flow
- Complete Nomenclature of Edges and Nodes
This in itself took a lot of time. Now the thing that is left is the GSAP selection and animation, which I will be doing now. As I think about programming how each GSAP and their individual edges will behave in each phase of the application, I realised that the variable that I am maintaining, which is "Application Flow", is of great importance. This has helped me a lot in organising the functionality of the different features at different phases of the application.
Application Flow :
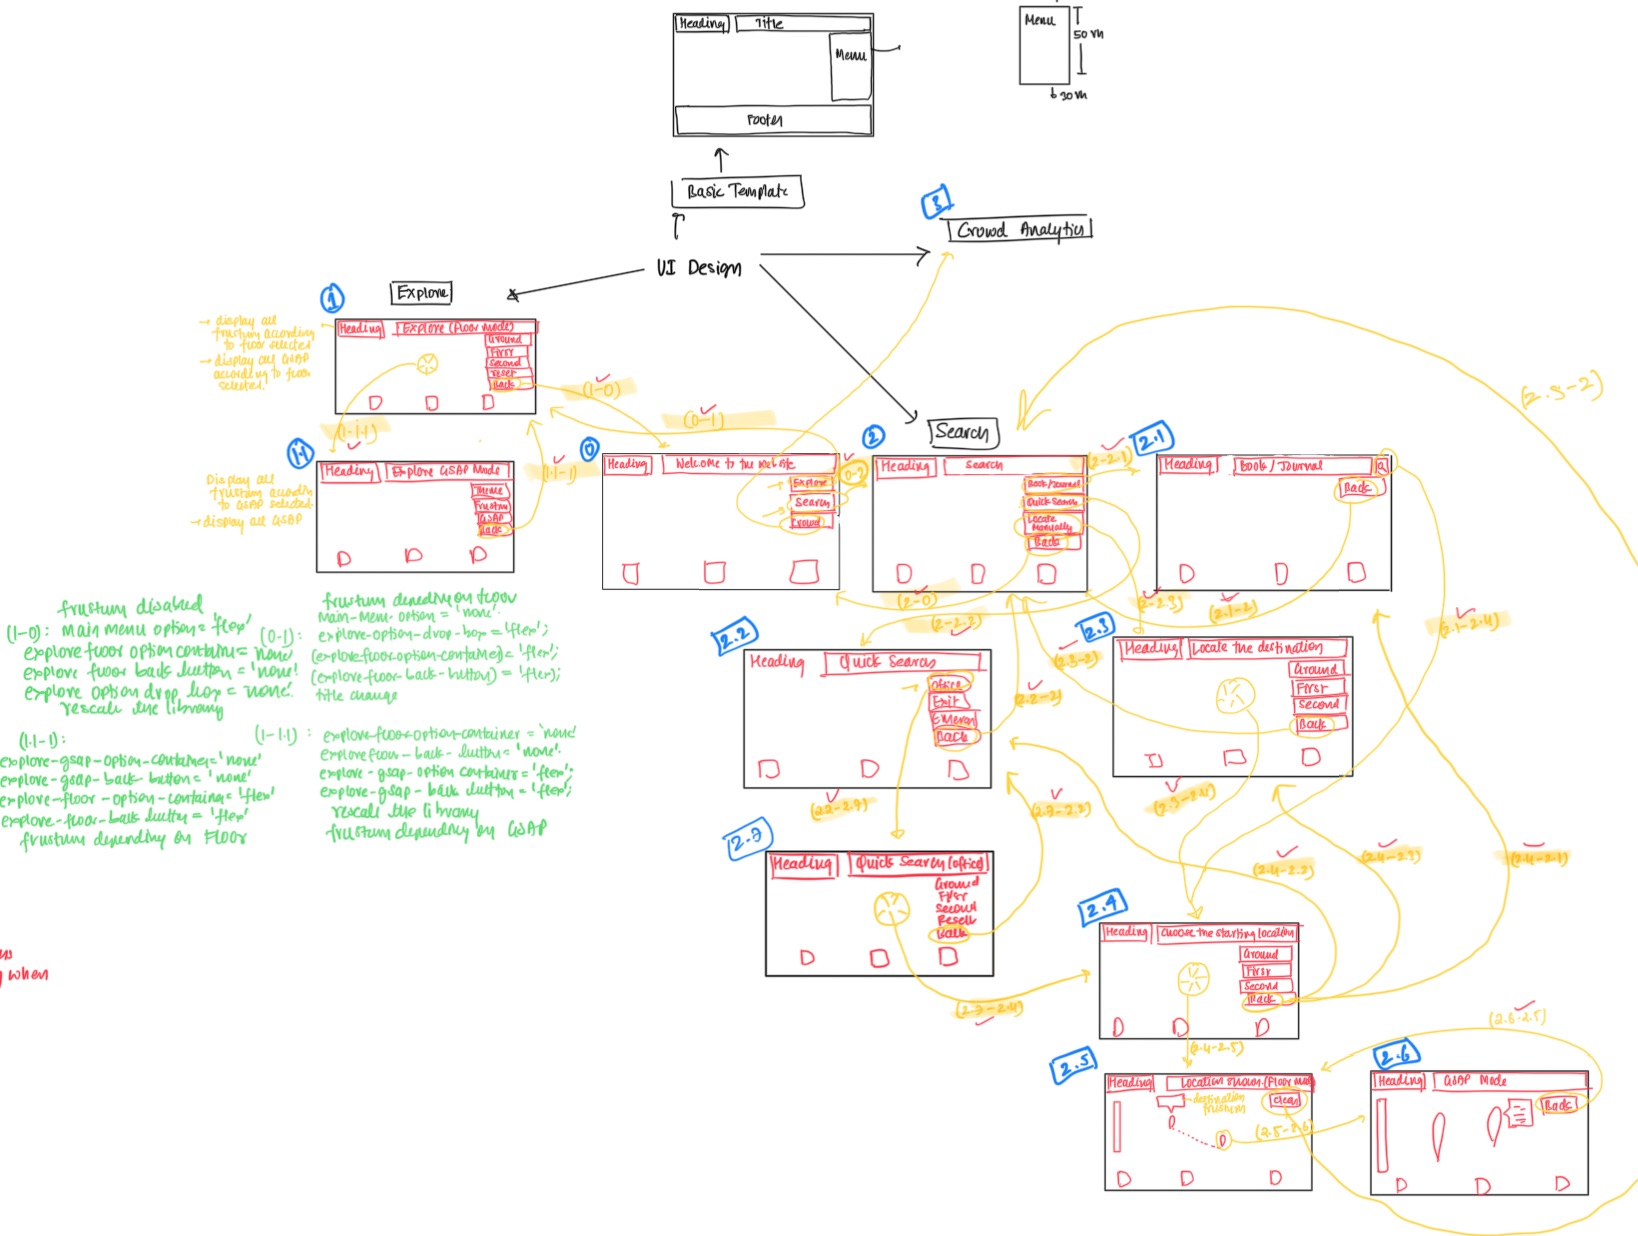
So I have already shown the picture of the flow above. Now given below is the picture of the application flow that I have developed.
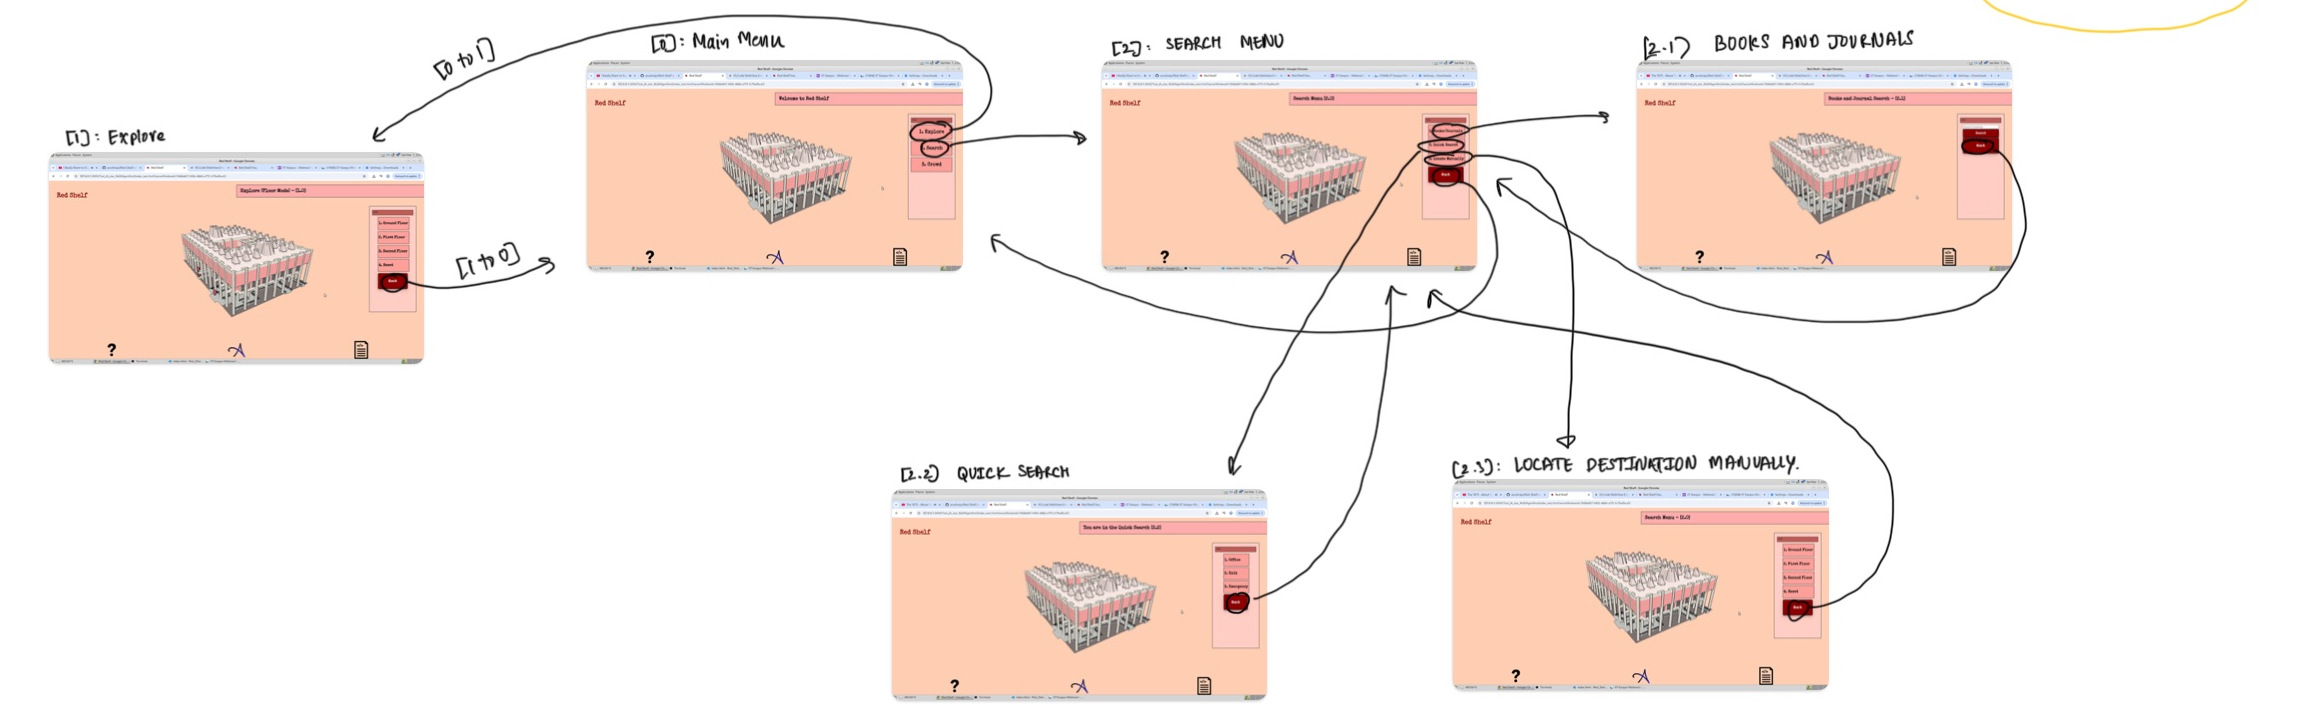
I have only completed making the application flow equal to [0], [1], [2], [2.1], [2.2], [2.3].
Complete Nomenclature of Edges ands GSAP :
Now coming to the nomenclature, I have added the outer library edges and gsap, and it's picture is given below. I have also updated the grid variable with the added gsap and their corresponding gsap and nodes depending in the code to better make it work.
This time, just to be saved from all the unexpected accidents, I have pushed the complete application code into a separate branch on GitHub. And I am also maintaining an additional Blender file. Since in these two days, both my Blender and source files were corrupted or overwritten. This feels devastating, but thankfully I am on track now.
7/3/26
God, lots of progress has been done. And I am going to share it in here. Firstly, now I will be keep uploading the updated blender files in the GitHub releases because I have realised that, in the computers that I work on, my blender files keep on getting corrupted. And just to save myself from getting betrayed by these computers, I have started maintaining the releases. Also, the code of this second version is uploaded in the second branch of my GitHub repo, just to be safe from the accident that has happened in the past. Now coming to the progress.
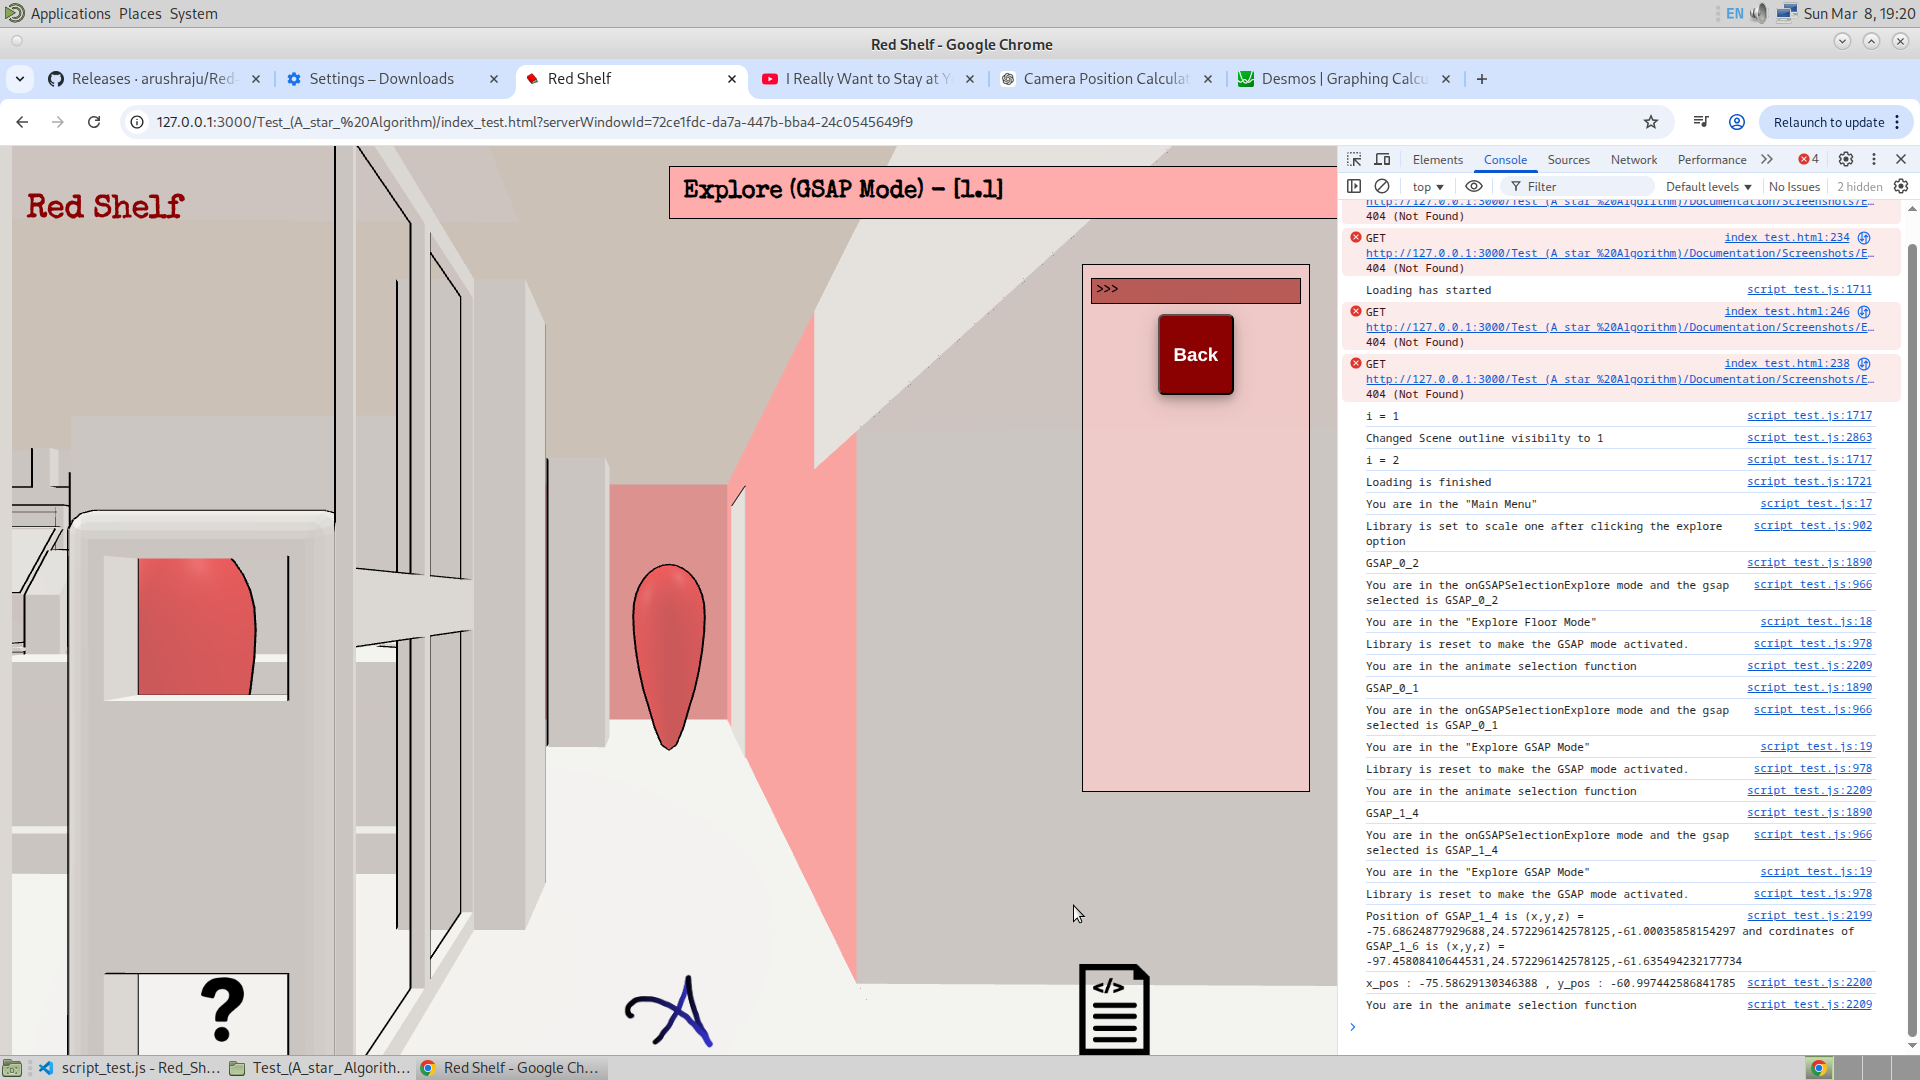
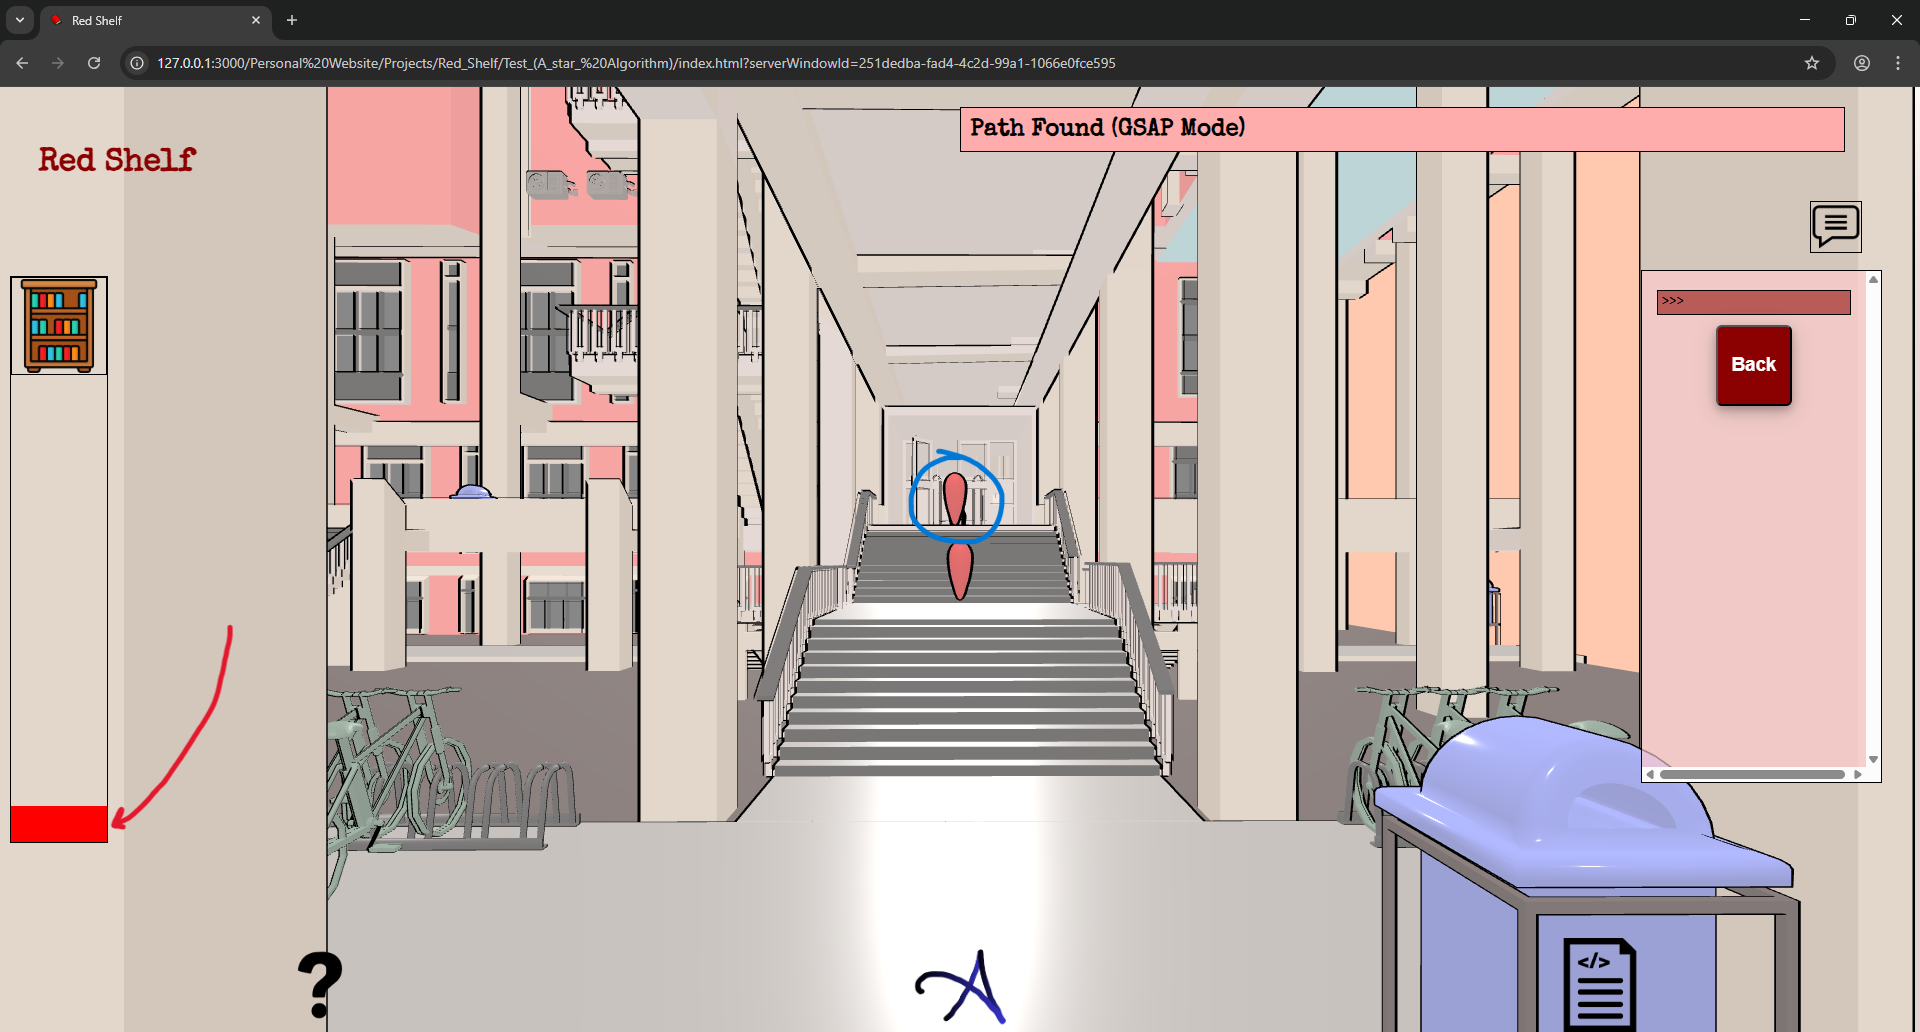
- Complete application flow of [2 to 2.3] and [2.3 to 2.4] and [2.4 to 2.3] and [2.4 to 2.5] and [2.5 to 2.4] (which includes seeing the A* algorithm working)
- Re-designing the camera orientation in camera animation.
- Using the camera orientation to complete the application flow [1 to 1.1] and [1.1 to 1] and [2.5 to 2.6]
I have also decided that I will be keeping the outline of the application turned on always. This is just too good to be kept as an option to be enabled. Now coming to the
Application Flow :
Given below is the mind map of the application flow that was already shown above in Rough Sketch.
As seen, a significant improvement has been done. I have also added the floor focus option, which will direct the focus of the floor necessary for getting the full control of the floor. So what I have realised is that the maximum and minimum distance of orbital controls, along with the target point, must change for every floor chosen. And this floor focus function that I have introduced does that. It makes it easier to select a particular GSAP at any particular location. Anyways, moving on. One thing to note above is that I have selected the starting point to be some arbitrary point, and also the ending point to be some arbitrary point, and finally I am getting the path from the starting to the ending point (for which I have used some graph search algorithm). And that's an achievement.
Camera Orientation :
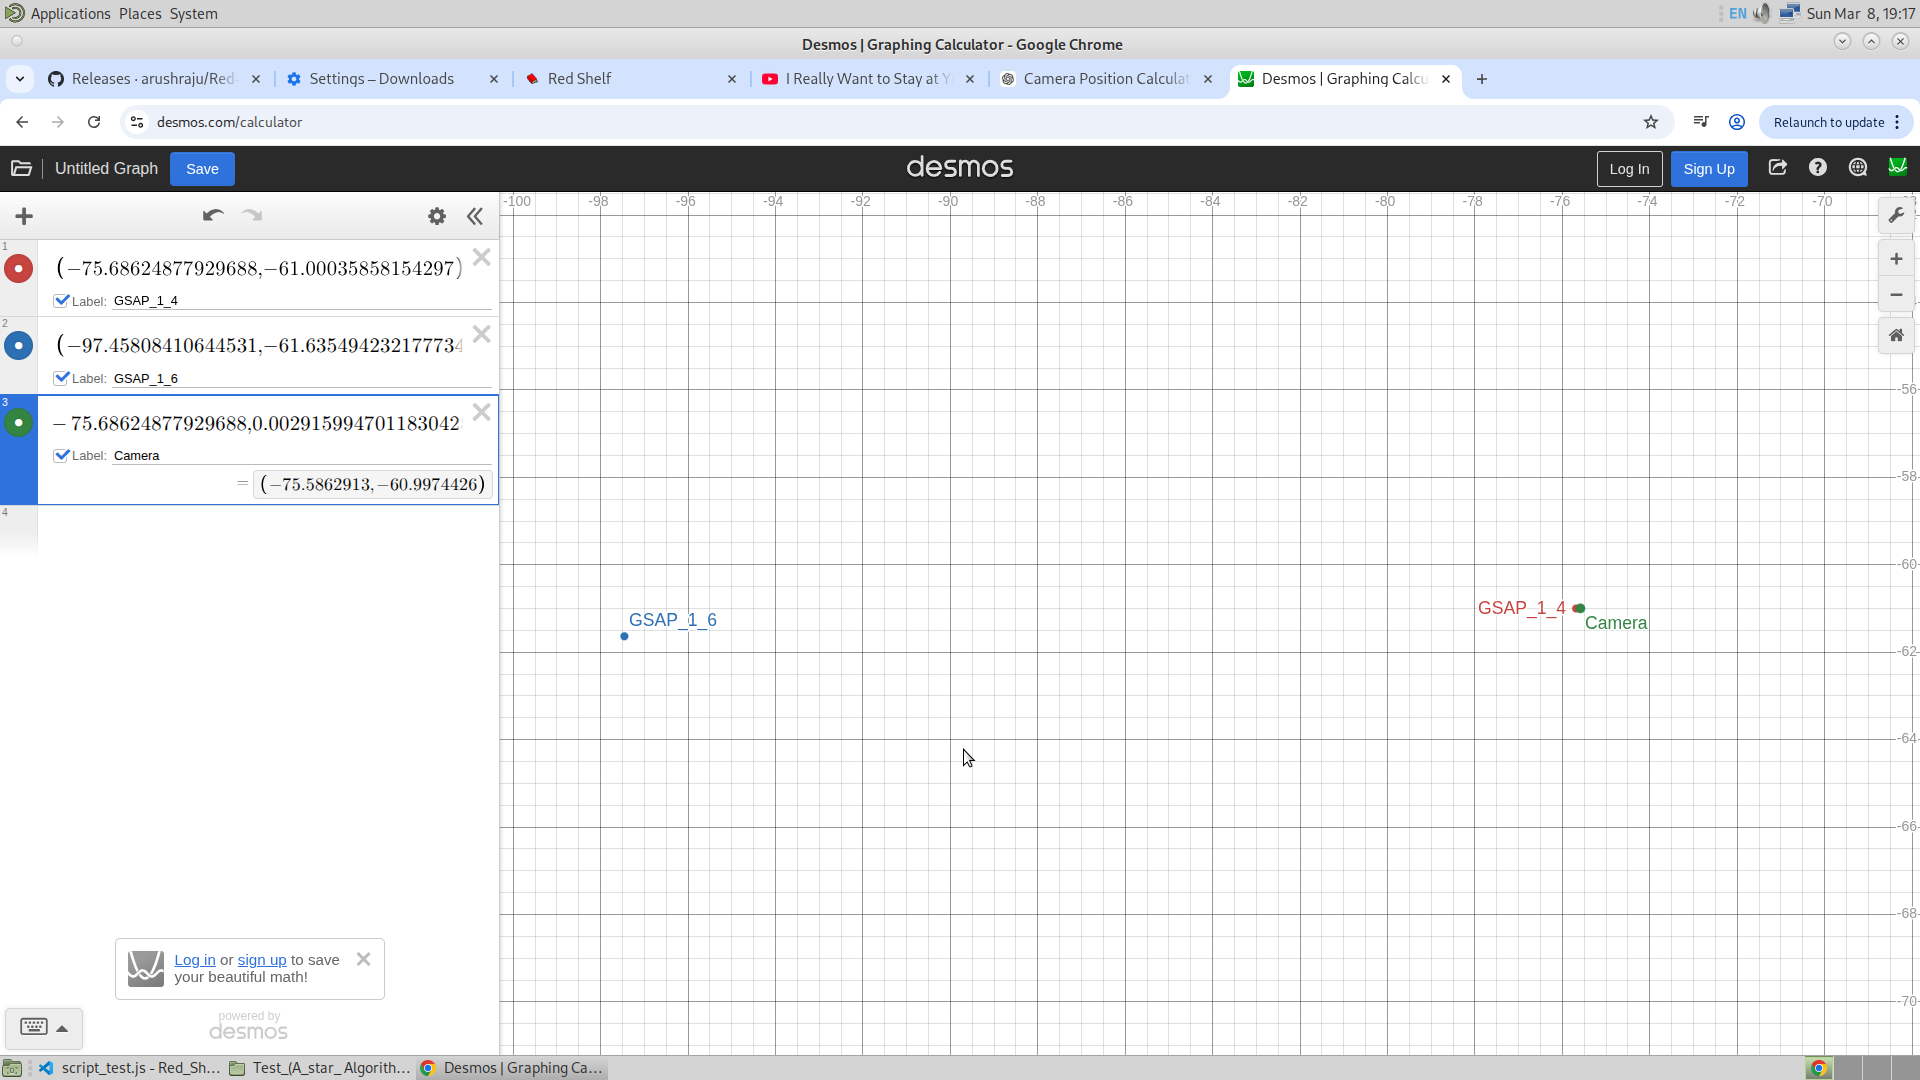
So the problem that I was facing was how will I make the camera face the right GSAP (which is the next GSAP) at a time when I don't really know the next GSAP. Earlier, if I were to summarize my approach, it was all hard coded. And now, after the inclusion of the graph search, to a lot of extent I have come out of the hard coded logic, which is a good thing. Now in order to solve the problem of orientating the camera to the right next GSAP, I am using this way where I will be drawing a straight line between the origin of the selected GSAP and the next GSAP. And then at a distance d I will find the final coordinates of the camera. And then I will use GSAP to animate the camera from the initial coordinate, which is the present one, to this final one. And this is how I will be doing the animation. Given below is the formula for finding the coordinates of the final point which is at a distance d from point A and lies on the line passing through points A and B.
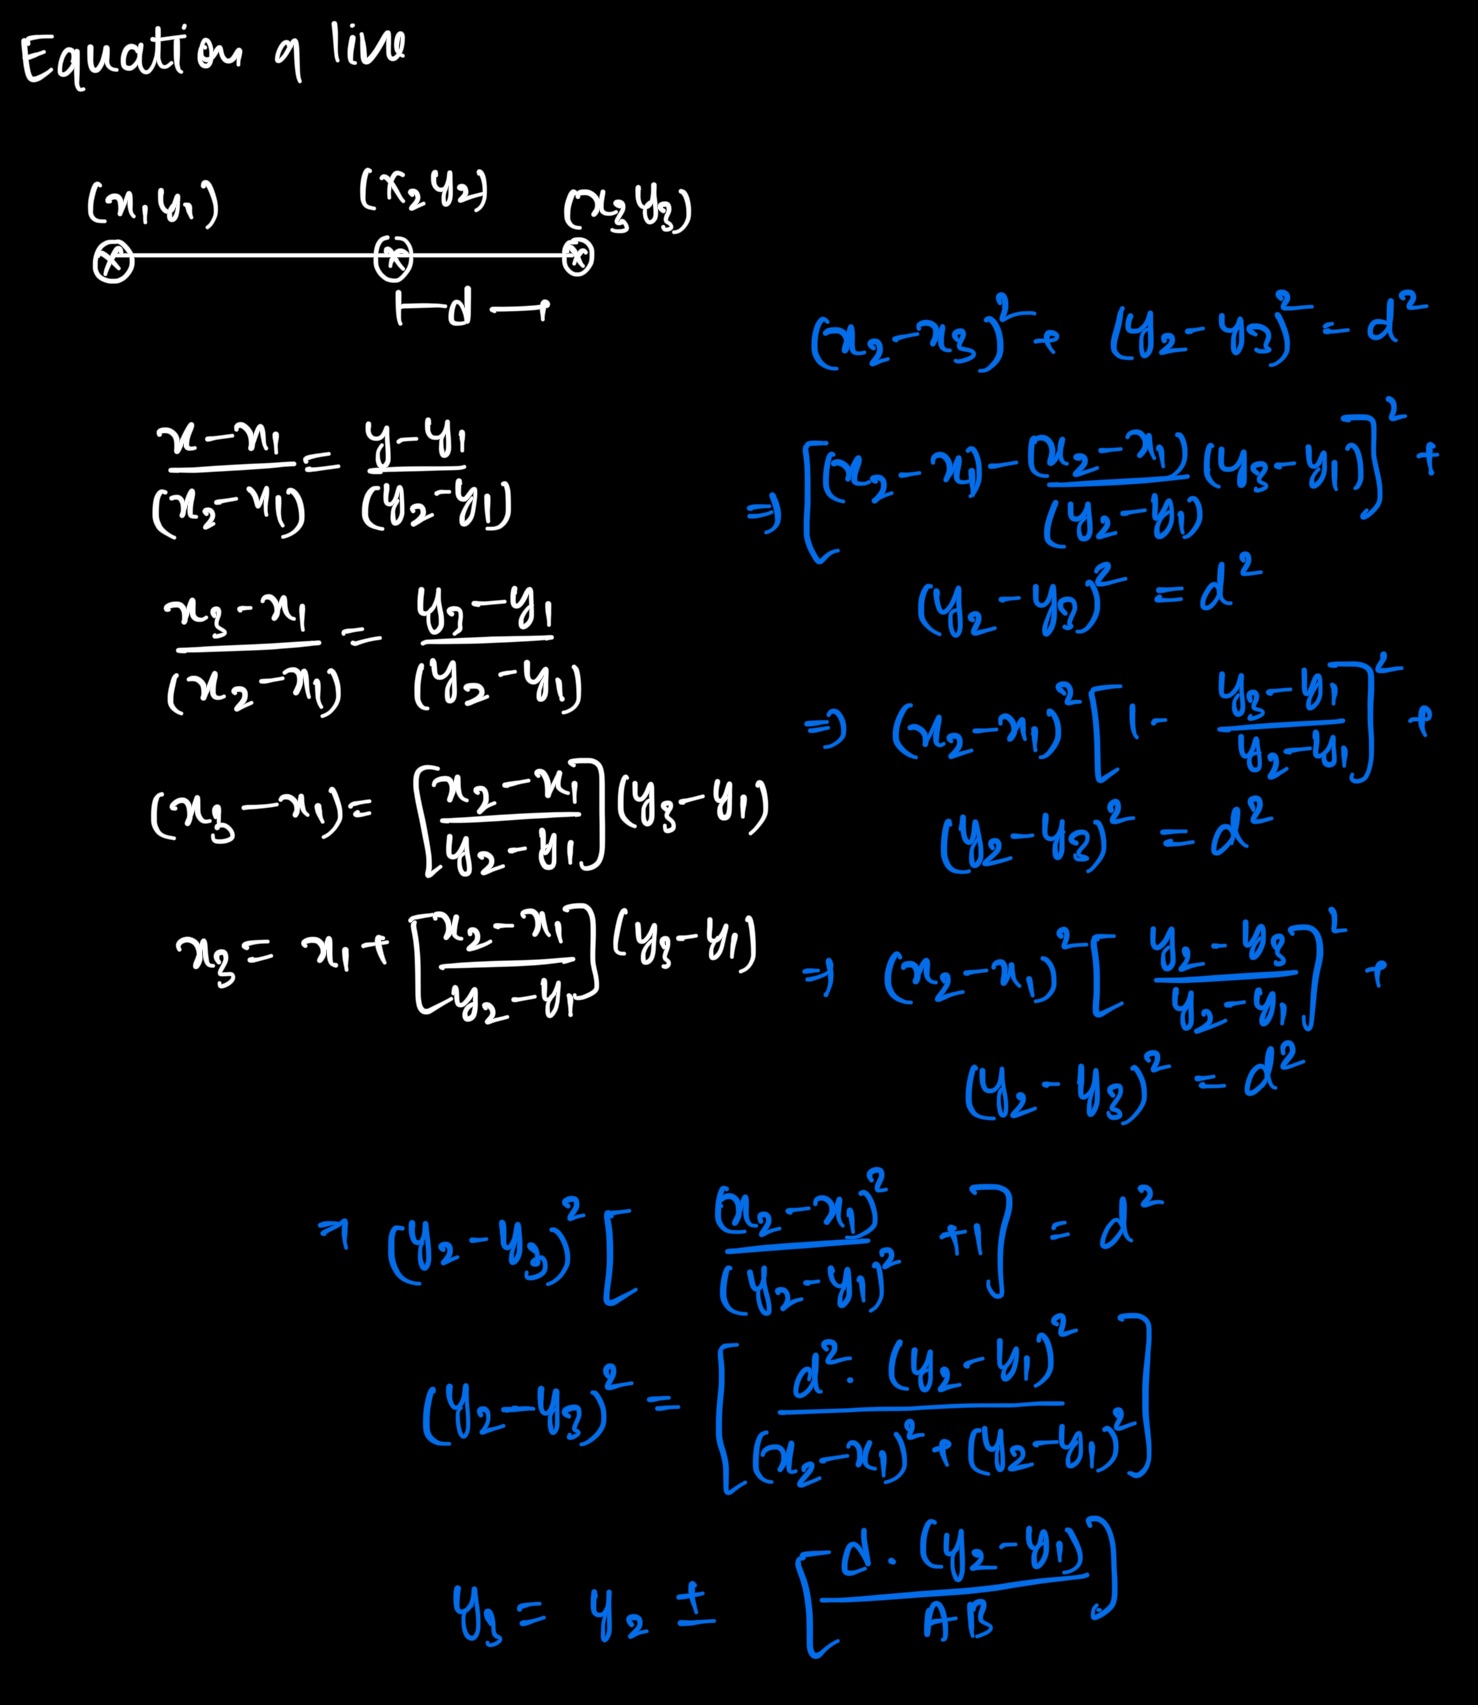
In this case, all I needed was the selected GSAP and the target GSAP where the camera must be pointed. Then I would find the coordinates of the selected GSAP and the next GSAP and then, using the above logic, get the final coordinates of the camera and then animate the camera.
Given below is the visual way in which I validated my understanding.
18/3/26
So there are many updates, and I am excited to list them one by one. Given below is just that. As always, I will first list down the major updates, and then I will explain each of them in detail.
- A* Star Algorithm implementation
- Bookshelf and Journal Search
21/03/26
So today, I have mainly worked on putting the right void object for setting up the frustum. And also, I have added the switch boards in the reading room of the ground floor and the second floor. From all that I have done till now, I see everything is very cluttered. The frustum is no more functional in this version till now. So let me use these notes to systematically summarize everything for now. Given below is the list of things that are required for me to work on tomorrow. By tomorrow, I will have to finish version 2 completely. And this includes everything except for the Pointer Lock Controls. And the day after tomorrow, I will work on the third version, which will include the pointer lock controls for the explore. And also the use of .remove() function to optimize the smoothness of the application. Also, the third version will contain the vegetation in the explore version. So from what I am seeing, the second version is focused on improving the search and crowd features of the app. And the third version will be focused on the Explore and Admin features, which will indeed be heavy.
Tomorrow's task is as follows :
- Make use of the frustum objects that were made today, and add this feature appropriately at different application flows. This also includes the pop-up that will appear after clicking on the frustum.
- Re-build the instance of tables of the entire library, along with the switch boards and the staircase. This will surely bring the memory of the glb file to less than 10MB. Good for the app, I guess.
- Re-define the application flow once again with the GSAP and the Frustum settings, which also include the development of the entire quick search.
- Adding the pointer lock controls in the explore, which means also adding a virtual joystick for mobile use.
- Adding the vegetation in the explore option, making use of
.remove()to add and remove the mesh when getting into or out of the explore mode. - Adding the percentage bar in the GSAP mode when the search is made.
- Adding the drag controls to the application for the admin menu, and using Supabase to handle the application. This step will surely take a long time. I am not sure if I will be able to do this before leaving this college.
- Also, I was thinking to add the geo-location, but since I have already tried and have seen the poor accuracy, I think adding a dummy 2D map with the camera's location being the live location in the app is a good idea. And I will ensure that this is also added to the application before I leave.
23/03/26
Today, I had my third meeting with the staff members, and I have completed my second version of the application. Now is the time to move to the next step, which is Phase 3. So, given below are the details regarding Version 2 (which still contains some bugs), and then I will discuss my plans for the third phase of this project.
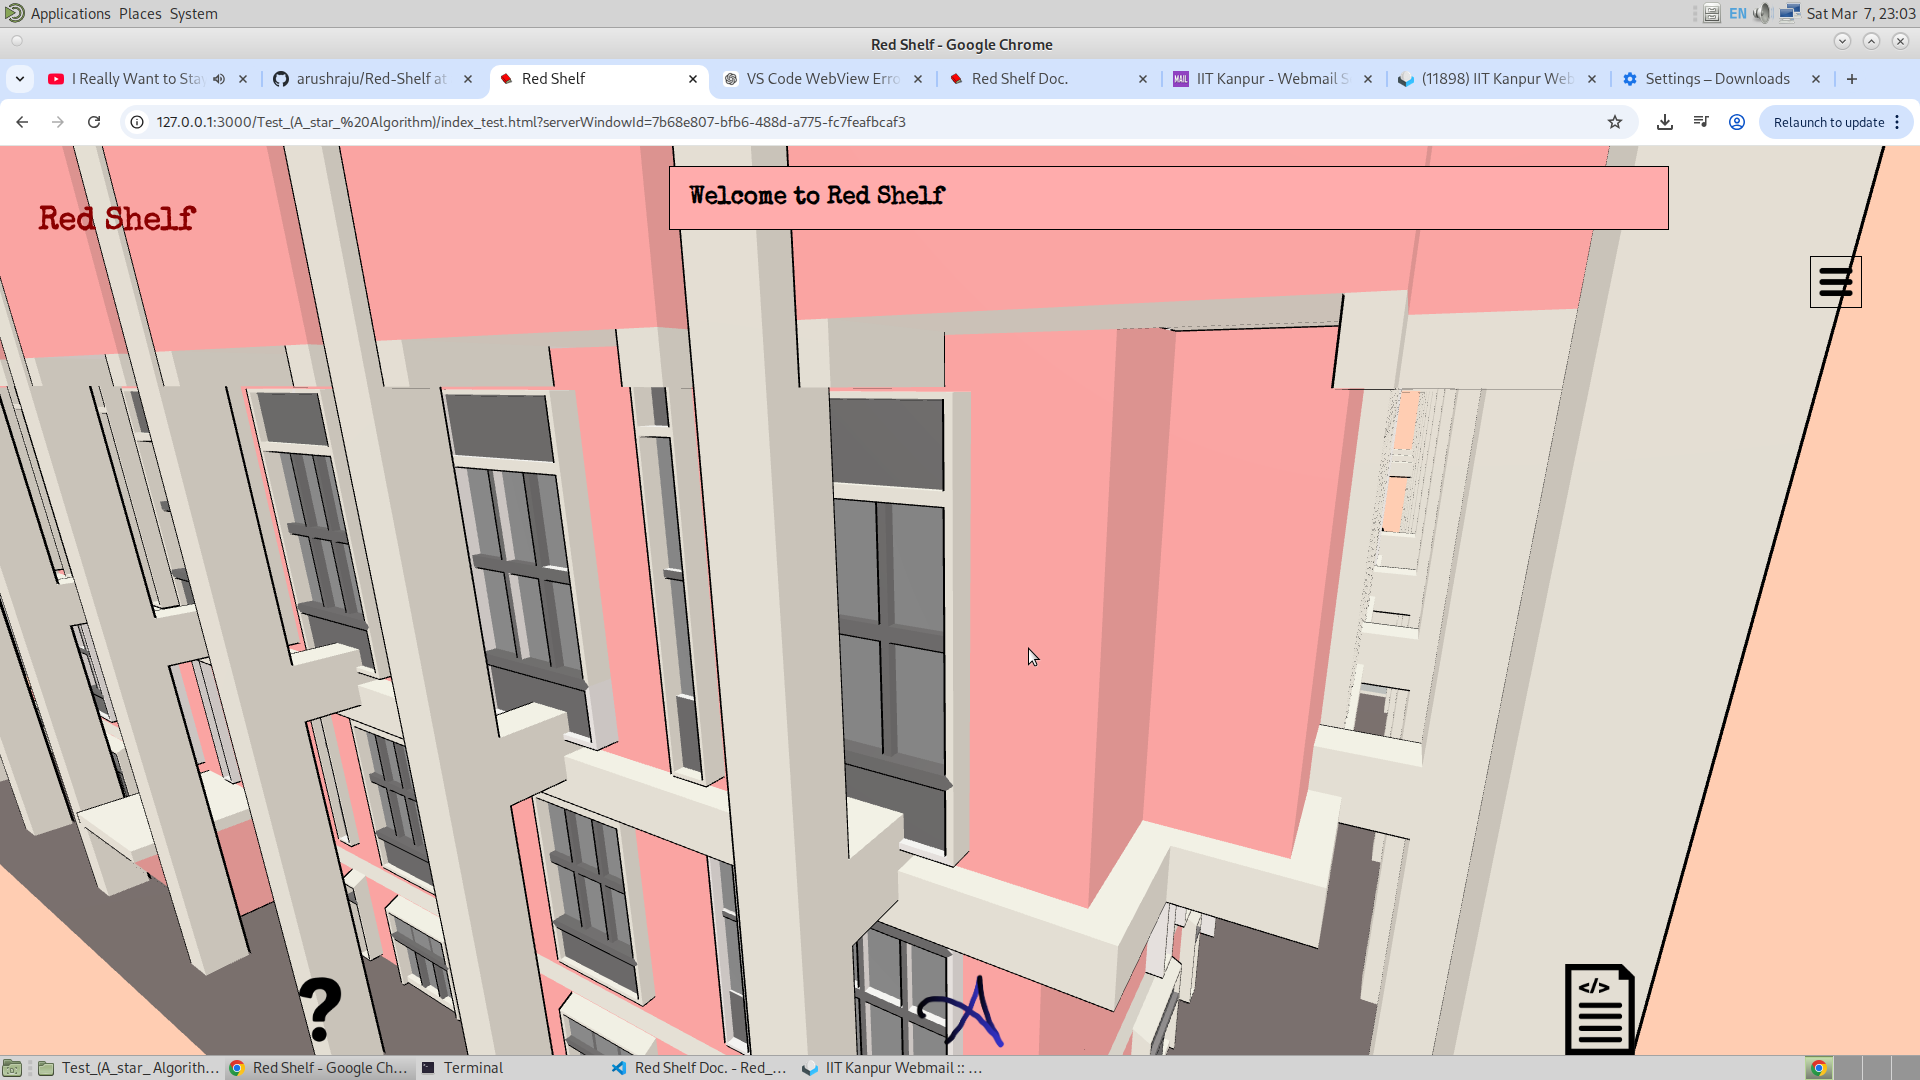
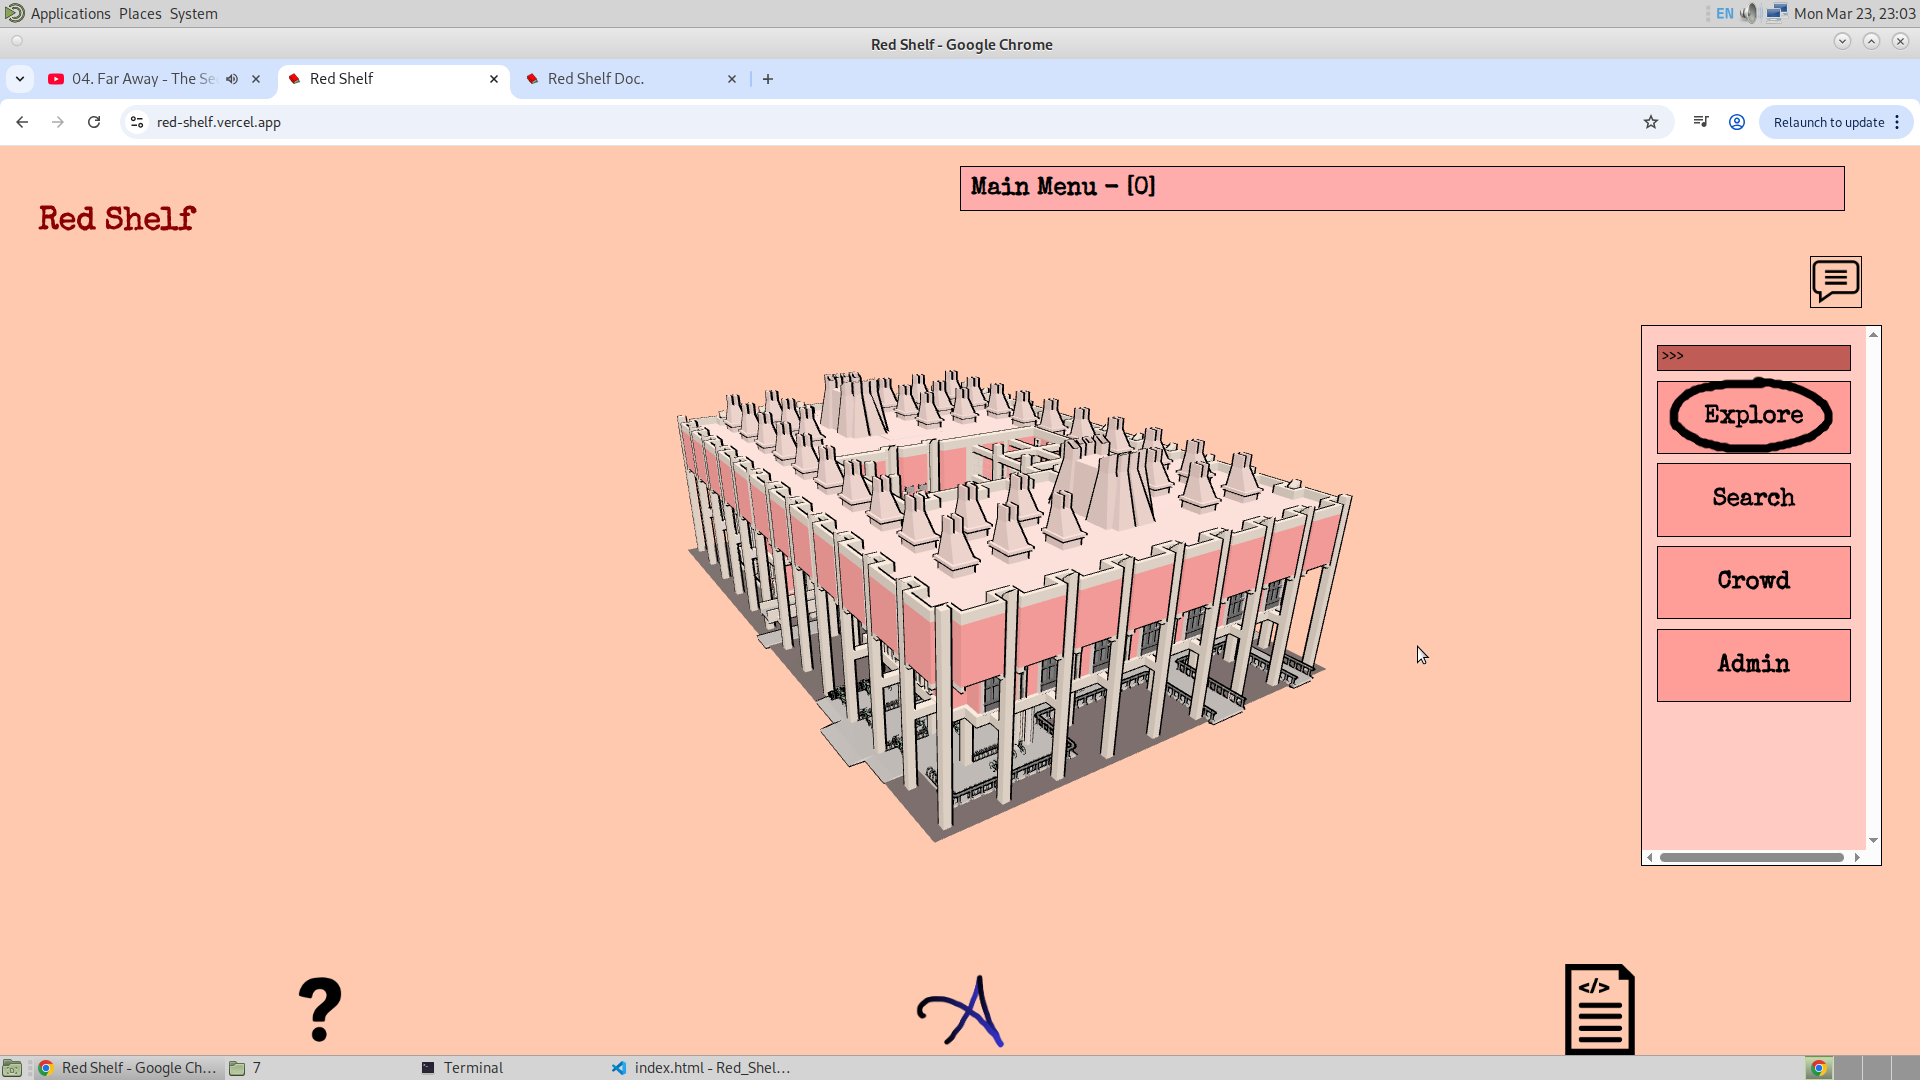
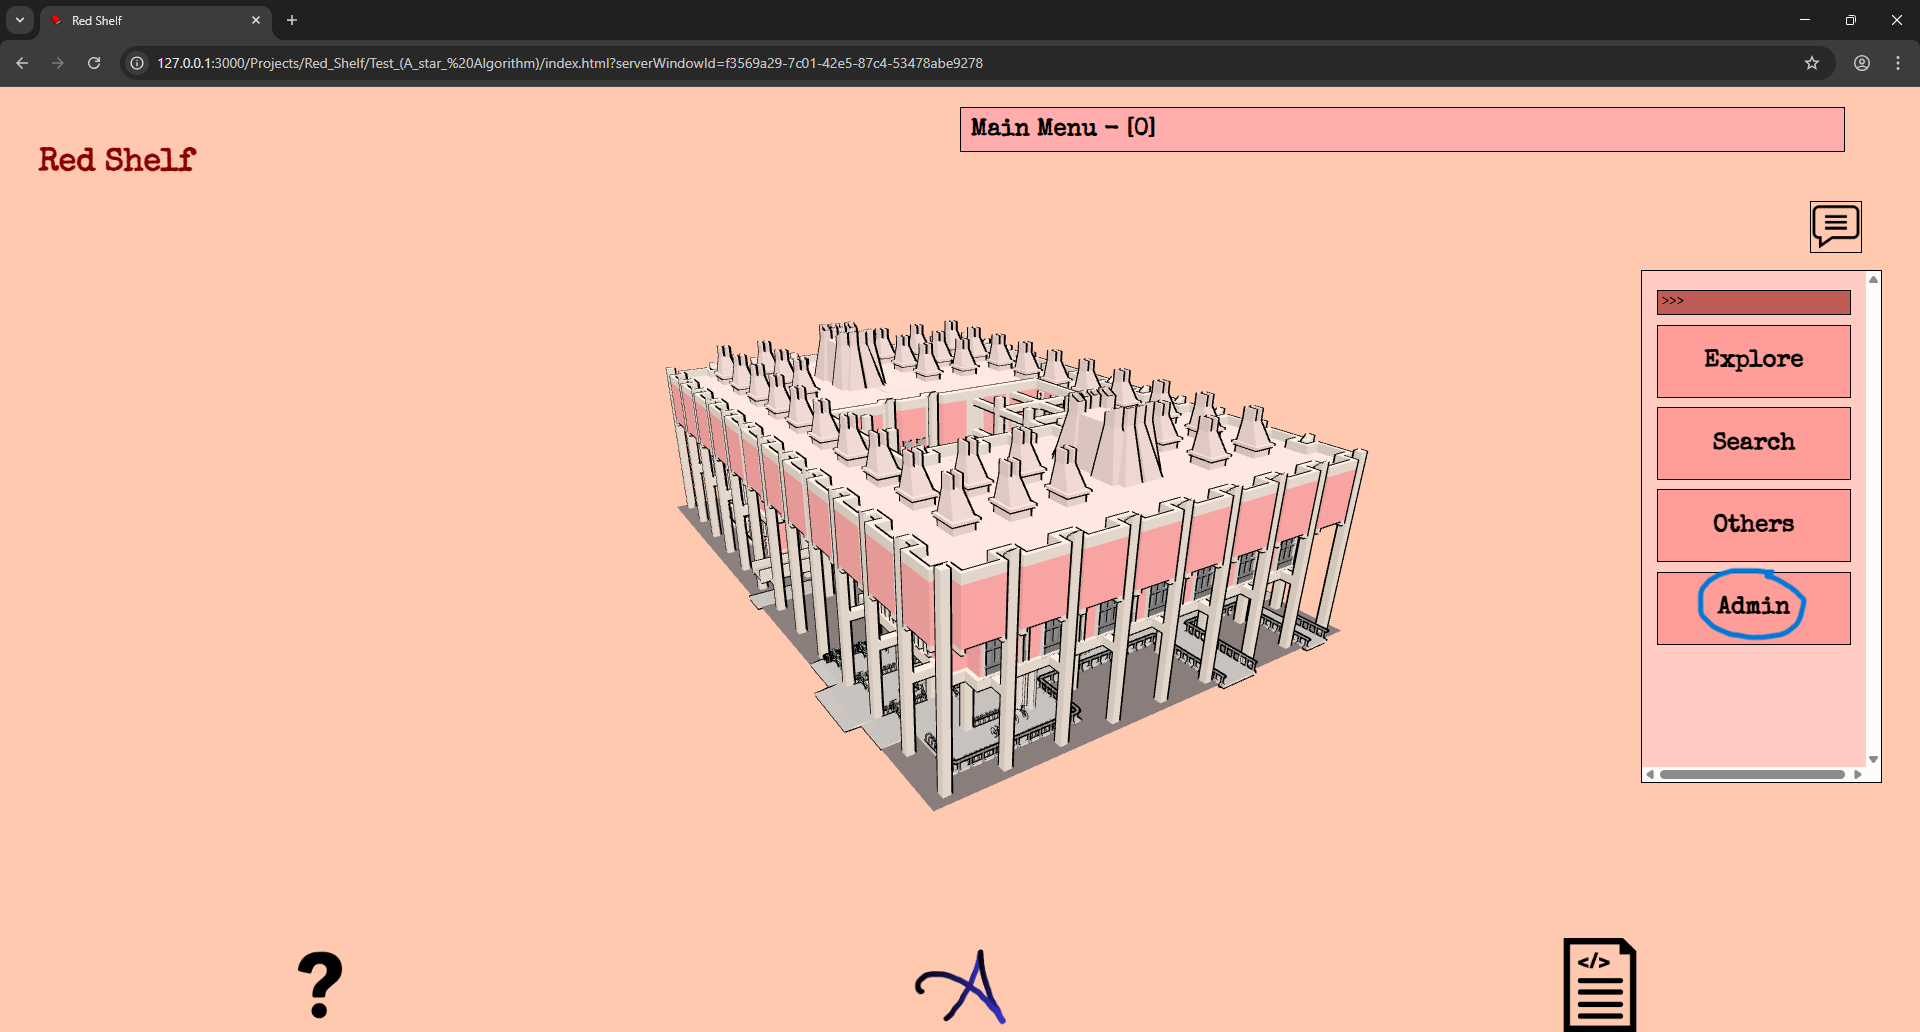
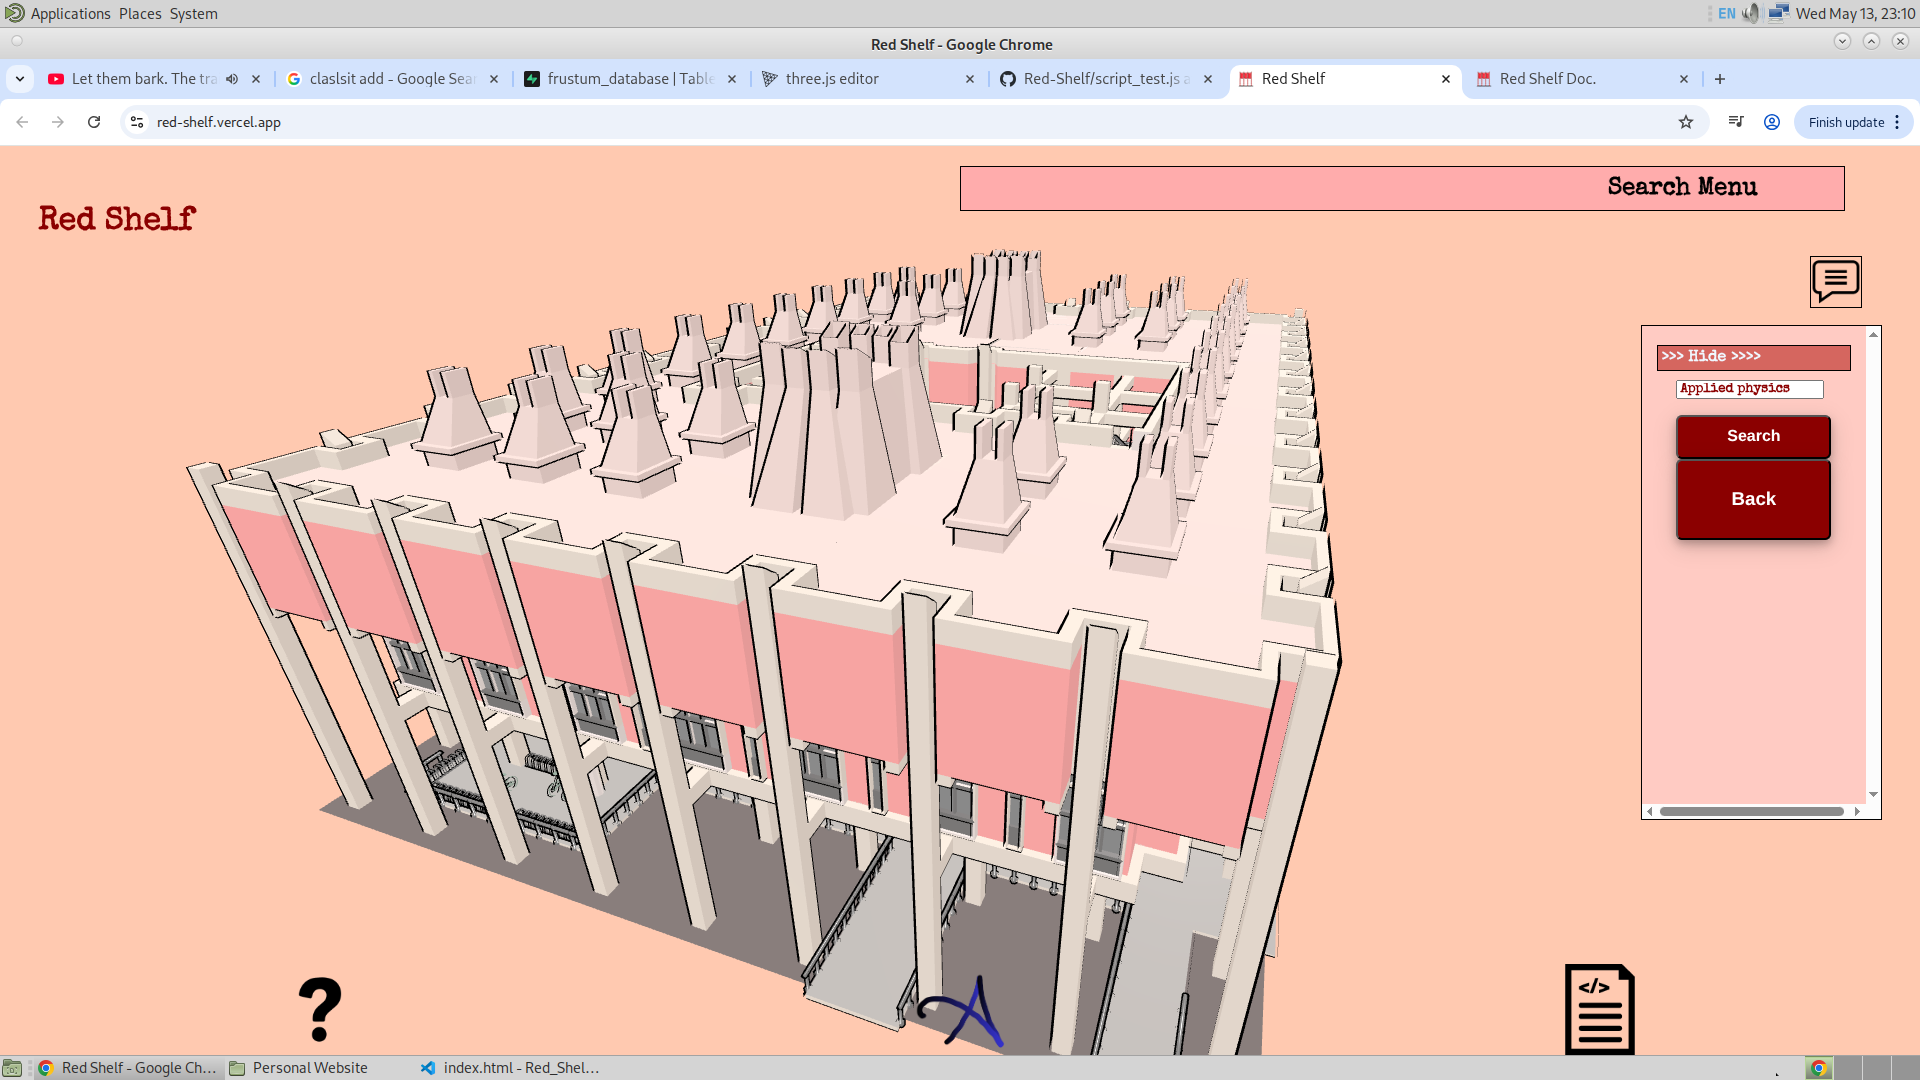
First, let me show the UI:

There is a menu bar, which can be hidden by pressing the top button on the menu bar. There is also a frustum button, which can be used to toggle the frustum. Then there is the title, followed by the footer and the heading.
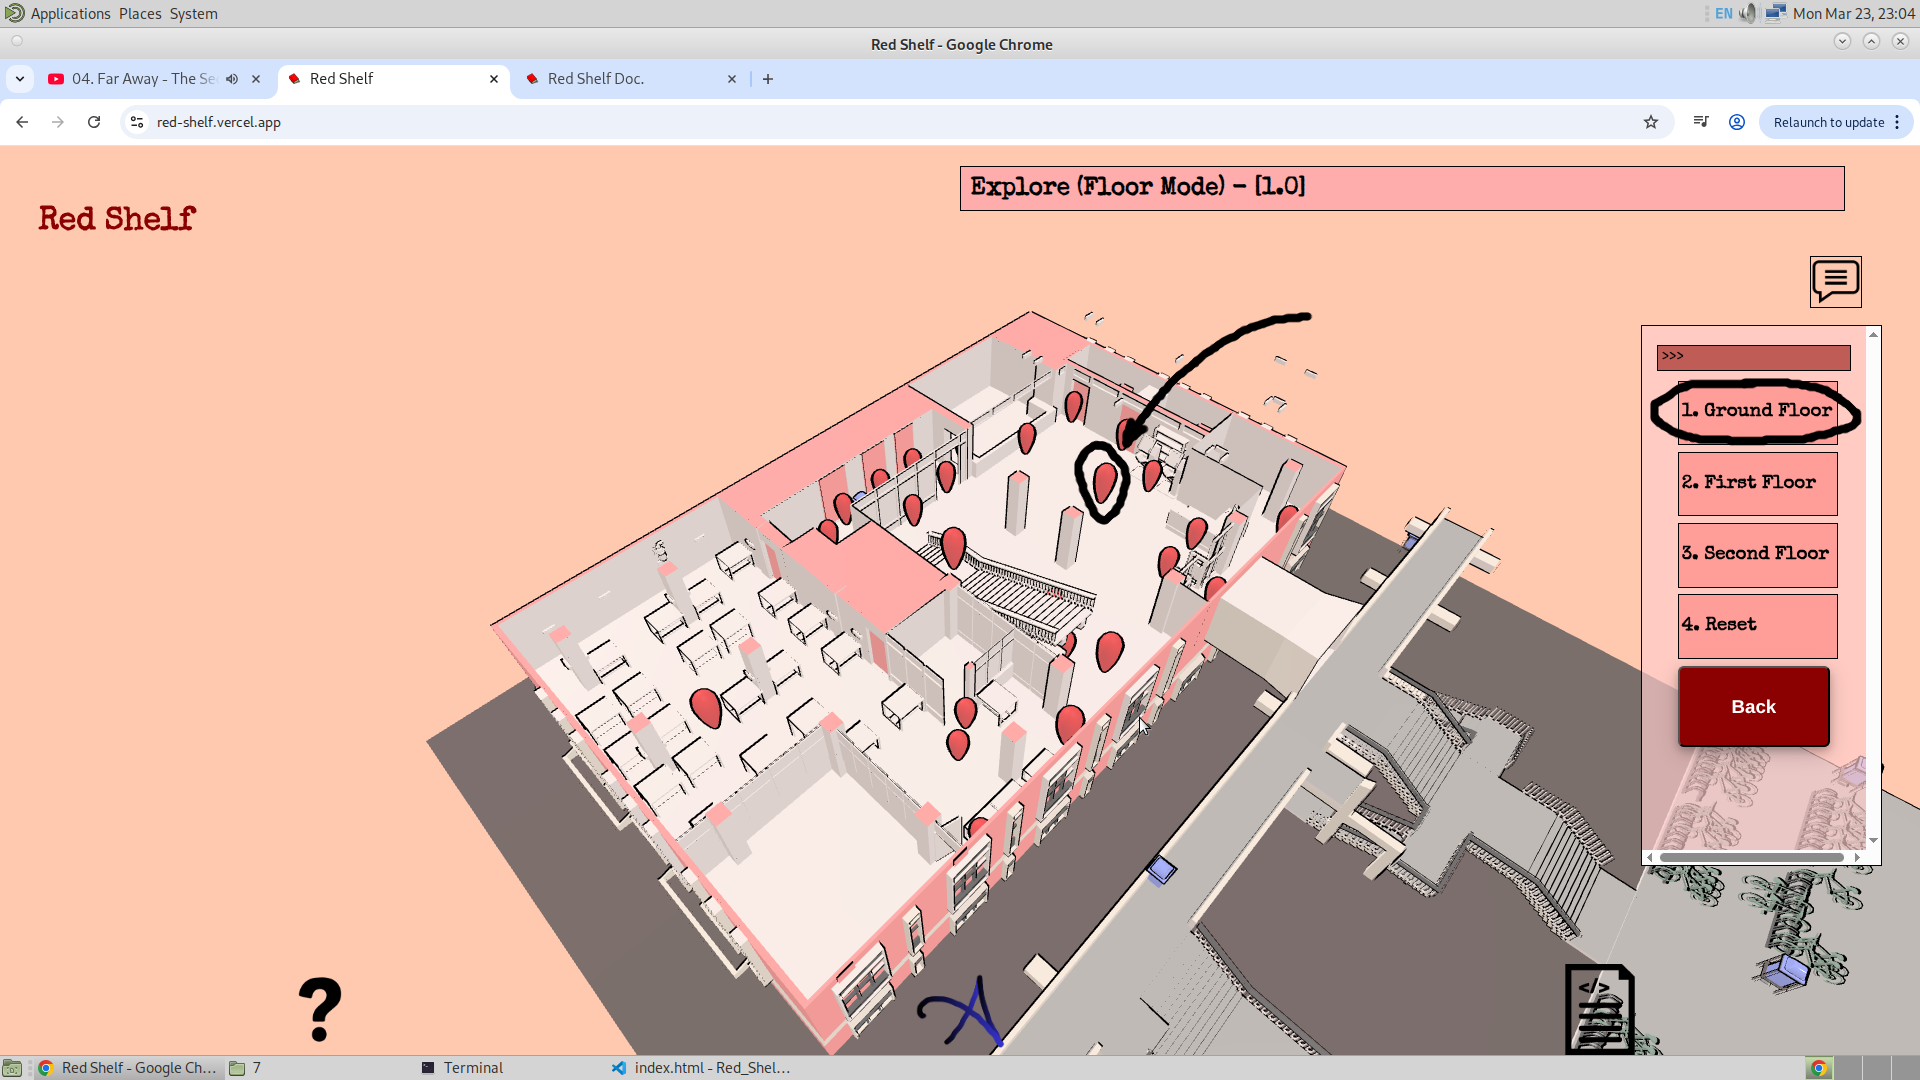
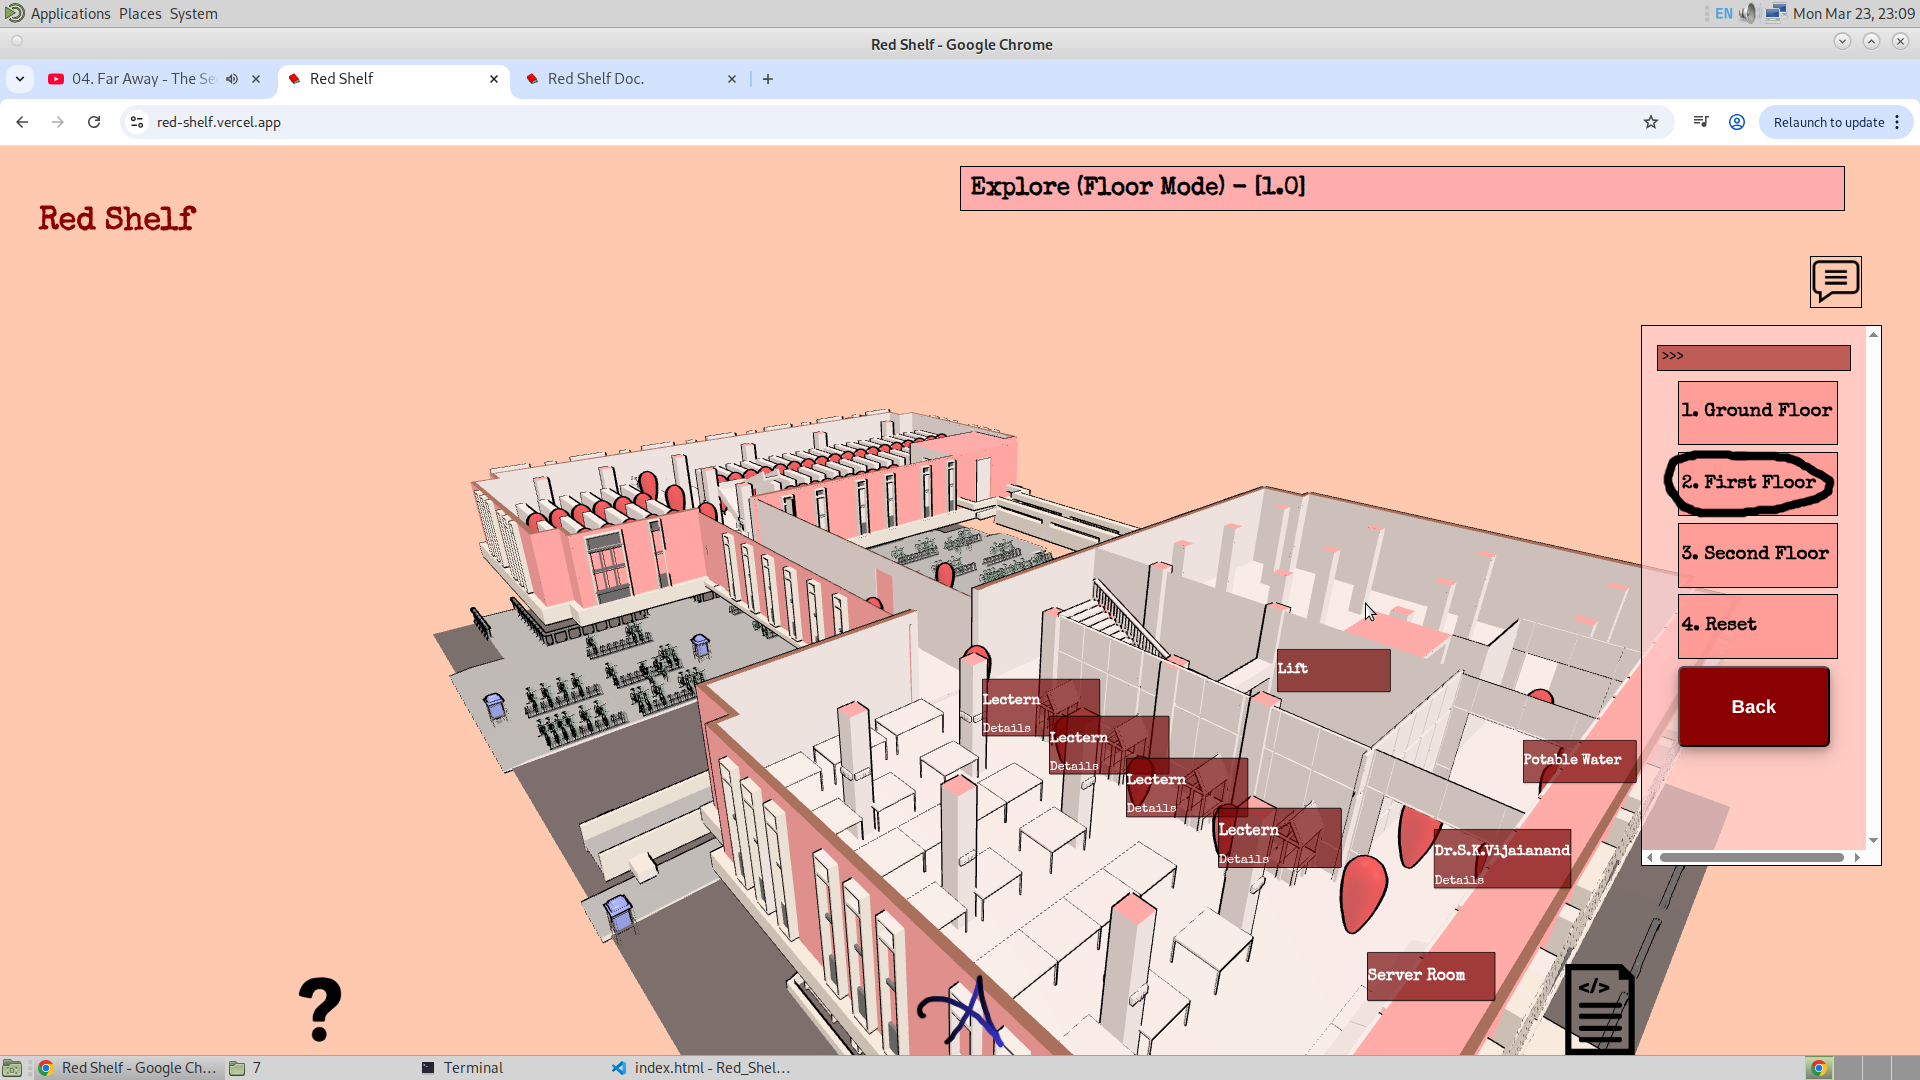
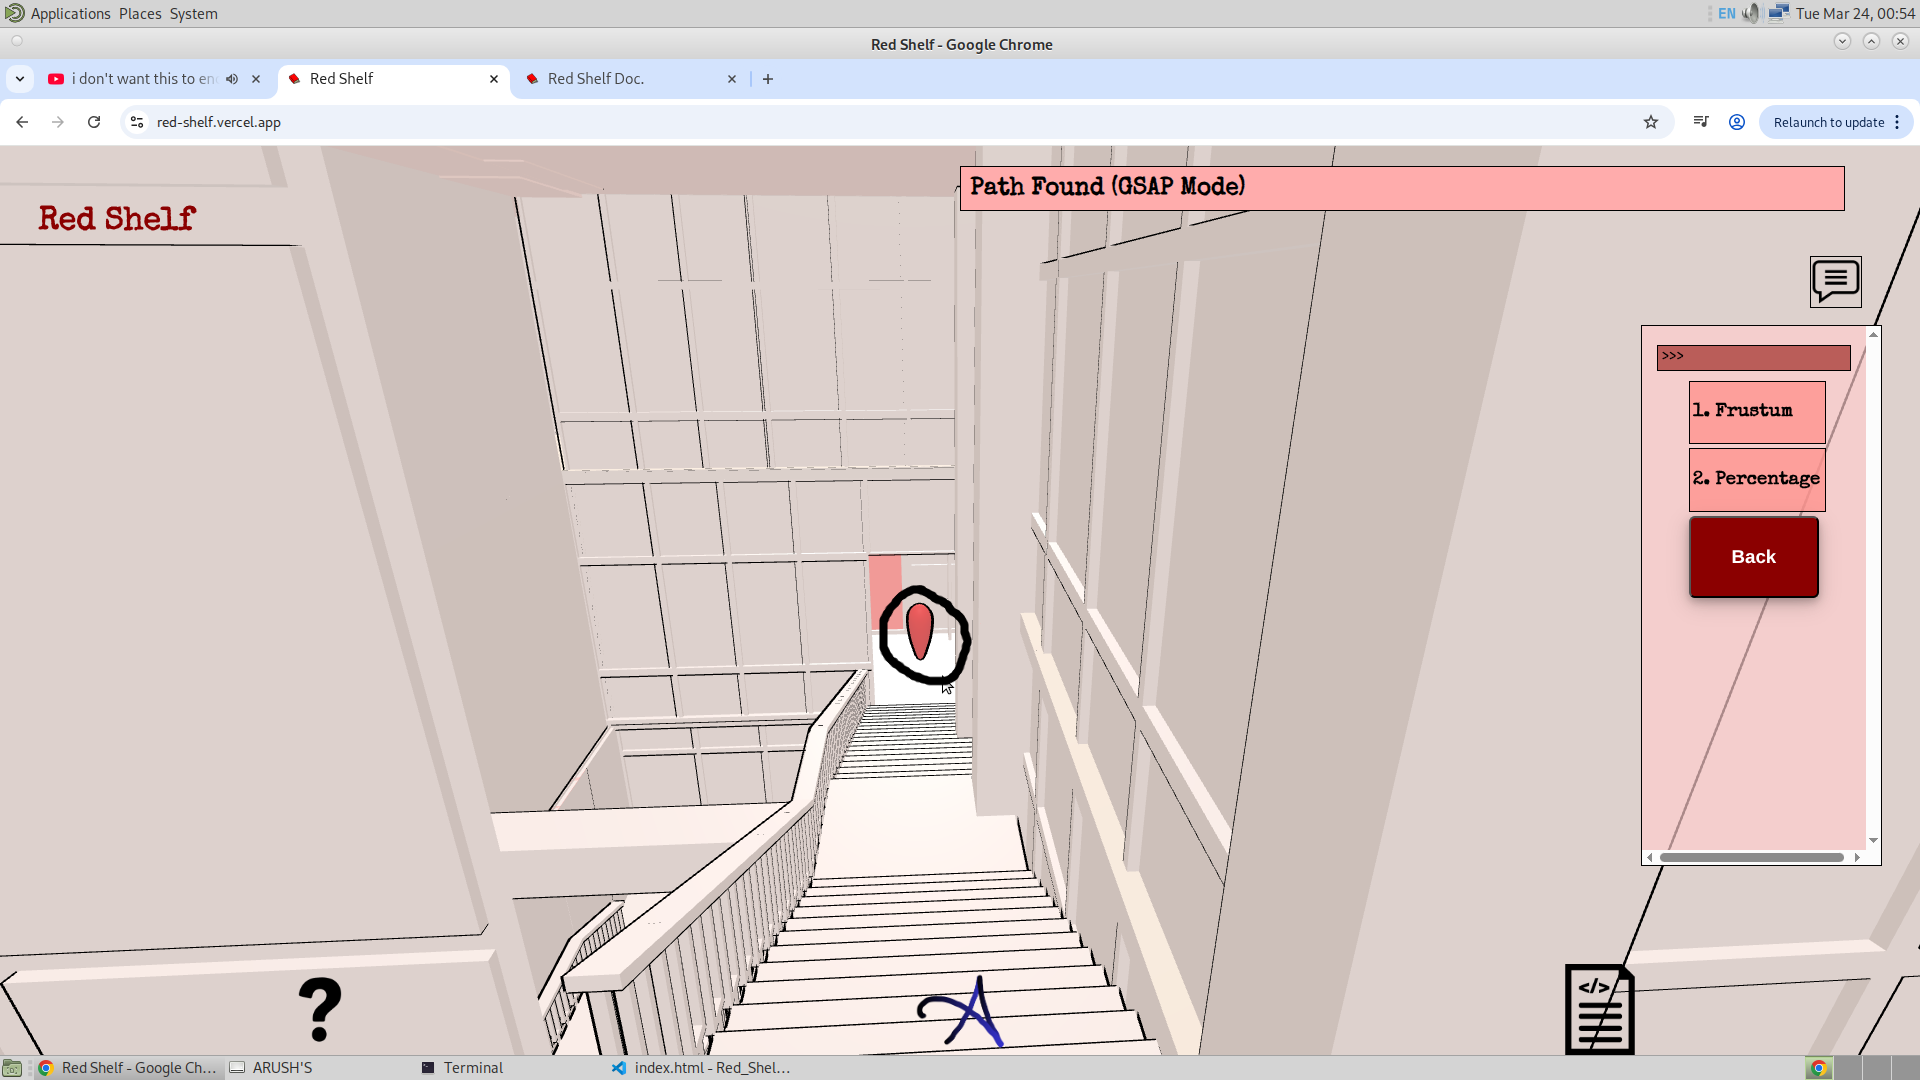
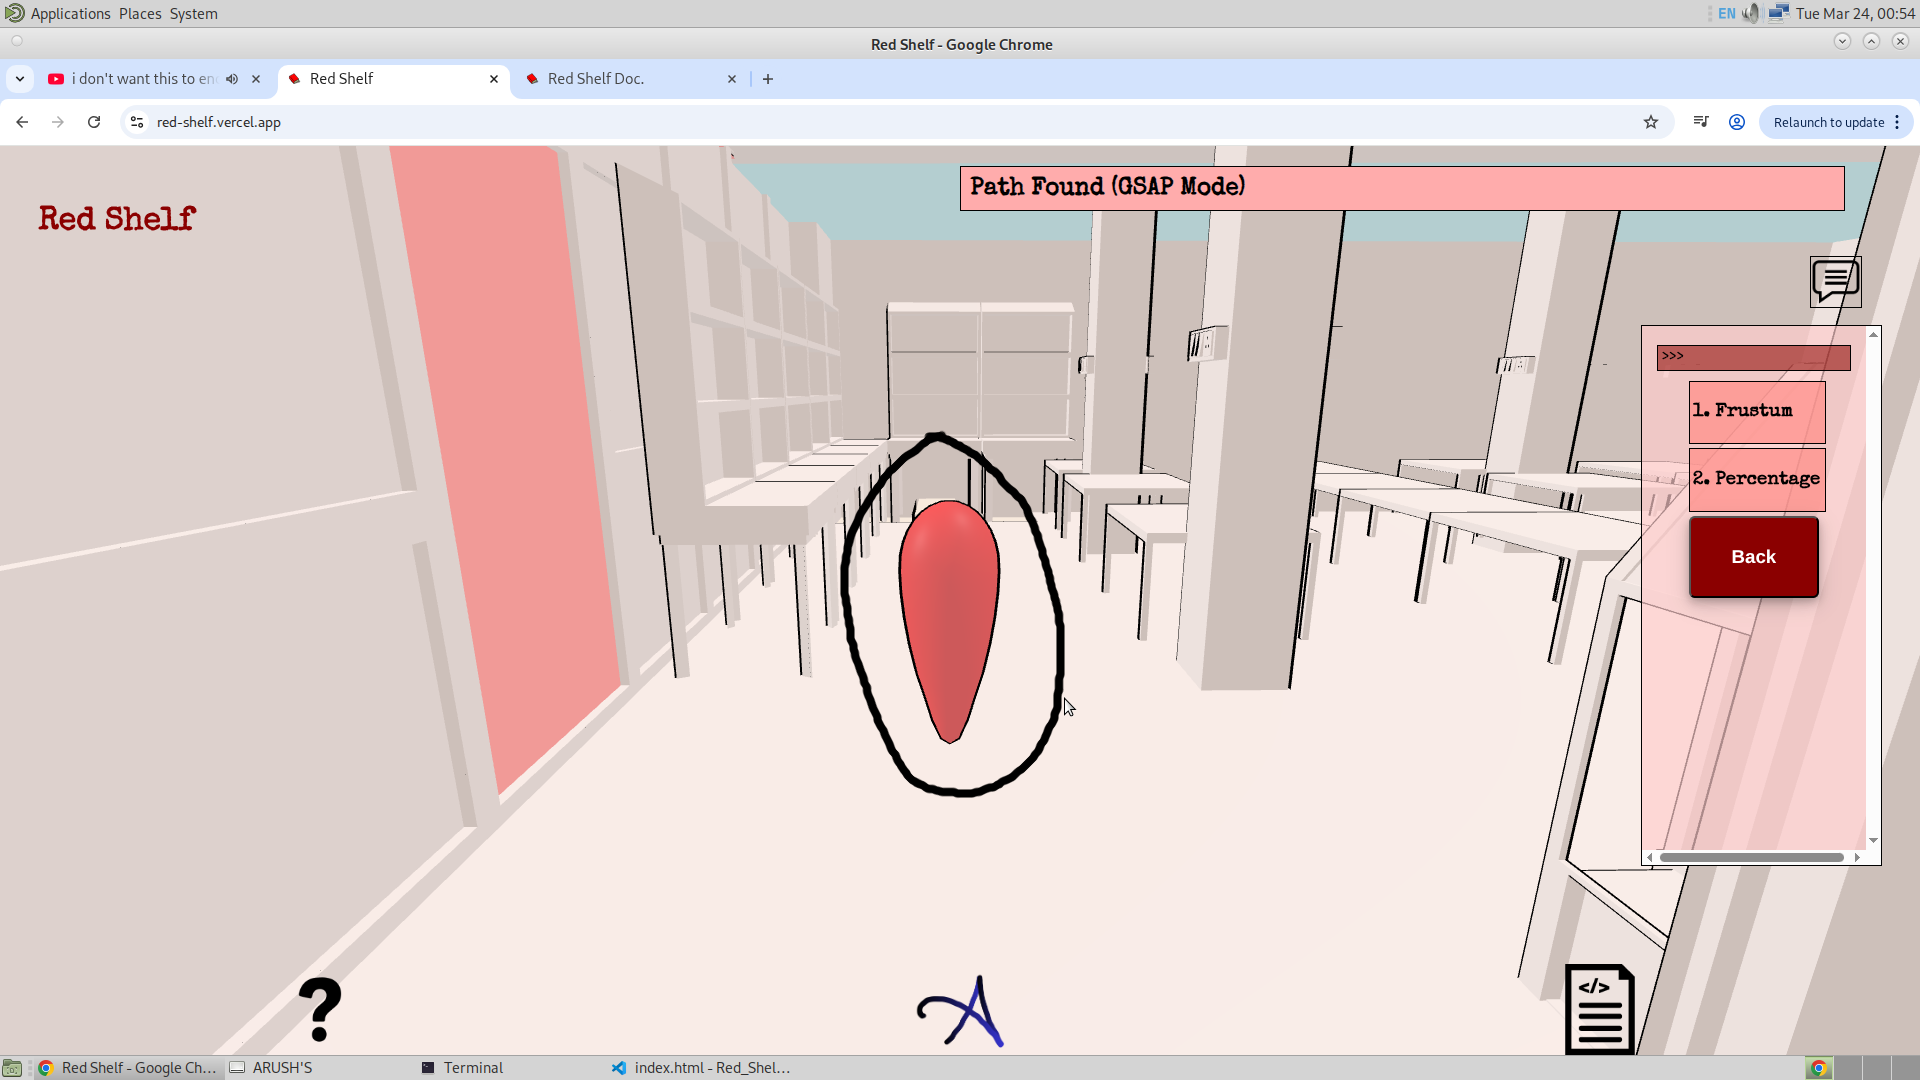
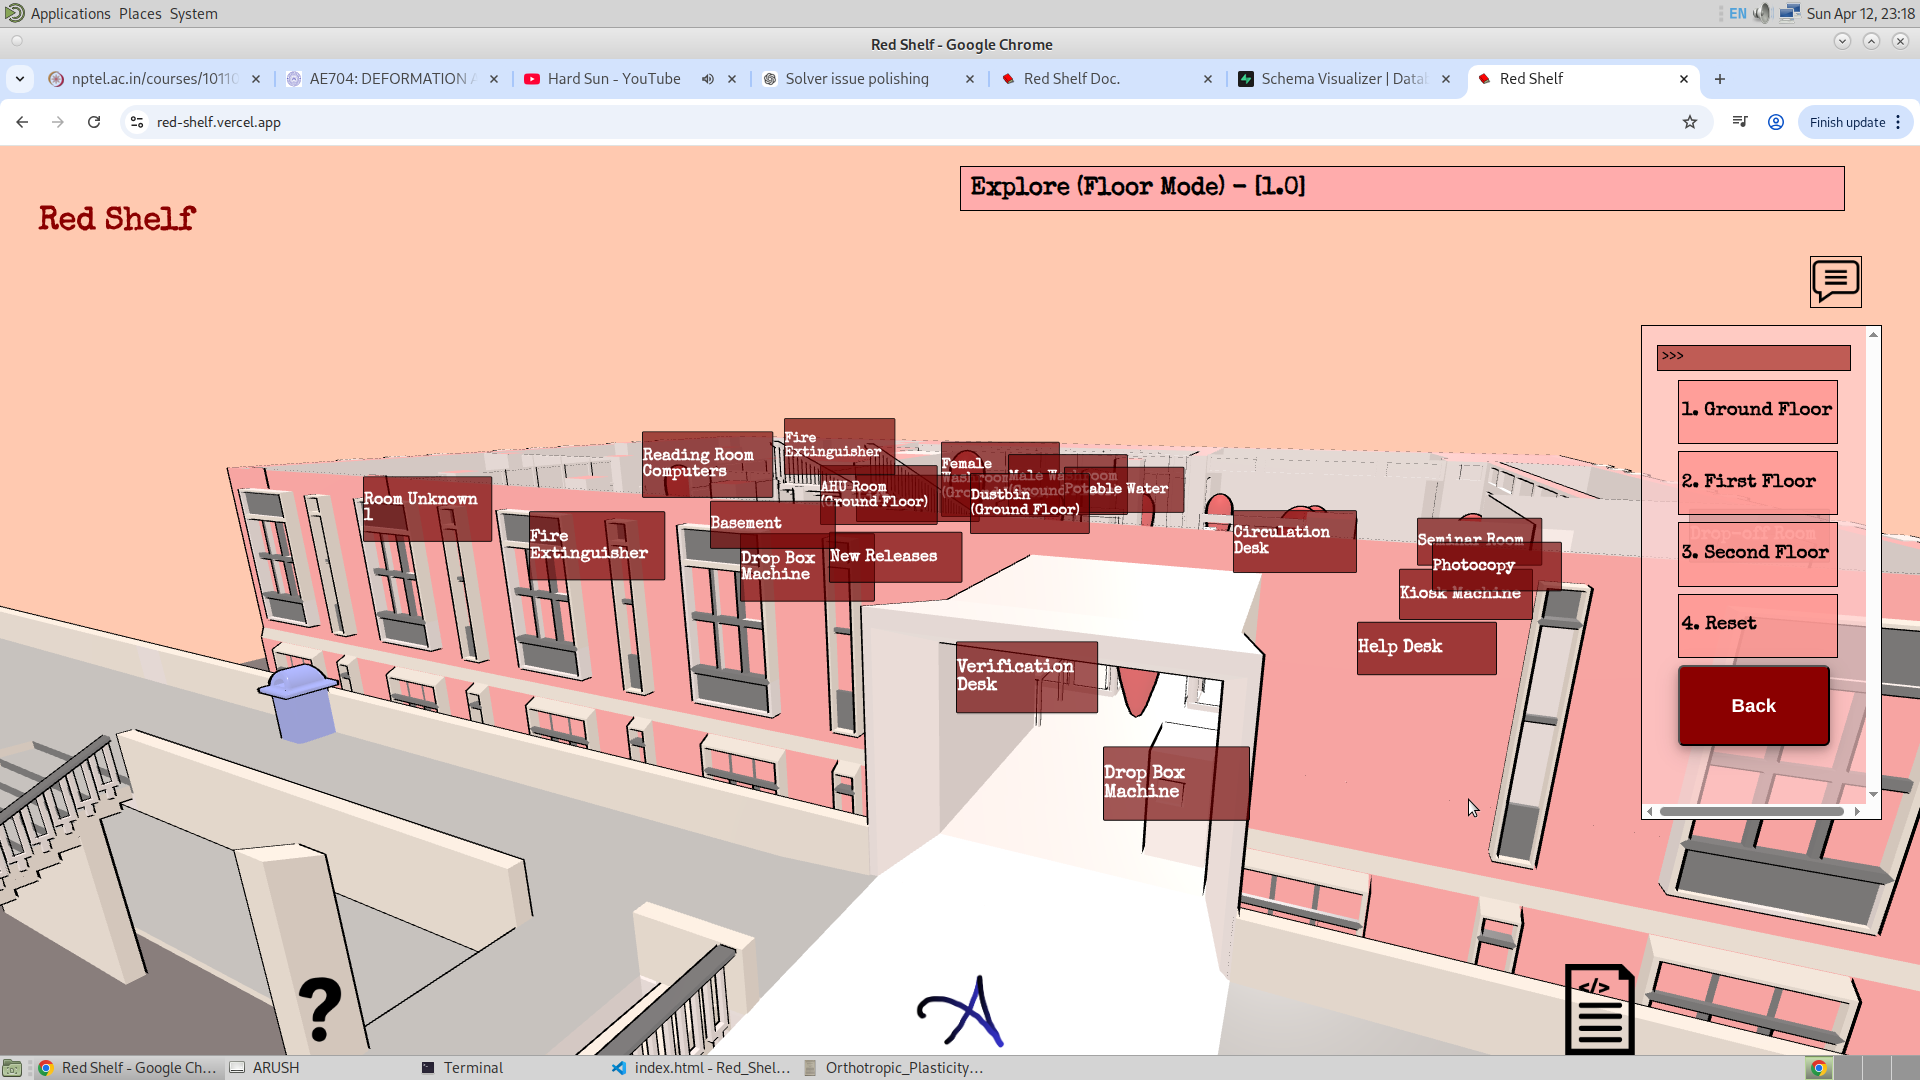
1. Explore Mode:
The first option in the main menu is Explore, which can be used to take a virtual tour of the library. It allows the user to roam around the library. Pressing the Explore option takes the user to the Floor Mode of the Explore Mode, which allows the user to jump to different floors of the library from a bird’s-eye view. Finally, after clicking an icon, the user enters the GSAP mode. This is where the user can view the library from a first-person perspective.
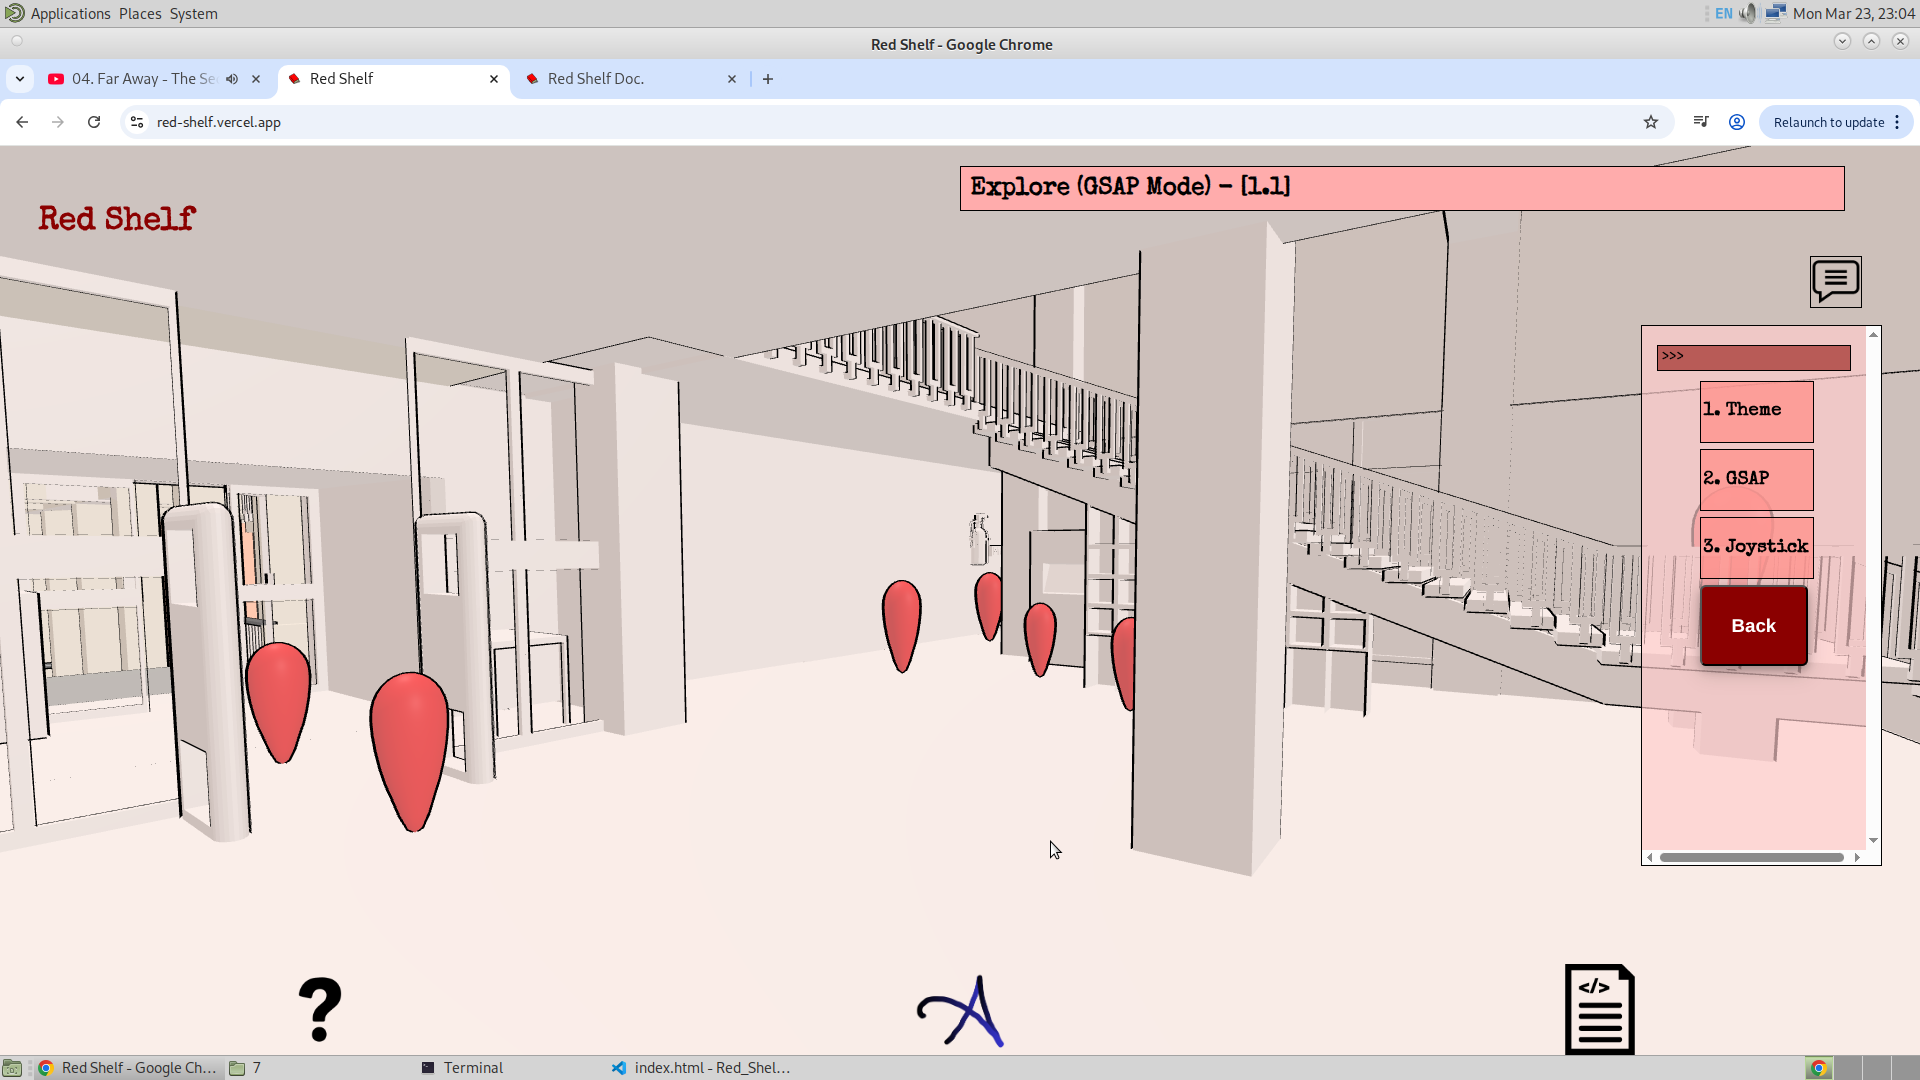
Apart from this the Explore mode also have the option to enable the frustum. Which would be the helpful when trying to know what certain thing is. And this feature will be disabled when the application is in the GSPA mode.
Now with that being said, I would now like to share my thought on the future plans about Explore Option.. In the past I have made this website Link. And this was the website where I have used the Pointer Lock Controls. And I alos want to add that in this website for the explore option. This is a bit resky but I will try. ,And then the second thing is the vegetation option. To add the realism and beauty. These two option will complete the version three Explore Mode.
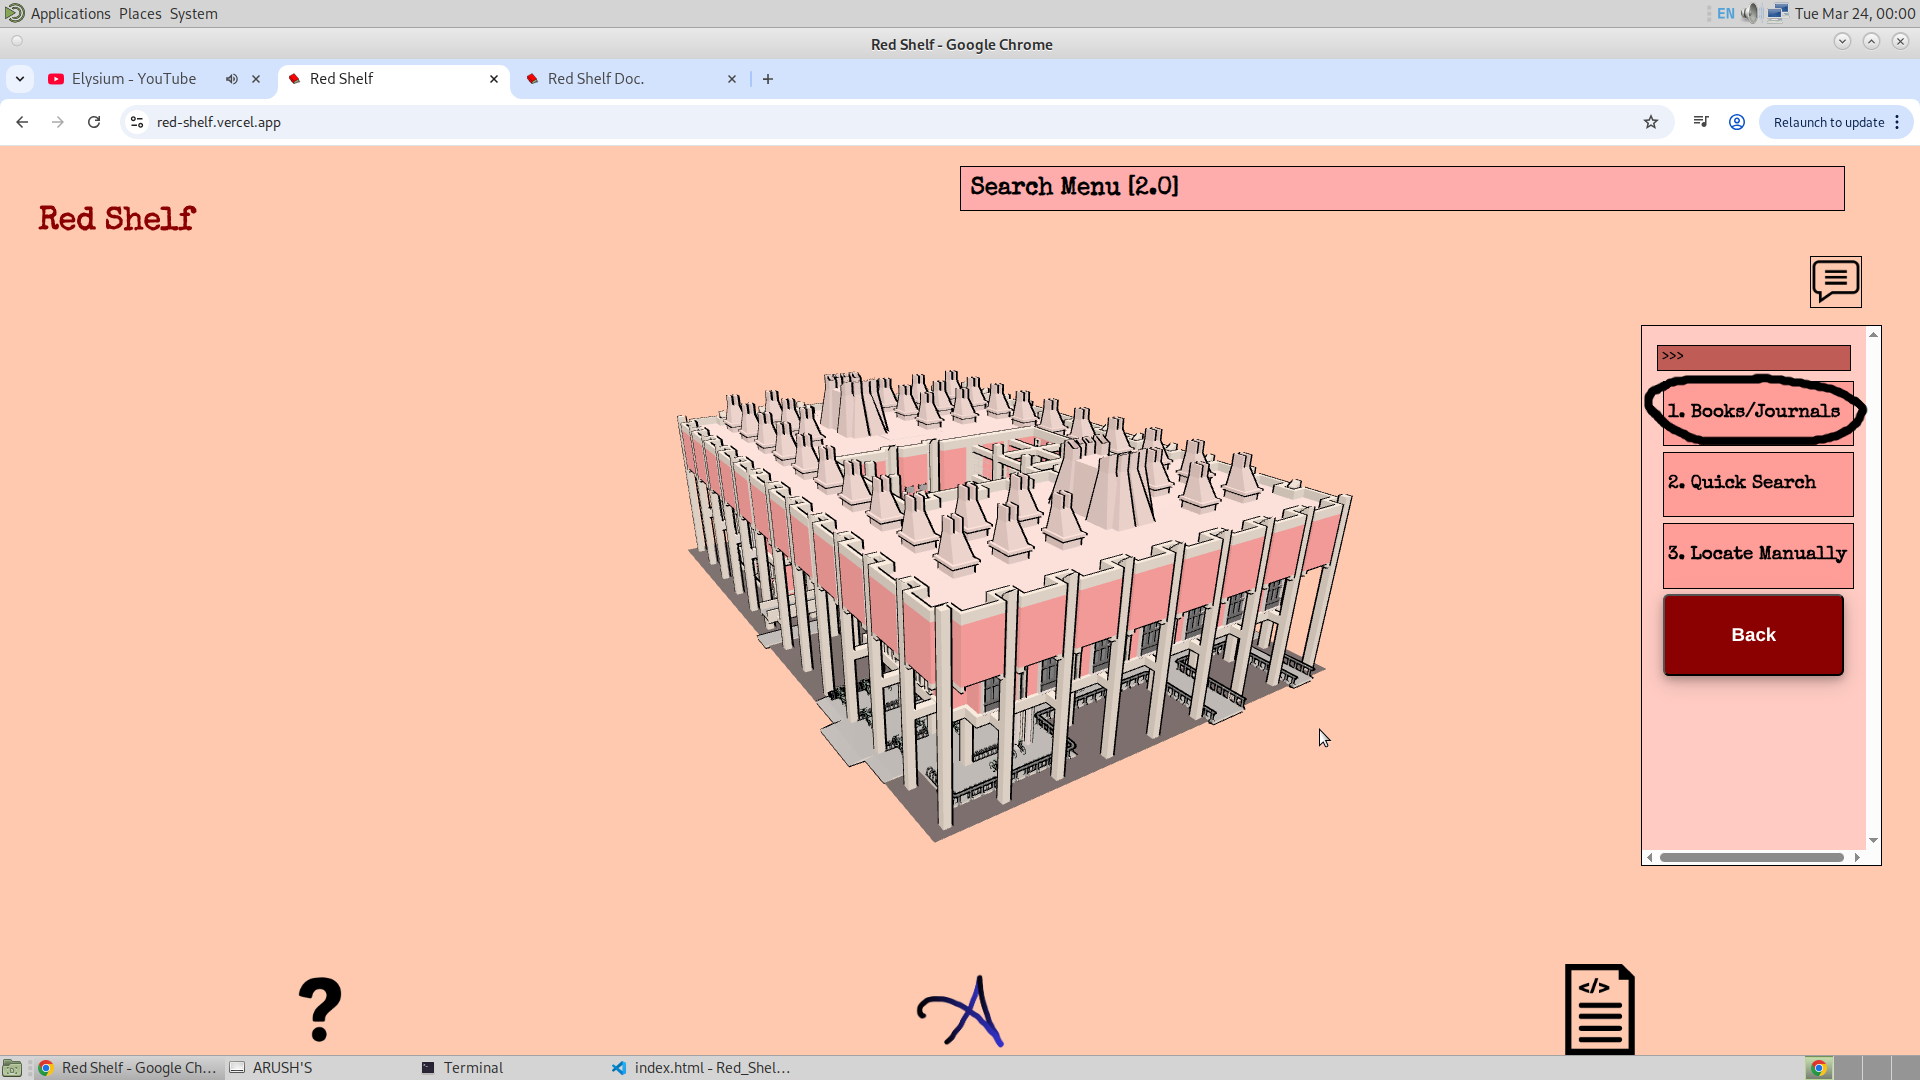
2. Search Mode:
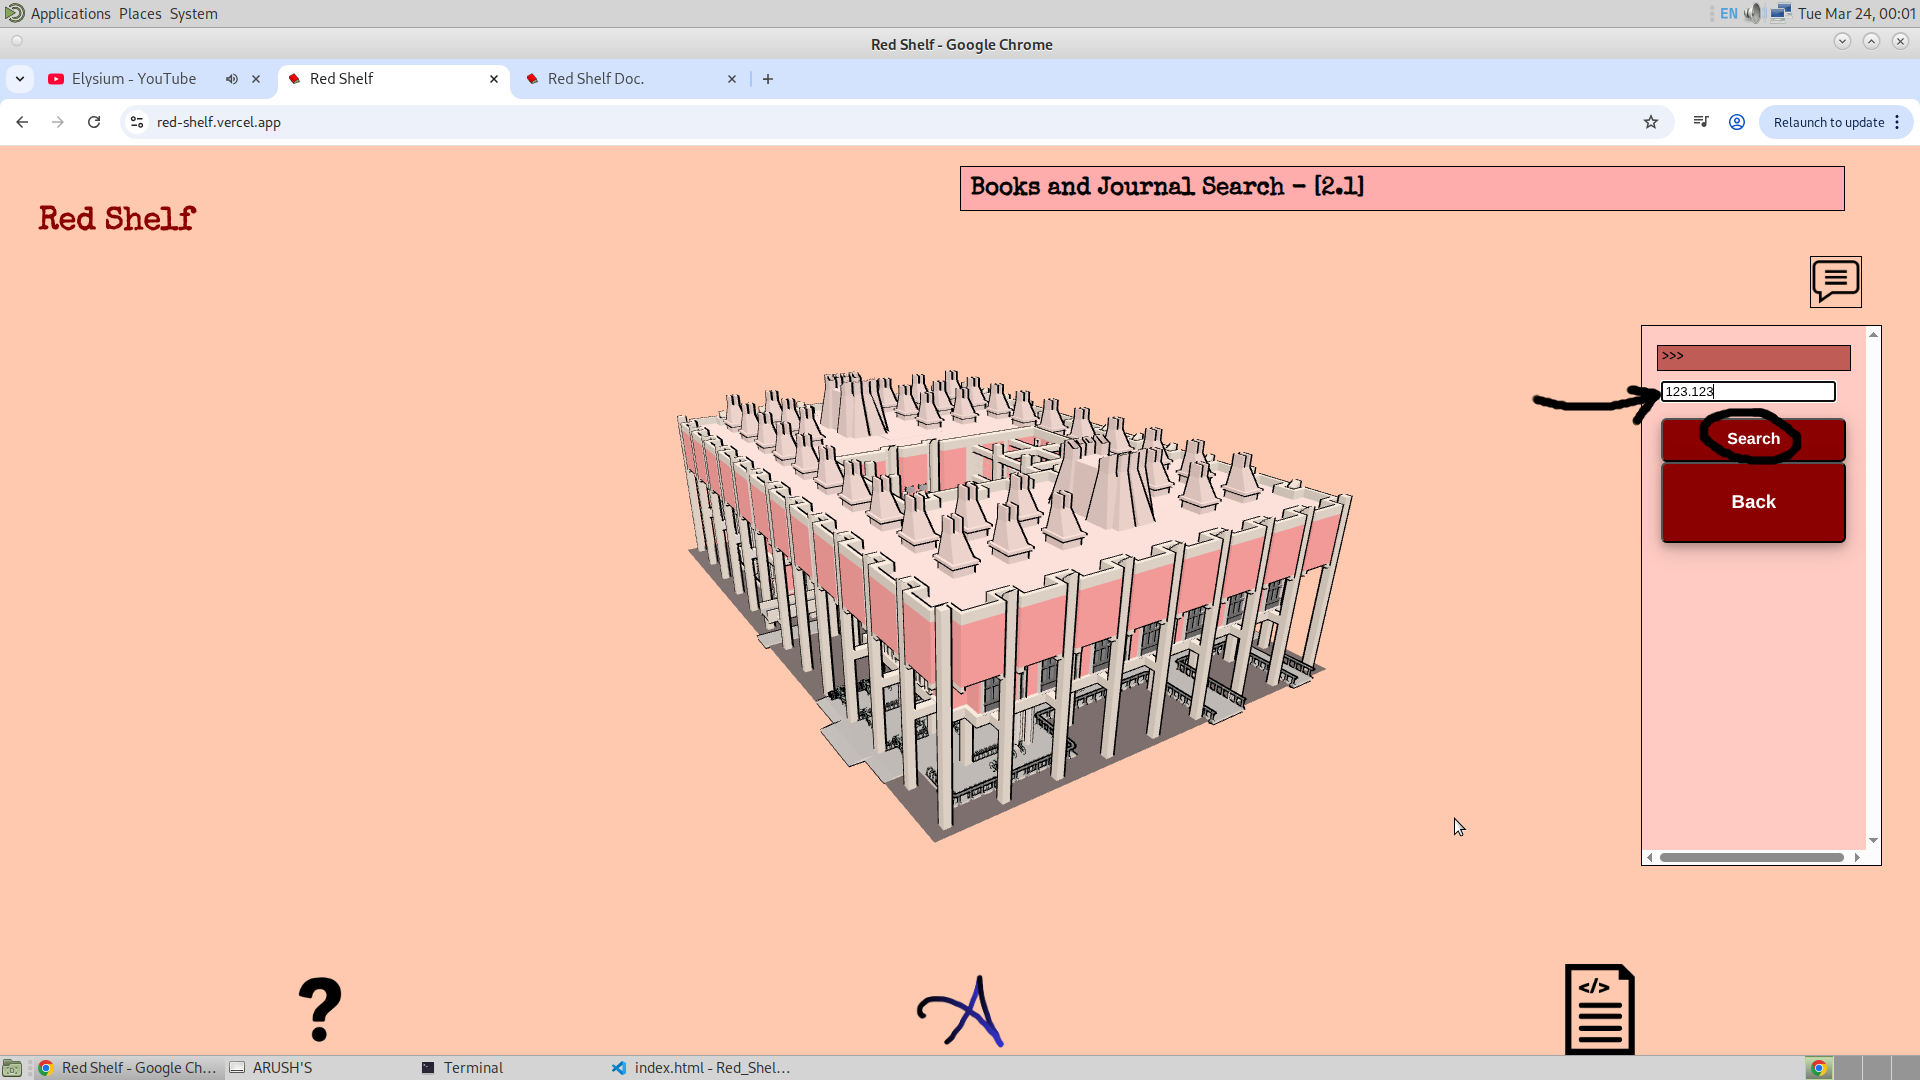
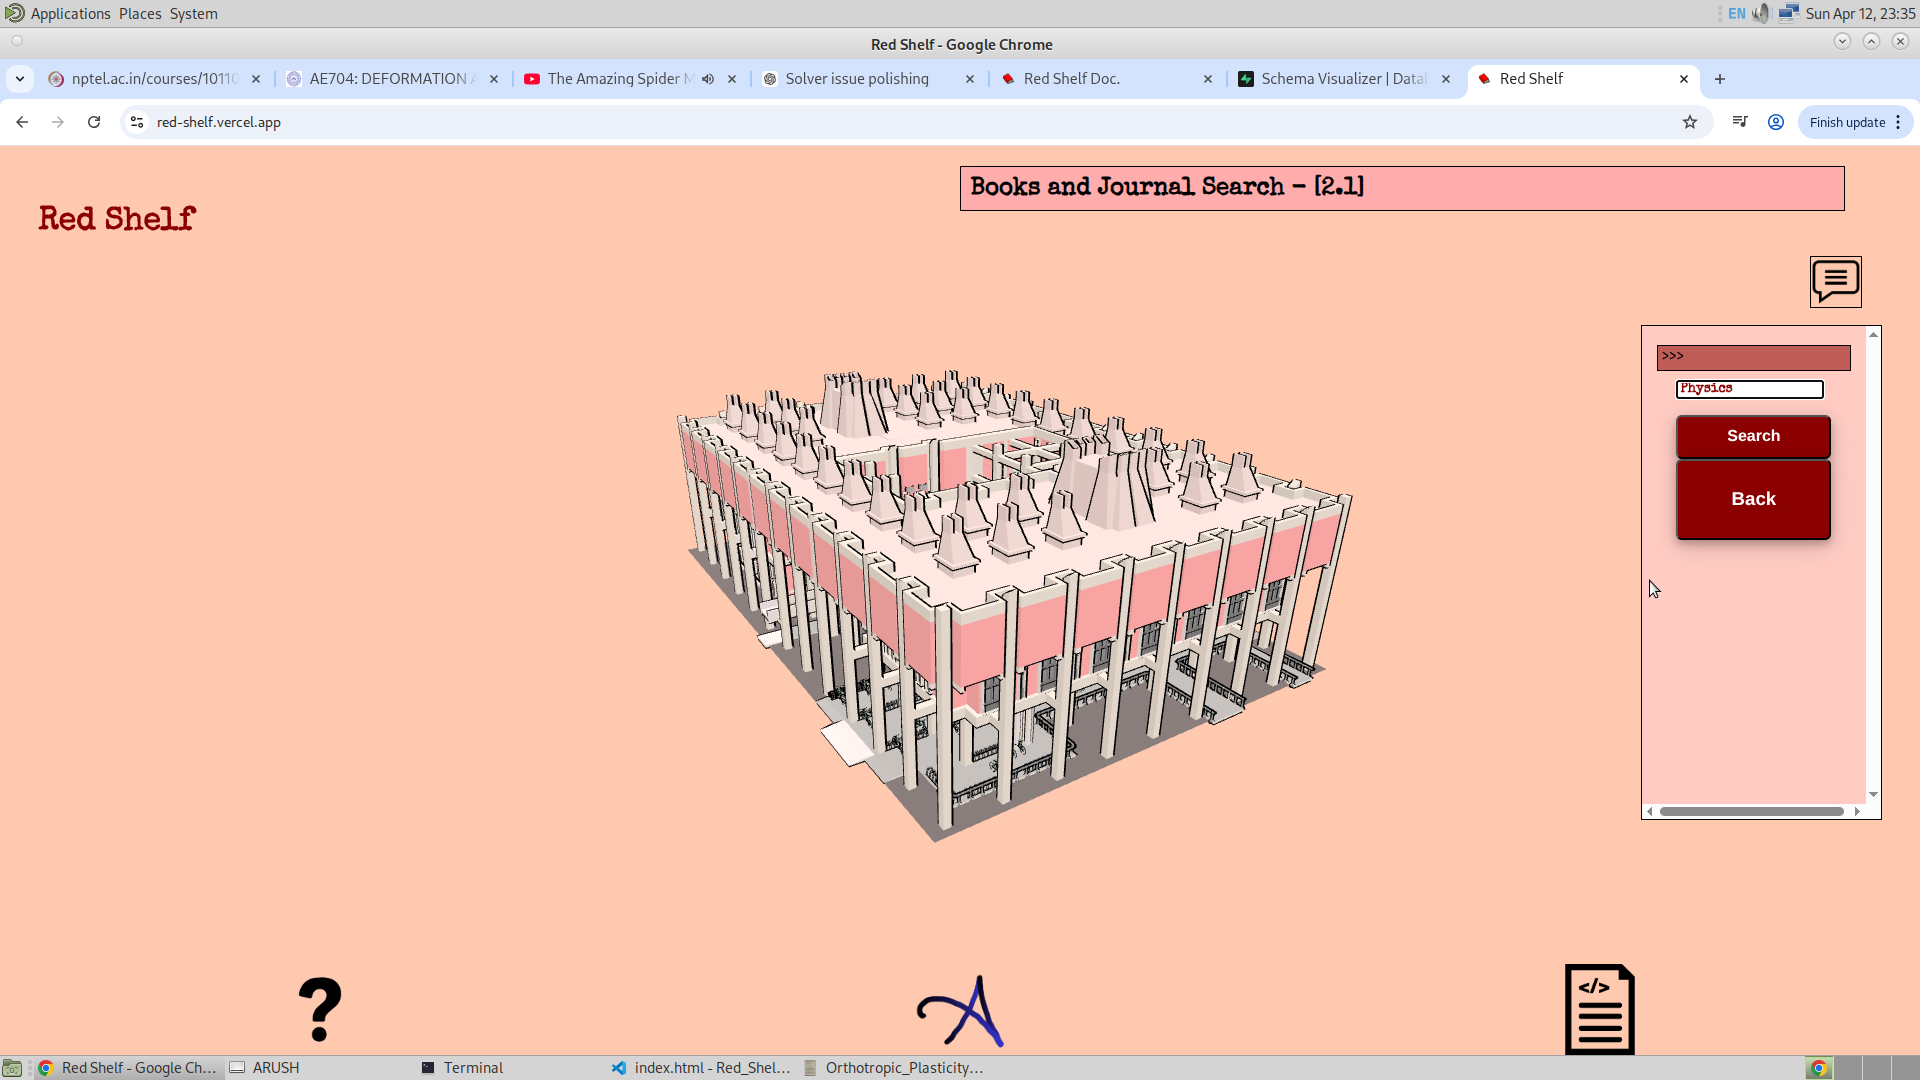
2.1. Book/Journal Search:
Now, finally coming to the feature that was the main objective of this application. This time, I had data about the bookshelves on the first floor, and I have used this data to build this feature. First, the user enters the book ID, which is then used to find the corresponding bookshelf, and this in turn is used to determine the target GSAP. Altogether, this is used to assign the Ending Location. After that, the user is asked to select the starting location. Given below is the part of the code illustrating this logic.
Here, I was suggested to implement the following improvement: once the book ID is entered, the first floor should automatically appear, rather than requiring manual selection. This is a fair suggestion and will be added. Apart from this, the third version will contain information about these bookshelves, their ranges, and the corresponding GSAP data, all stored in a PostgreSQL-based database (Supabase). Currently, I am using an Excel file to store and retrieve data, but moving everything to a database will allow me to manipulate the data directly from the application through an admin section. Additionally, the database in the third version will also include the Grid and information related to the frustum, referred to as frustum_info. I am still somewhat unsure about the design of the admin section and how the database integration will work, but I will refine this later.
Another suggestion I received was to add images for each bookshelf. Each bookshelf will have its own image along with a description. This will be implemented using the frustum feature, allowing users to visually cross-check the bookshelf in real life. I have requested the required images from them.
Another important dataset that I am going to receive relates to book classification. It turns out that each book has a three-digit number, where the first two digits indicate the subject of the book. For example, 620 may correspond to Aerodynamics and 629 to Aerospace Structures. This suggests that the prefix "62" represents the broader subject of Aerospace, which may span multiple bookshelves. Therefore, the data I expect to receive will map these subject codes. With this, if a user enters a subject like Aerospace, I can highlight all bookshelves whose codes begin with "62". This will naturally include multiple bookshelves. For locating a specific bookshelf, the current system is already functional.
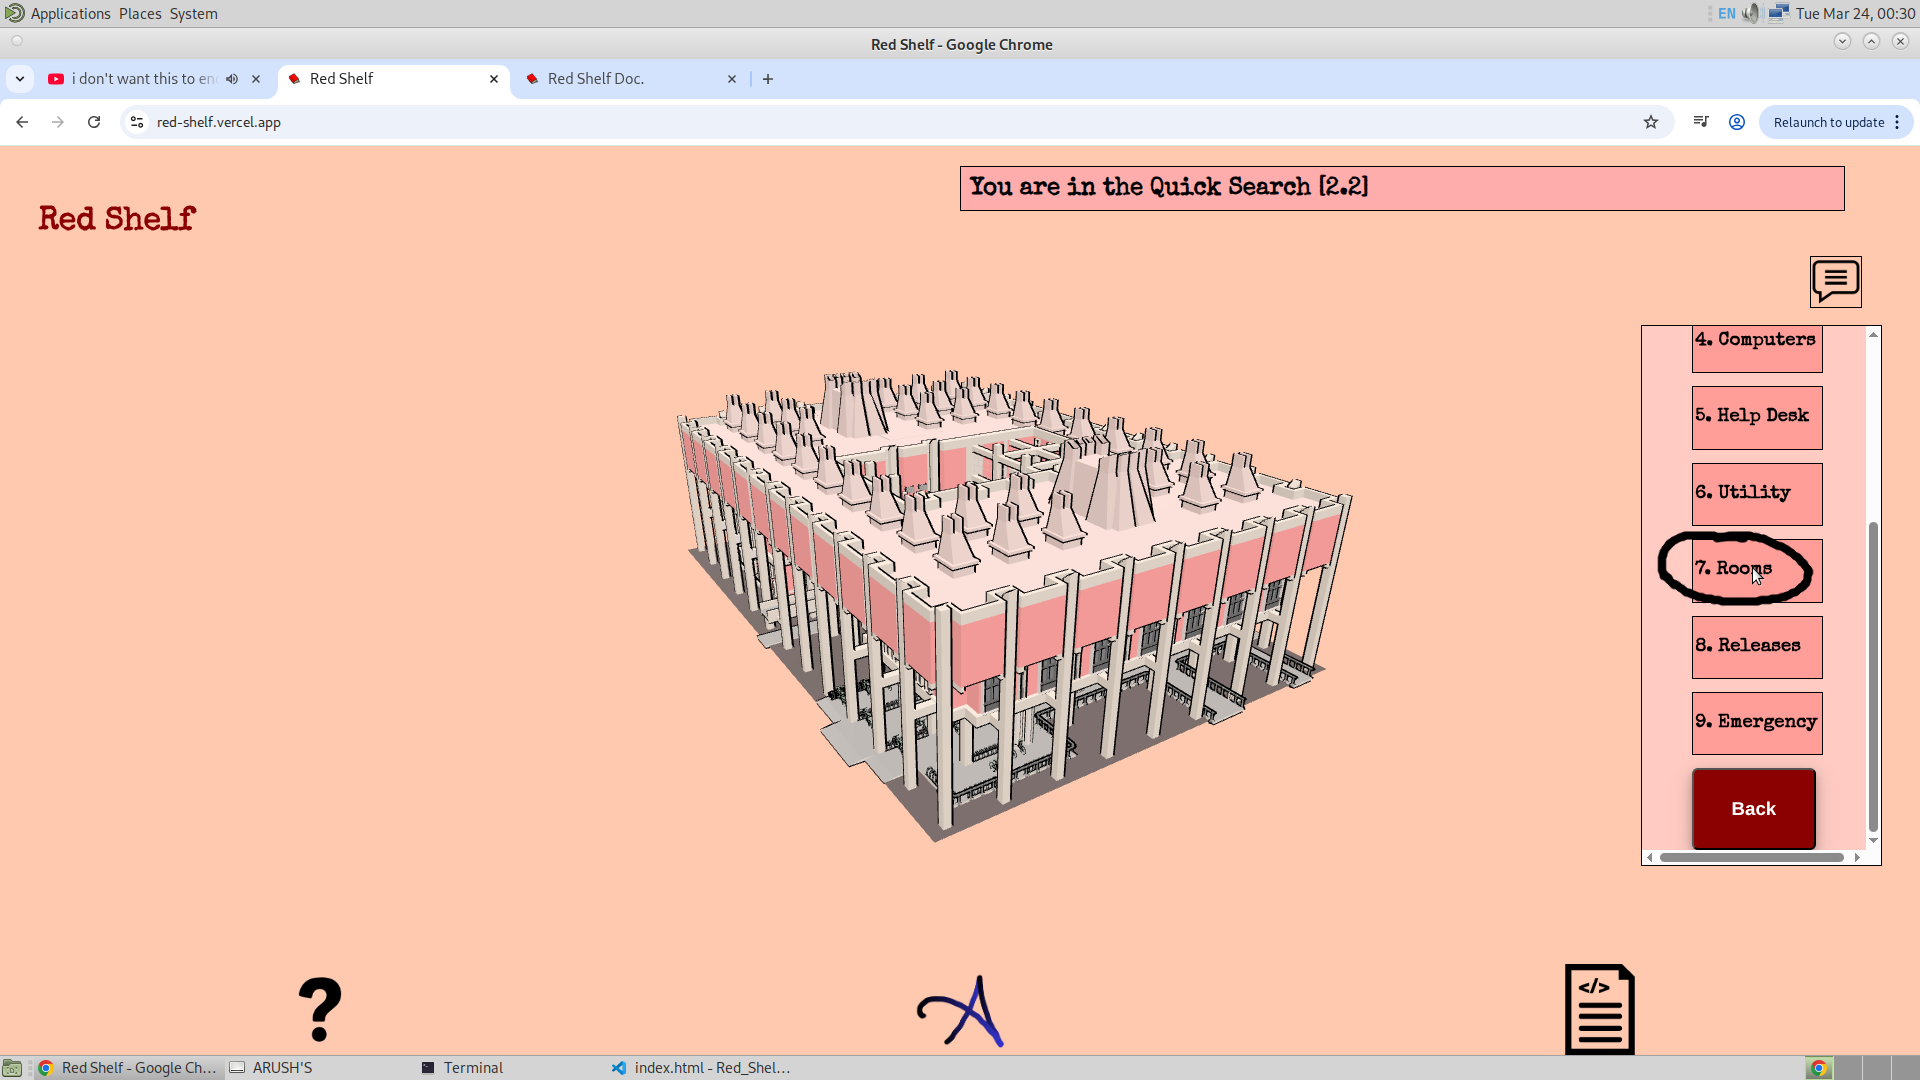
2.2. Quick Search:
This is a feature I came to know about after I started building the application. It allows users to search for essential facilities like washrooms and similar utilities. This feature transforms the app from just a bookshelf search engine into a more complete indoor navigation system. There are several options under this feature, such as Washroom, Dustbin, Emergency, and others. When any of these options is clicked, the corresponding GSAP is activated. The user can then click on one of them to select it as the ending location, after which the starting location needs to be selected. One important thing to note is that here the user is not searching for a bookshelf, but rather for essential facilities within the library.


Now, the user can select the GSAP, which sets the ending location. Once this is selected, the application will then prompt the user to choose the starting location.
As for future plans, there are not many major changes needed here, as this feature is already quite comprehensive. However, one improvement I can make is to add a search bar. For example, if a user types "washroom," the relevant option should appear automatically. This will be useful as more options are added to the Quick Search feature in the future. Additionally, I would like to include options such as Charging Ports and Switch Boards (for fans), as these are practical utilities that users often struggle to locate. These additions will be implemented in the third version of the application.
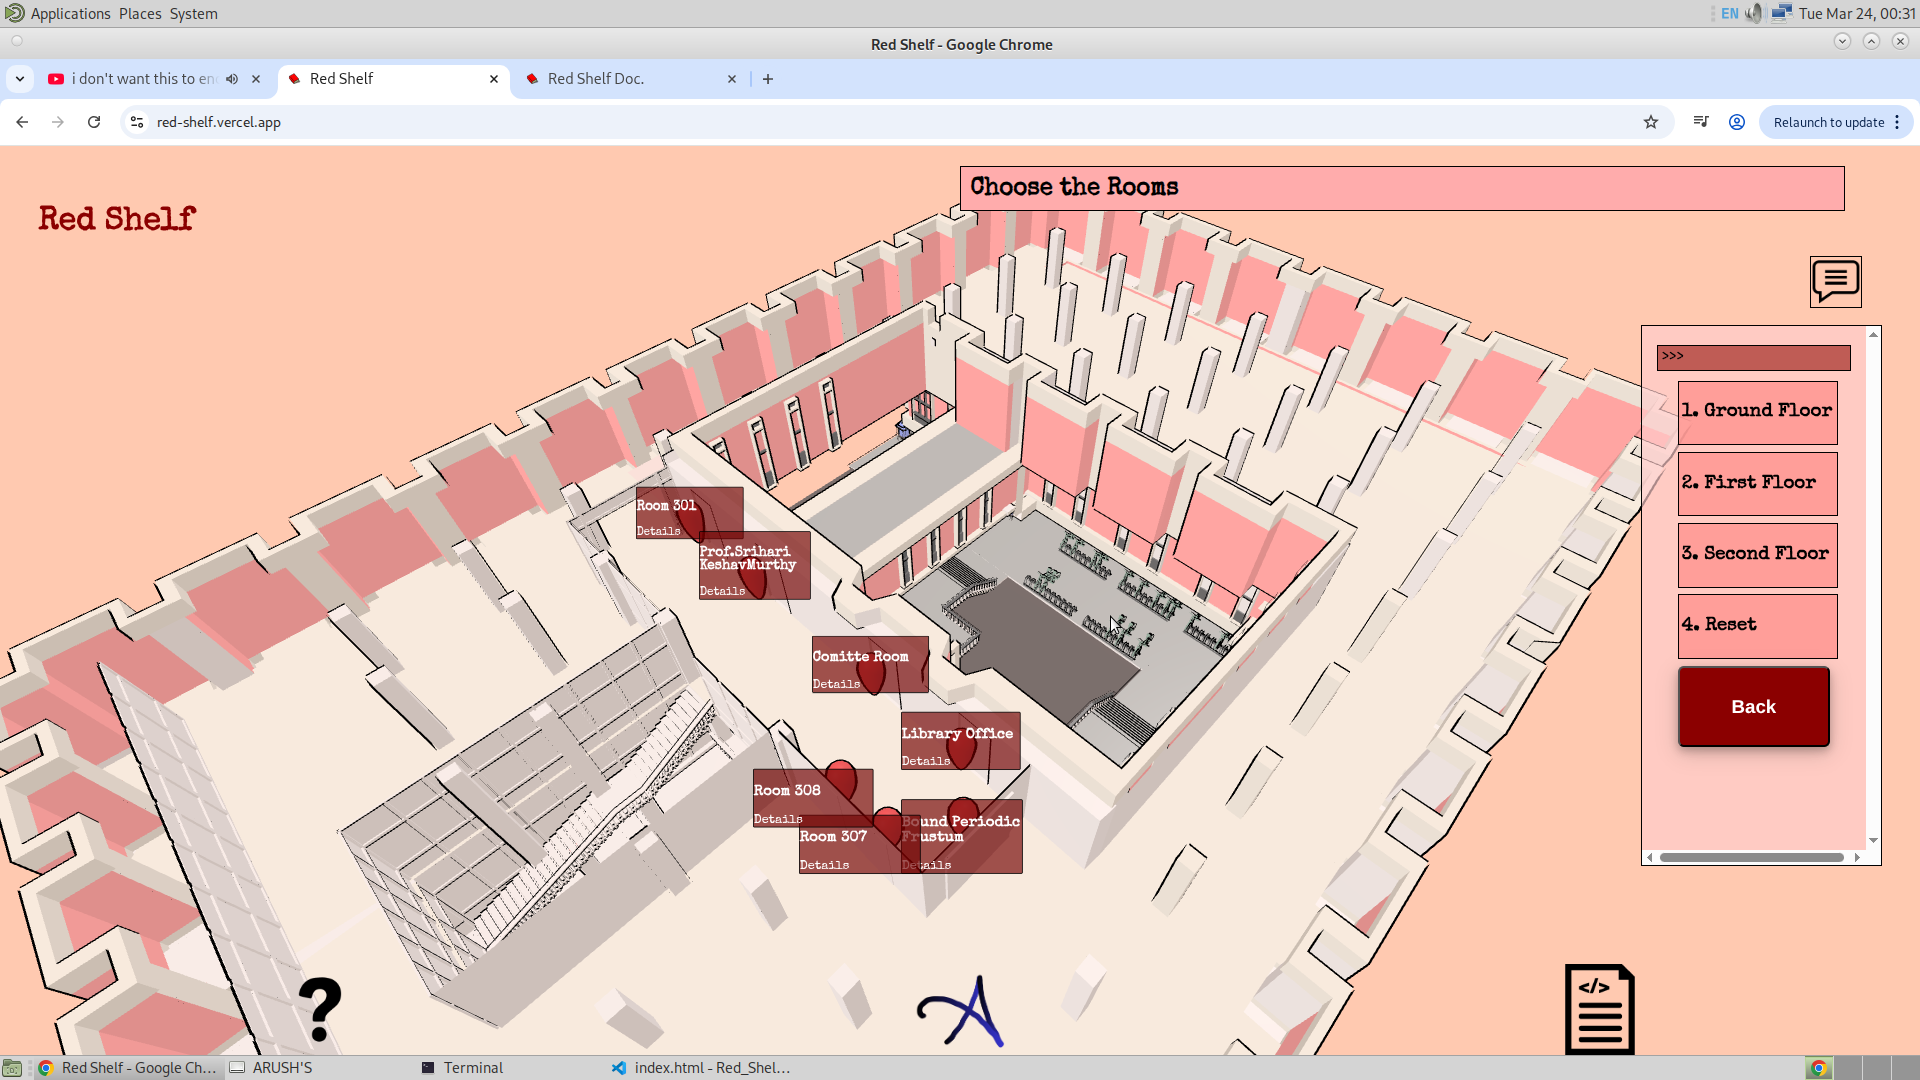
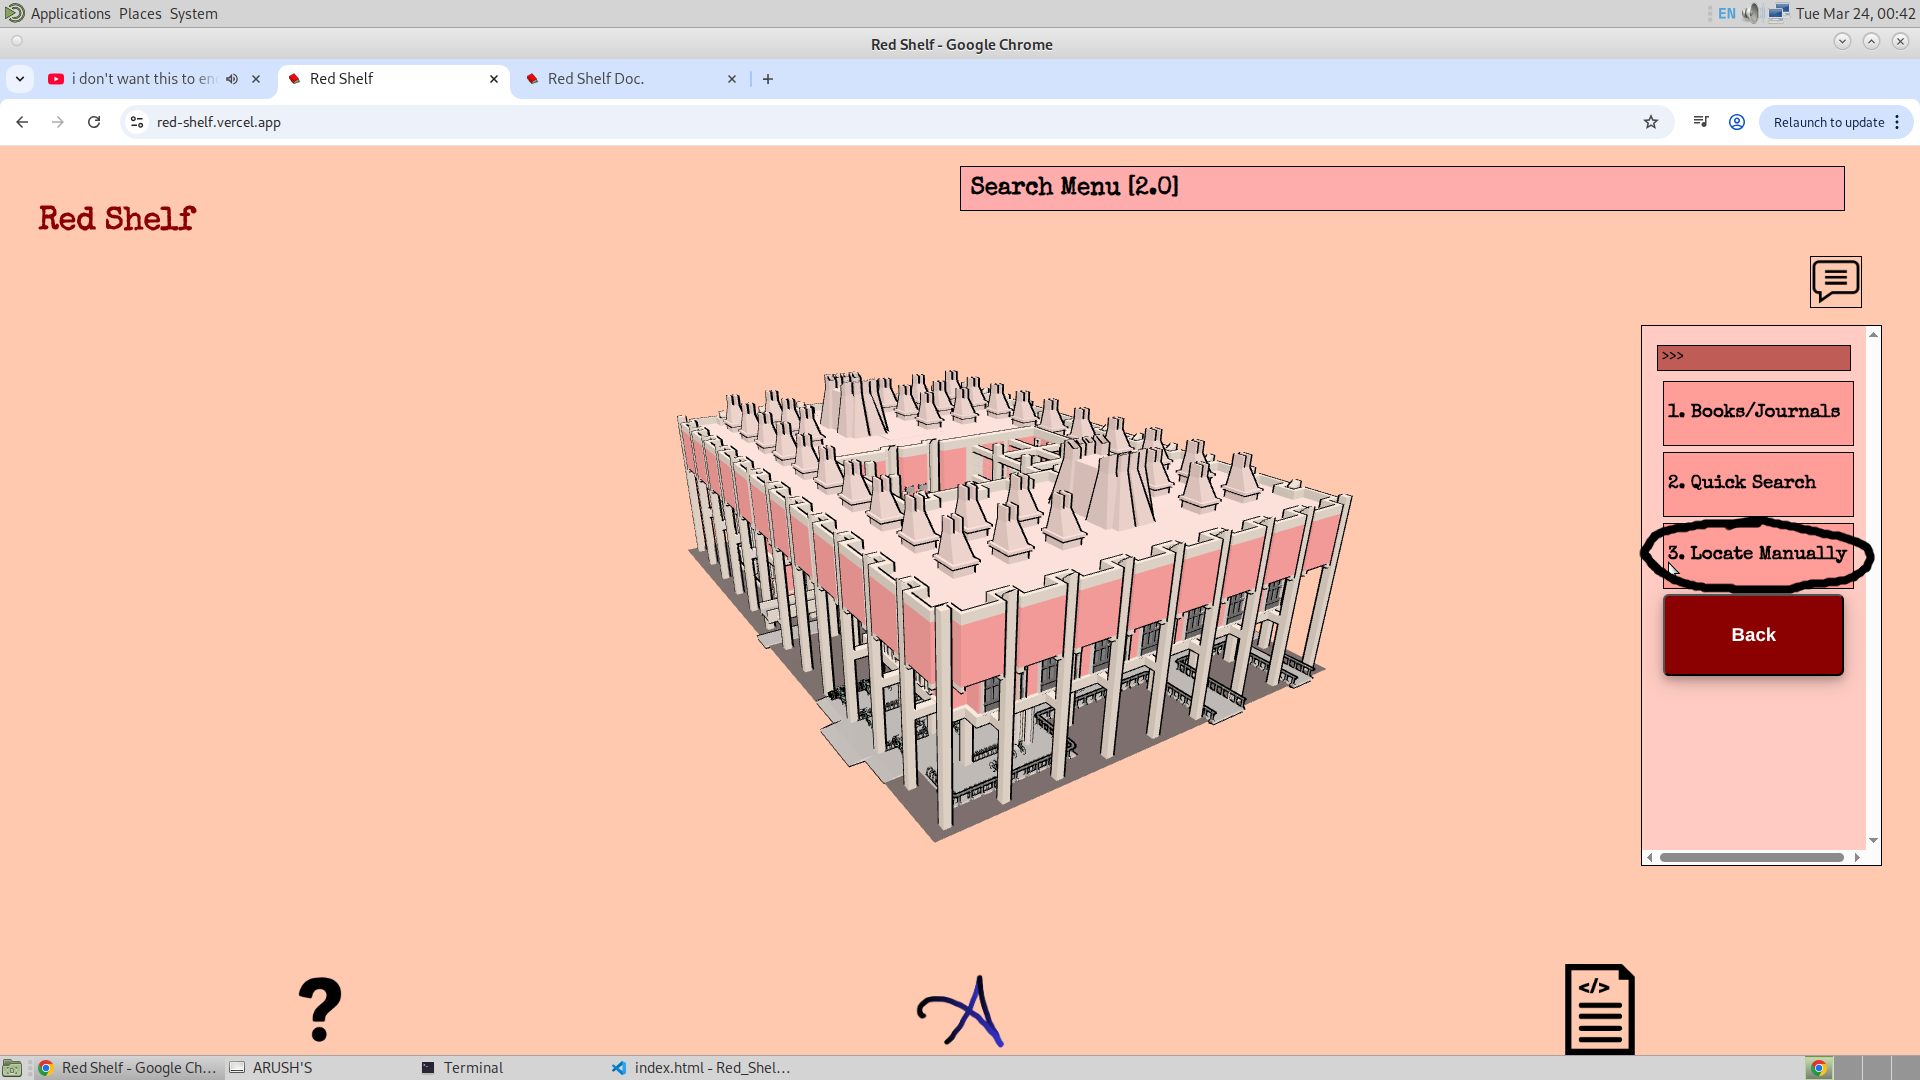
2.3. Manually Locate:
This option allows the user to select the ending location at any point. It does not have to be a specific place or a bookshelf, ultimately giving the user the ability to navigate from anywhere in the library to anywhere else. Upon selecting this option, all the GSAP points are activated, and the user can click on any of them to manually select the ending location.
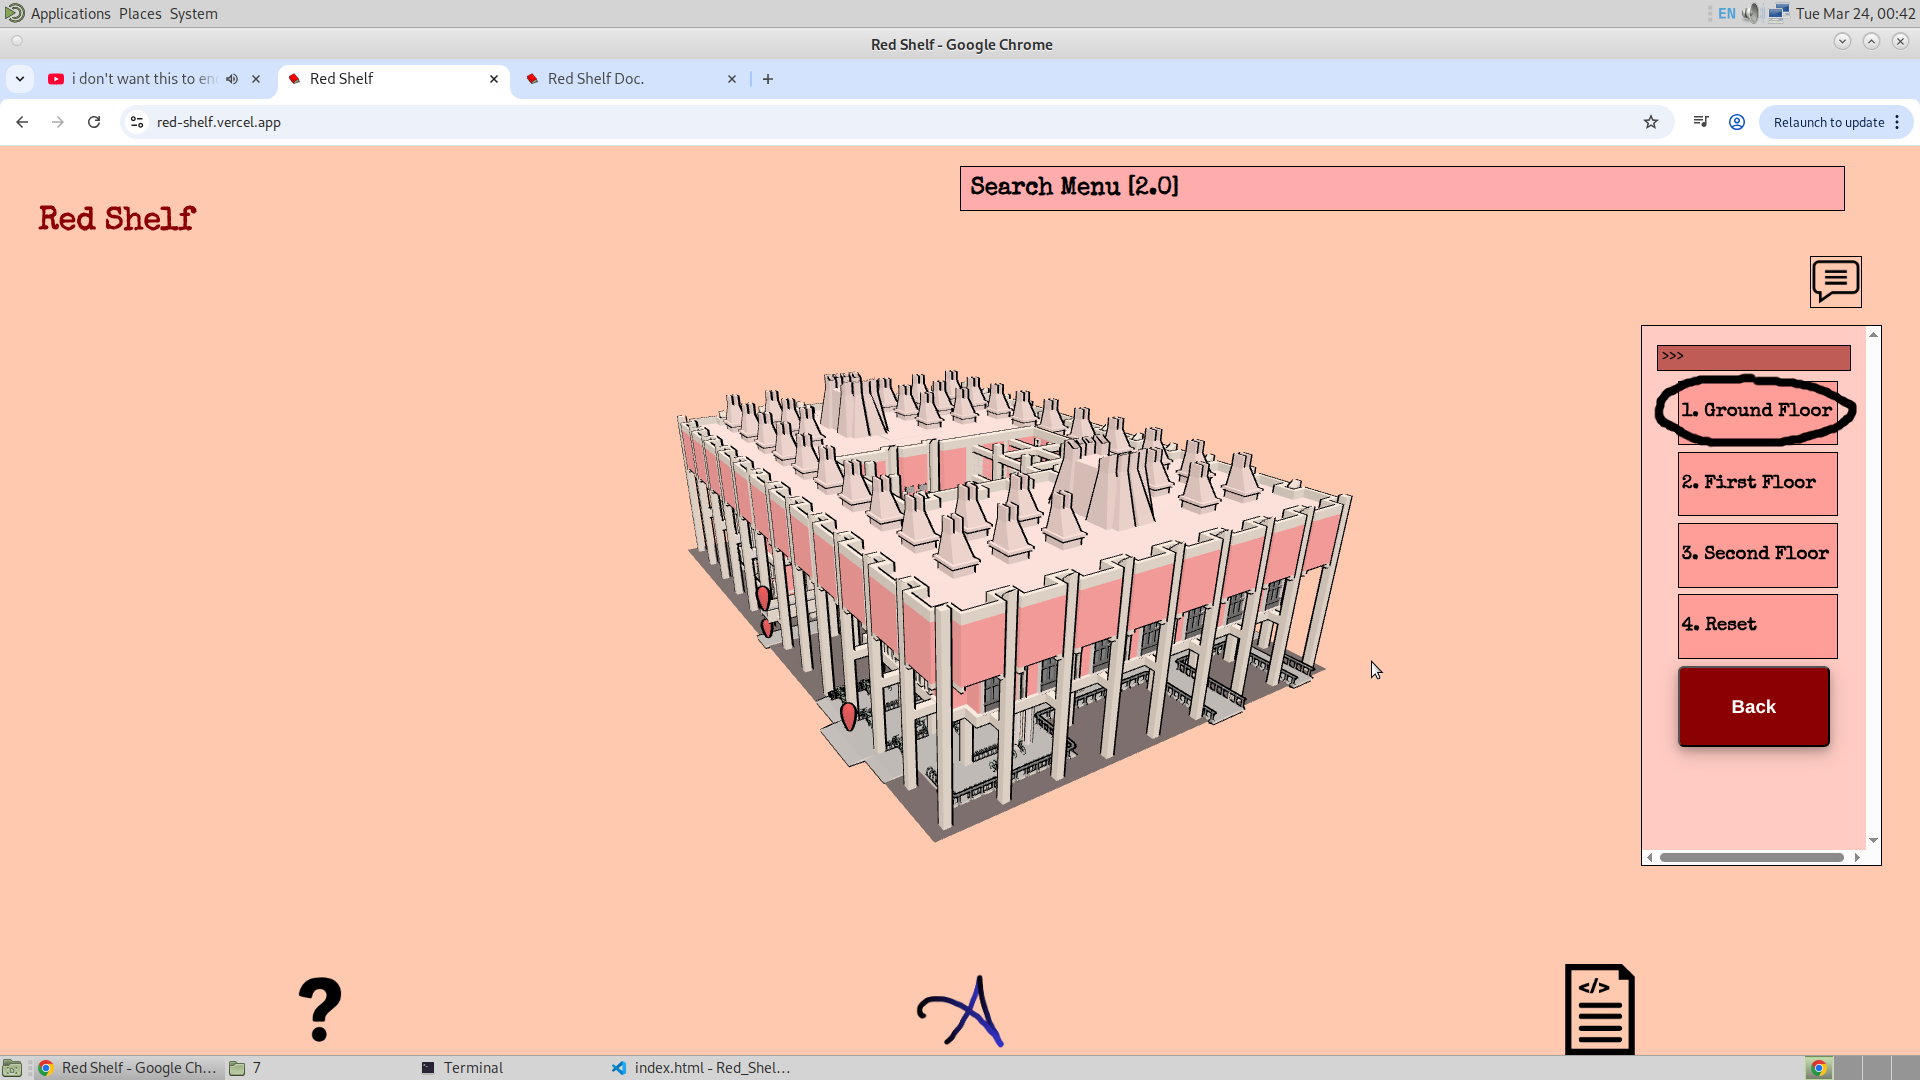

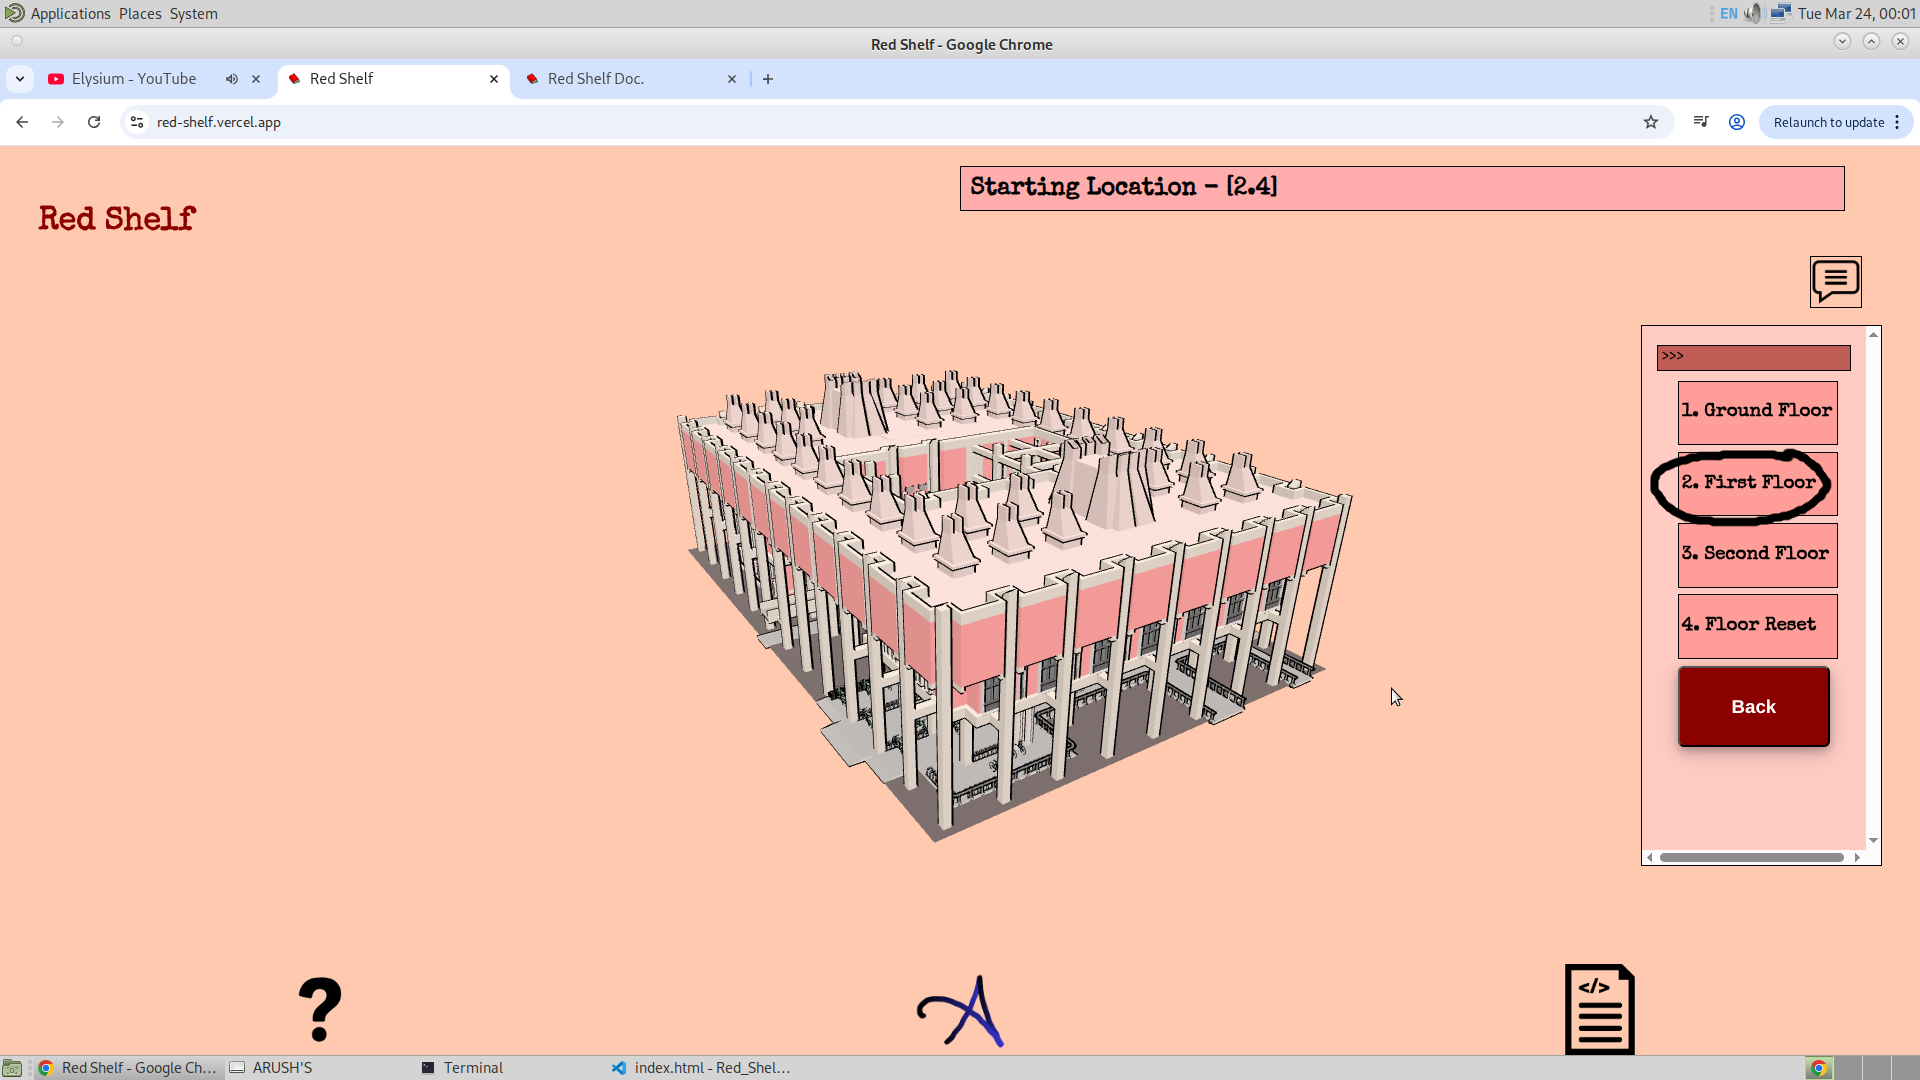
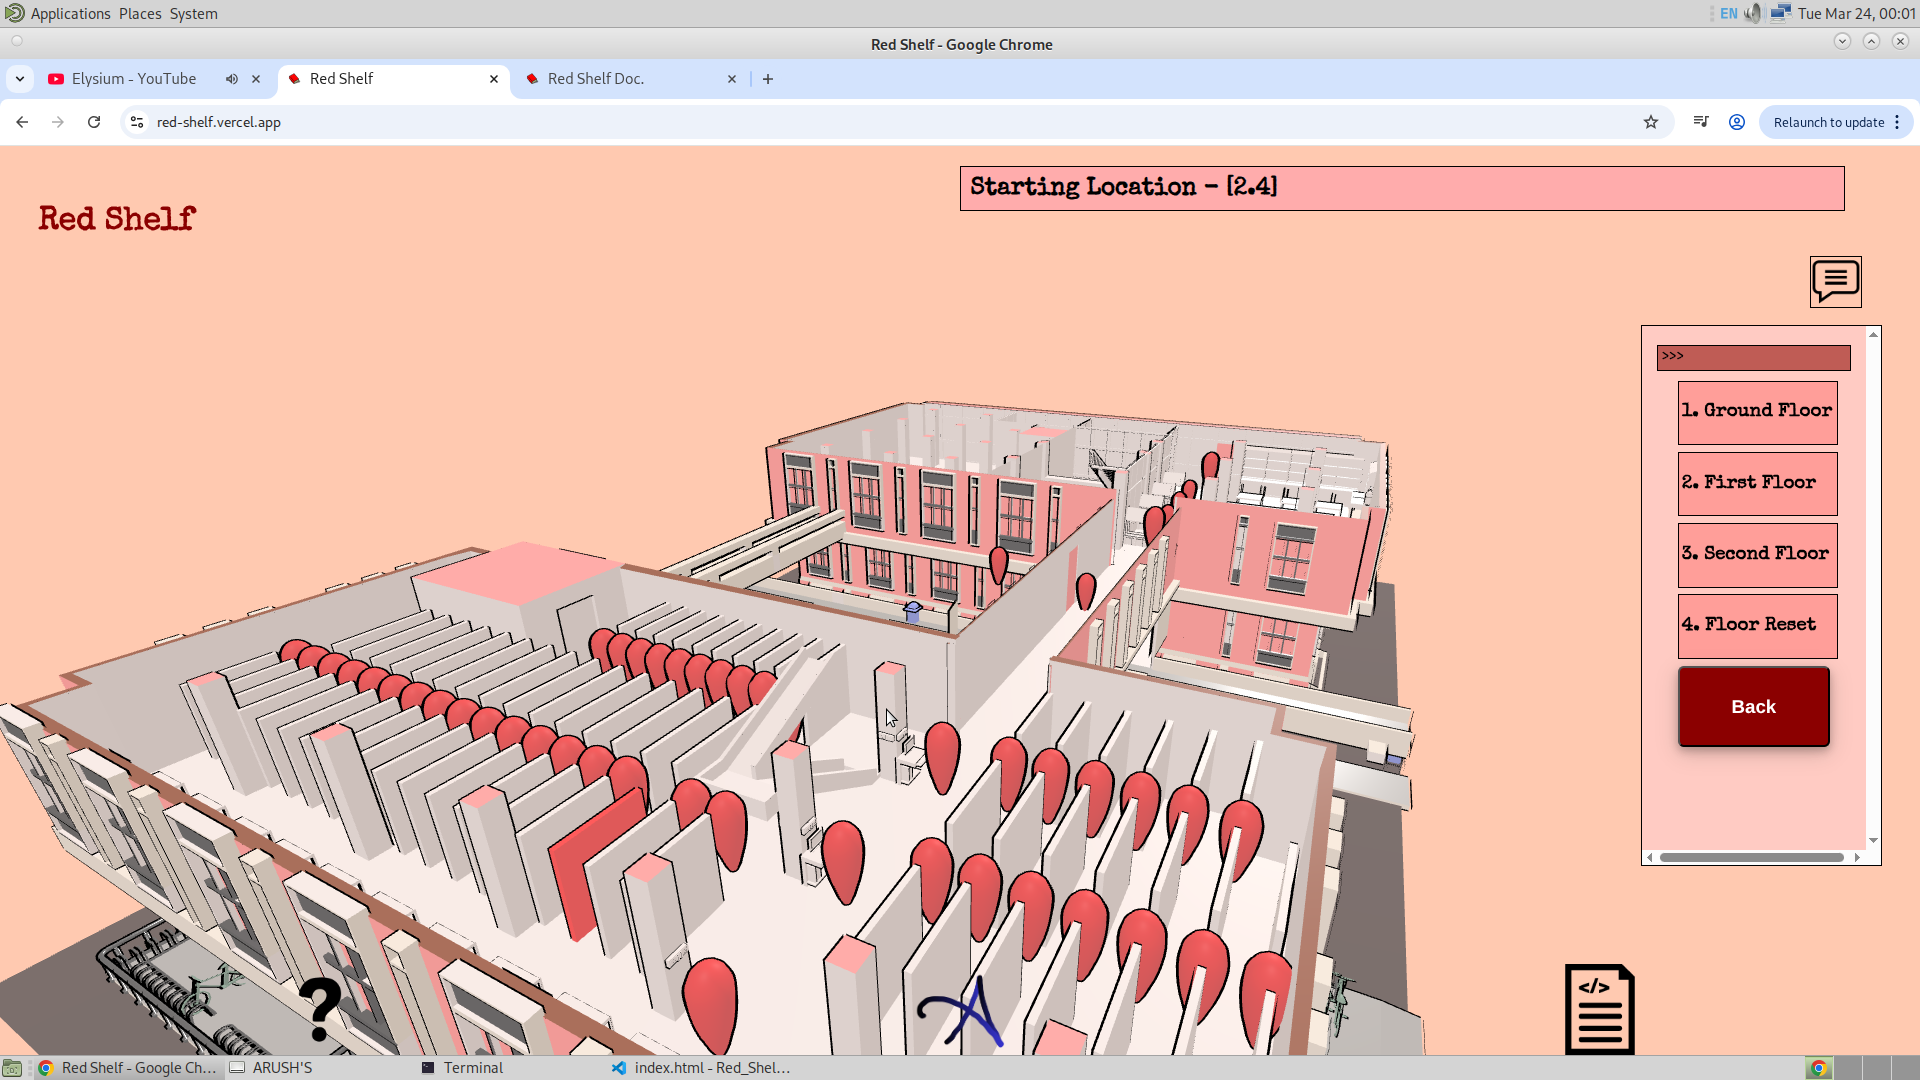
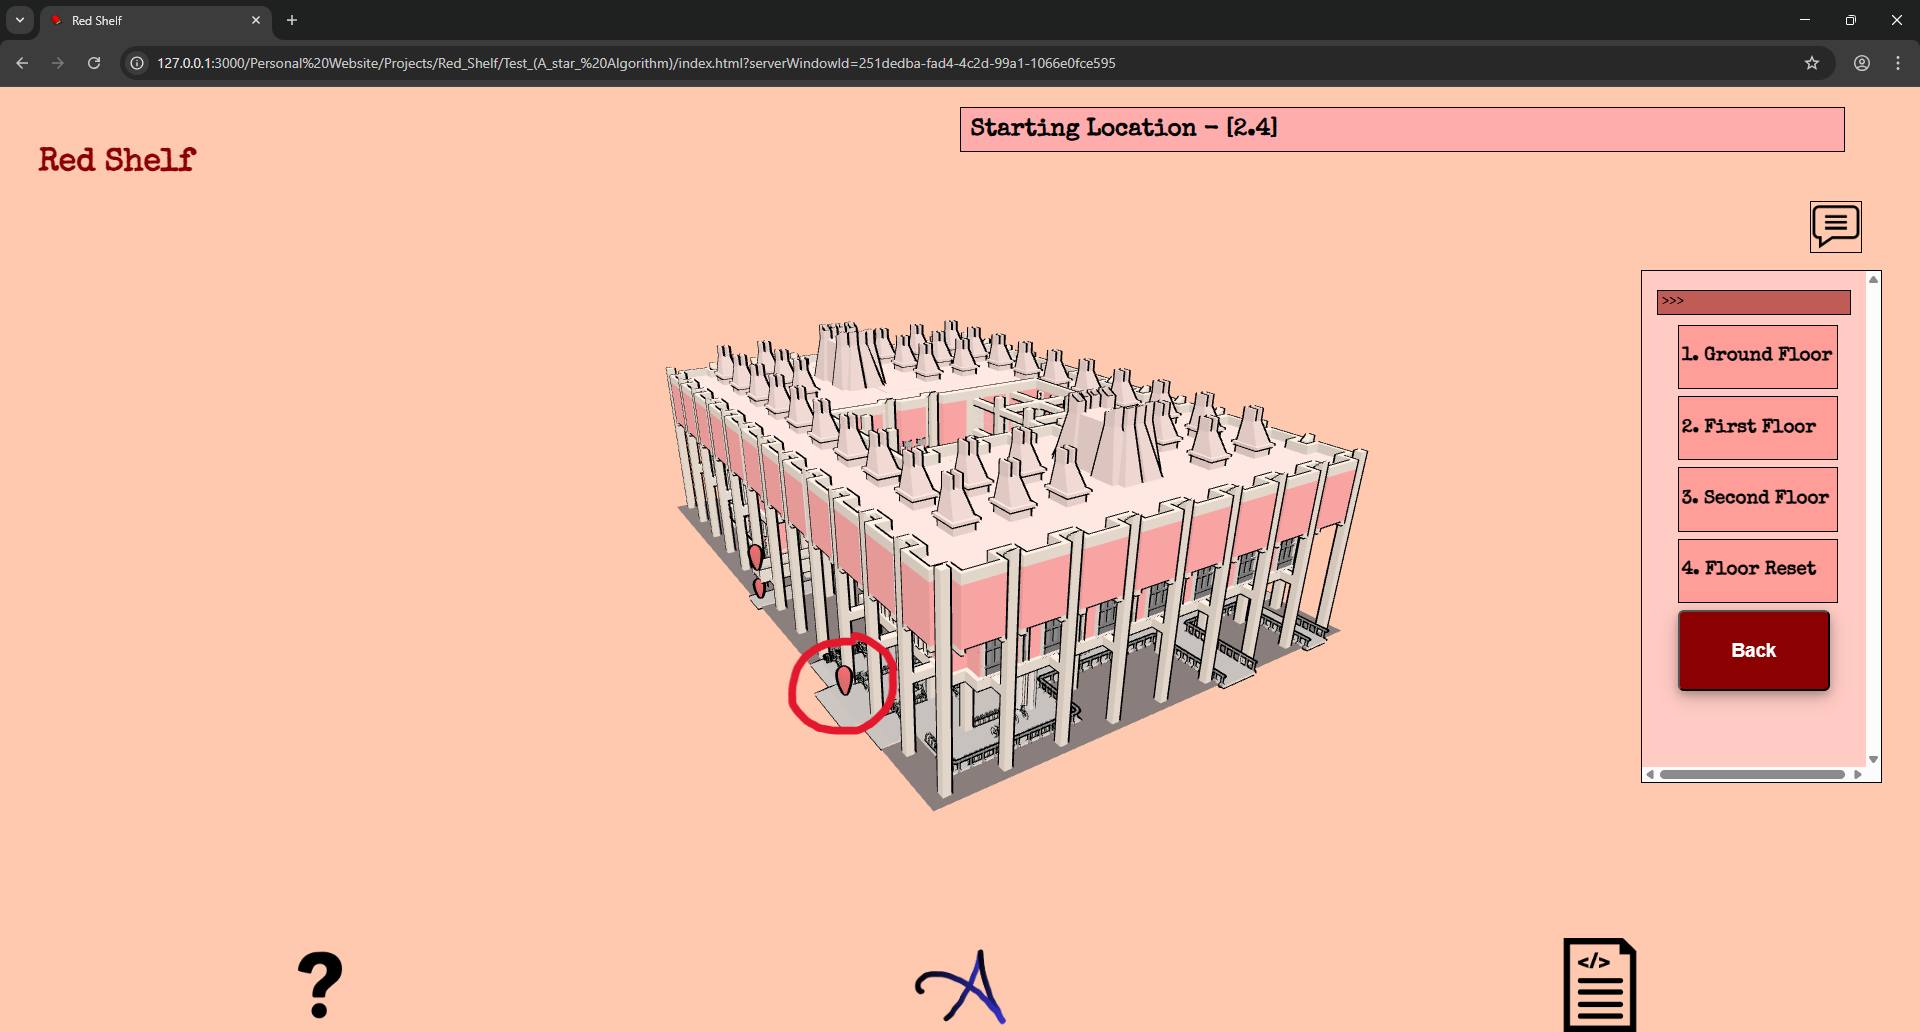
2.4. Starting Location:
Here, all the GSAP points except the selected ending location are activated. The user then needs to select the GSAP point that represents their current position. One possible approach could have been to use Geolocation, which would allow the application to automatically detect the GSAP point nearest to the user. However, since I have already tried this and found it unreliable, I will stick to allowing the user to manually select their starting position. Below, I have shown how the user can select the starting location.


3. Crowds :
Finally, I have the option for crowds. I think the staff members might be able to make this feature work. The idea I had was to train an ML model and use the library cameras to detect the number of students present at each table, and then update this data in the application. This data could then be displayed to users within the app. However, I now realize that this will take considerable time and may not be feasible at the moment. Therefore, I will disable this option for now. That said, I will keep the code and leave room to revisit and improve this feature in the future.
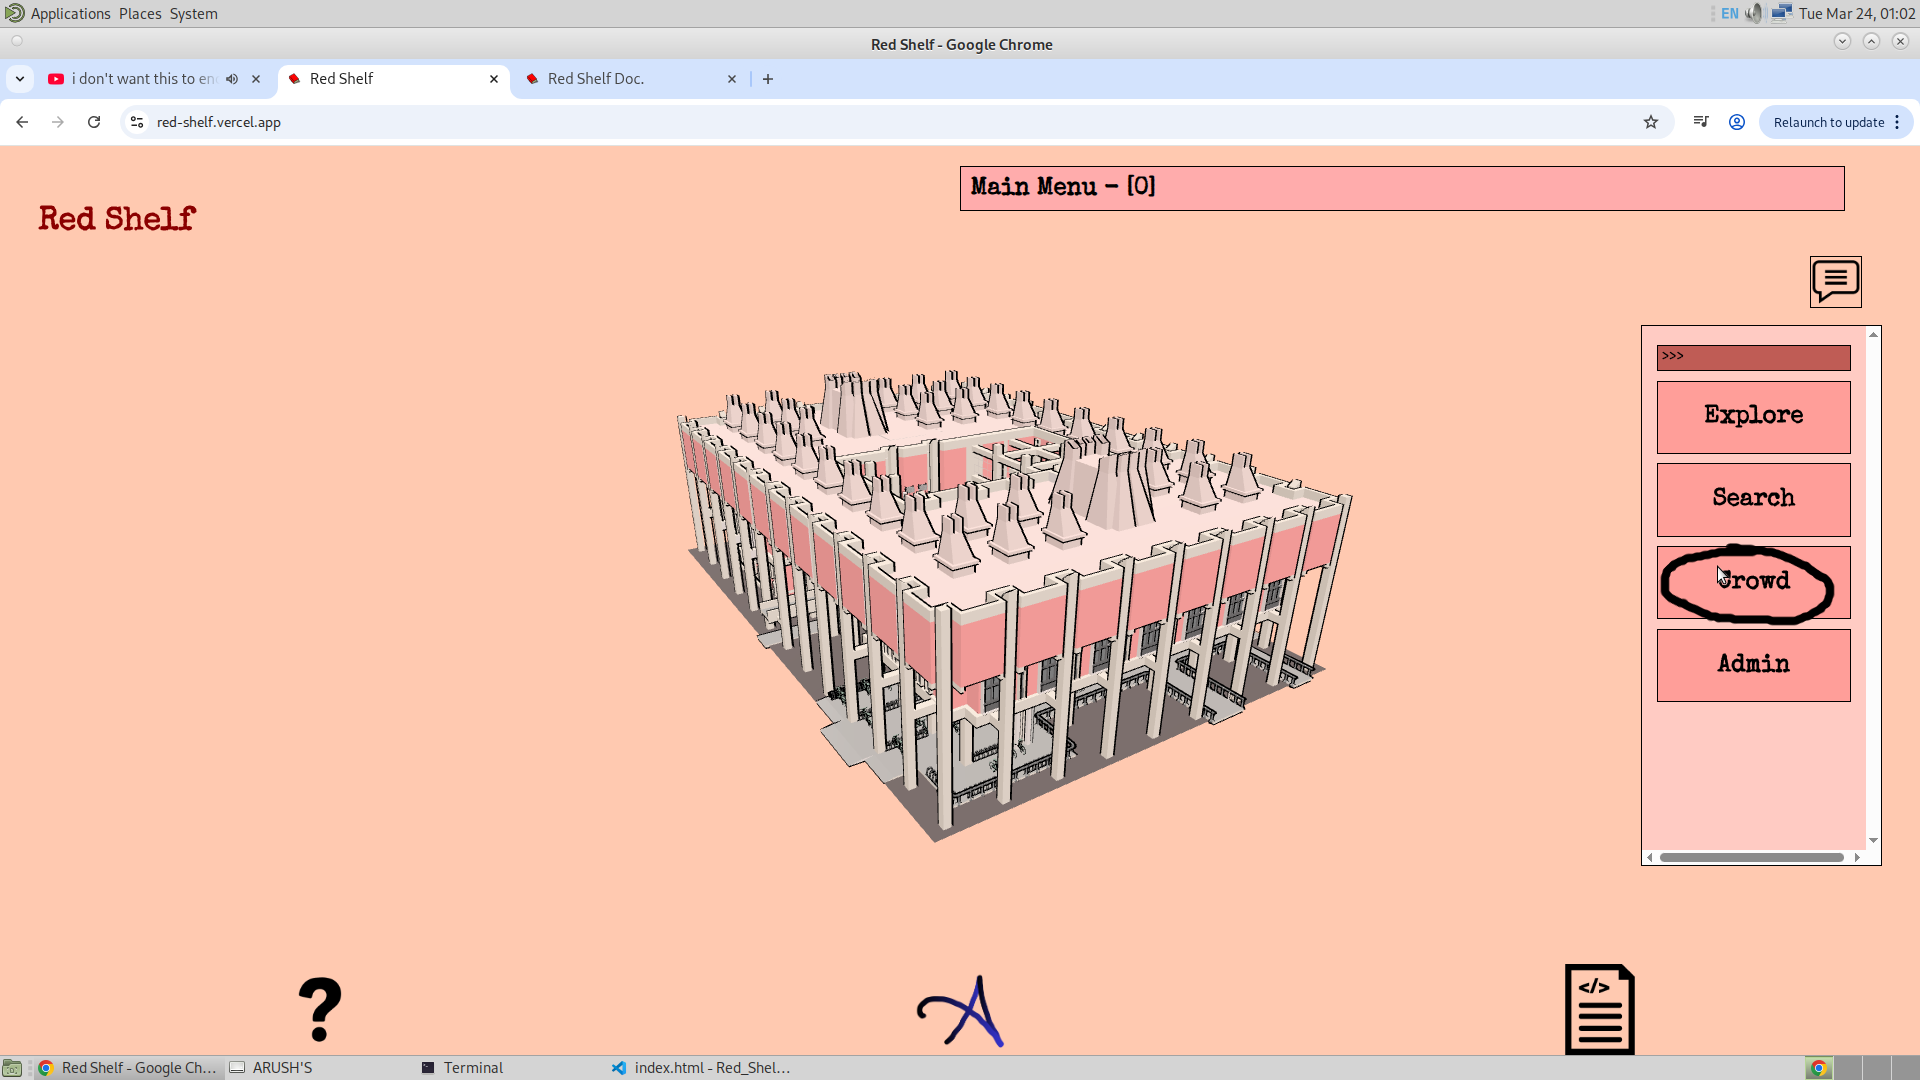
I won’t make this option working for now, but I will still keep it in the app. So, I am thinking of naming the third menu option as Miscellaneous. This will contain options like Crowd, which will be about Seat Availability or something similar.
The next option in this category would be Charging Ports. Knowing which charging ports are occupied can sometimes be useful, or which charging ports are available along with unoccupied seats.
The third option is Fans (Thanks, Paarth!). This feature will allow the user to select a fan and find the location of the switch to turn it on or off.
Now, let me discuss aspects such as the Admin Mode, which will define the structure of the application's database, and other upcoming improvements. So the number of database that i will be using is as follows :
- Frustum Info Init (For the Frustum Content)
- Frustum Info (not sure what for)
- Bookshelf (For the Bookshelf mapping)
- Grid (For the GSAP graph)
One more feature that is missing in this is the Feedback option. And this will be the fifth option after the Admin section.
I also thought about coloring the interior, but now I realise that color is what I am using to indicate and make the searched item visible. And if everything is colored, in that case, I won't be able to distinguish which item is searched and which is not. My plan is to keep the interior white rather than adding colors.
Also, for the purpose of the search, the staff members have given me the Excel sheet containing the data. So, for retrieving the data from the Excel sheet, I have used a library of JavaScript called SheetJS. You can find the Excel sheet of the data at the repository of Version 2 of Redshelf given. And for the code of retrieving the data, this post by my Mohamed Elnagar has helped me.
27/03/26 (Version 3)
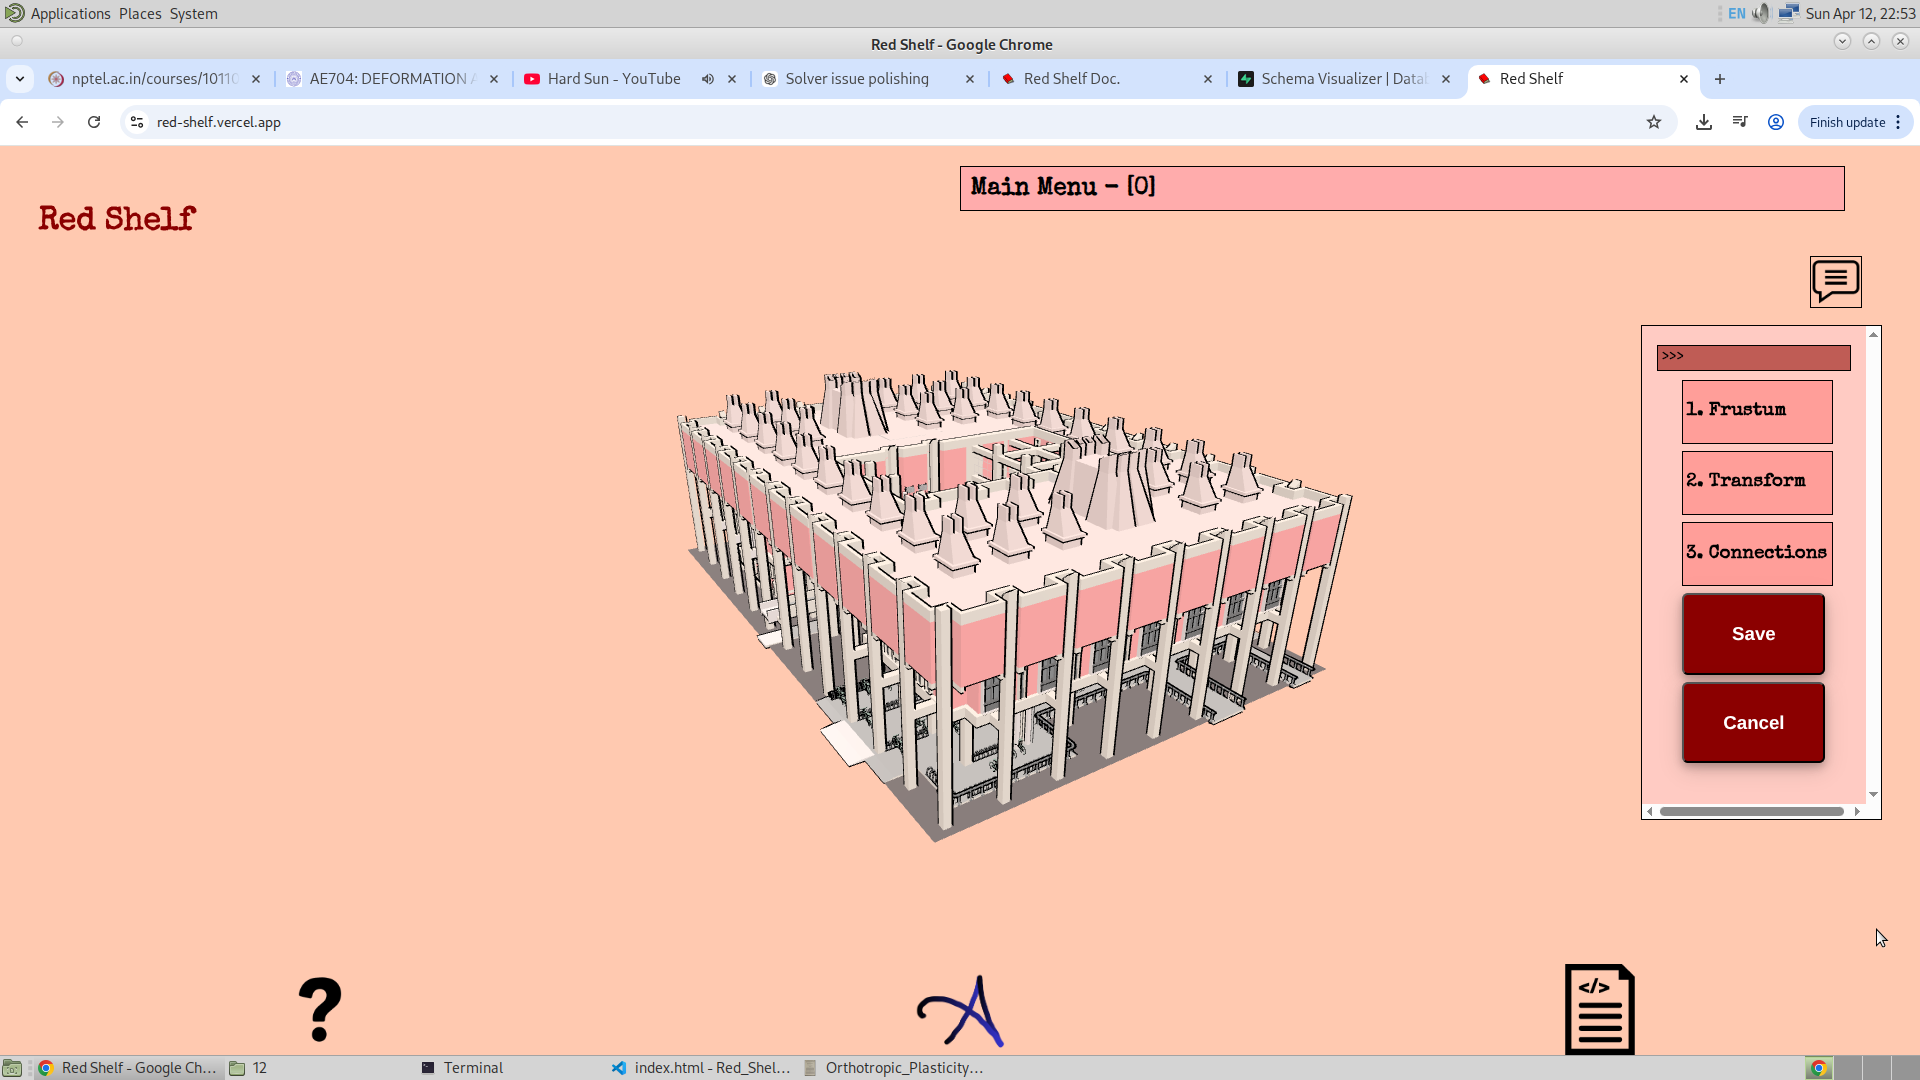
Yesterday, I started developing the database for the application. Today, I was able to implement the TransformControls along with the usual OrbitalControls. This was a big achievement. The only thing left is to manipulate the database using the front-end, which is what I am aiming for in the next two days. So the plan for the next two days is as follows.
- I will finally complete the modelling of the second floor, which includes tables, fans to switch mapping, and finally the charging port.
- Then I will add the fans to switch mapping in the first and ground floor. And this will finally complete my mesh completely.
- Then the only thing left would be at the front end, which includes me making the application flow 3 and 4 completely. I will complete the application flow 3 and the subject‑wise bookshelf search by Sunday. And then the only thing left would be to integrate the website with the database.
- So later after the above, all that I will be left with will be to connect the database with the website. And this will complete the website's version 3. I will still be missing the pointer lock controls for the explore option, because of the lack of time. And maybe I will have to skip this feature.
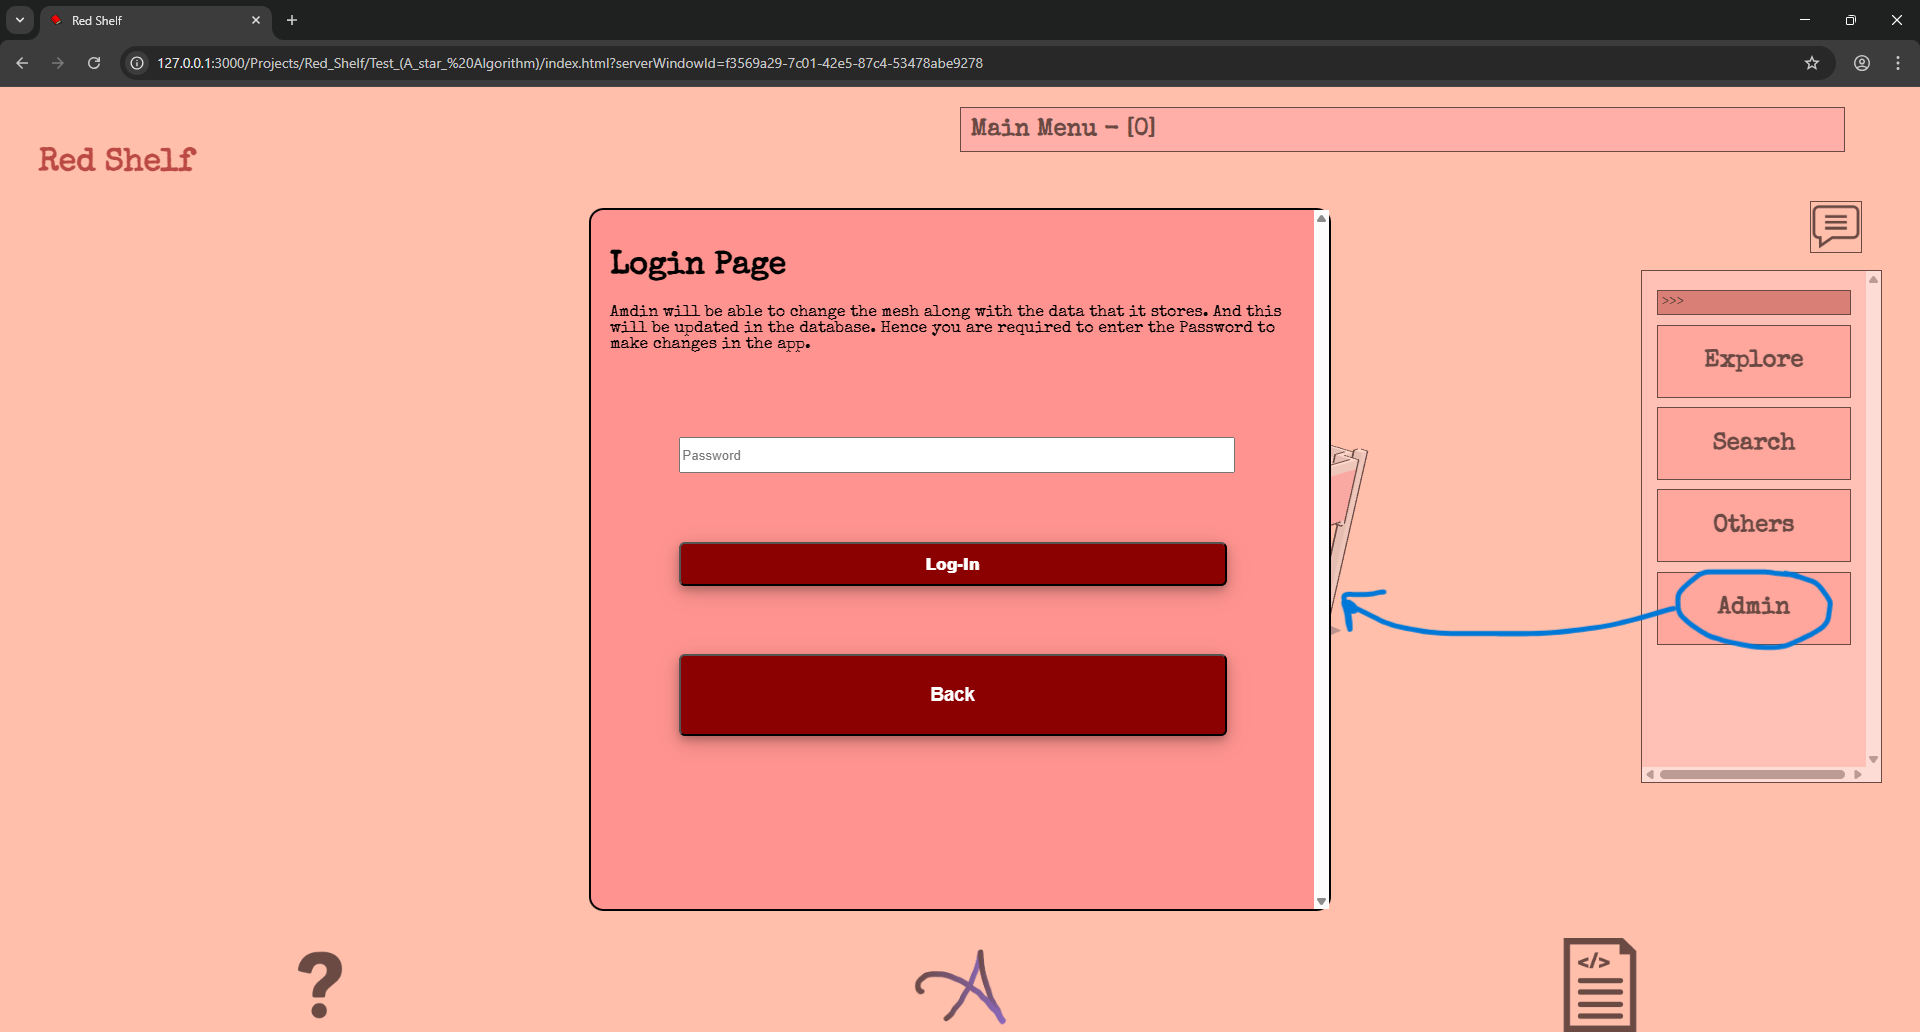
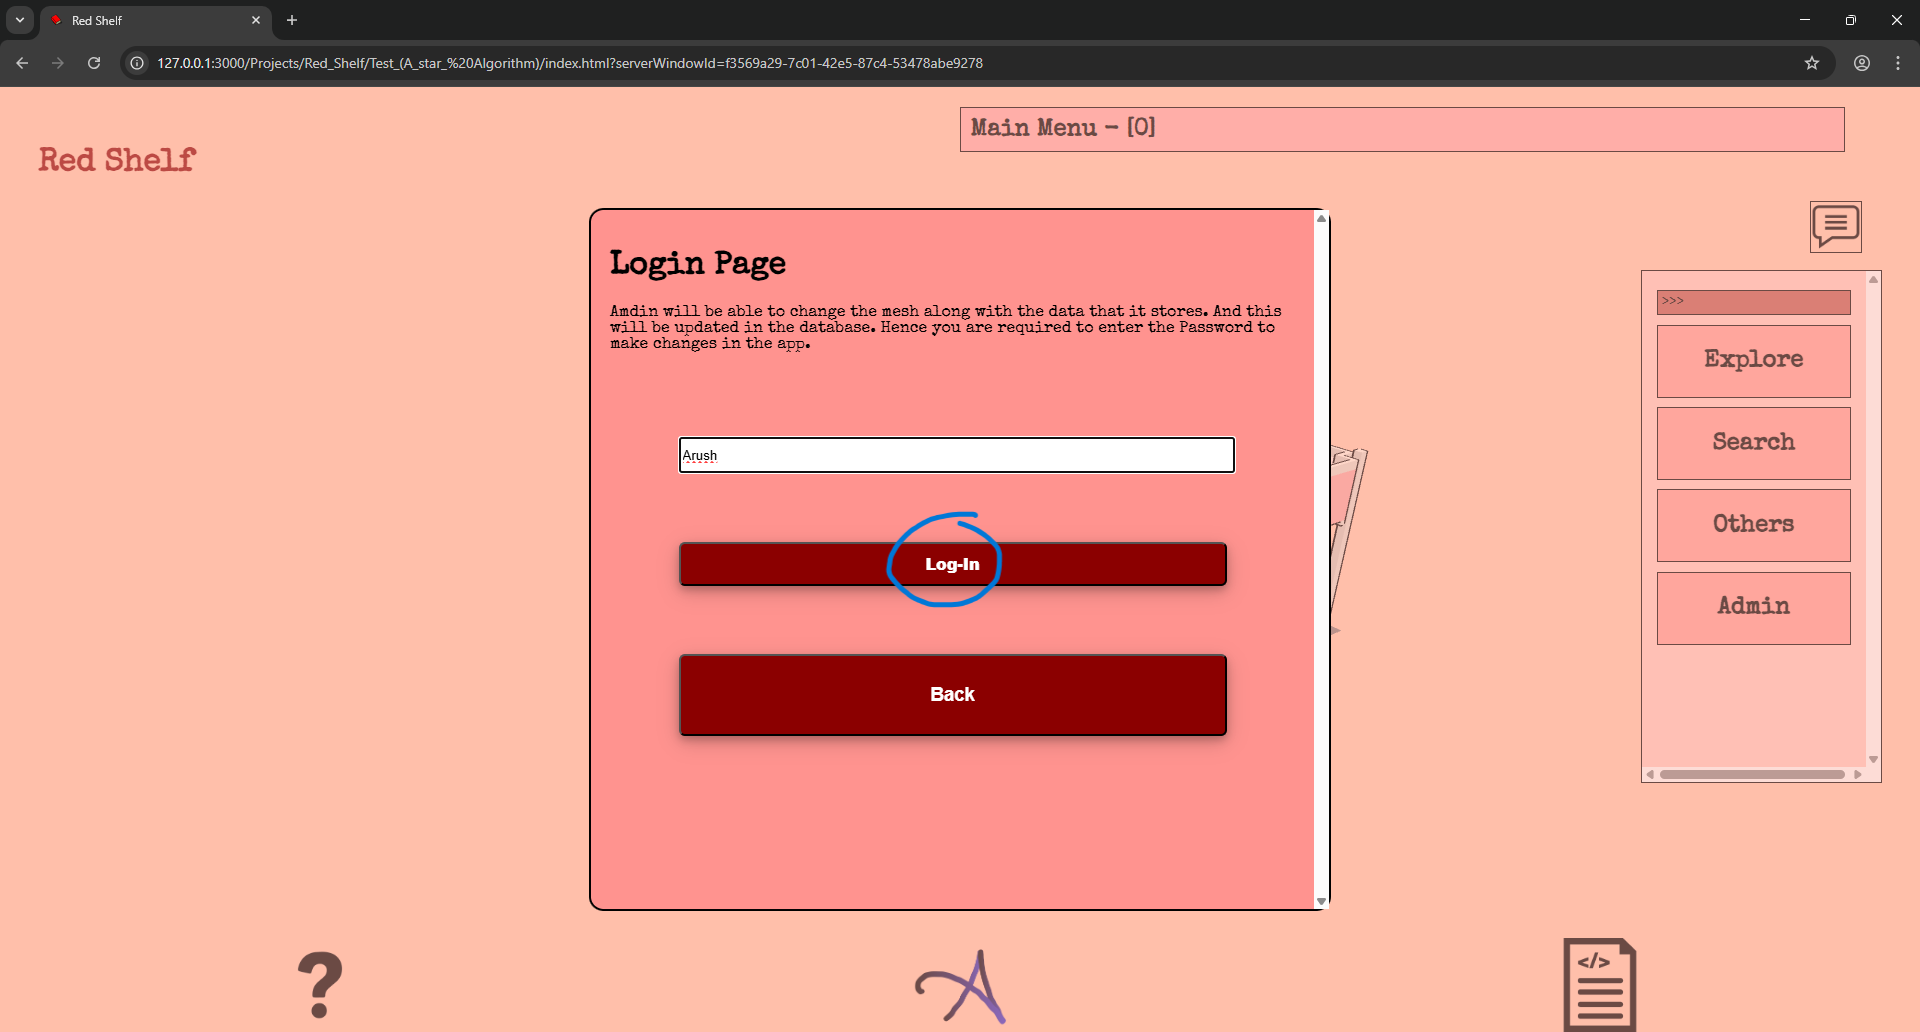
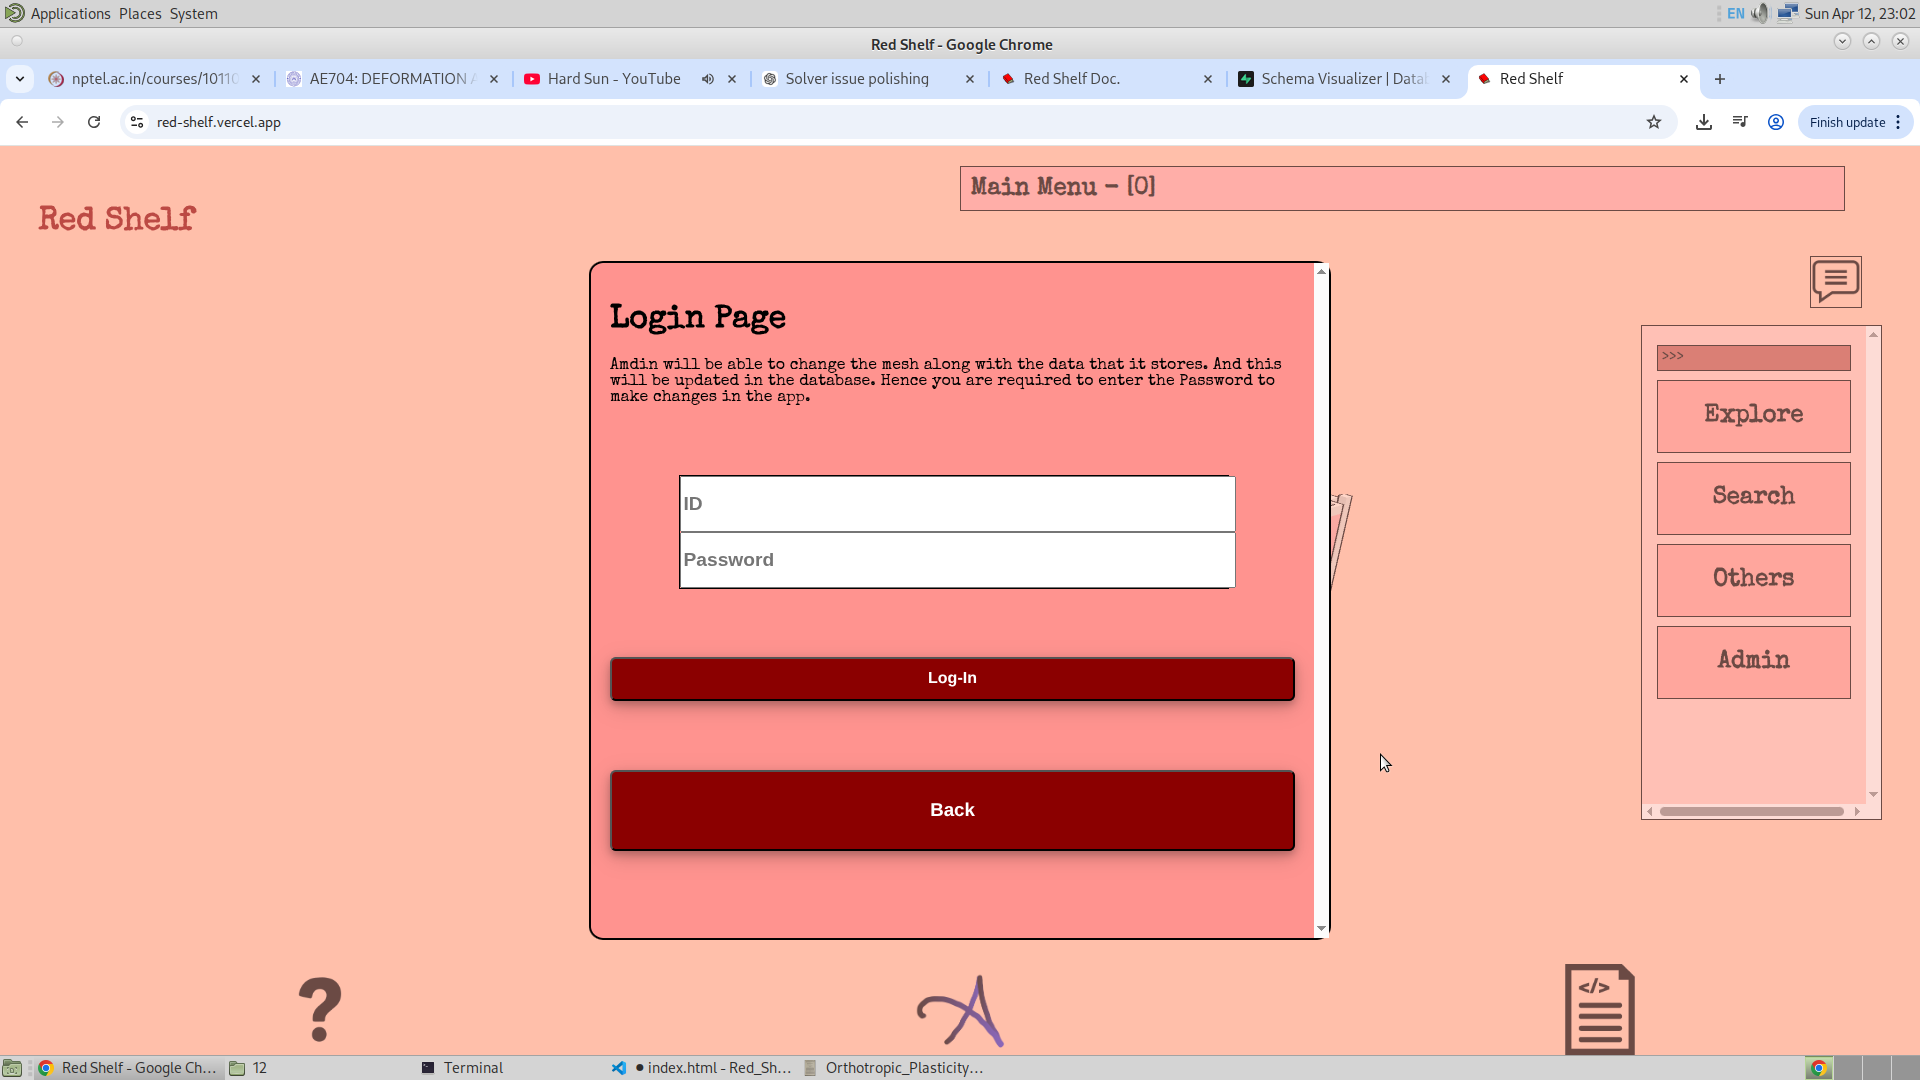
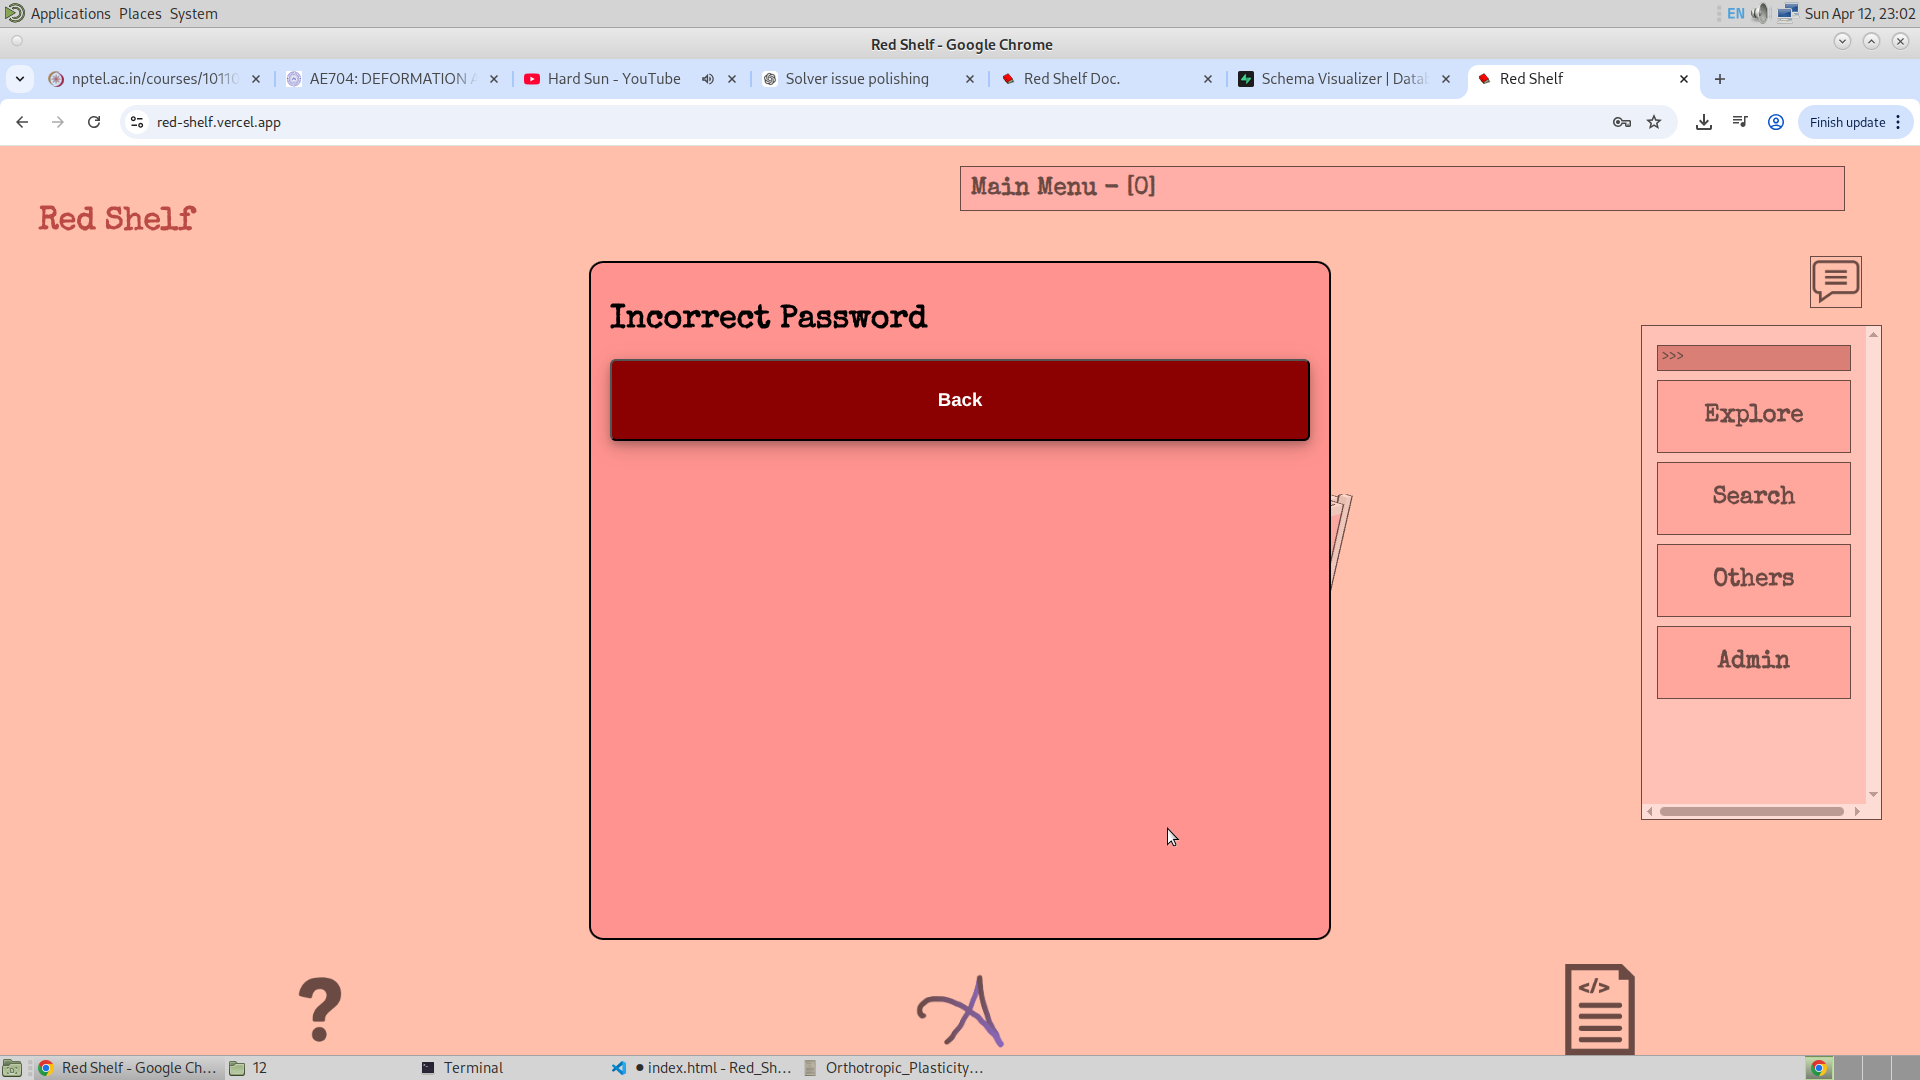
I have also redefined the application flow completely, with the added Miscellaneous and Admin menu option. Admin will have the login page, which would have the password injected as an environment variable in the Supabase. The features I am thinking to give them are to be able to change the frustum content, and the location of the bookshelf along with the name of the bookshelf (Range). And also the location of the GSAP at every floor. Hence there are three options in the admin option, which are Bookshelf, Frustum, and finally GSAP.
Yesterday, I made three tables in the database in SQL, and given below is the map that shows the tables and their relation. (The code of which will be given in the Repository)
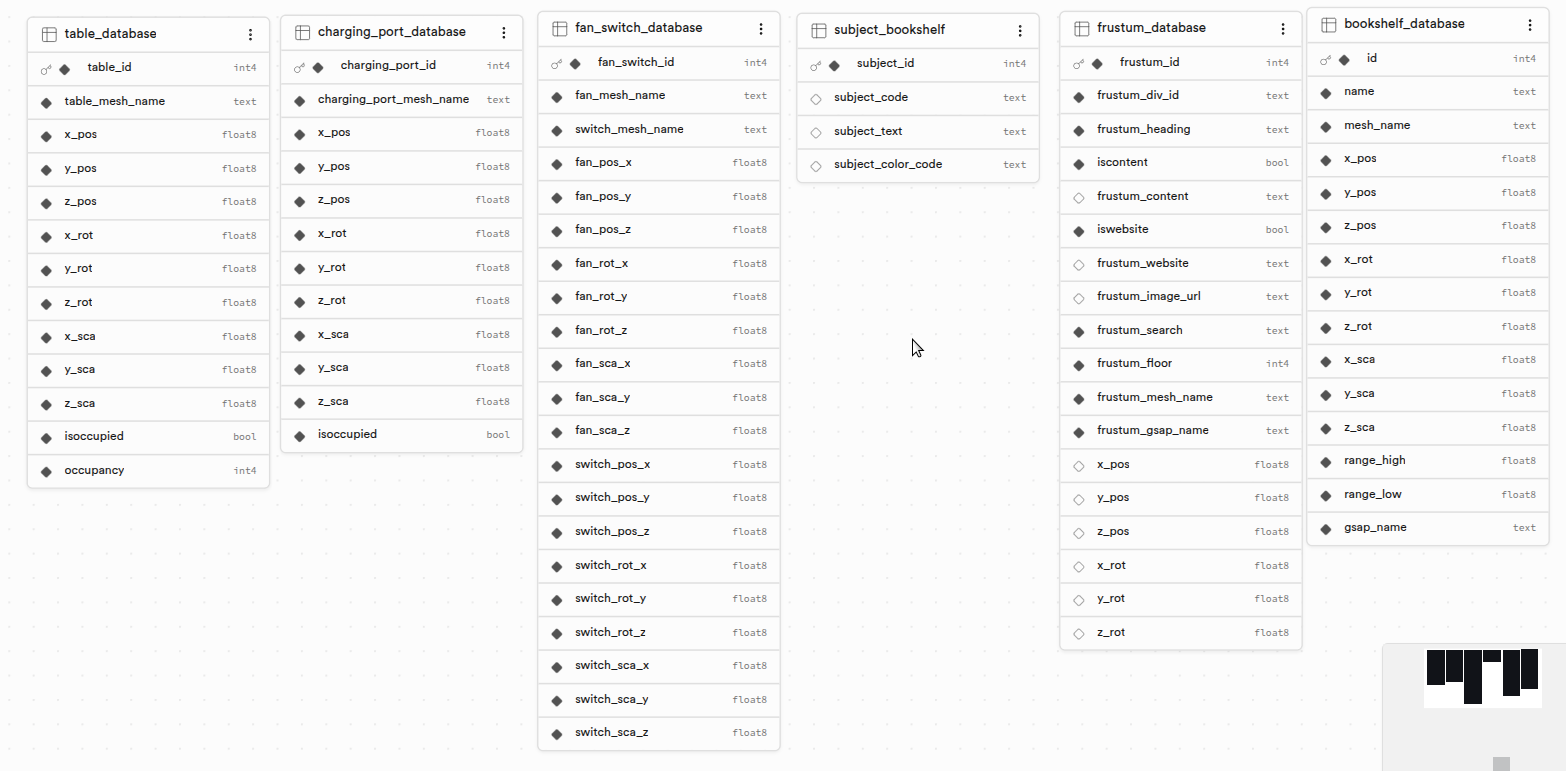
I have used five tables in my database, and they are listed below:
- Bookshelf_Database: This will store the position of the bookshelf transform and its corresponding GSAP. I plan to use this when the admin selects the bookshelf and could be able to change the location or range of the bookshelf.
- Subject_Database: This will store the subject code and the subject itself. It should be noted that the subject must is what will be searched, and the subject code is what I will have to use to make multiple bookshelves red. And I think this table has to be used along with the above Bookshelf_Database, for smoother workflow.
- Frustum_Database: This is the frustum database which will contain the information about the frustum object (object that corresponds to the frustum), and the heading, content, image, and also the id of the div. I am thinking to make this pop‑container dynamically on the website using DOM. And the ability to control or manipulate this will also be given in the admin section.
- GSAP_Database: This will store the GSAP name and the GSAP at its neighbour, along with the position of the GSAP. I would also like for this to be changed or manipulated using the RedShelf's Admin Option.
For now RedShelf will have four tables in its database.
28/03/26
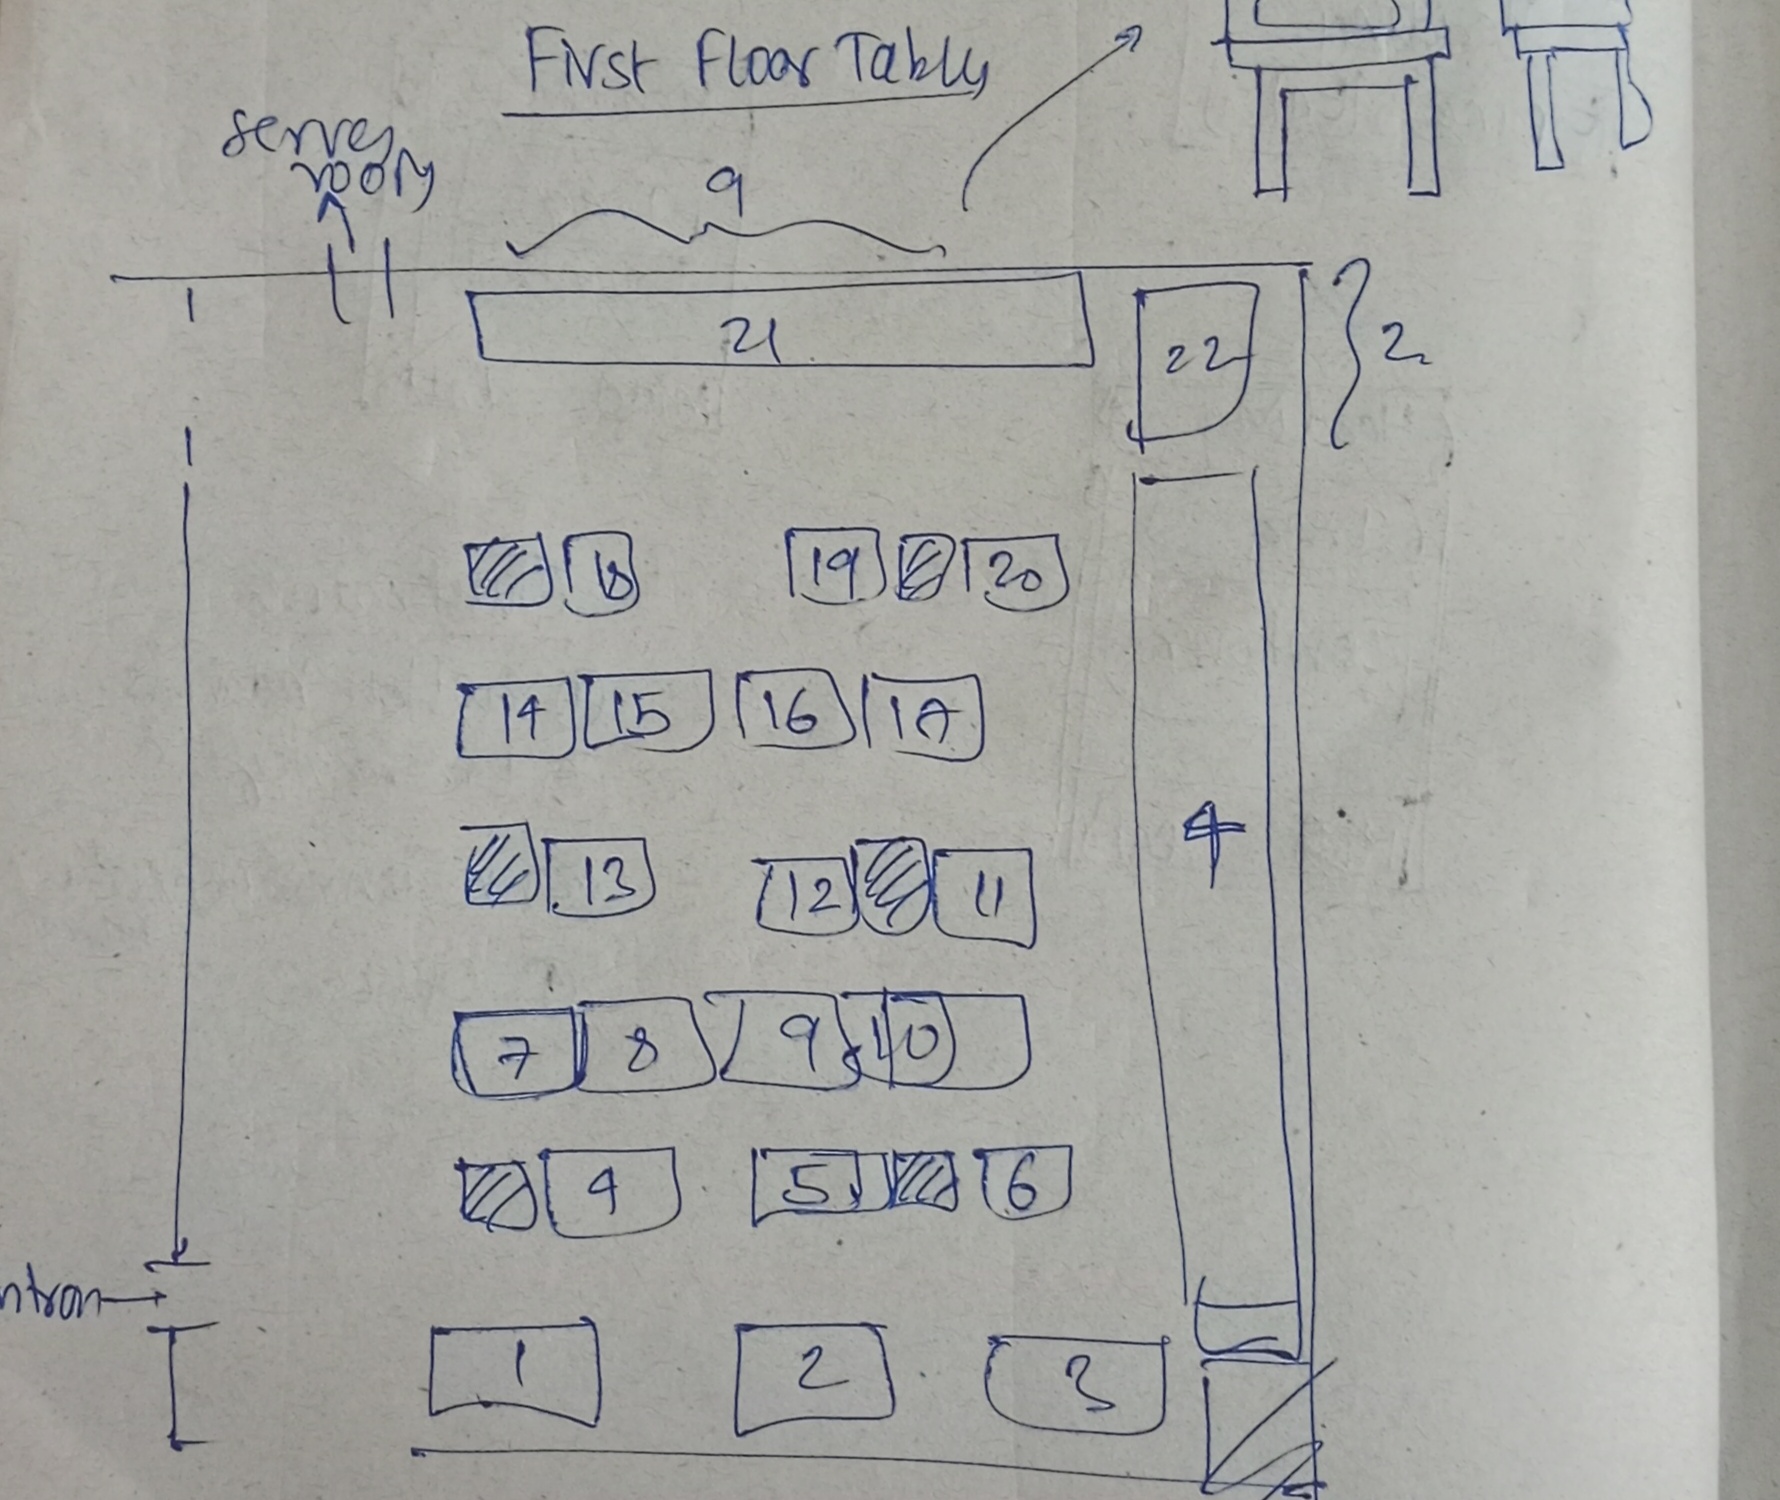
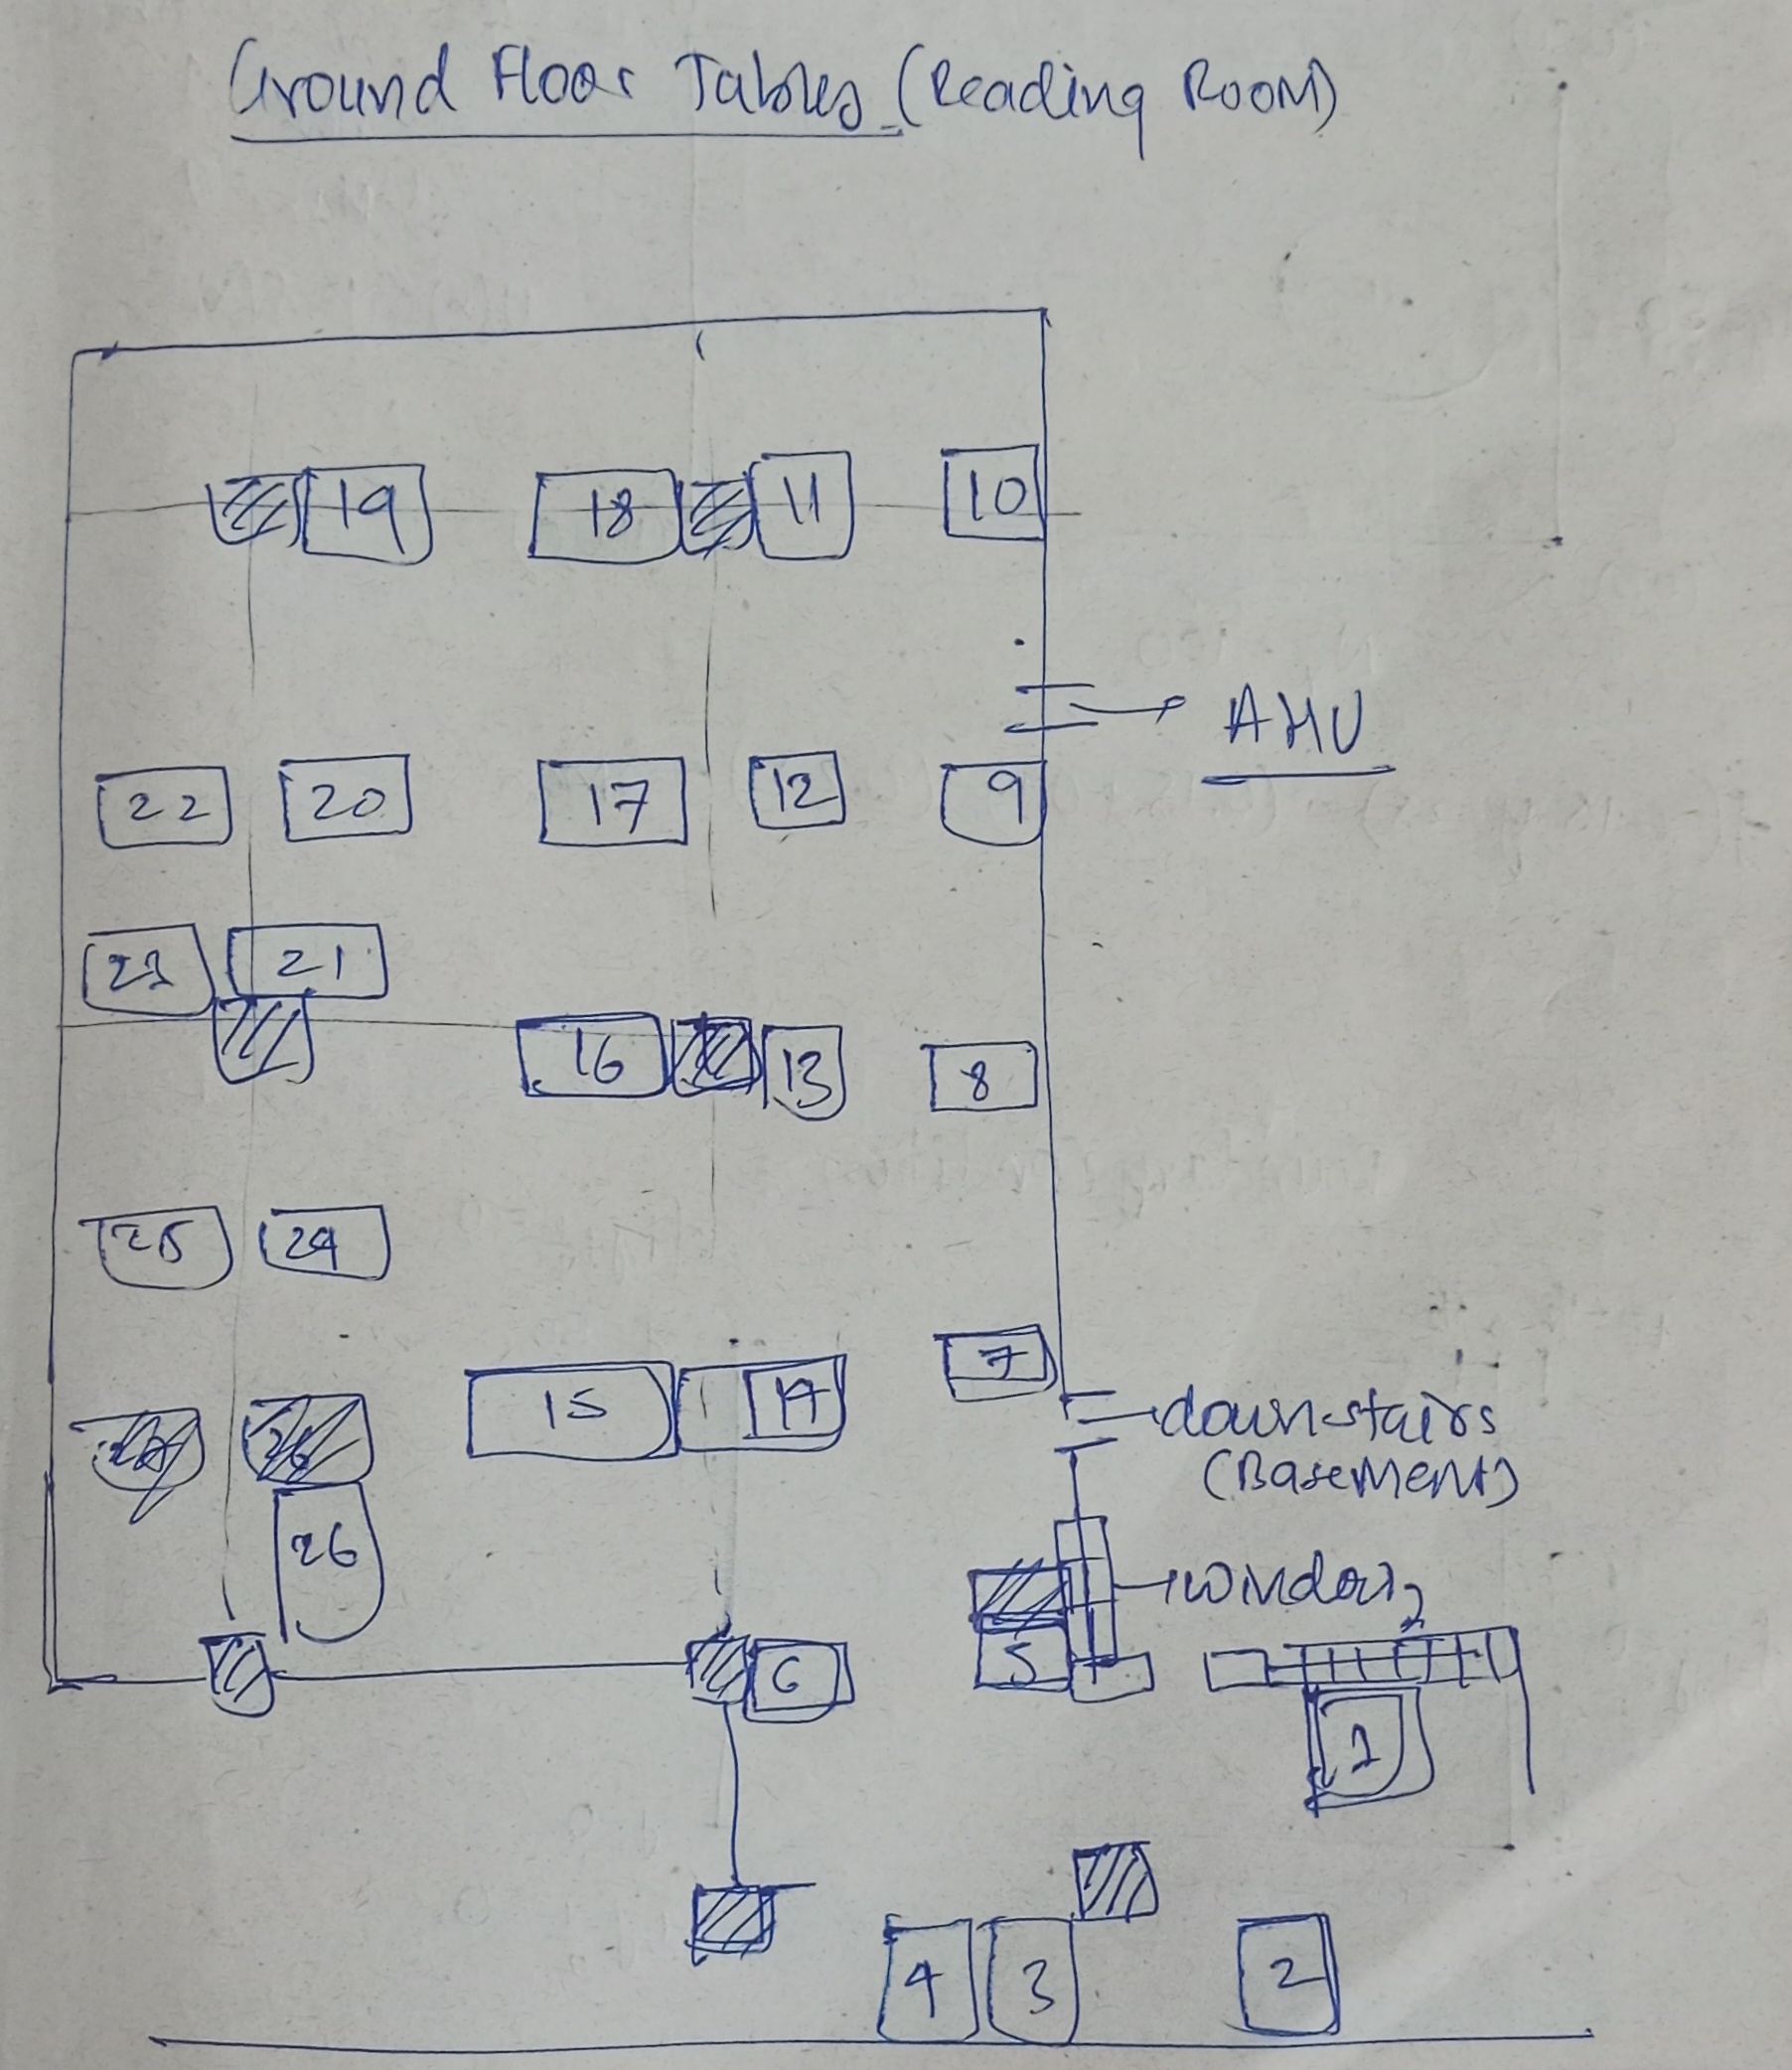
I went to the library today, and I have now started to plan the second floor of the library. I will be attaching some pictures of the sketch of the library that I have taken and will be using to model the library. Now, with time, I am feeling a bit shy about staring at everyone in the library, and I am sure that everyone over there seeing me coming to the library and just staring at them might make them feel uncomfortable. If you are one of them, I apologize for that.
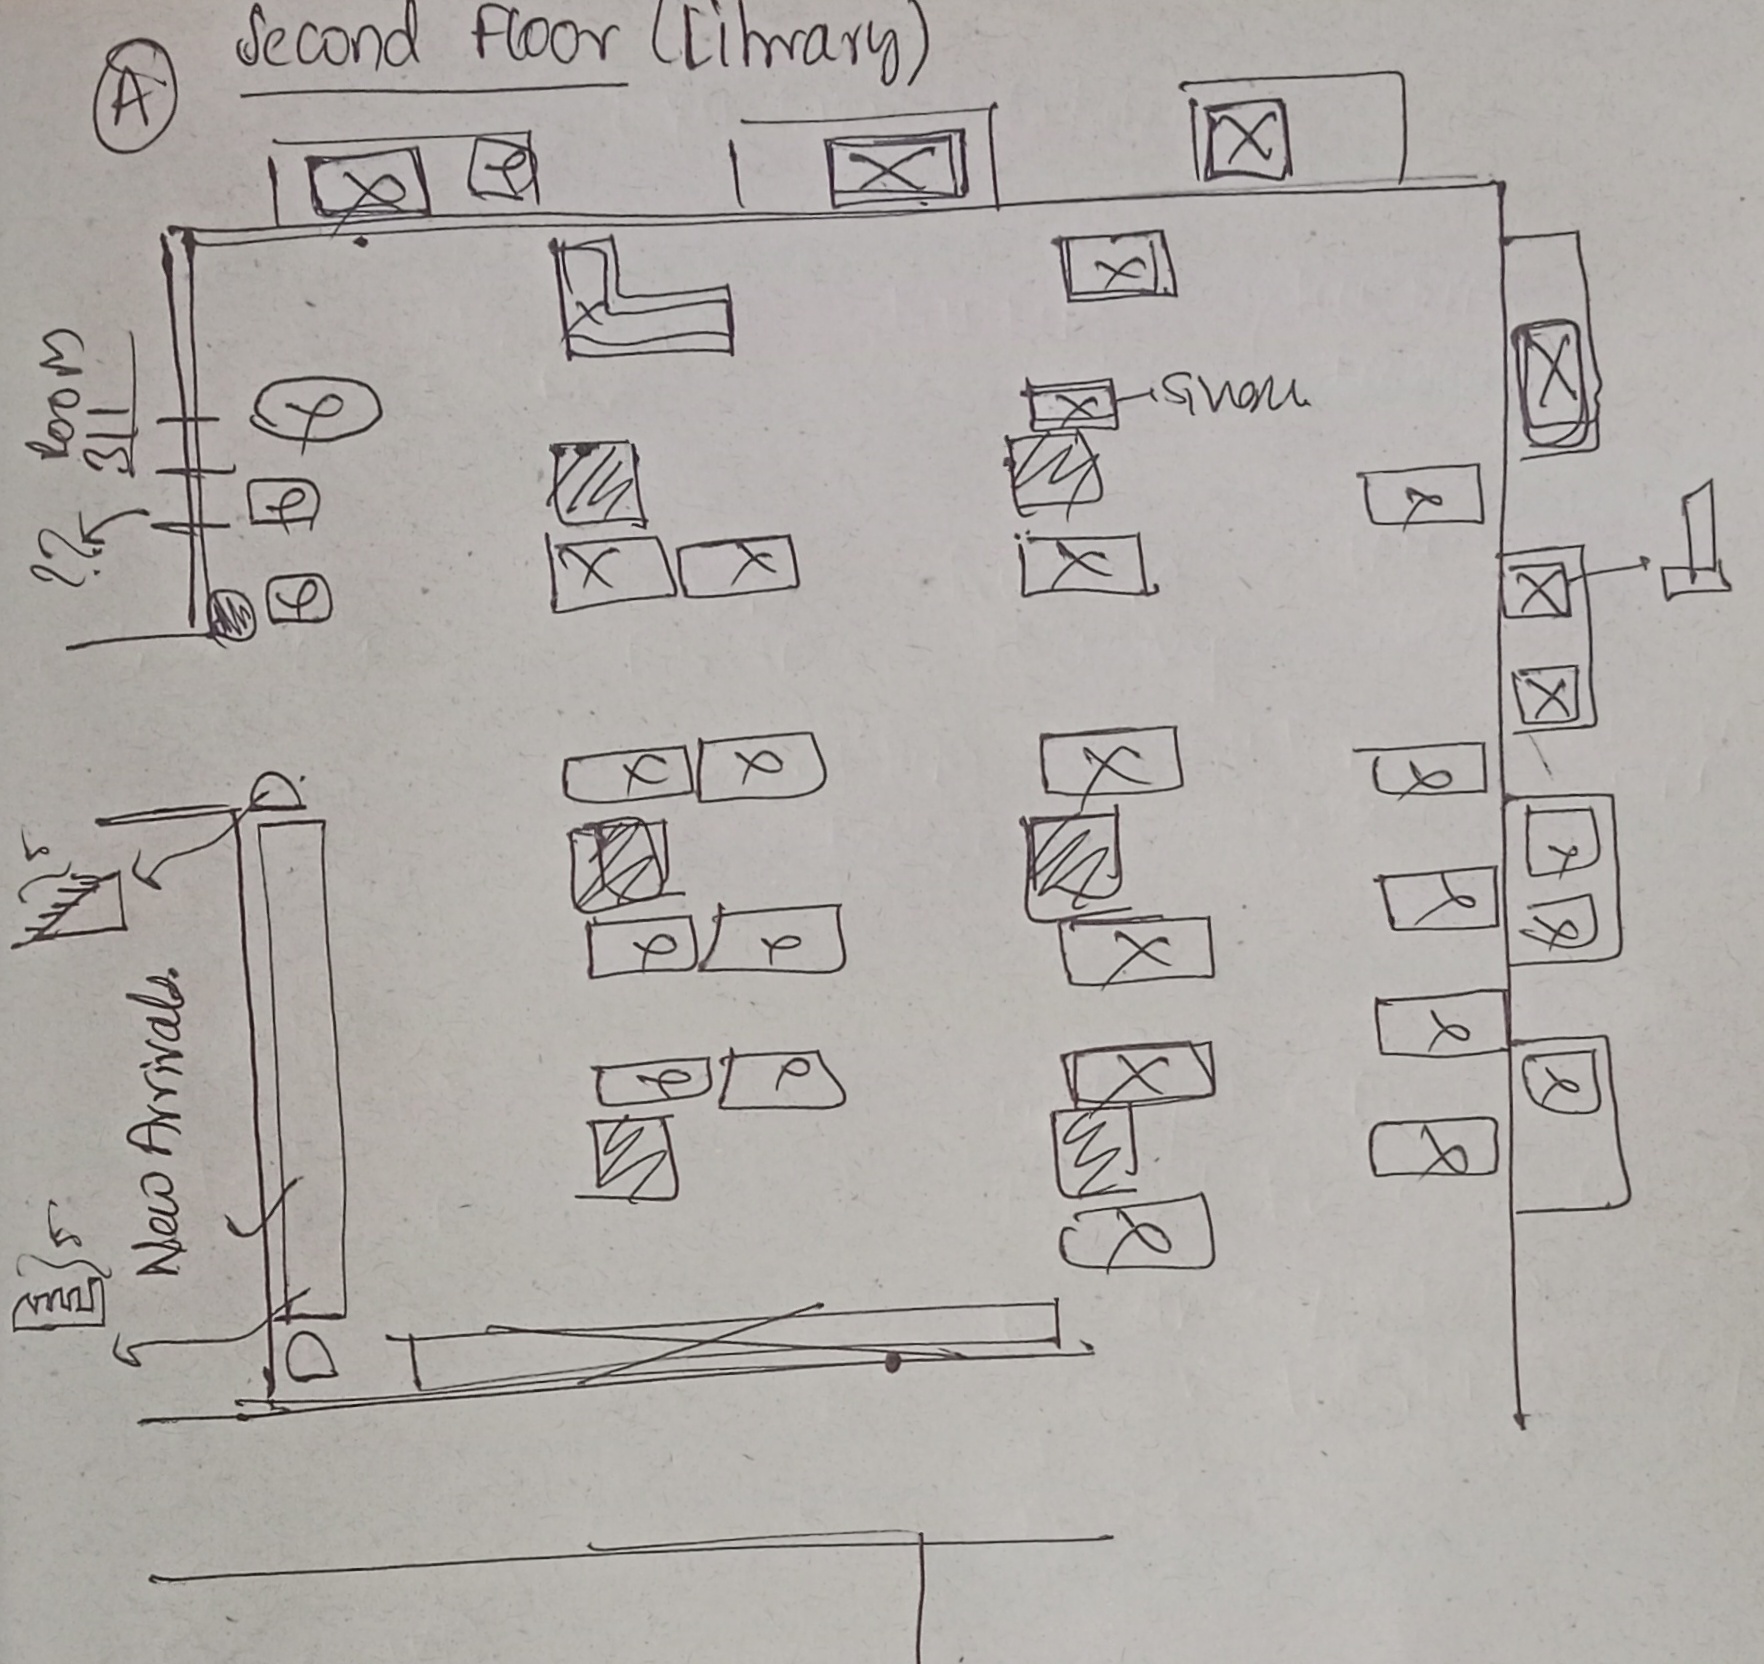
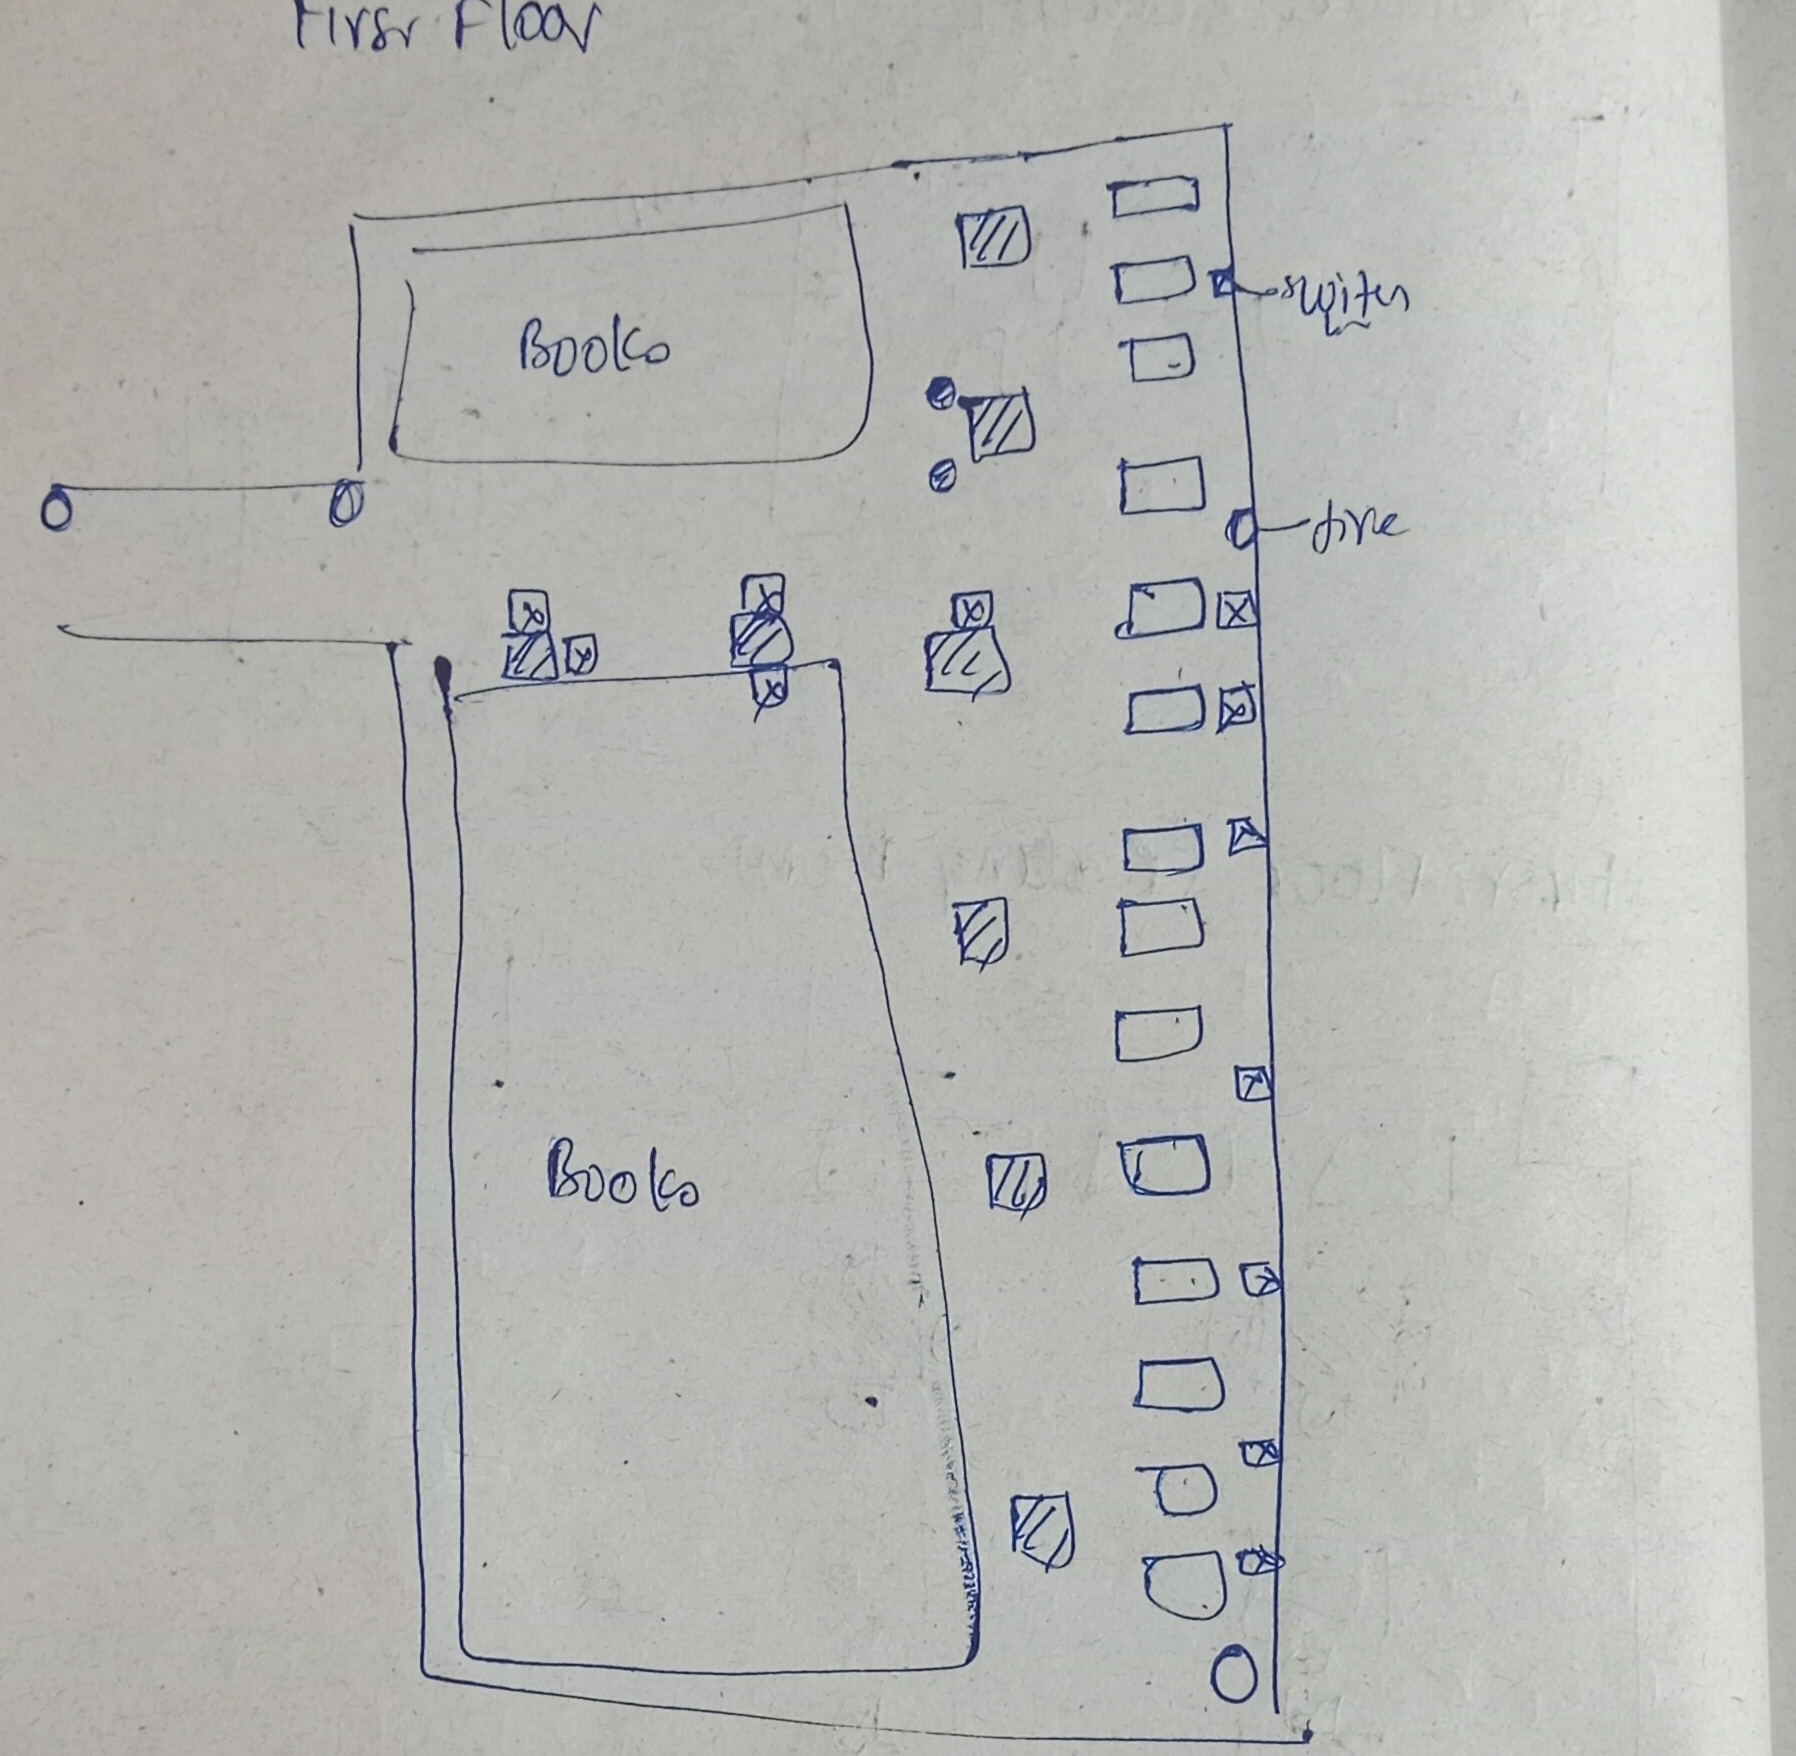
Anyways, so here is the sketch of the second floor. And there is a lot of work that needs to be done and is still not yet. Tomorrow morning is the time when I have decided to reach the second floor of the library and complete my sketch of it. Then at night of the same day, the complete model of the same will be done. And this ends my usage with Blender for this project.
Along with the second floor, I think this is the right time I would share the pictures of all the floors of the library, the sketch that I used to model the tables inside the library.
I have given myself the time of one week (5/4/26) to complete this version 3 of Red-Shelf and finally complete my contribution to this project.
29/03/26
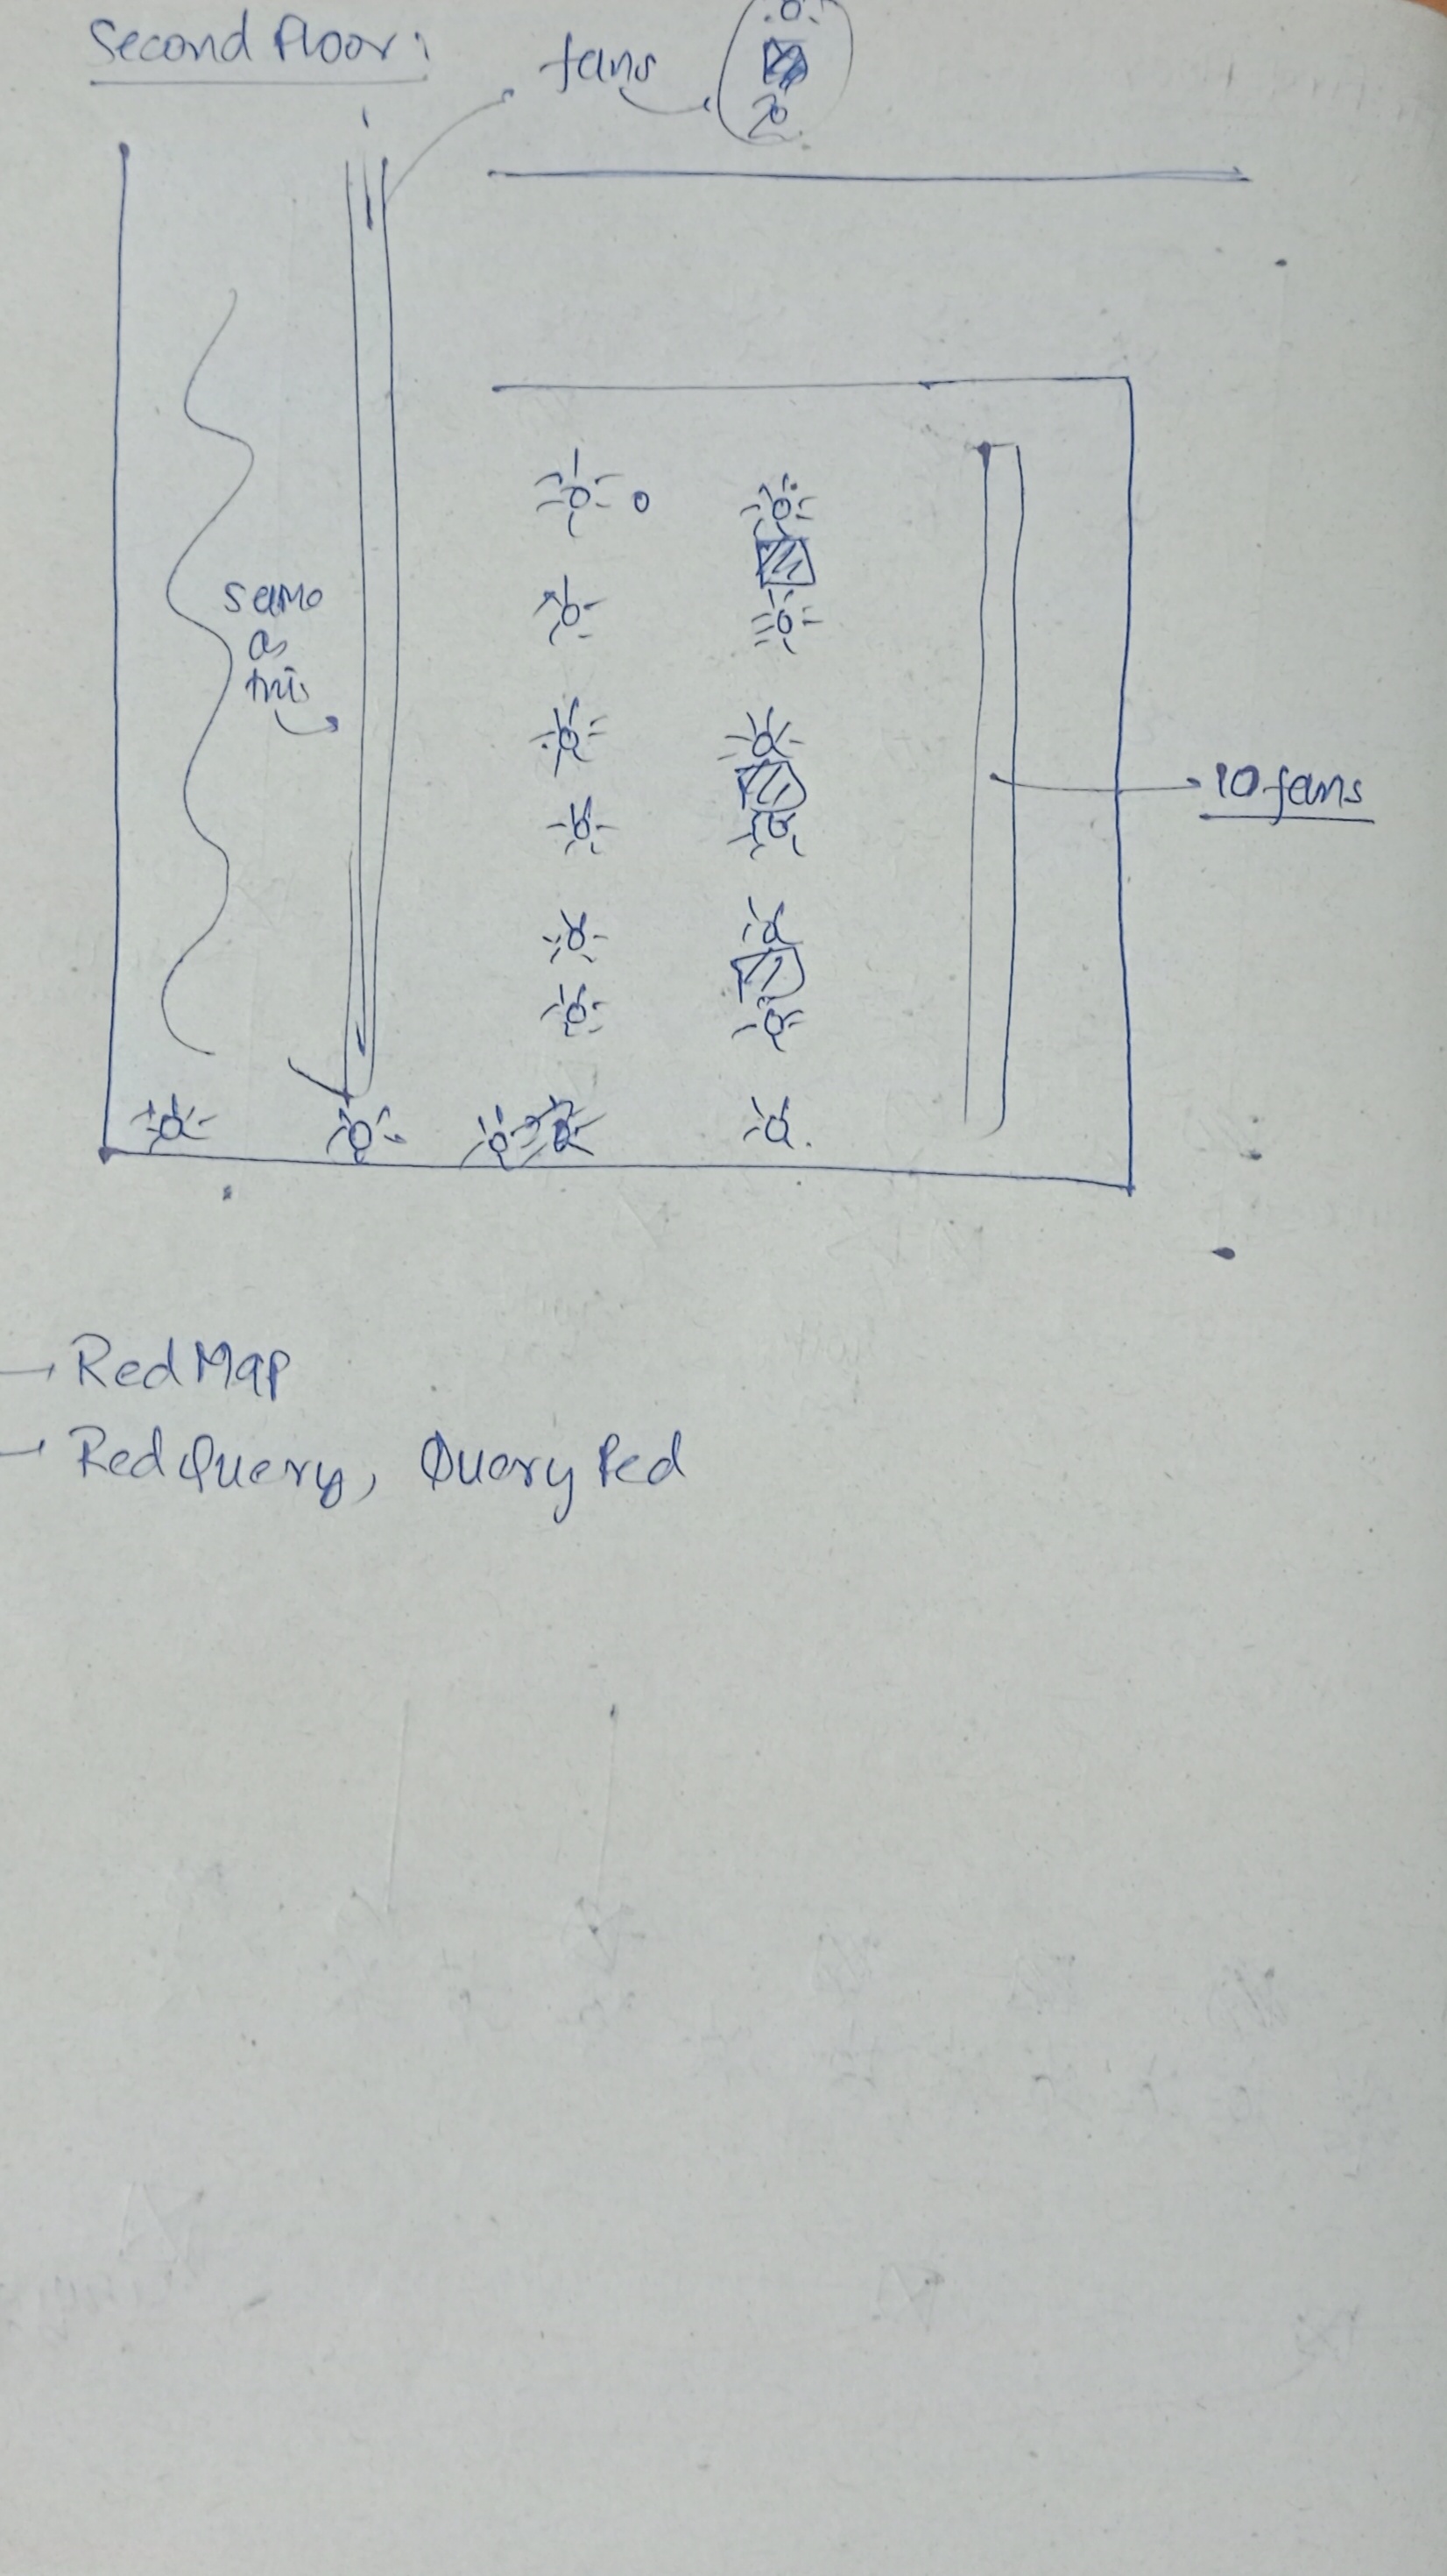
So now I have arrived at the second floor of the library with the objective of completing my sketch of the second floor. I have given myself an hour complete the sketch of the second floor. I think I will have to abandone the idea of sketching the fans with the switch since tat will take a lot of time and I dont have that. So for now I will make the tables and the charging port of the second floor and this will do the job for me.
For today, I will have to make the tabkes to not be the insatnced but to be used from the databse so that the mesh of tables will be just one but the using the add(mesh) and then also importing the cordinates of the tables from the databse, I will be able ro replicate the complete tbales setup that will otherwise would hav eto be present int he mesh, increasing it;s size and memory problematic for the application and my repo.
Given below is the image of the sketch of the second floor that i have taken. This contain the tables and the switch boards along with the important rooms and emergrency.
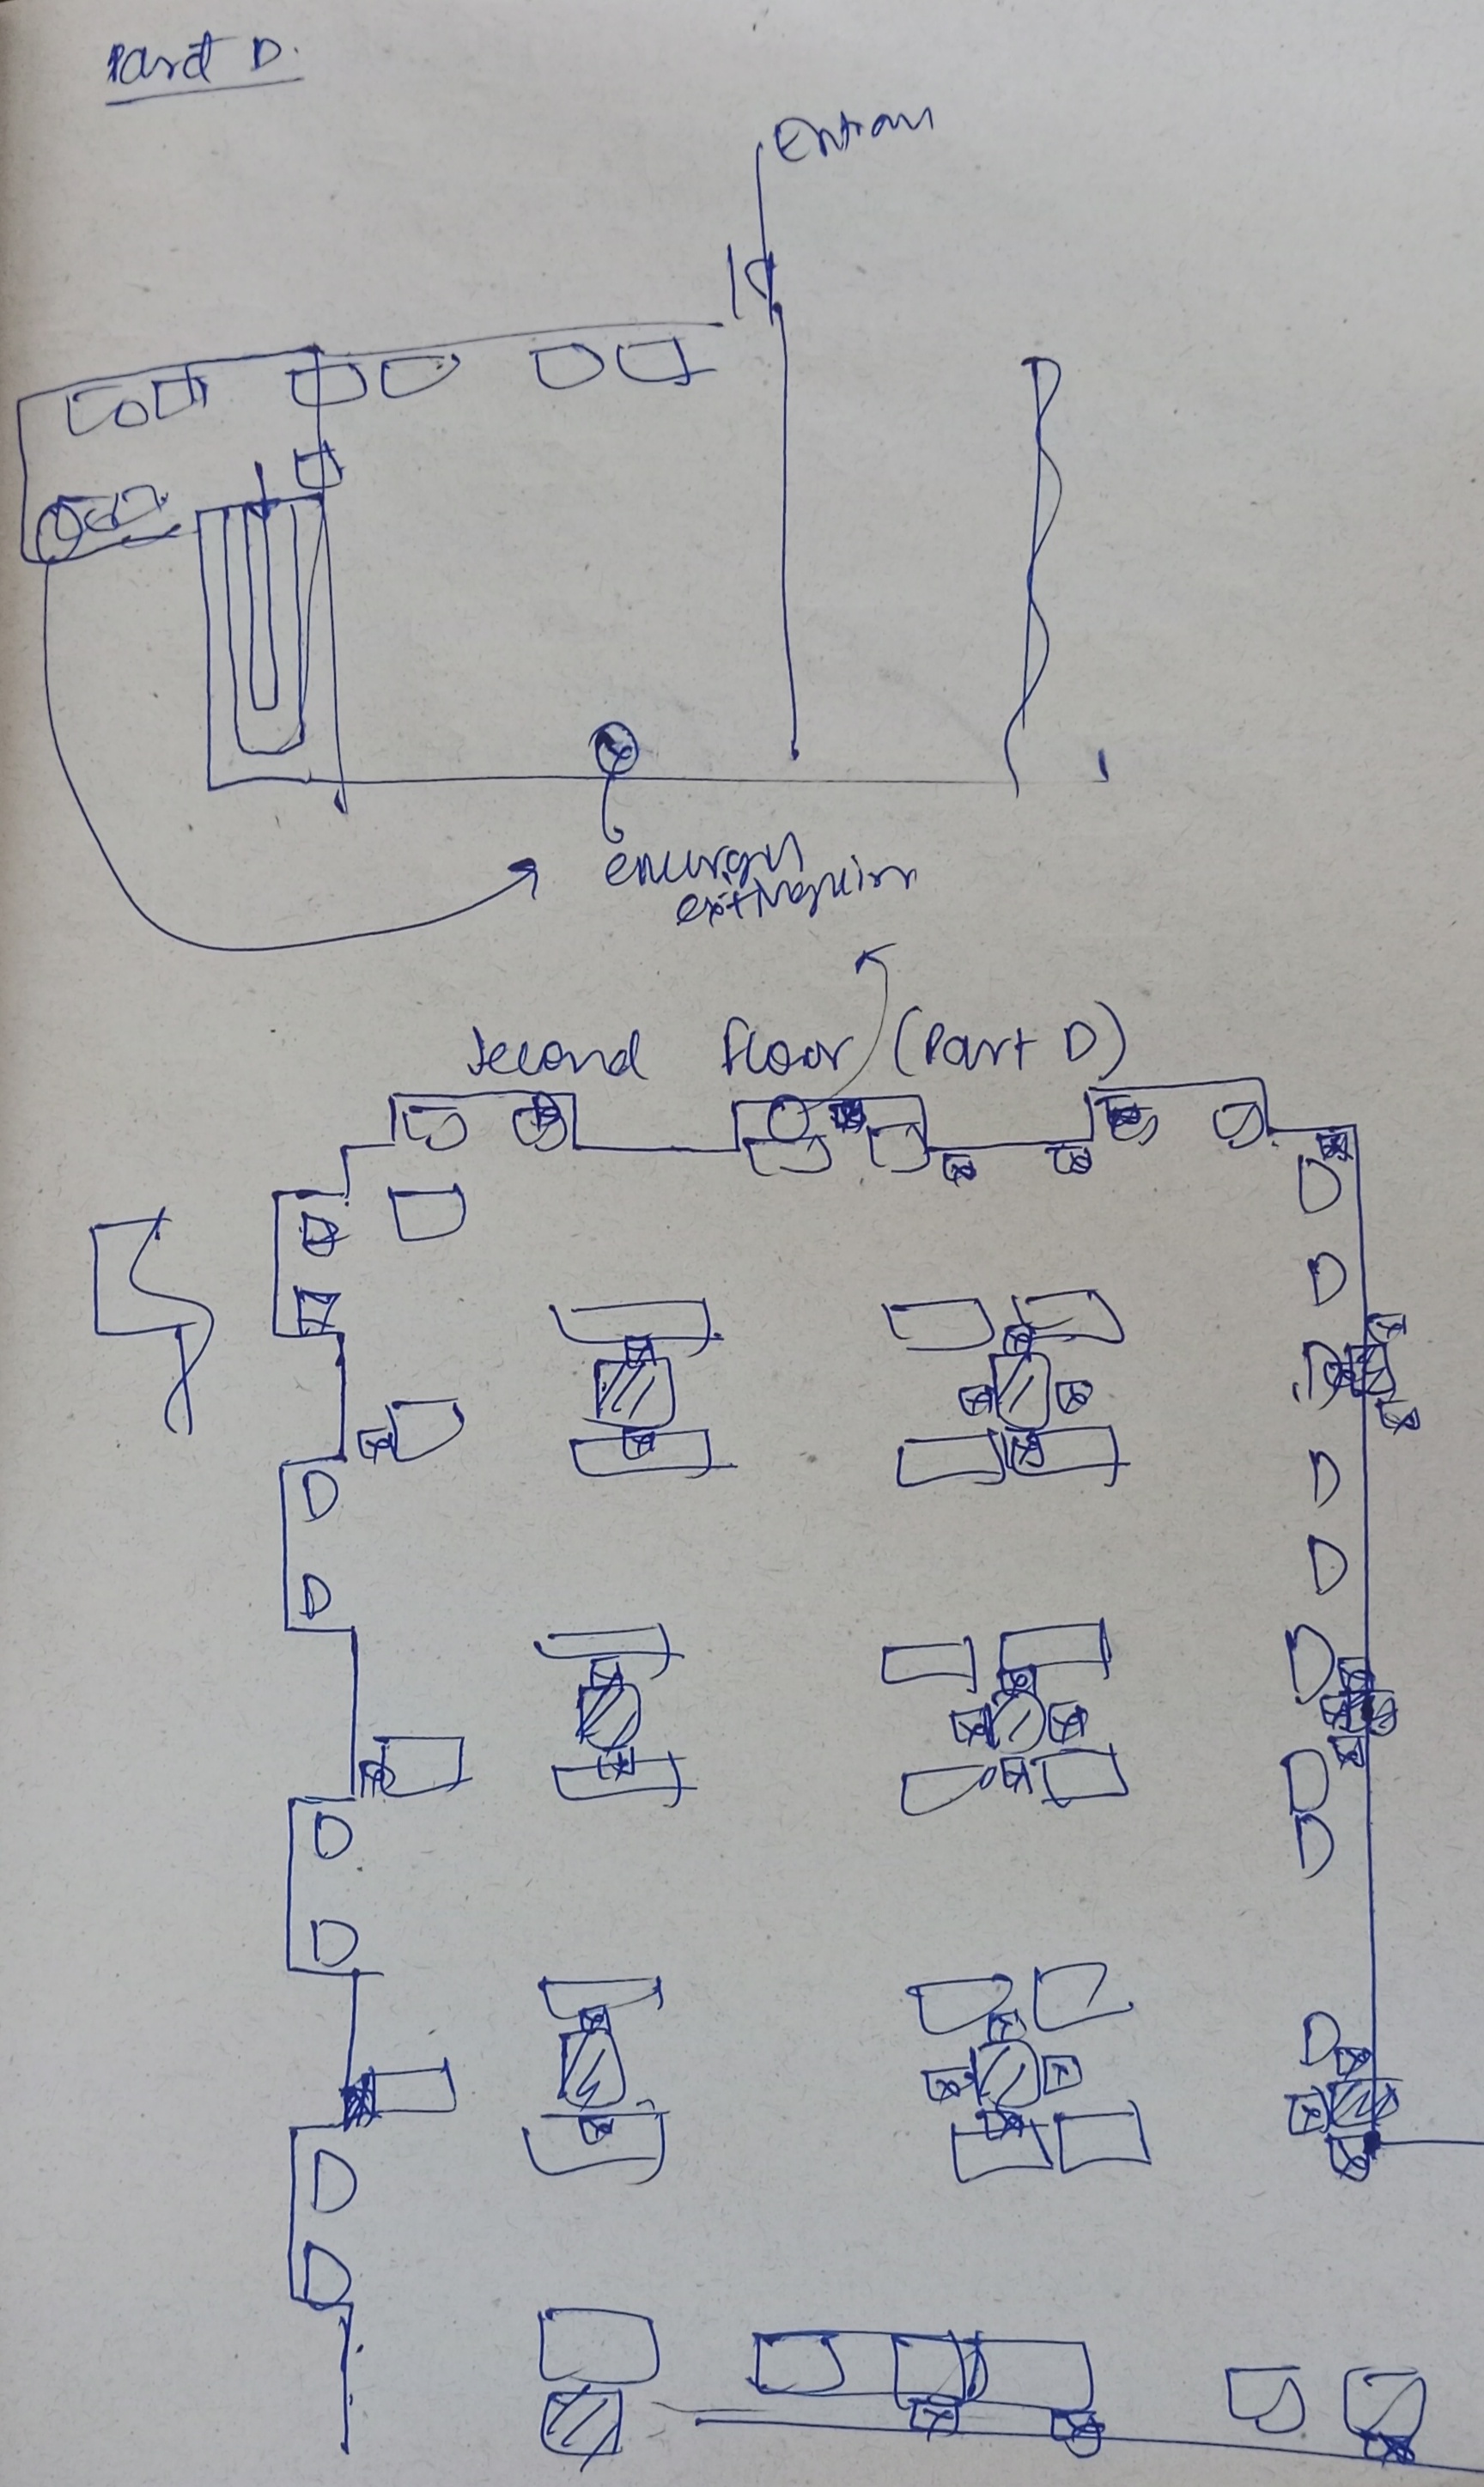
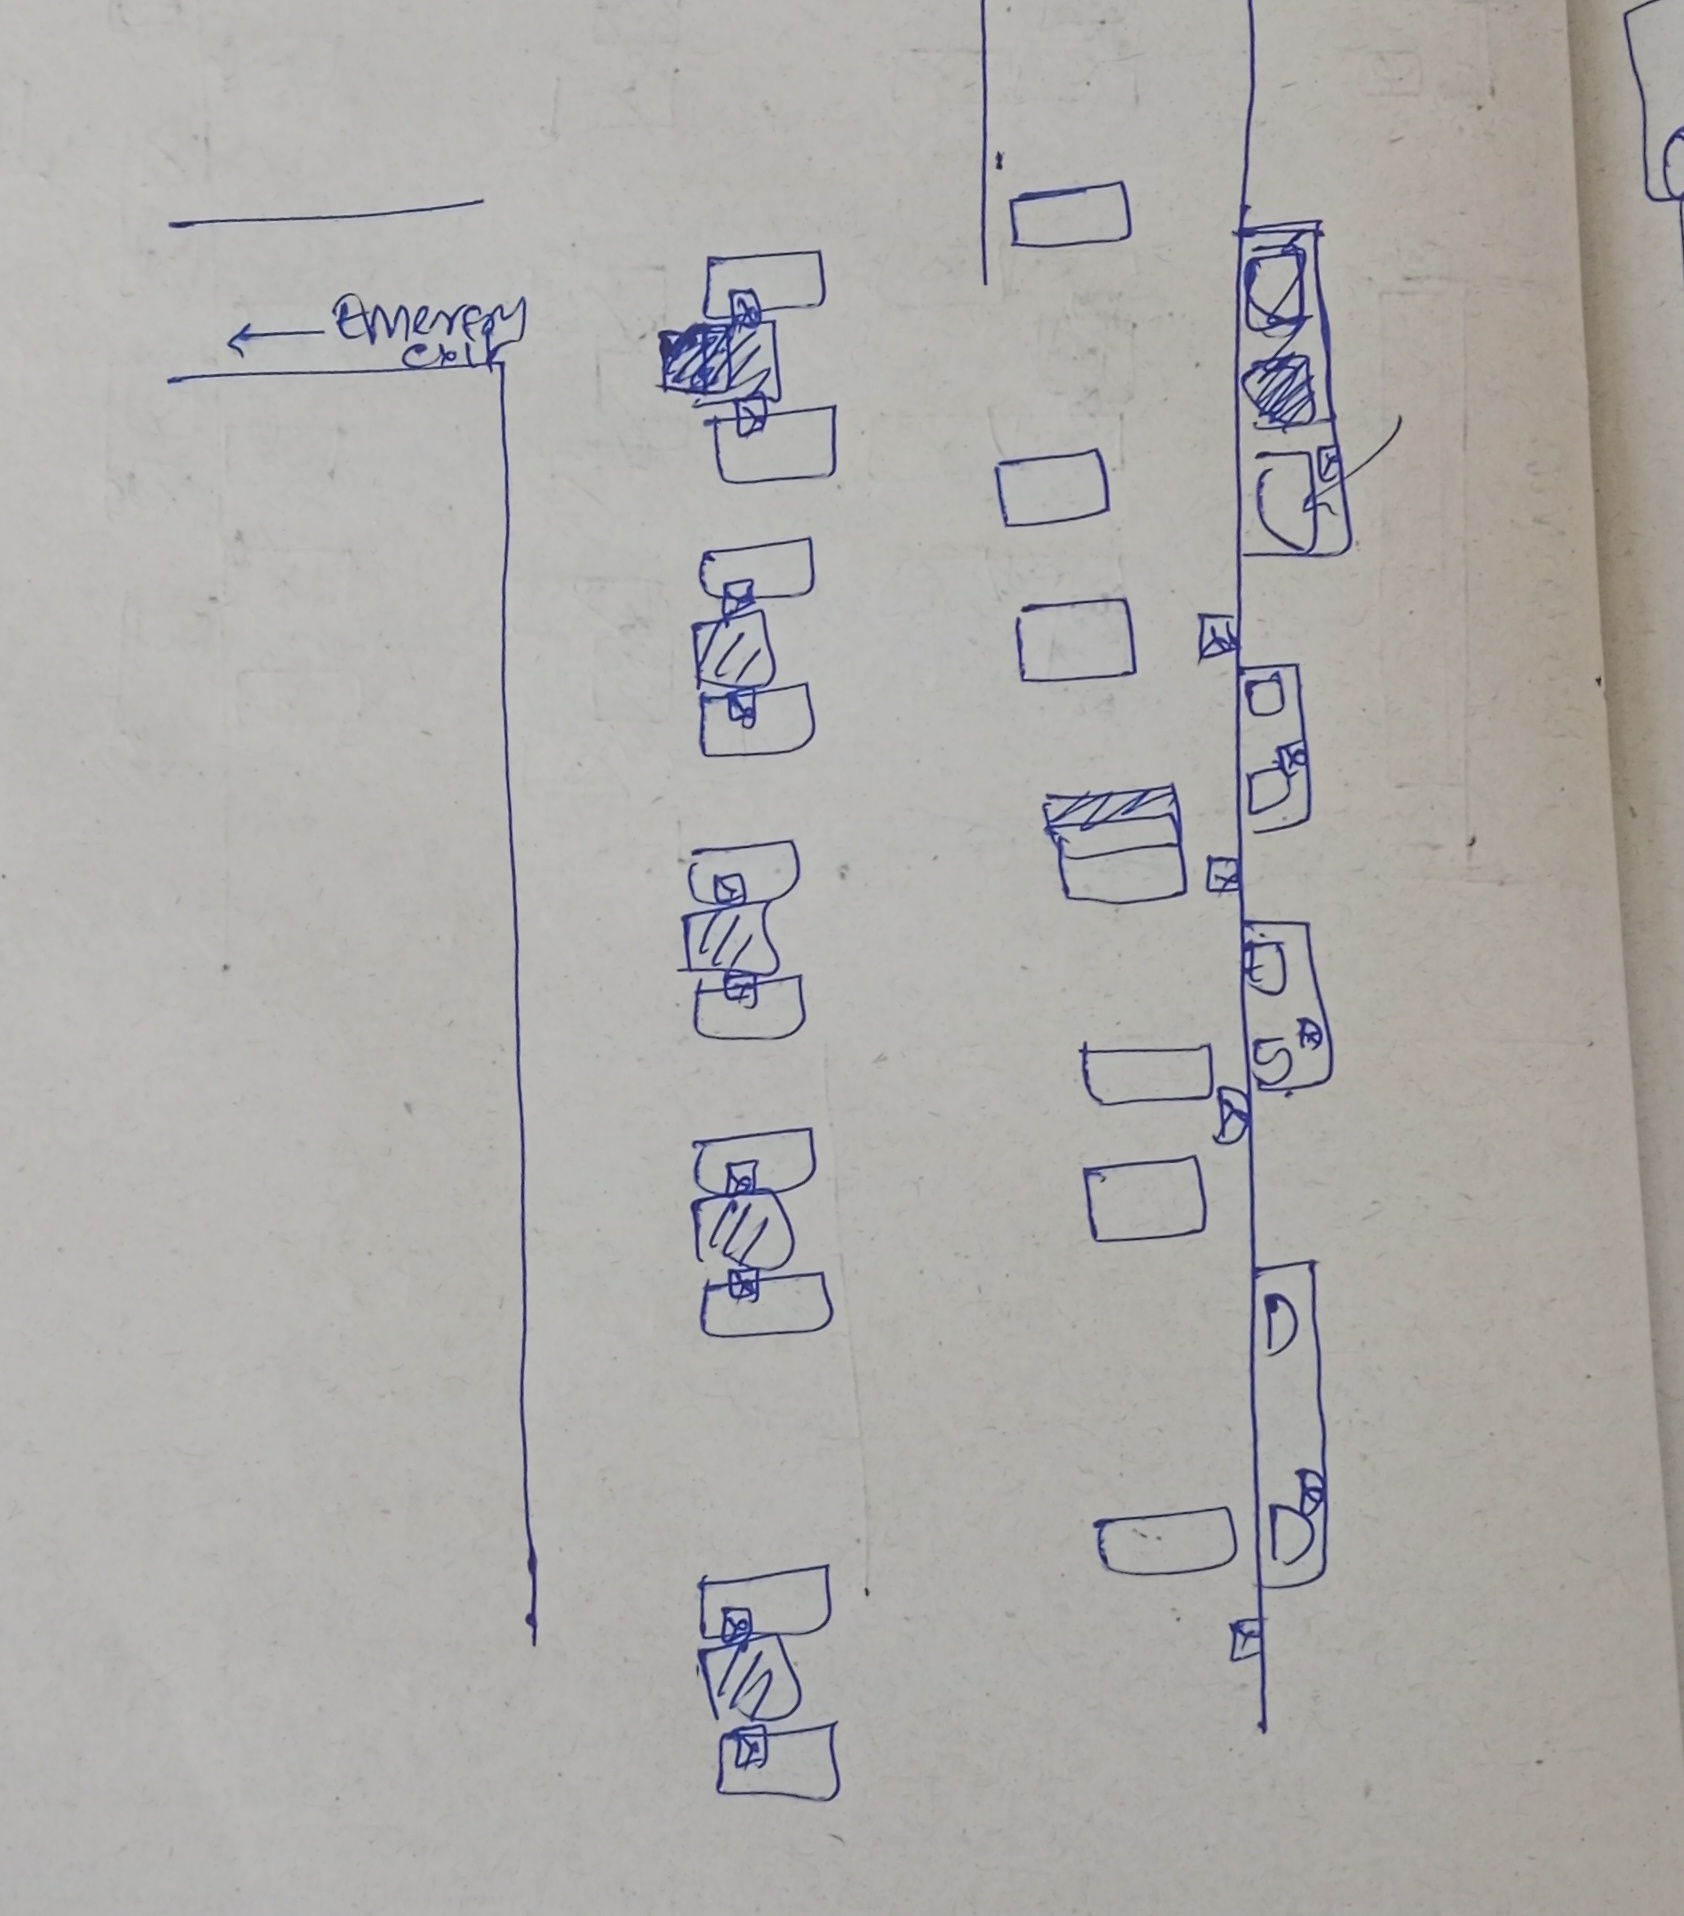
So I have done making the schematic of the second floor. This was the most akward expereince. There are mnay who I could see were uncomforatble beacuse of me staring at things around them. Along the way, I also got to know about some other placs for the new realeses in the first floor, and also the emergency exit in the seocnd floor. So now the task is to model the second floor completley and then make the appropriate frutums at the second floor, include the tables in the crowd application flow and then finally make some changes in the frusutm. Then refine the explore option and the grid and then make then fix some of the things in the quick search. This will complete this weeks task of making the seocnd floor. And then in the next week I will work on the charging ports and fianlly the database (which will alos include making the search engine smart enough for each subjects). Today I will mail the staff members to meet next week weekend.
So fianlly I was ble to amke some decent prototype model of the second floor. Given belwo is the image of it. For now it has got the new release section along with the fire extinguisher and the tables charging ports.
Tomorrow, I will be polishing the model, and export my final model into the glb file. I will instance the staircase tomorrow. Along with that I will also make the switch boards to be of the instanced and the tables to be in real. Thats it for today.
30/03/26
From 30th to 1st, I got to know that the Linux lab is off, which means I cannot use Blender. And thus, I have started focusing on the Three.js part, which includes adding the percentage feature and then handling the beast — the database. I have added the percentage feature today, and also polished the Miscellaneous application flow. I will try to fix the database tomorrow and the day after that, since the Linux lab won’t open by then (1/3/26). After that, I will polish the app by filling the helper and the title bar, along with polishing the mesh. This will complete version 3 of the application. Finally, I will have a meeting on the weekend with the staff members, and this will end my journey of Red Shelf.
So anyways, the progress for today is just the percentage bar, and that’s it. Given below are the images of examples showing how this works. This isn’t new though.

Here, as a part of the example, I have selected a bookshelf and demonstrated how the percentage bar can change. I think I will not make those GSAP icons like I earlier planned, since that has a high effort-to-return ratio.
31/03/26
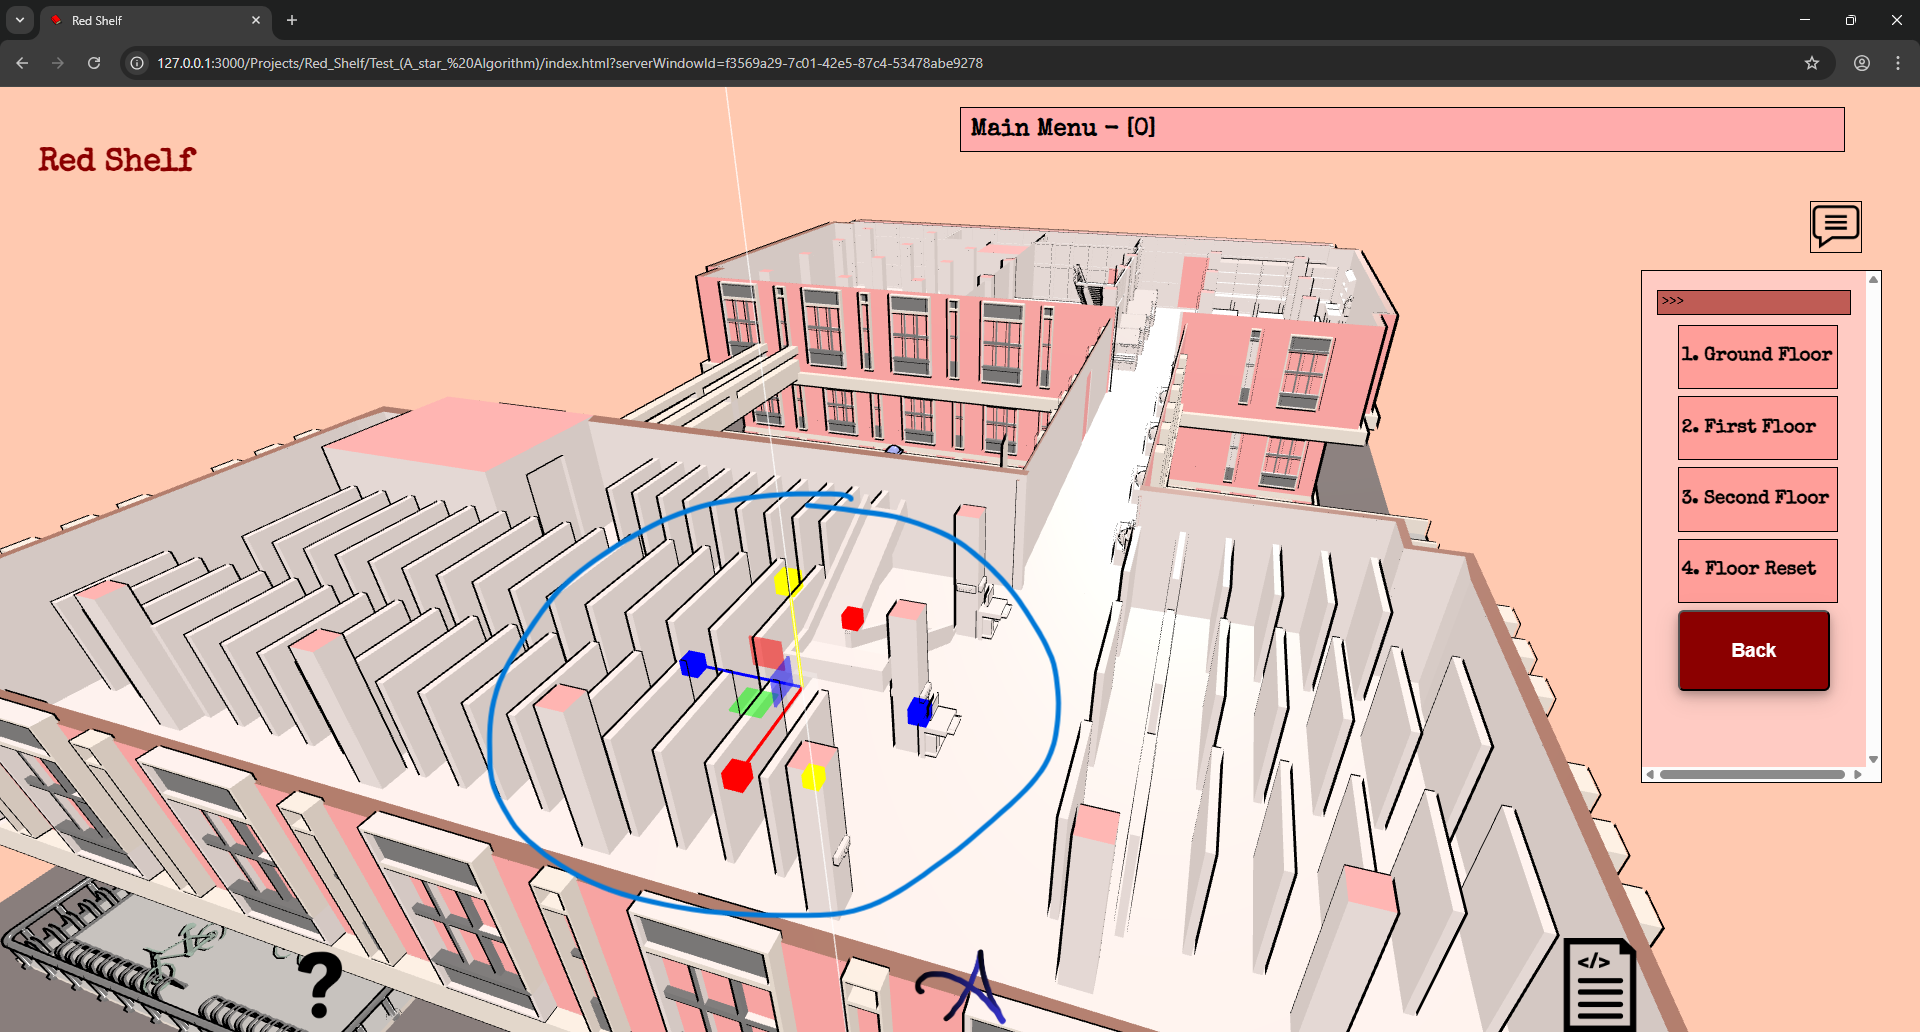
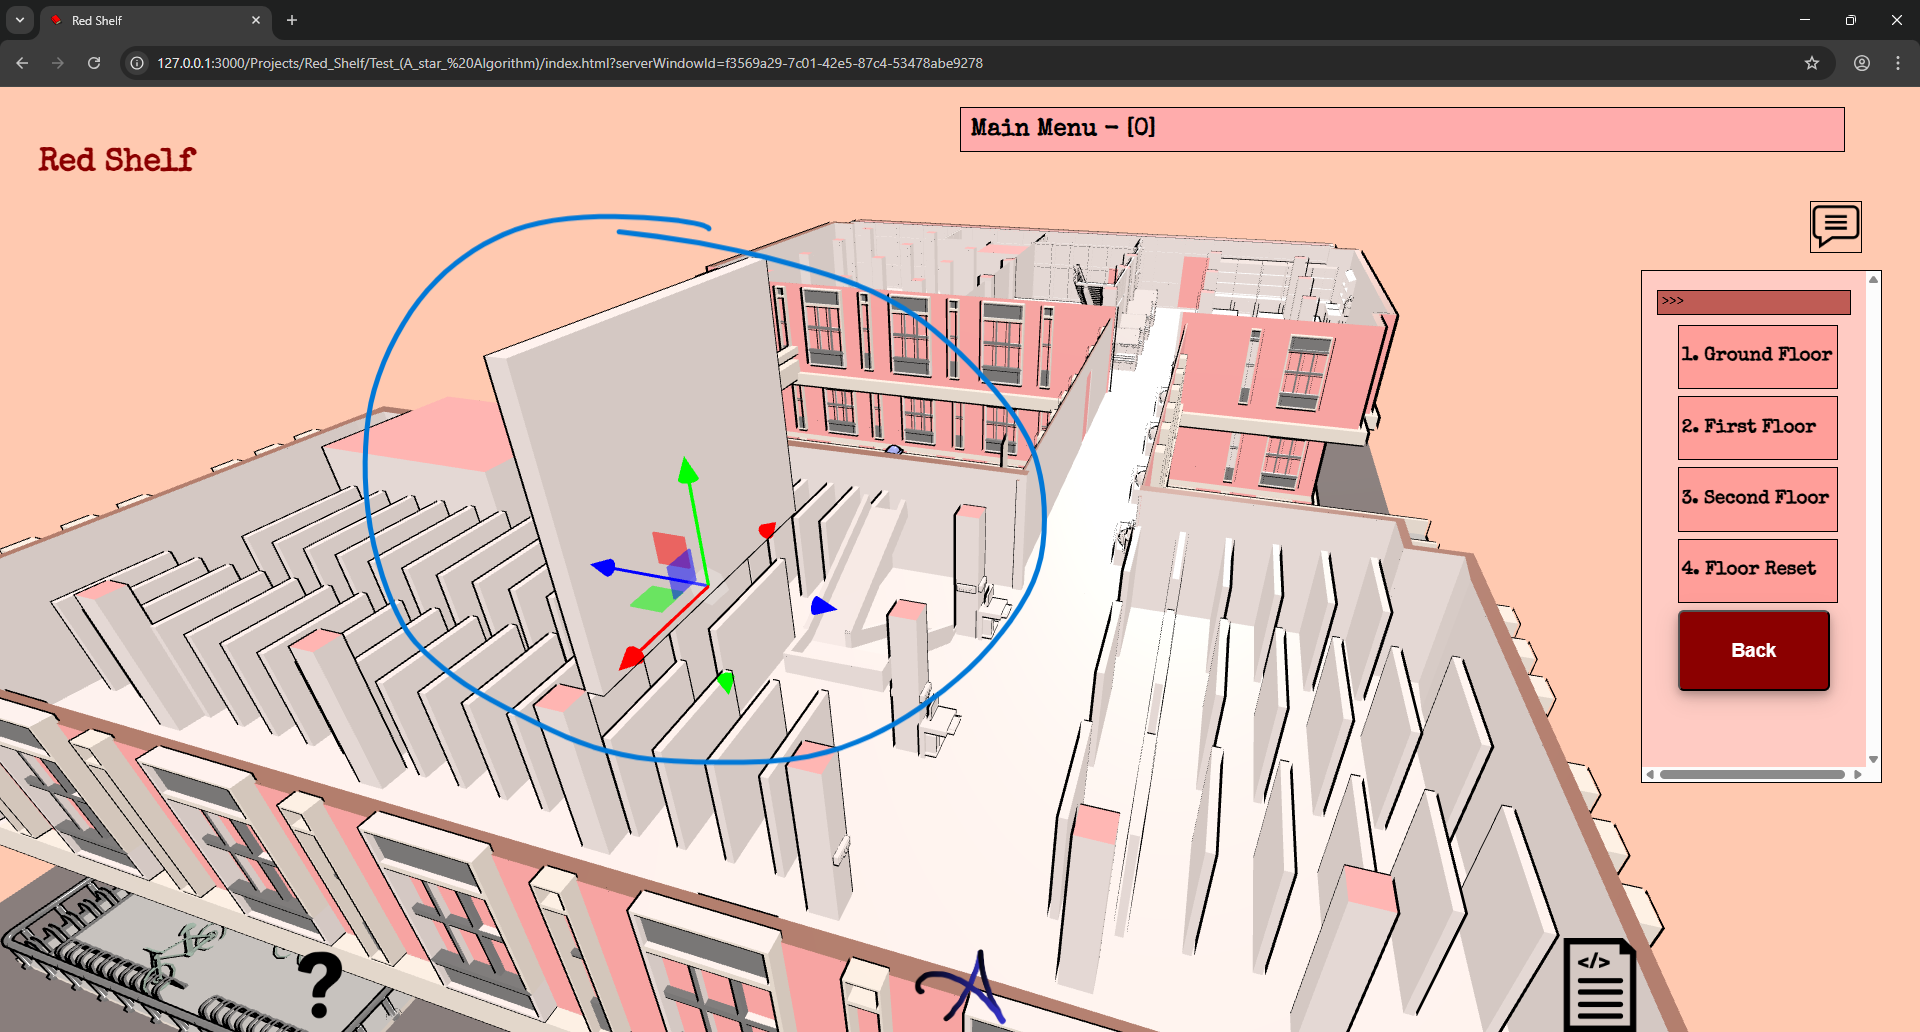
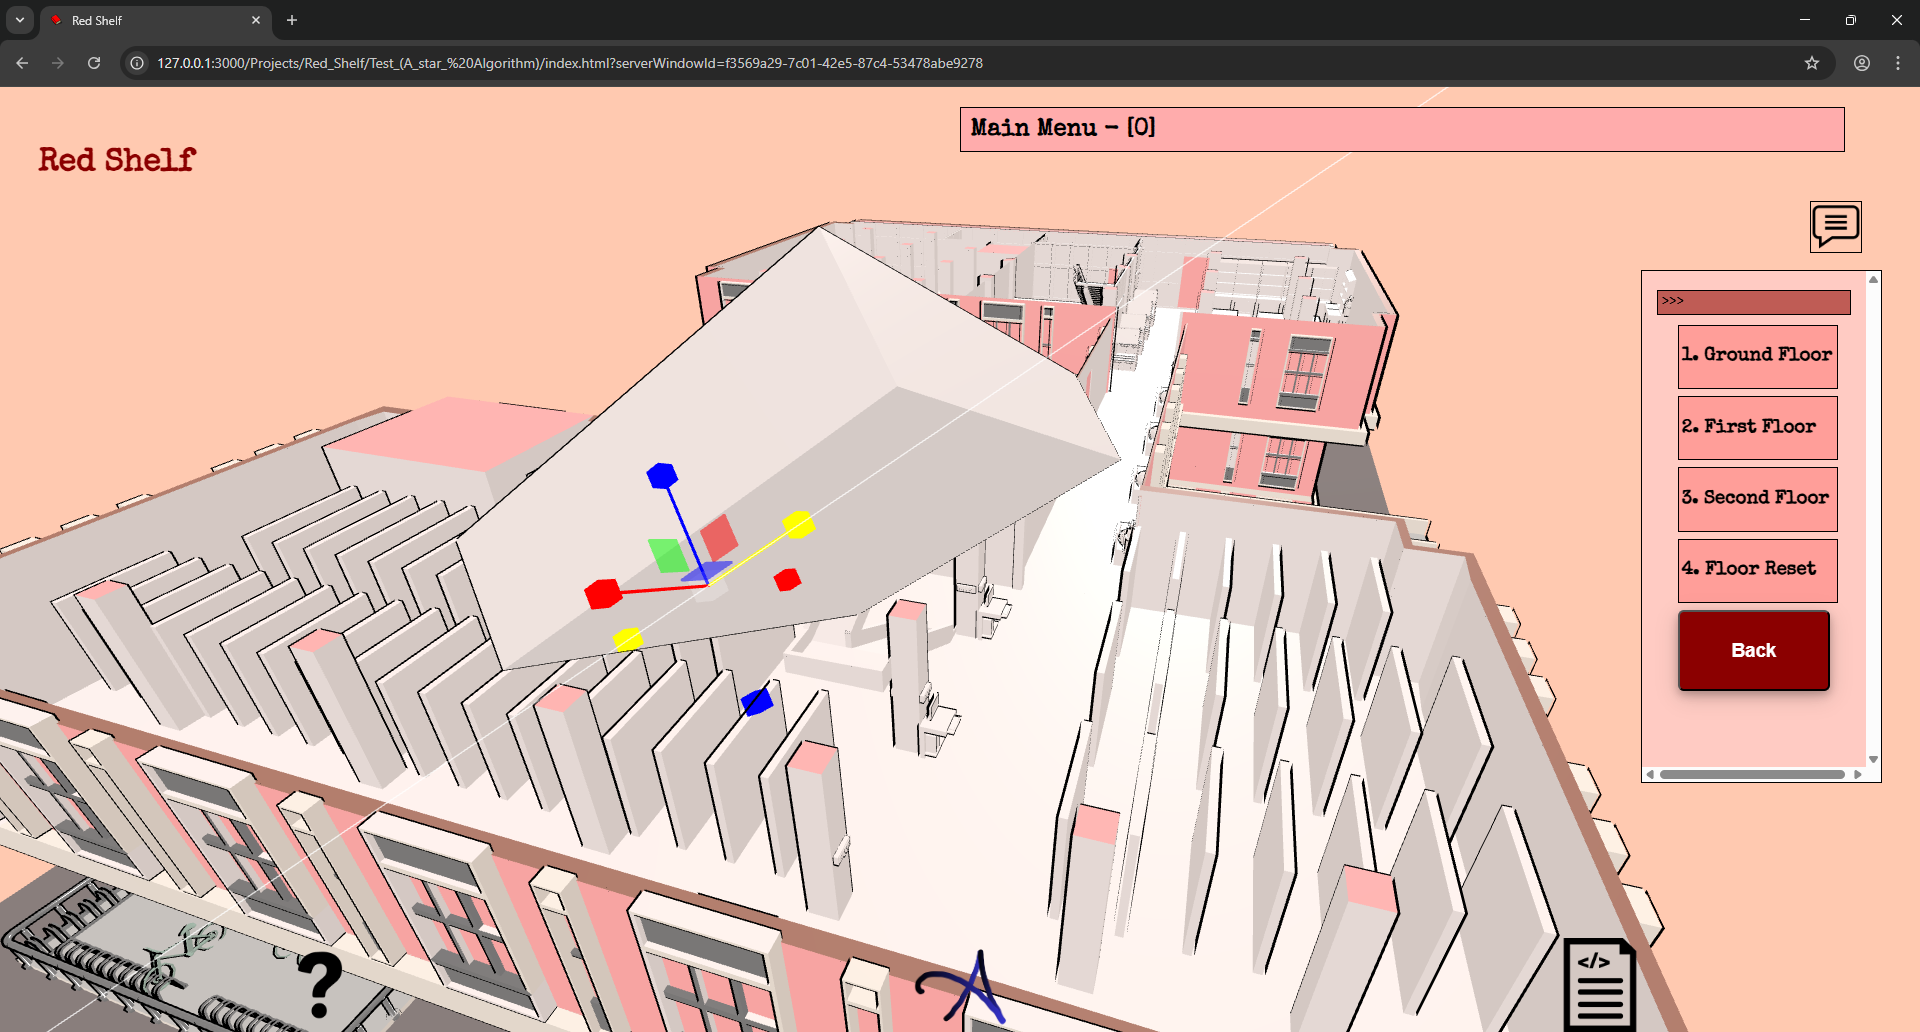
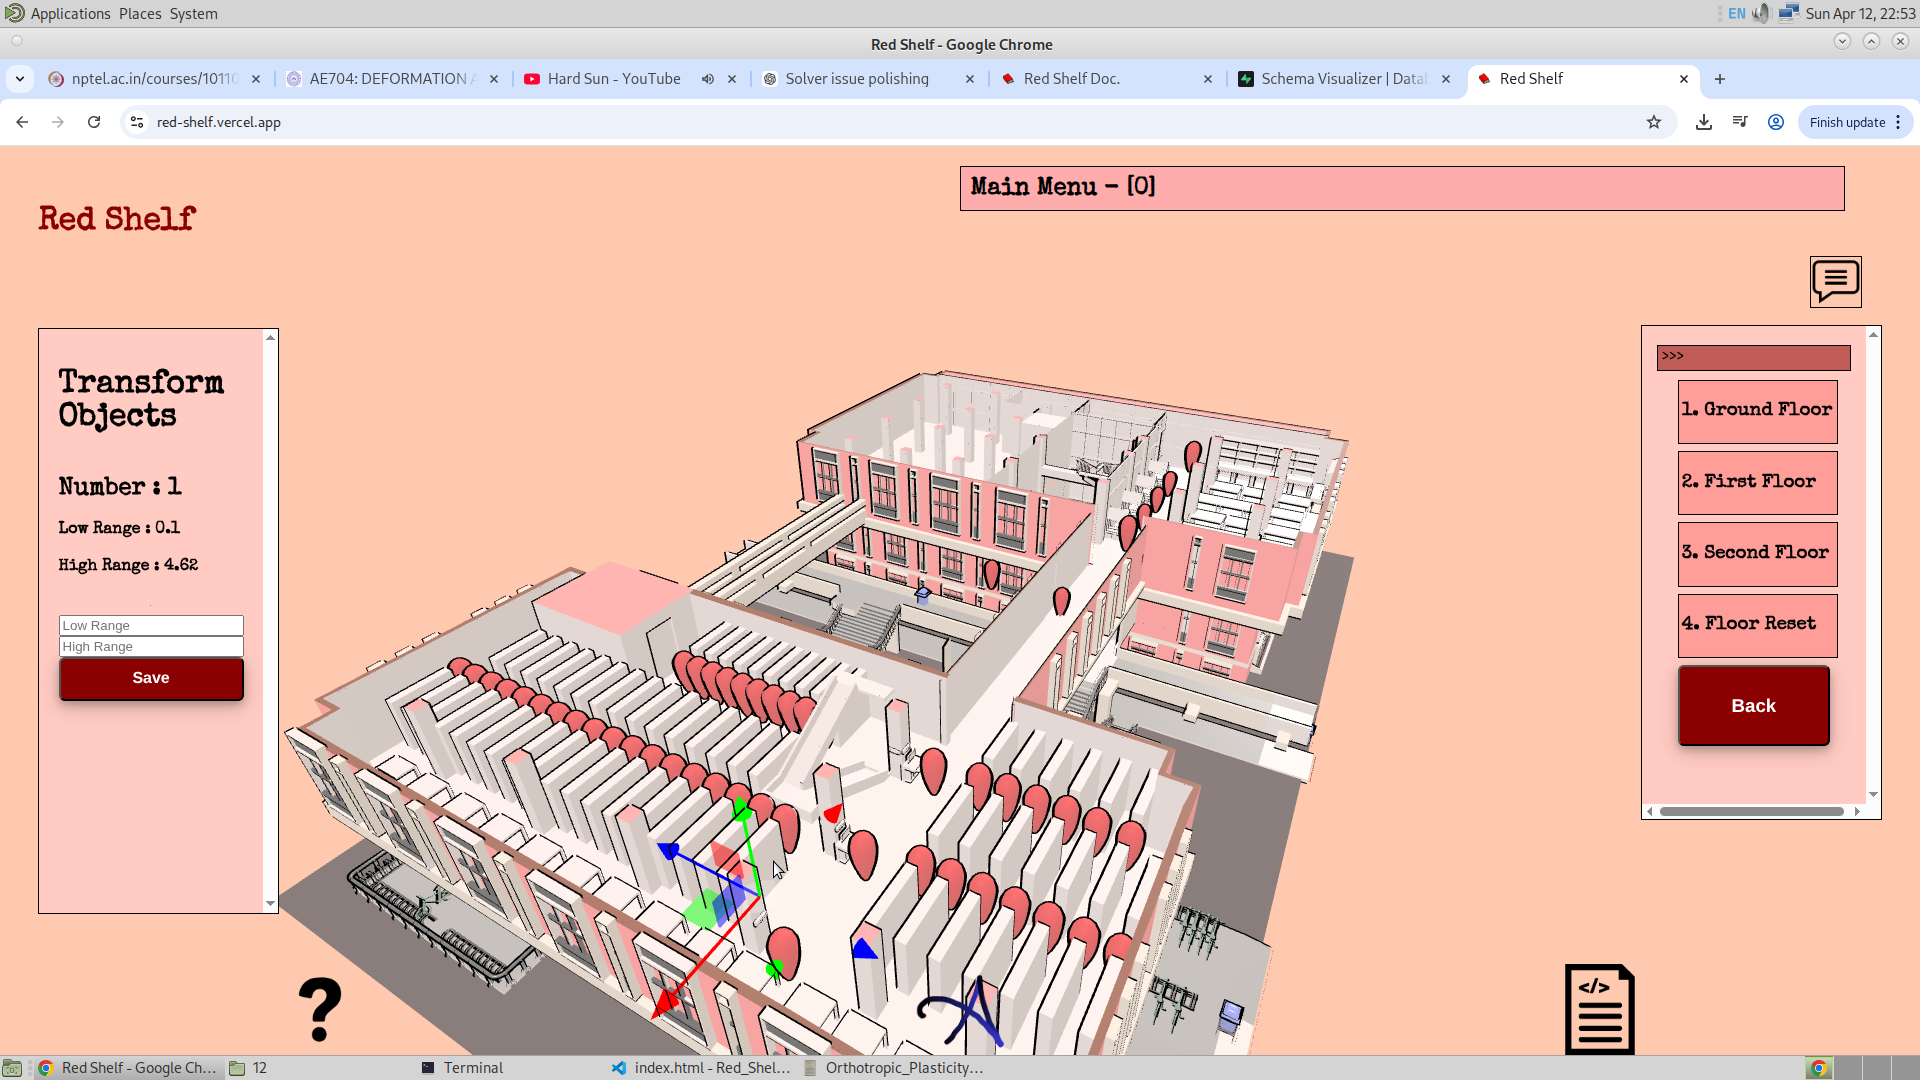
So I finally implemented the Transform Controls that has given the ability for the admin to change the transform of the bookshelves and the tables. What I aim for is for the admin to make use of this to change the location of all the objects inside the library. And this could be anything—so this could be a bookshelf or dustbin or anything.
Here is the image where I have logged into the application admin section and then changed the location of the bookshelf. The only thing now is to translate the bookshelf locations into the database, so that when the admin changes the location of the bookshelf, he will be able to change the data inside the database.
I have also given them the ability to rotate and scale the bookshelf. And soon I will be doing this for every article inside the library.
Now the only thing left is the Database. And I did not get time today to make this. I will have to make this tomorrow.
12/04/26
Long time. So there are many things I have added to the app, and it is almost done. I had a meeting scheduled with the staff members yesterday, but it got postponed to Wednesday, and today is Sunday. So here are the things that I have added to the app:
- Database!! (Supabase extensively)
- Switch board coloring
- The rough sketch of the fan and switch mapping
Database
-
bookshelf_database
This stores the coordinates of the bookshelf. This is because the admin can actually change the location of the bookshelf. Along with that, it has low-range and high-range values, which are used to find the right bookshelf for a given call number of a book. These range values can also be changed by the admin. Finally, mesh name and gsap_name refer to the name of the mesh I have kept for that bookshelf in Blender, and its GSAP name. Earlier, I was mapping this manually in the front end using some function, and the names of GSAP and bookshelf were carefully chosen to make mapping easier. Although the names haven’t changed, now that the data is stored in the database and can be retrieved directly, I can be less strict with naming conventions.
Another thing is that Supabase makes it very easy to implement authentication for database usage. There is a section/table of authenticated users, and I have registered myself in it. This can also be modified by inserting or deleting users from the table. Each table has policies that can be set: I have allowed public access to SELECT data, but restricted UPDATE, INSERT, and DELETE operations to authenticated users only. The interface for the authenticated user is shown below:
-
frustum_database
This is the database where I have stored the coordinates of the frustum to allow the admin to change its location (it could represent a dustbin, for example). I have also stored content and website links in the frustum. Not all frustums have content or a website, so there are flags called isContent and isWebsite to indicate their presence. Each frustum also has a mesh and GSAP value, which are used to navigate to that location, and these are stored as well. I am essentially recreating the
frustum_infoobject from the code, which is how I originally stored frustum content. It also includes a floor field to indicate which floor the frustum belongs to, and a frustum_search column to store its quick-search category. In the future, I may allow adding images for each frustum, and at that time, the image URL will also be stored (currently NULL).Here is the interface for changing frustum content, heading, website link, and quick-search settings:
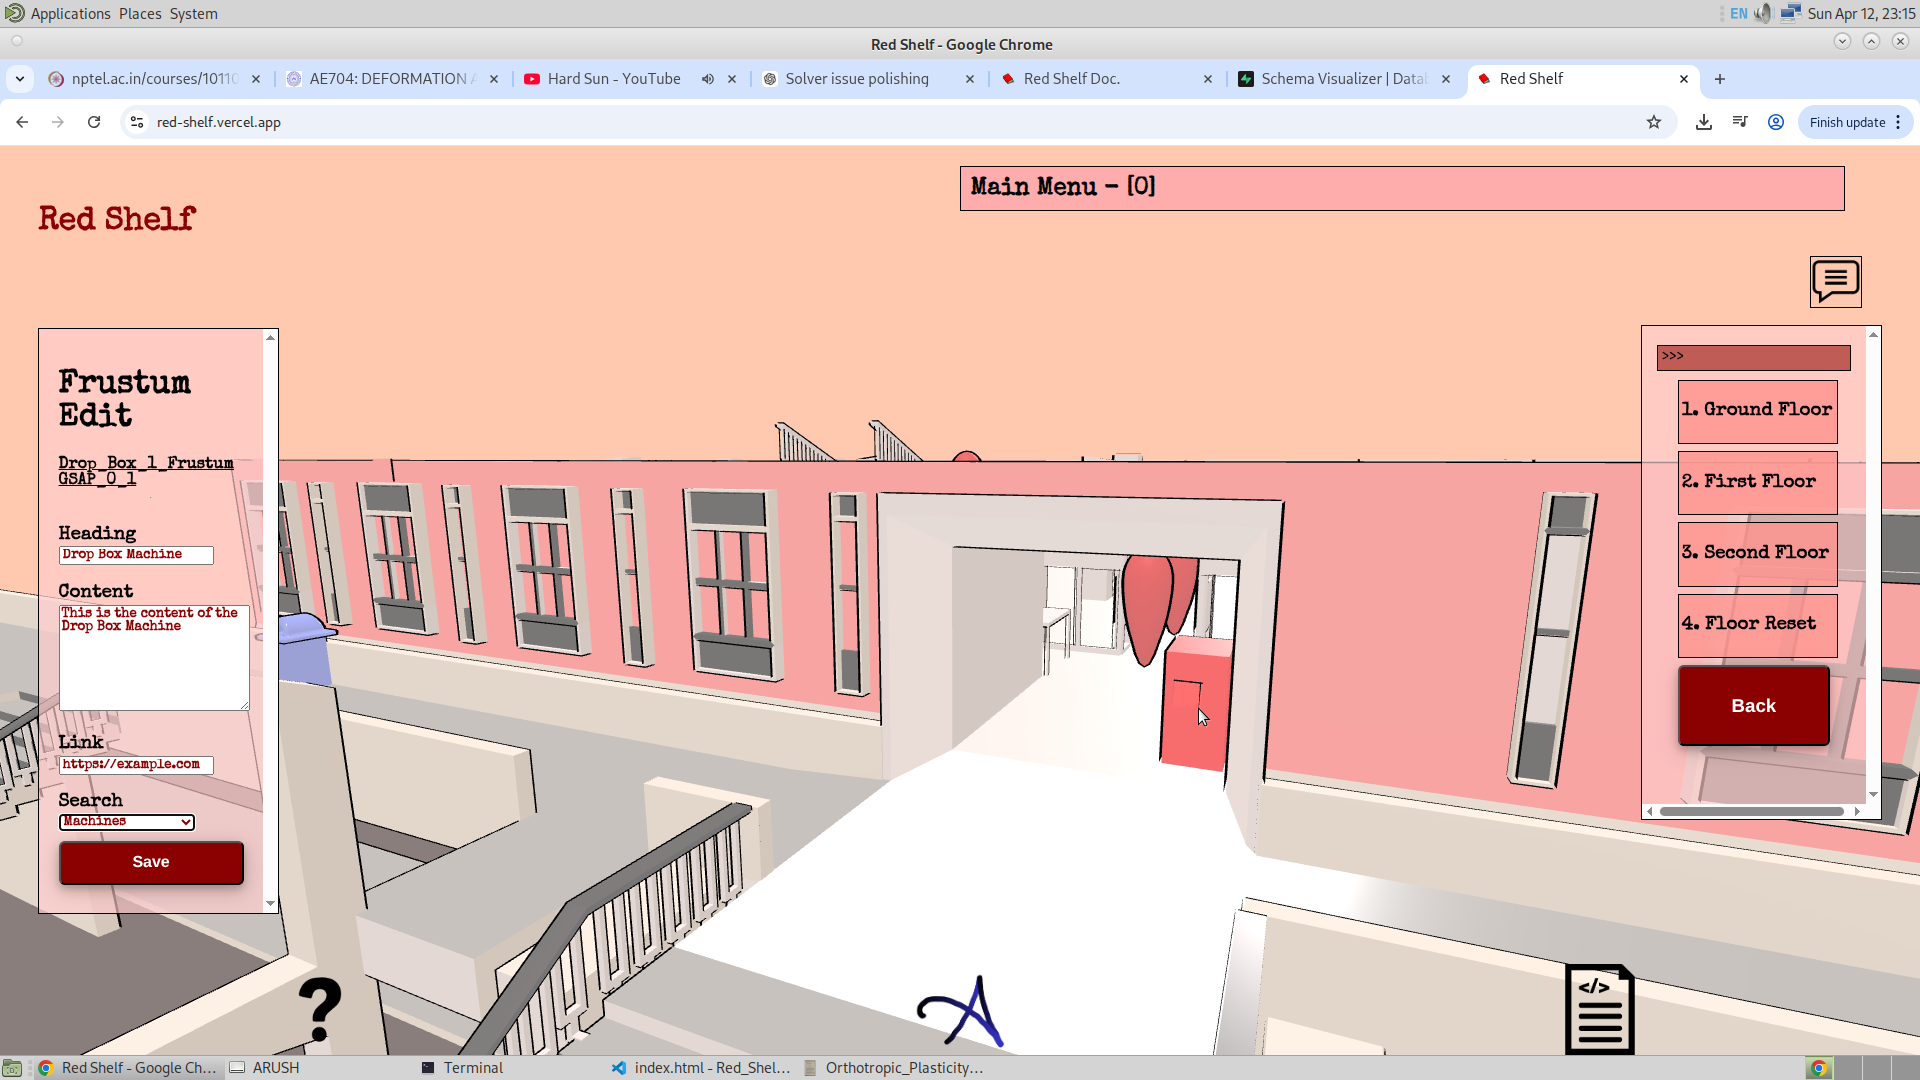
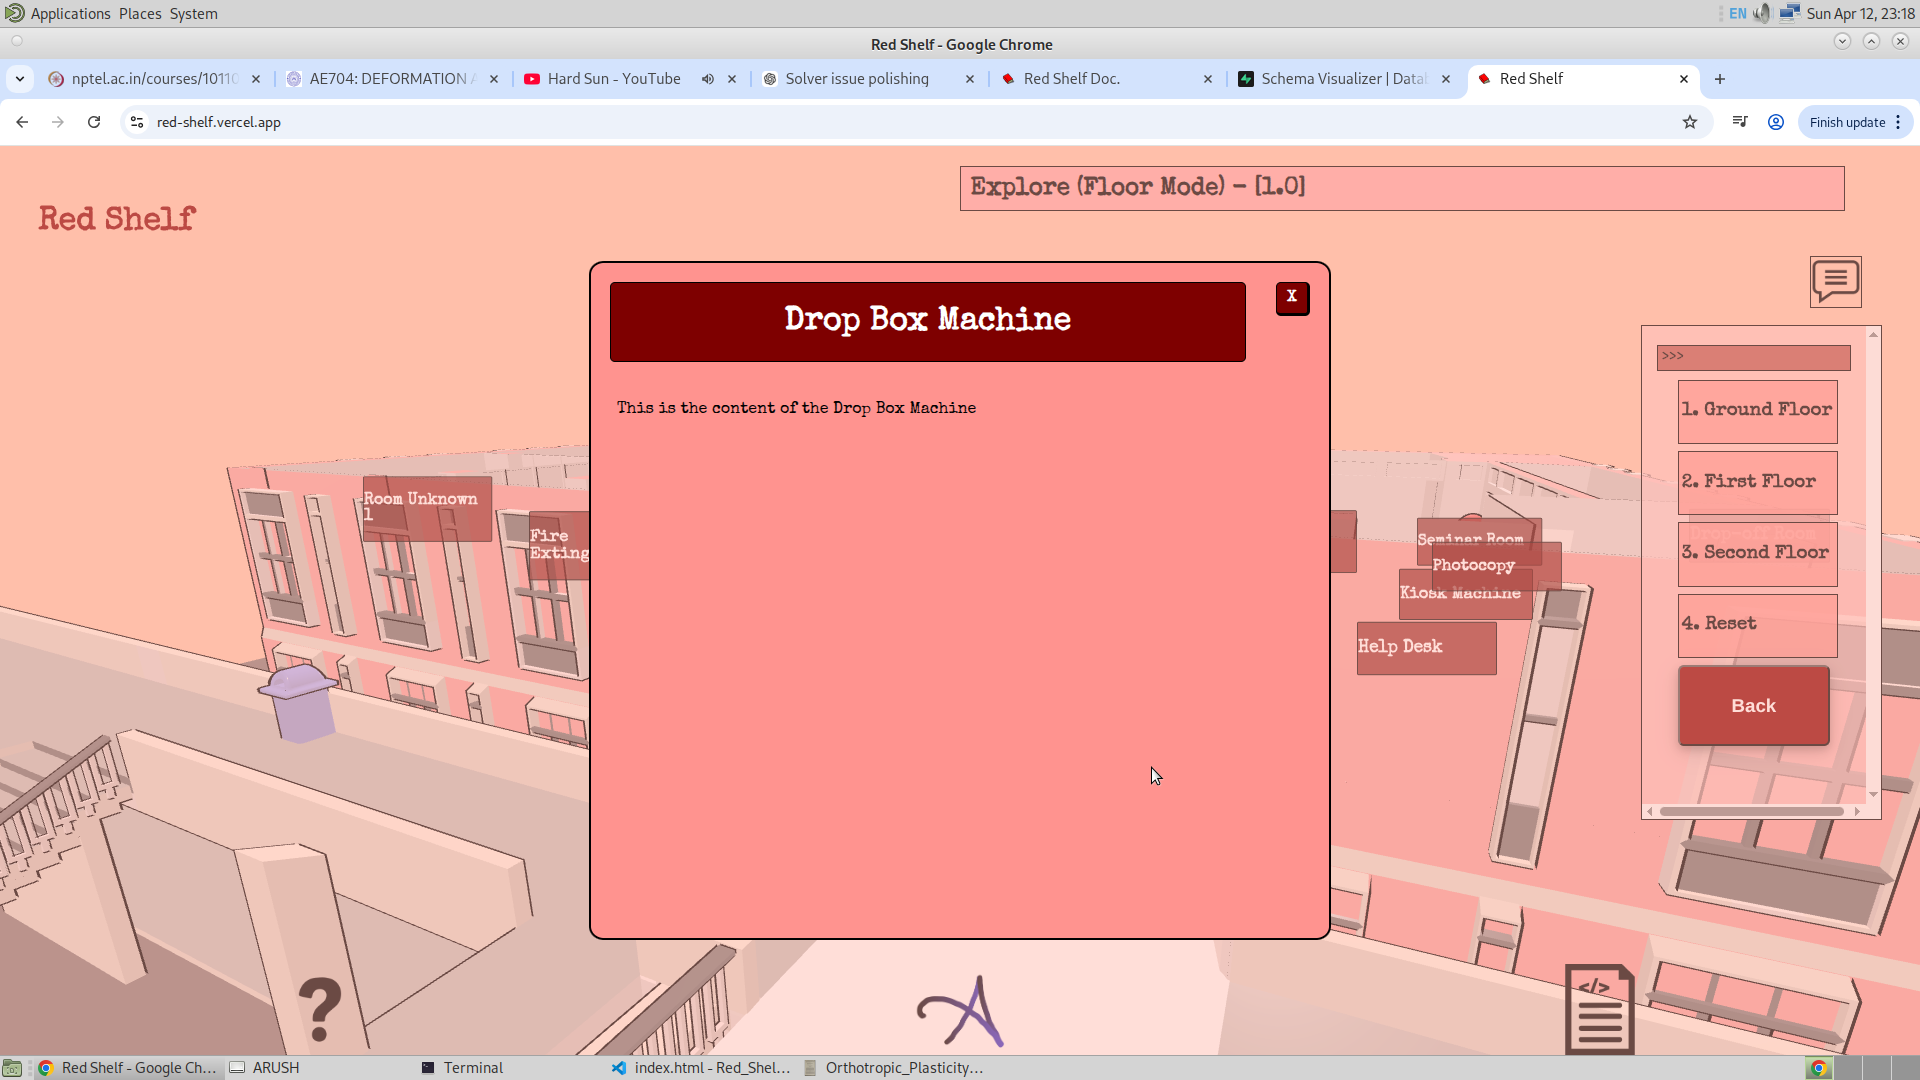
I have added event listeners on every frustum, so when clicked, a popup appears containing the content and heading. This content can be changed by the admin. In explore mode, when the frustum is enabled and clicked (e.g., the Dropbox frustum), a popup appears. Similarly, in quick search, typing a keyword like "machine" shows relevant frustums along with GSAP navigation. All of this is configurable by the admin.

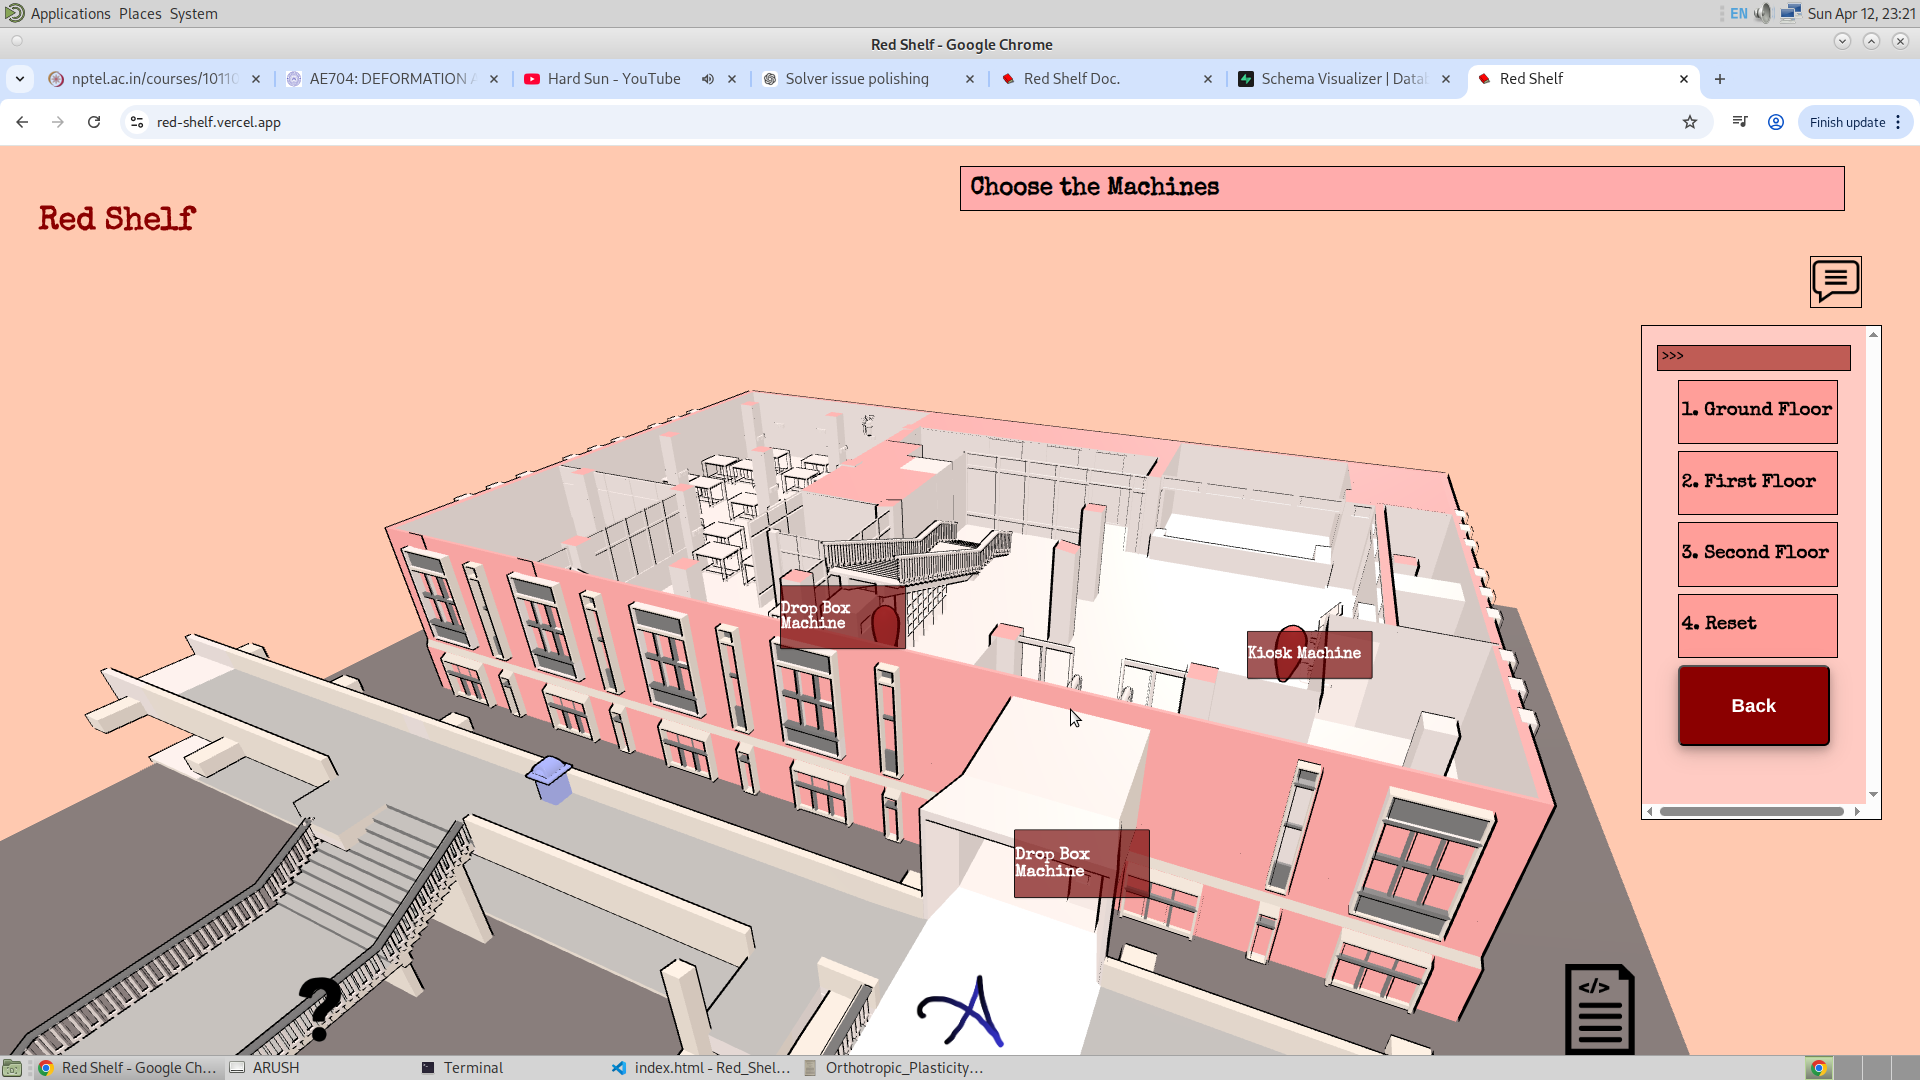
-
subject_bookshelf
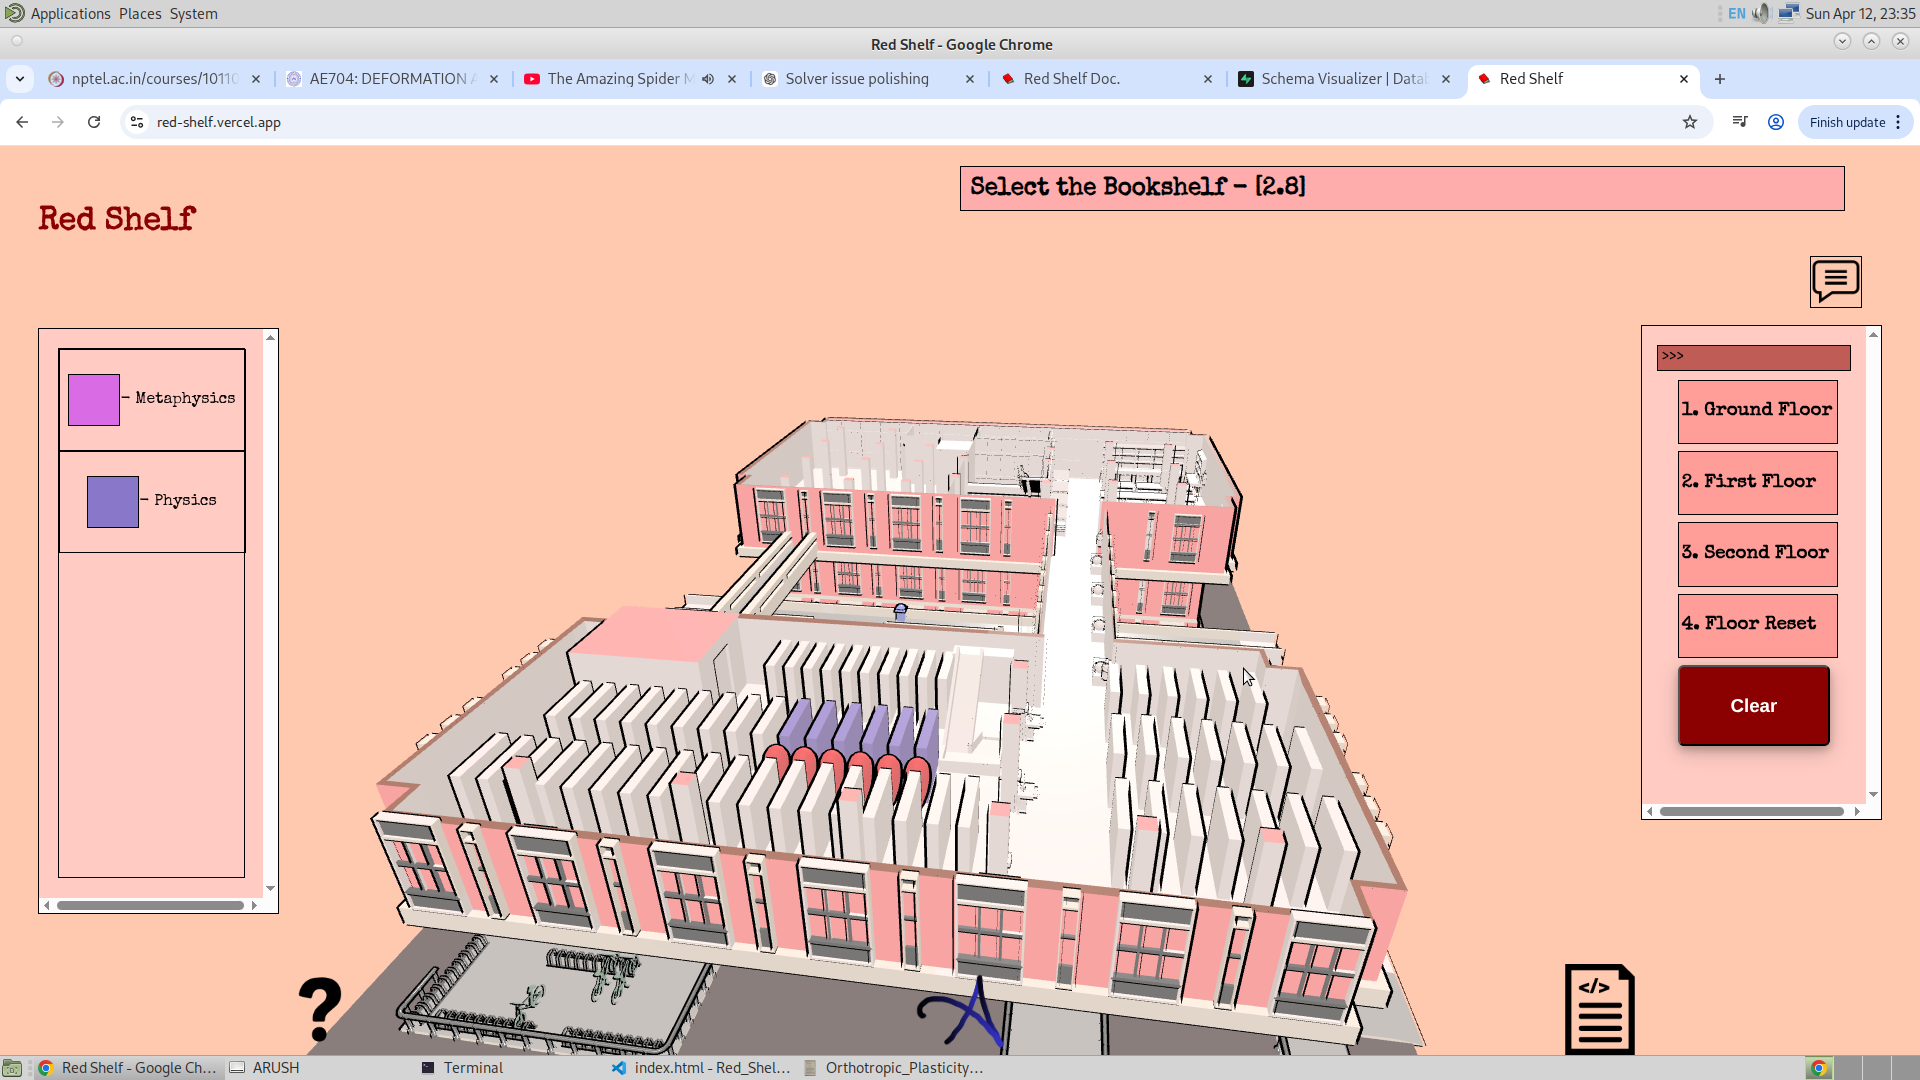
I have also added subject search, since typing a call number can feel unnatural. The staff members provided data for each subject, which made it possible to create this table. It stores the code representing the subject range, the subject text (for display in the legend), and a hex color code for visualization. There are about 100 subjects, and I generated distinct colors using the iwanthue tool.
After generating the colors, I stored their hex codes in the database under the subject_color_code column. When a user enters a subject name, I use the LIKE clause to find matching entries and highlight the corresponding bookshelves with their respective colors. A legend is also generated showing subject names and colors. This functionality is demonstrated below:
-
table_database
This database stores information about table coordinates to allow changes through the admin transform option. It also stores occupancy data such as whether a table is occupied and the number of people present. Currently, this data is randomly filled, but I believe a proper solution can be implemented in the future, at which point this table will be fully functional.
- The same applies to charging_port_database and fan_switch_database. They are not in use yet, but I will populate them soon. I do not think transform columns are necessary here, as the locations of charging ports, fans, and switches are unlikely to change.
Charging Port:
The solution is not yet known, but the problem is clear. Being able to know which charging ports are empty and which ones are occupied is of great interest to me. This feature (although not in use yet) is intended to solve that problem. I will keep everything prepared so that a demo of this feature can be shown. Right now, instances of the switchboard are being used. I might store data about the switchboards, considering that they are instances, because creating new meshes is not something I am leaning towards.
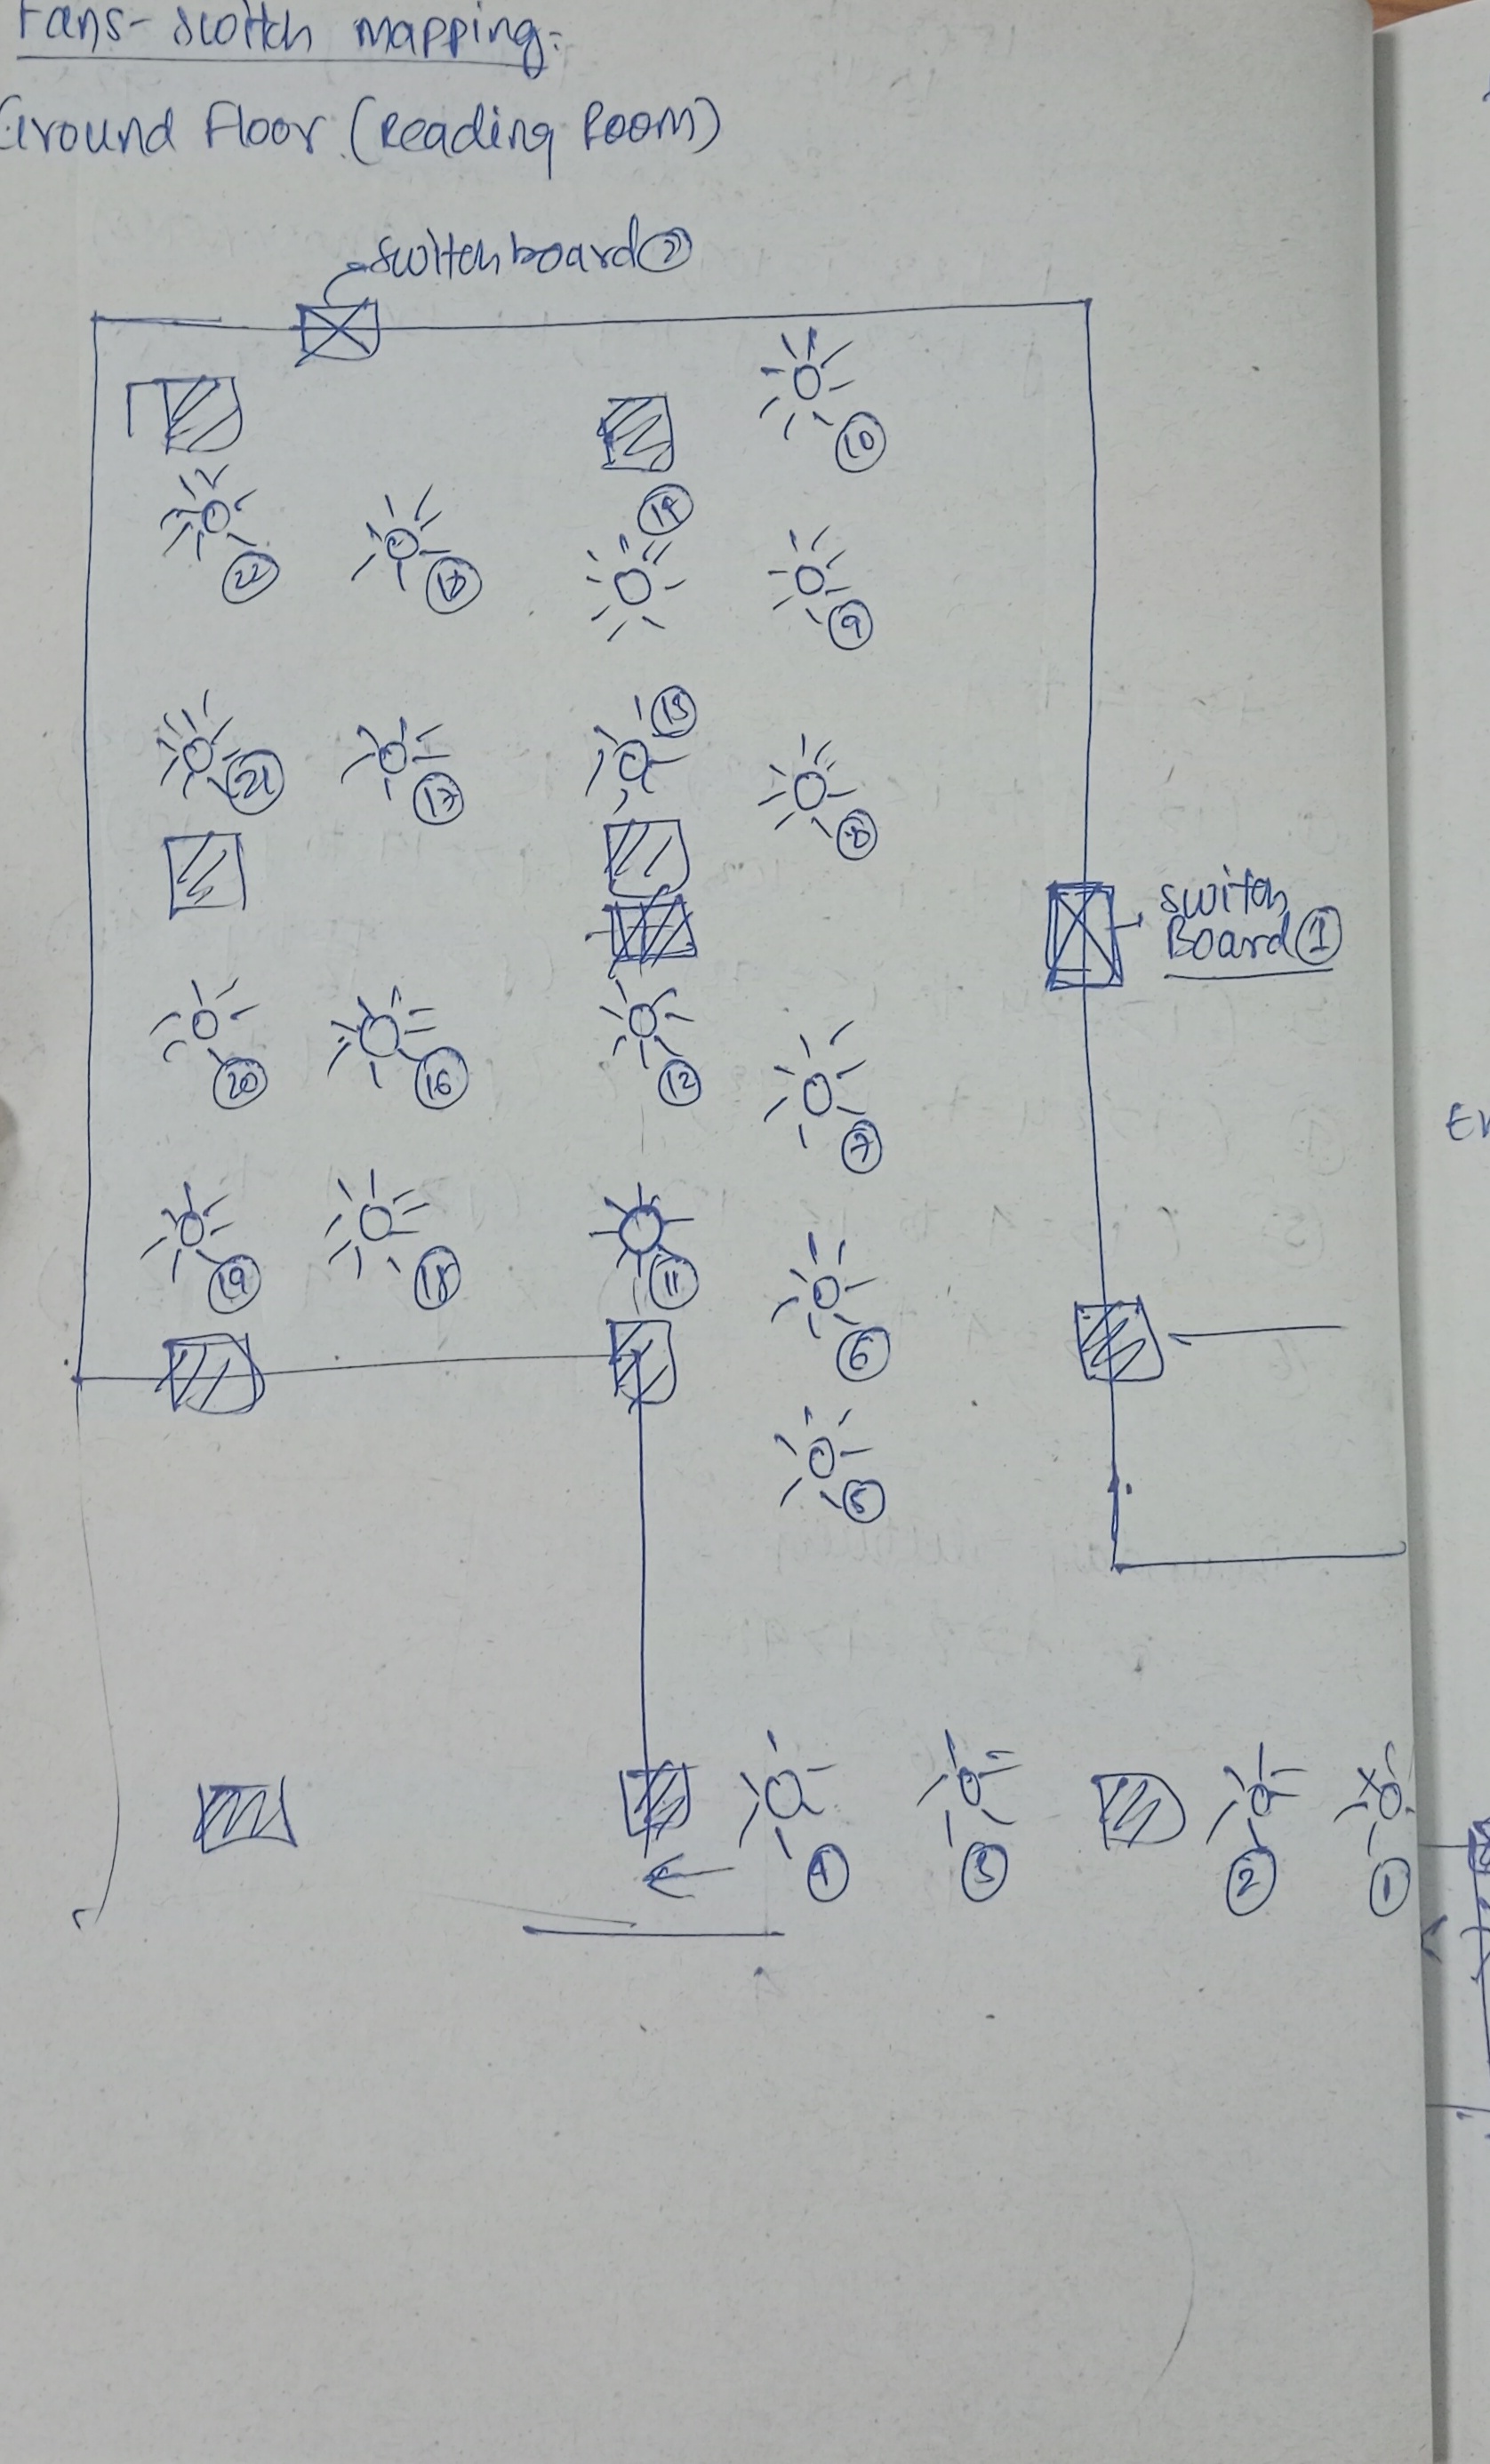
Fan to Switch Mapping
I have already started making the sketch of the fan-to-switch mapping, which is given below. I hope to have this feature completely implemented on the website by Tuesday, before my meeting with the staff members.
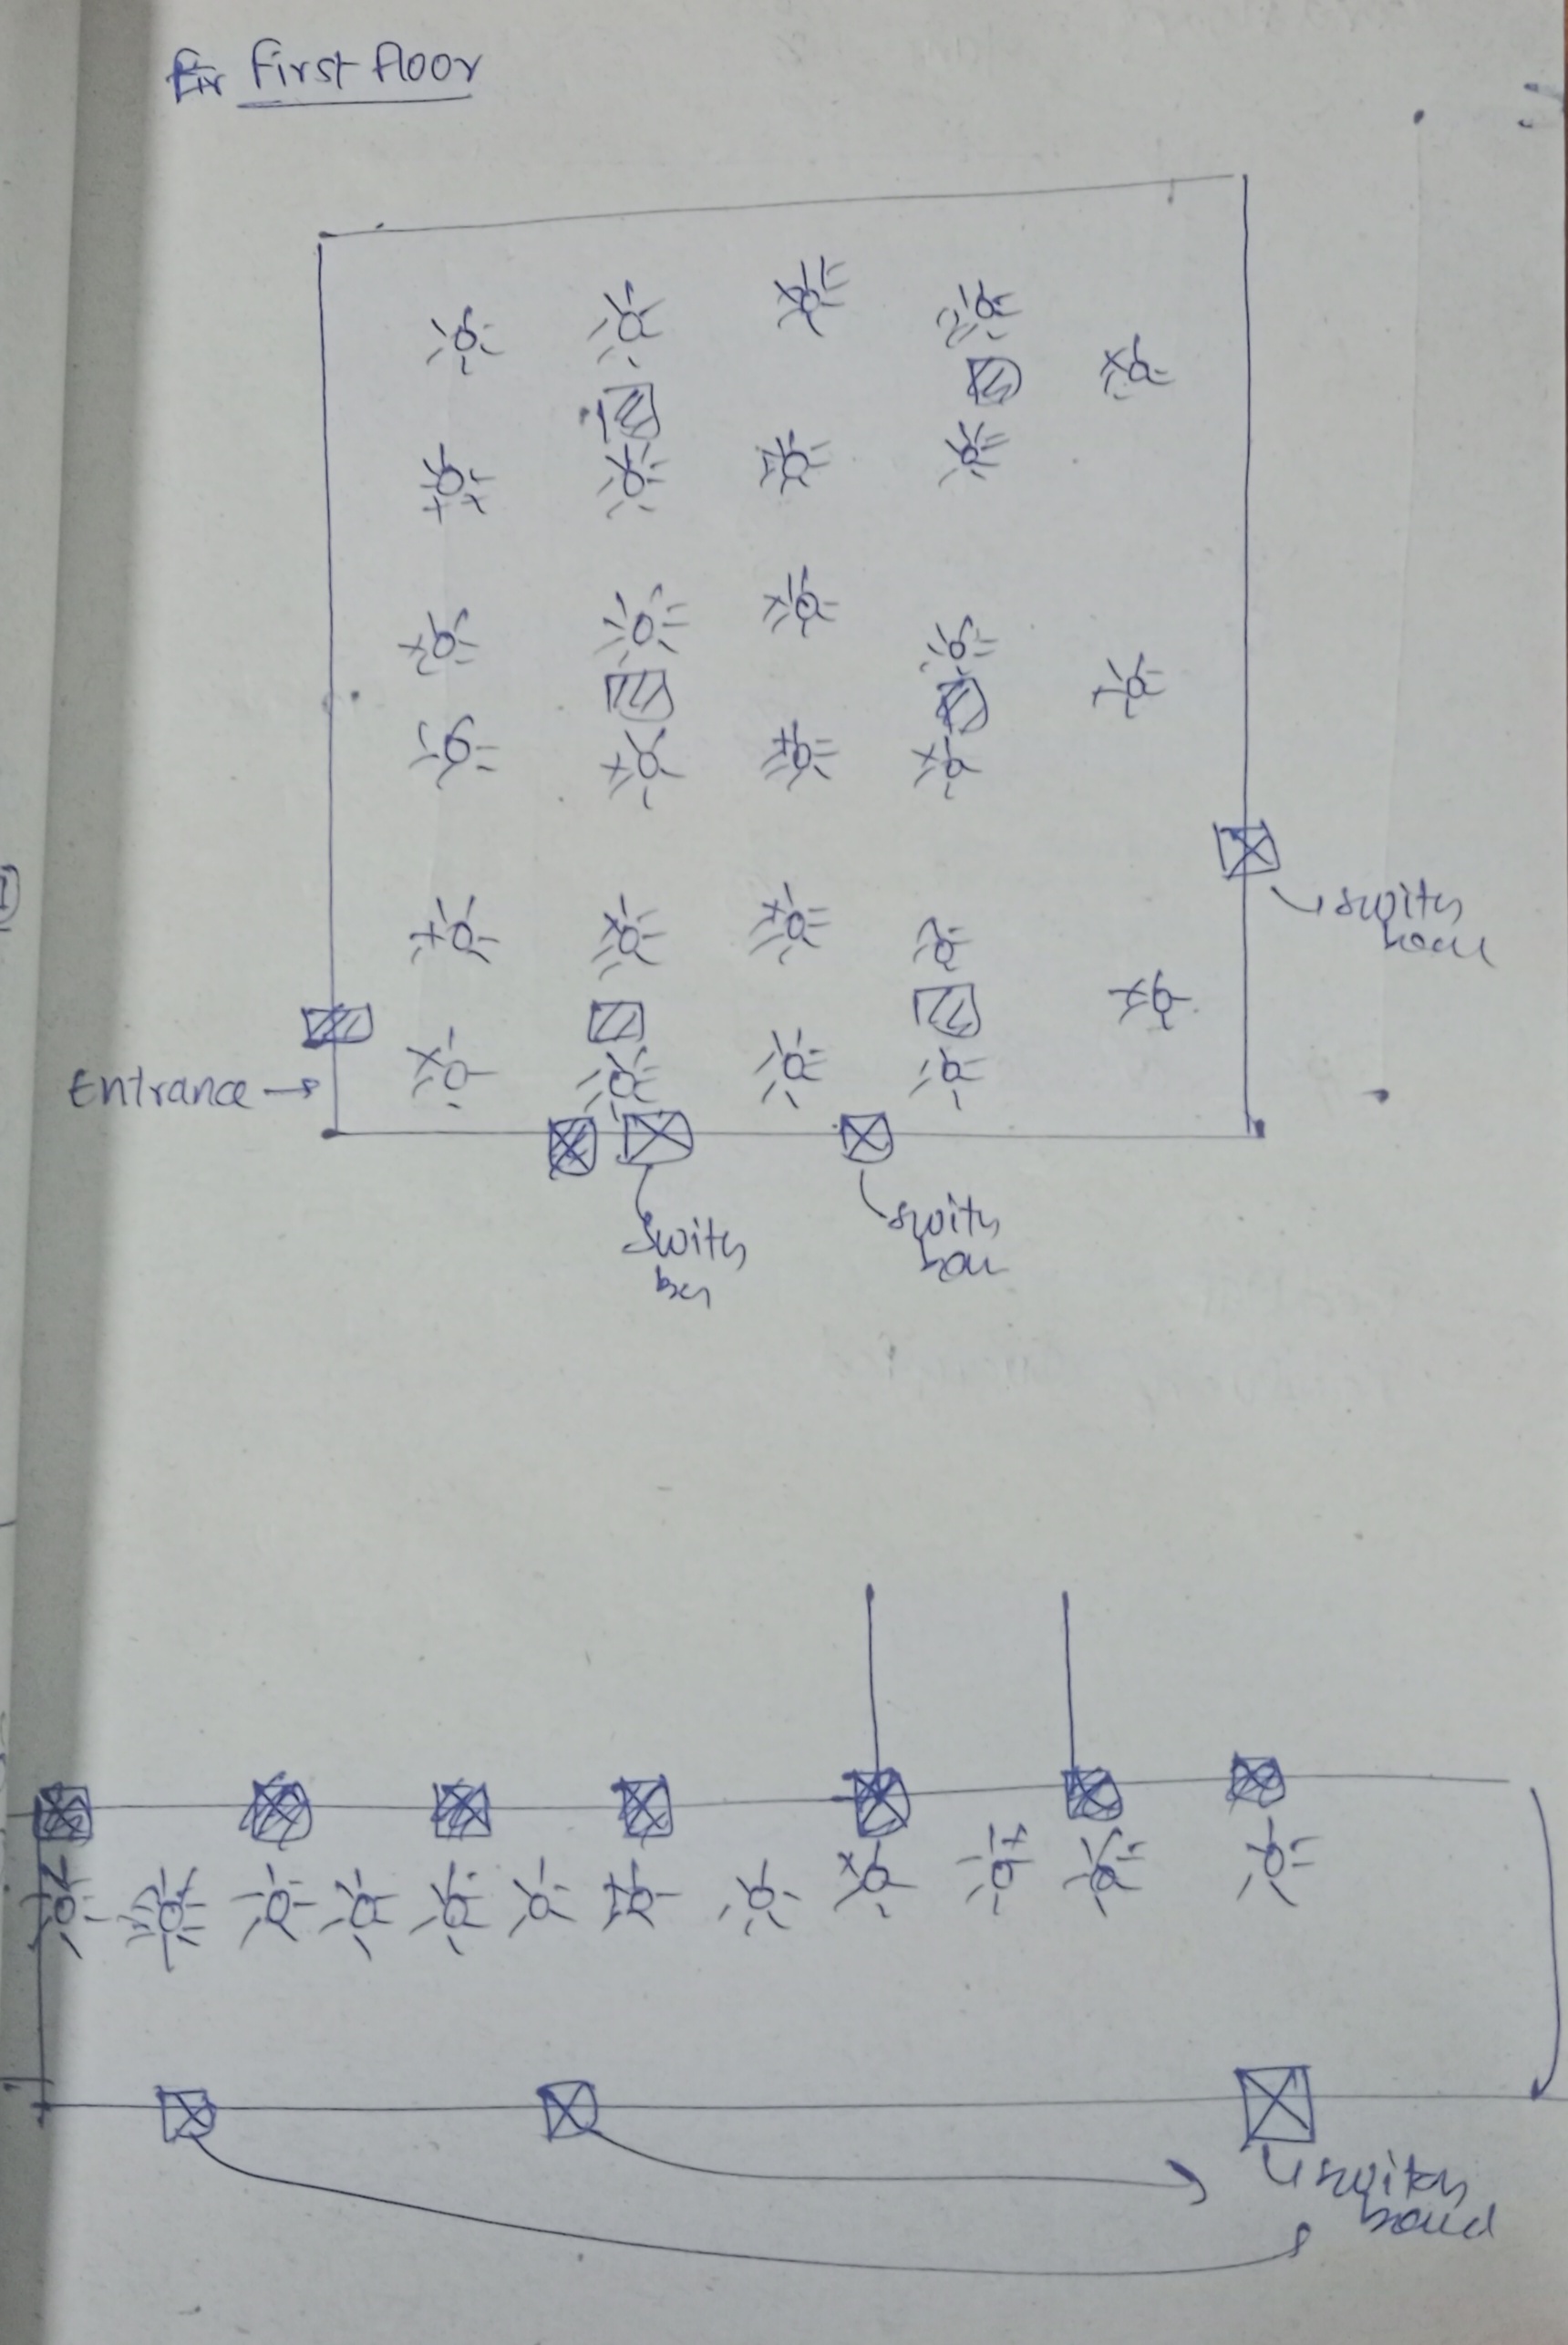
Also, I think it would be better if the admin had the option to pan (controls.pan.enabled = true). This will make it easier for them to navigate and make changes in the app. So by the next meeting, this feature of fan-to-switch mapping will be completed.
15/04/26
I had the meeting with the members of the library, and what I thought to be my last meeting turns out that I will have to wait for one more meeting before I could completely finish making this application. So here are the feedbacks I have got that I would like to list out, and that is as follows:
- Adding and deleting the GSAP, Frustum, and bookshelf is one thing, and this might take a lot of time. Because this would mean I am making a complete 3D software for the admin, which is way too much work to do.
- And then the second thing is that I will instead make the subject to be an option to select from, rather than a name to be entered. And this looks clean, since this would mean that there is only out of some pre-defined subjects from which the user has to choose, and this means that the user cannot choose from any other subject other than the options available. And this would also mean that the problem of overlapping of the range of the bookshelf for a given subject code will no longer be a problem to be worried about... Clean. And since only one subject could be chosen, then the problem of having to choose different colors will be solved.
- And man, I have seen changing the position of the bookshelf at the ground floor, and it did not work. I will first have to fix that problem. And then finally, after the first book is searched, and then immediately when the next bookshelf is searched, I see that there are some problems with the GSAP or the Frustum chosen. I'll have to fix that as well.
- And then they were asking me to add the feature of adding the image. I will take a look at how a typical application takes in and also stores the images of the user. This would be displayed at the pop-up when a Frustum is clicked.
8/5/26
It has been a long time. Now there are just a few fixes before I could completely pass this application to the staff members. The fixes are as follows:
- The first thing is adding ray casting in the Frustum, and this will surely make it easier for me to program since this will allow me to just make it turn off and on when the user clicks the frustum button. I might even focus on designing the button for better visibility of whether it is enabled or disabled.
- A starting animation. What I aim to do is make the controls disabled when the user enters the library. Because what I have noticed is that the website is very static initially, and with the addition of this animation (with the controls disabled at the very start, application flow equal to zero) will make the application more lively. Also, I think it will be better if I add the title to be moving, since this could also be used to display some facts or some interesting and important information. Just the text sliding at the top.
- And I will finally fix the main search menu with the data sheet that is given to me. This will be the last thing I will do for the search.
- And finally I will have to fix some of the grid. This is freaking annoying when I see that I cannot click on any GSAP to go to any other GSAP. And also I will have to fix the explore menu completely with the formula of the straight line to aim for the straight line. I have decided that I will not add pointer lock controls to the app, since that will make it more similar to my other websites. Maybe improving this clicking GSAP is what I would aim for.
- And finally I have to finish the documentation and the helper menu on the website.
12/5/26
There are many corrections made and today is hopefully my last meeting. Following are the things I have changed in the website.
- So I have changed the database of the subjects as suggested, and this time it is much more robust and reliable.
- I have set up the explore menu by adjusting the camera's direction. This is similar to the straight line equation that I have previously used.
- Finally, I have made some small refinements like correcting the graph of GSAP on the second floor, adding the
marqueefor the title, making the helper.js file for storing the title, content, and heading for each and every application flow, and finally changing the floor from ground, first, second to first, second, and third. Also, one small change is that after searching for a book, the floor will automatically be displayed. - The new logo of Red Shelf.
- Complete redesigning of the Frustum Mechanism.
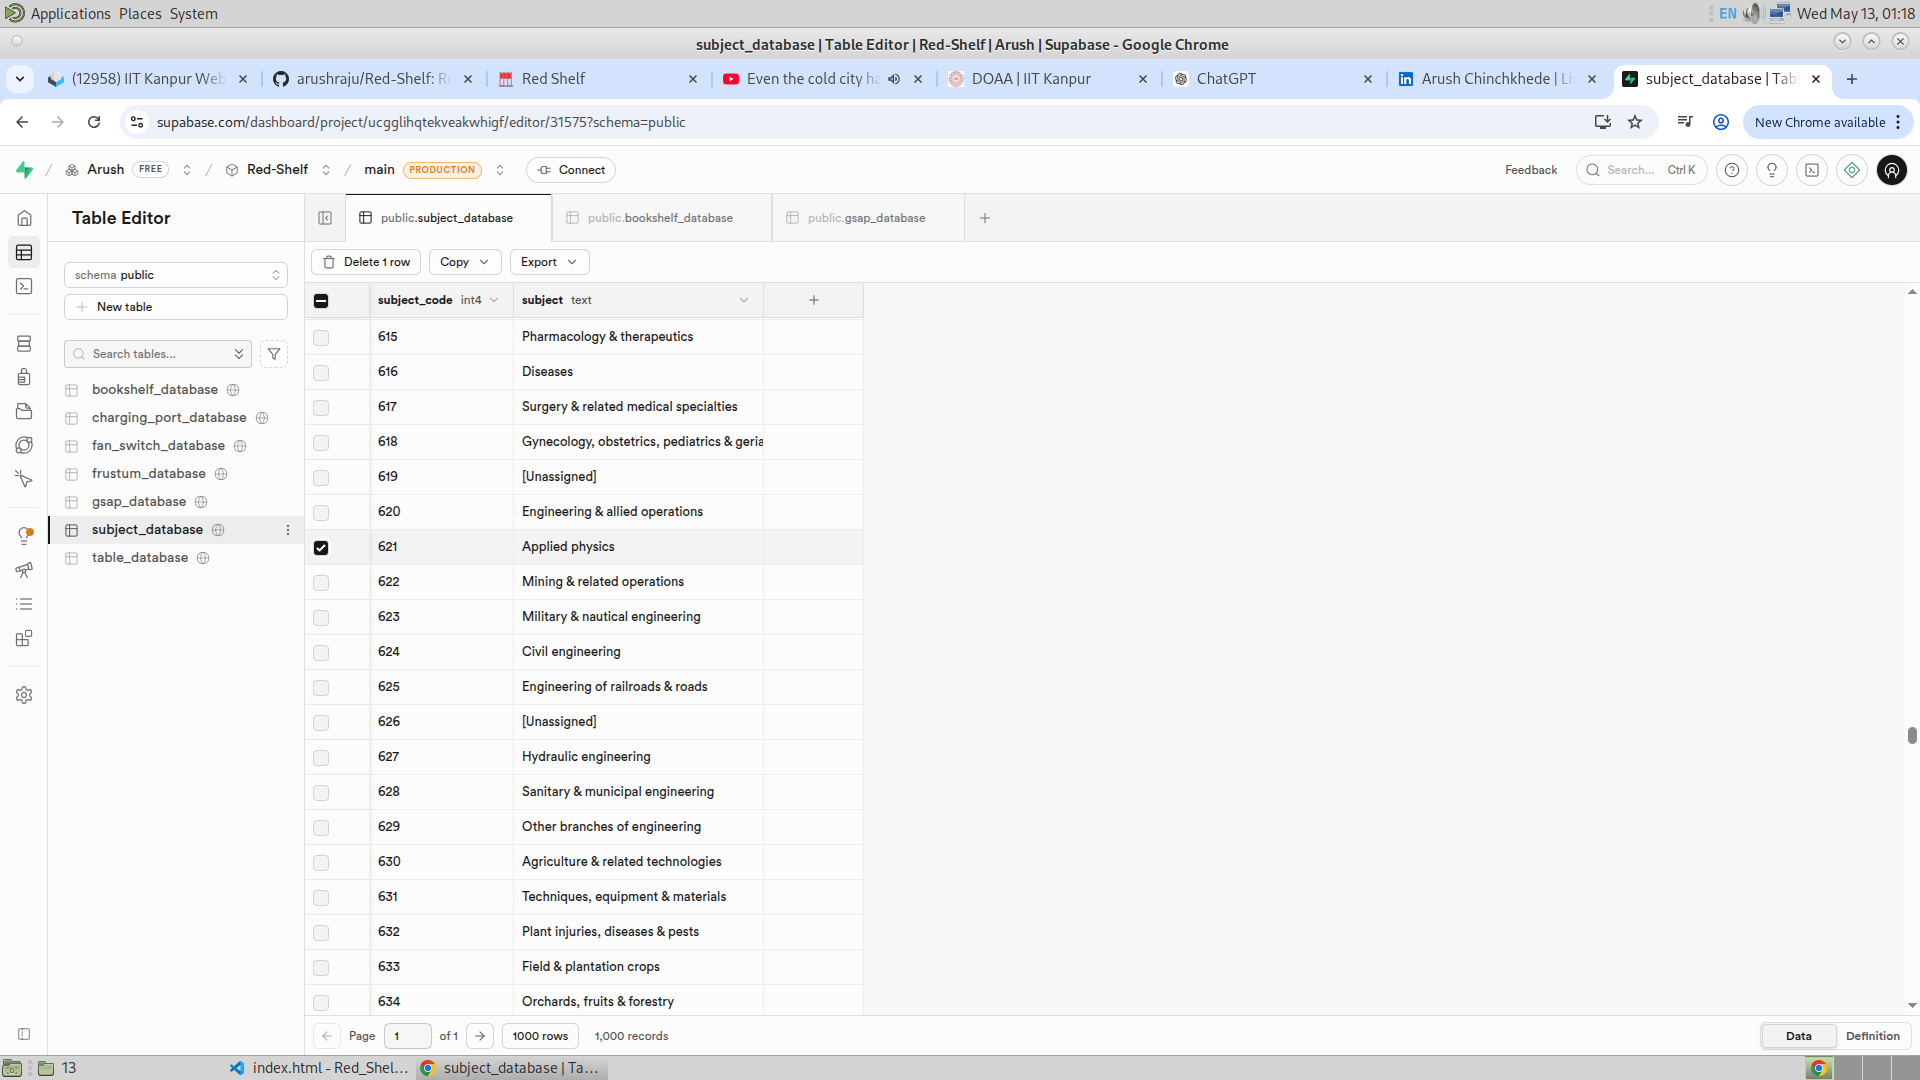
Subject Database :
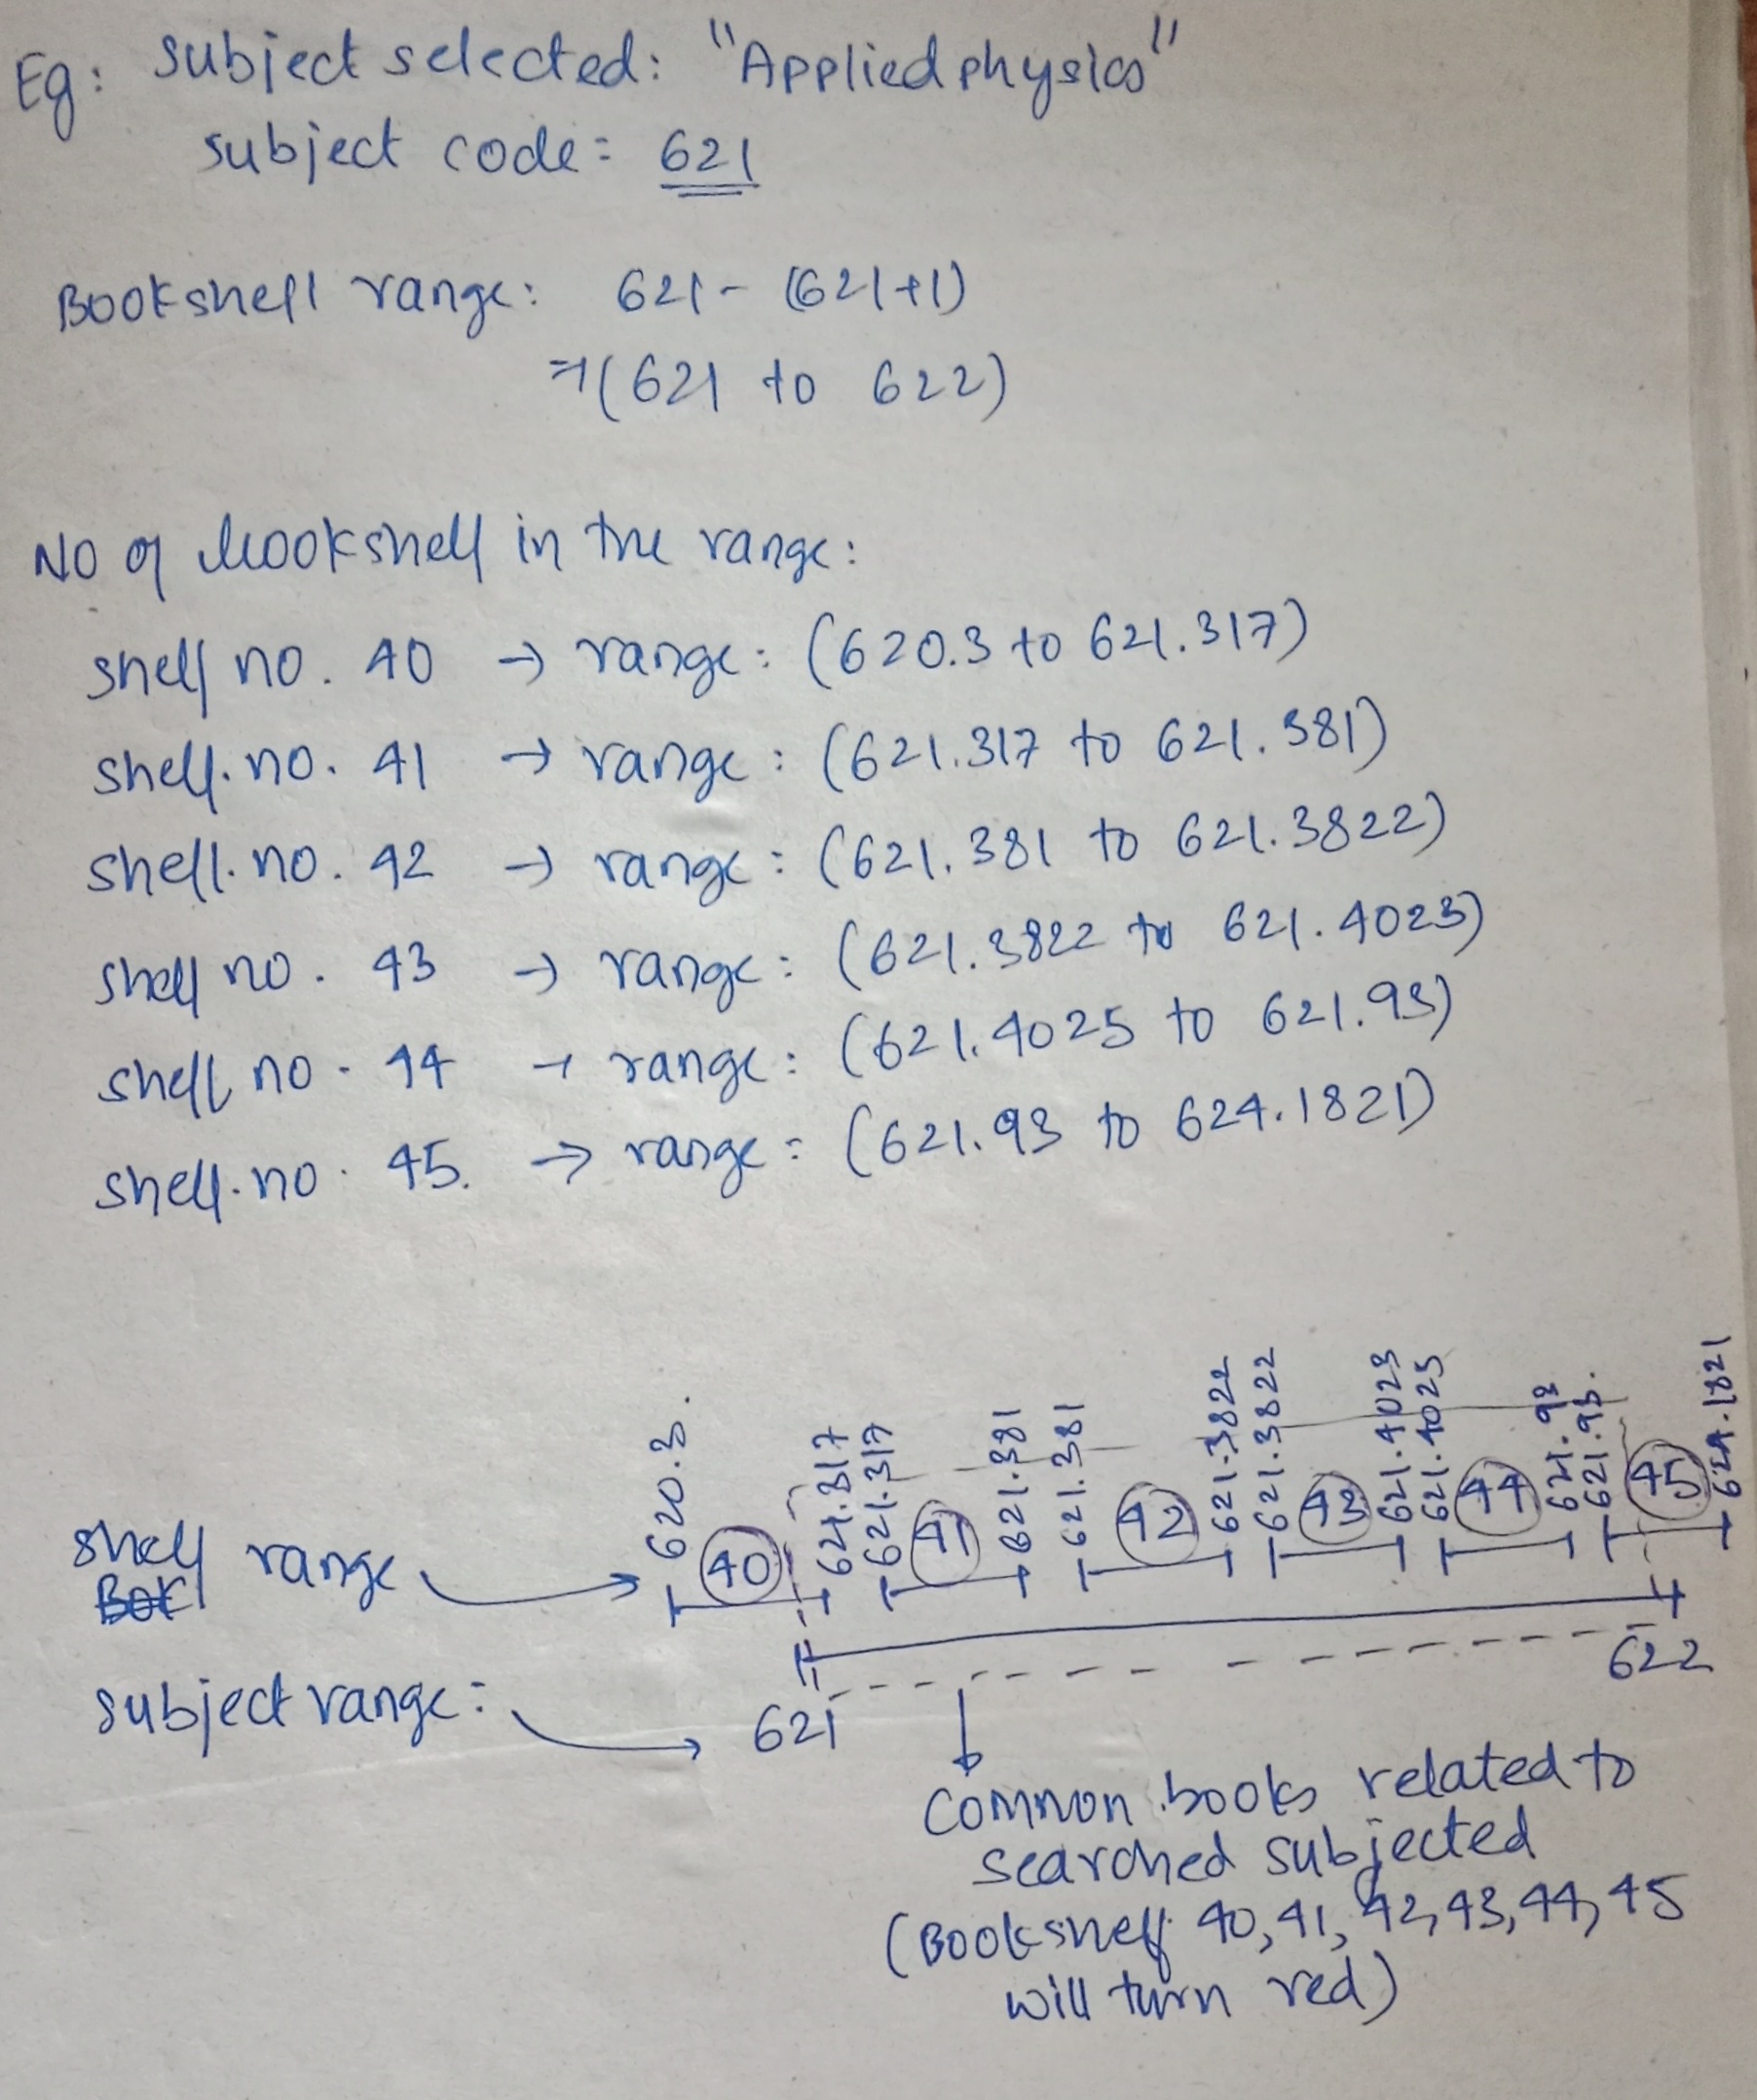
Let me be a bit more detailed when explaining it. Let's say that I searched for a subject named "Applied Physics", and now I want to look at all the bookshelves related to the topic "Applied Physics". Every subject has got some code. The code for "Applied Physics" is 621. What this means is that any book that starts with 620 will be in the category of applied physics. So some examples of books could be 620.12, 620.9856, etc. Numerically, this means that if the value of the book is more than 620 and less than 621, then those books will be in the category of applied physics. The image shown below is the code of subject "Applied Physics" in the database.
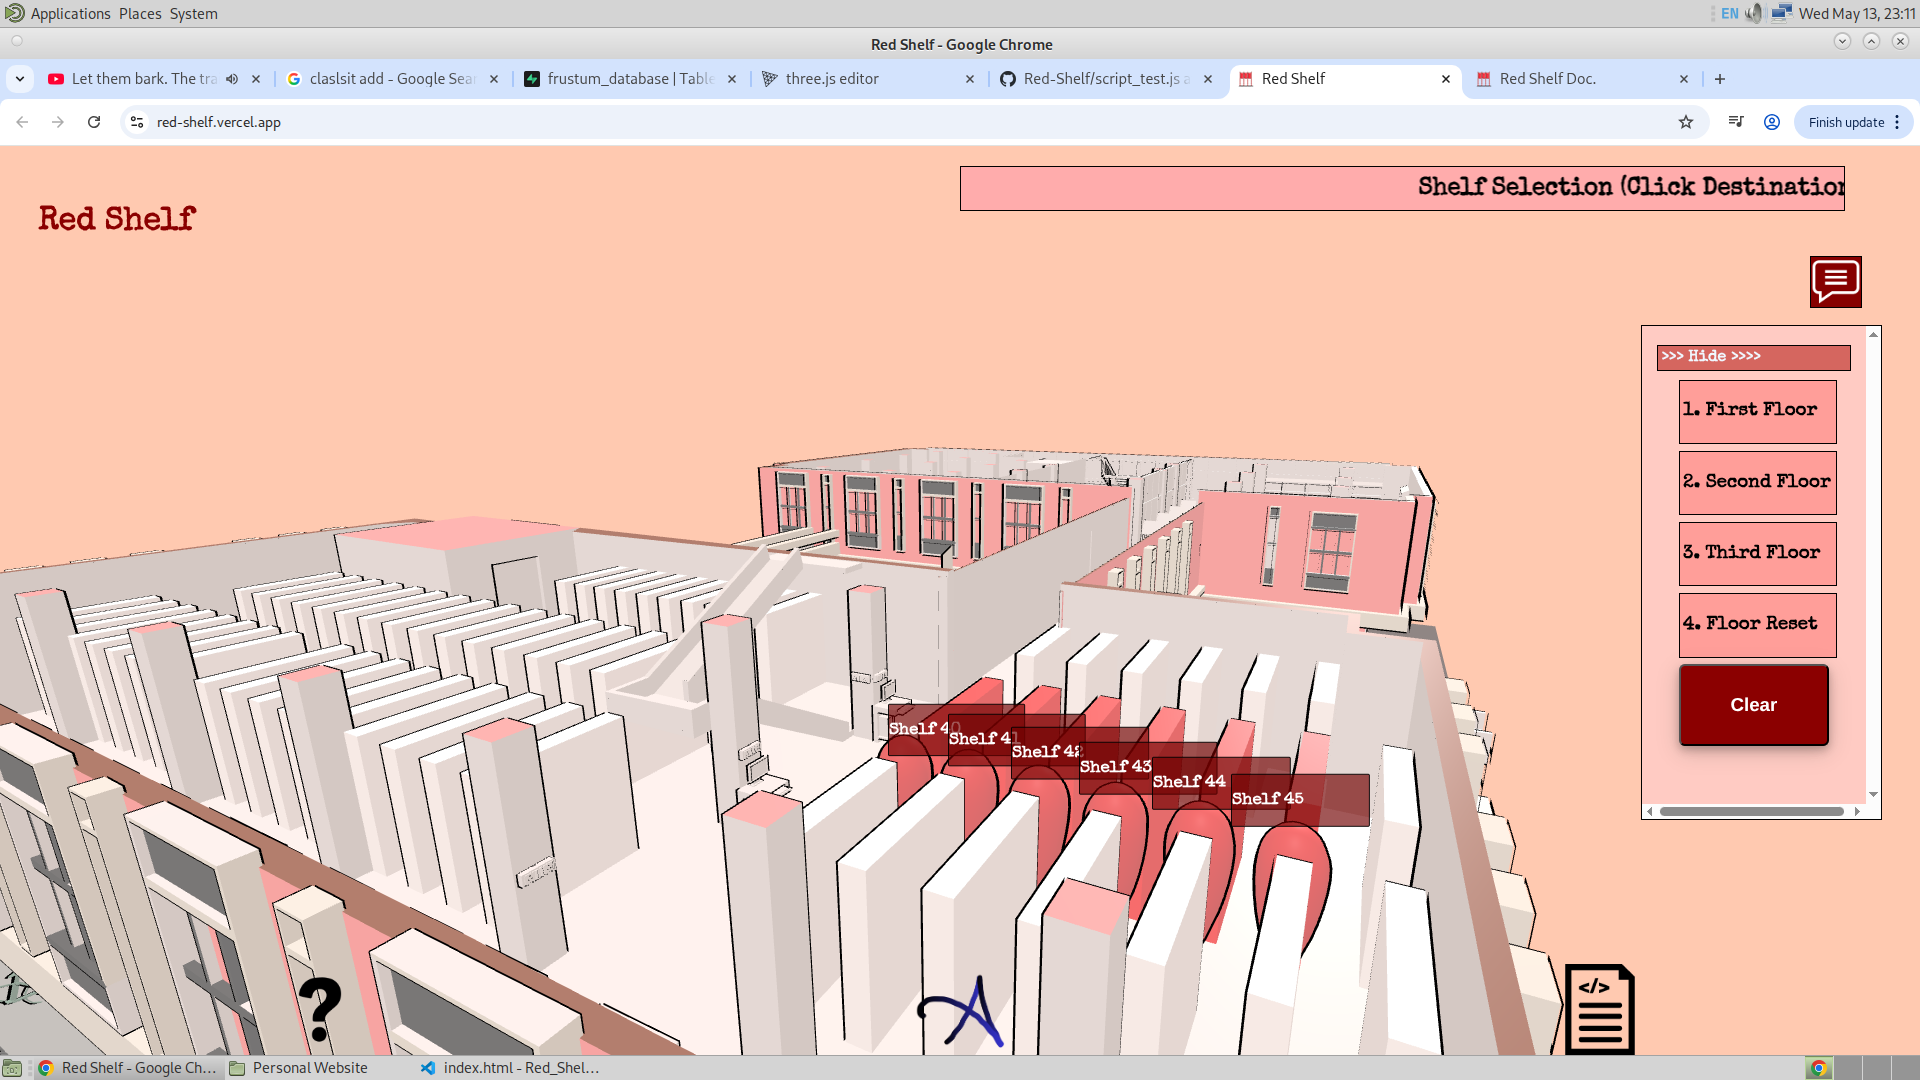
Now it's very unlikely that a given bookshelf will have all the books from 620 to 621. It will contain books from 620 to 621 but can also contain many other books which have values more than 621 and less than 620. From all the bookshelves, given below are all the bookshelves that contain books related to "Applied Physics". The way to identify if there are books related to the given subject in a bookshelf is by just checking the high range (upper bound) and the low range (lower bound) of the bookshelf. If the upper bound of the bookshelf is smaller than 620, then it is obvious that all the other books inside the bookshelf will have even lower call numbers. And hence it is certain that no book inside this bookshelf will be in the range 620 to 621. Similarly, if the low range of the bookshelf is higher than 621, then it is certain that any book in this bookshelf will have the call value more than 621 and no book will be in the range 620 to 621. And hence, using this logic, the website finds the correct bookshelf for a given subject. Logically, this is implemented as given below:
    if(
        !(
            bookshelf_low_range > (subject_code_number + 1) ||
            bookshelf_high_range < subject_code_number
        )

        &&

        (Number)(bookshelf.mesh_name) <= 54
    ){
        //...
    }
(Number)(bookshelf.mesh_name) <= 54 is because I wanted to search through the bookshelf that are issuable. Bookshelf number 55 to 64 contained books that are not issuable. Given below are the bookshelves with books in range 620 to 621 in the database : 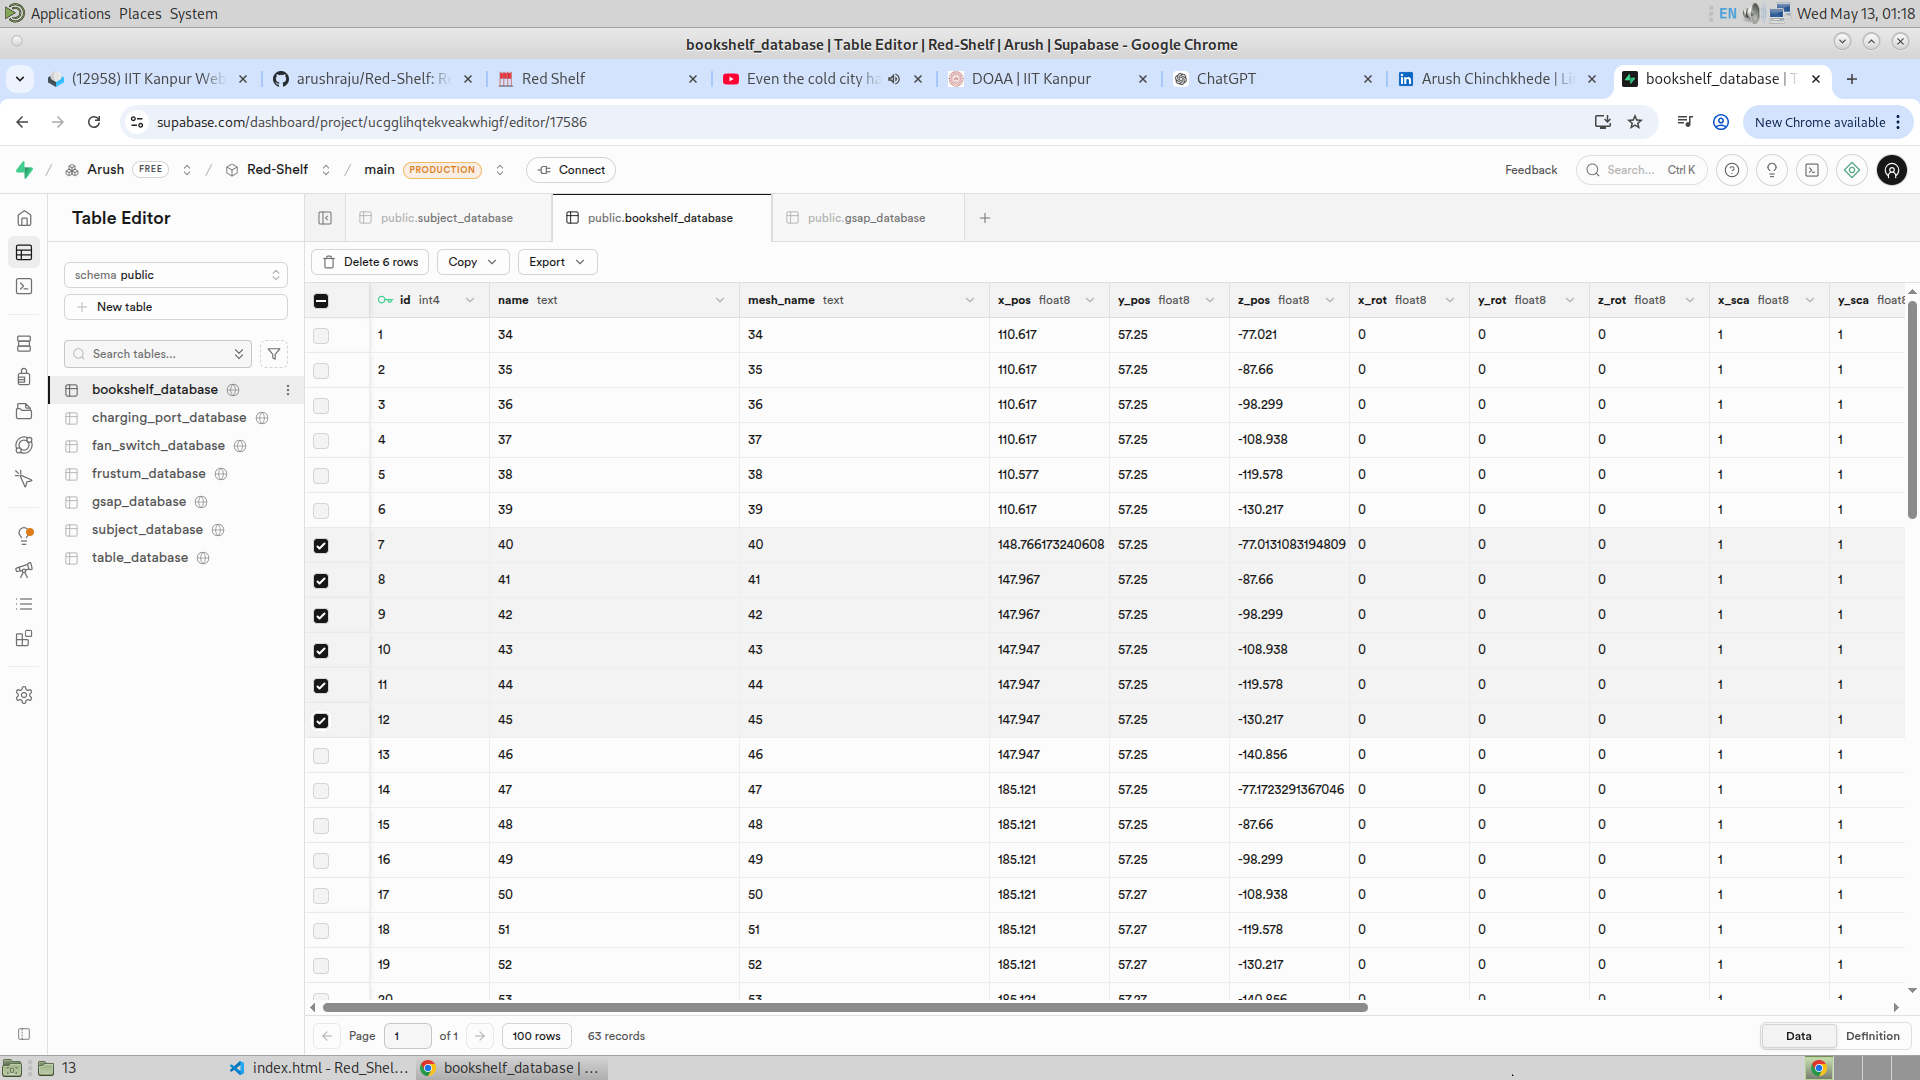
Given below is the above explanation pictorially :
Explore Menu :
So I will first talk about how the camera is animated to face the right direction, and then I will talk about how the Frustum works in the Explore Mode.
The orientation of the camera when the user enters the GSAP mode of explore mode is done in the same way as how I programmed the camera to face the next GSAP here (Done Earlier). Here we don't have any next GSAP to face. Hence, here I have taken the starting position of the camera to be the point (x_1, y_1, z_1) and the GSAP that I have selected is (x_t, y_t, z_t). And this is the straight line where the final point will be lying. And it will be at a distance of 0.1 units from the origin of the GSAP, which is (x_t, y_t, z_t). And with this, the final point (x_2, y_2, z_2) could be found. I have included the calculation and the example below:
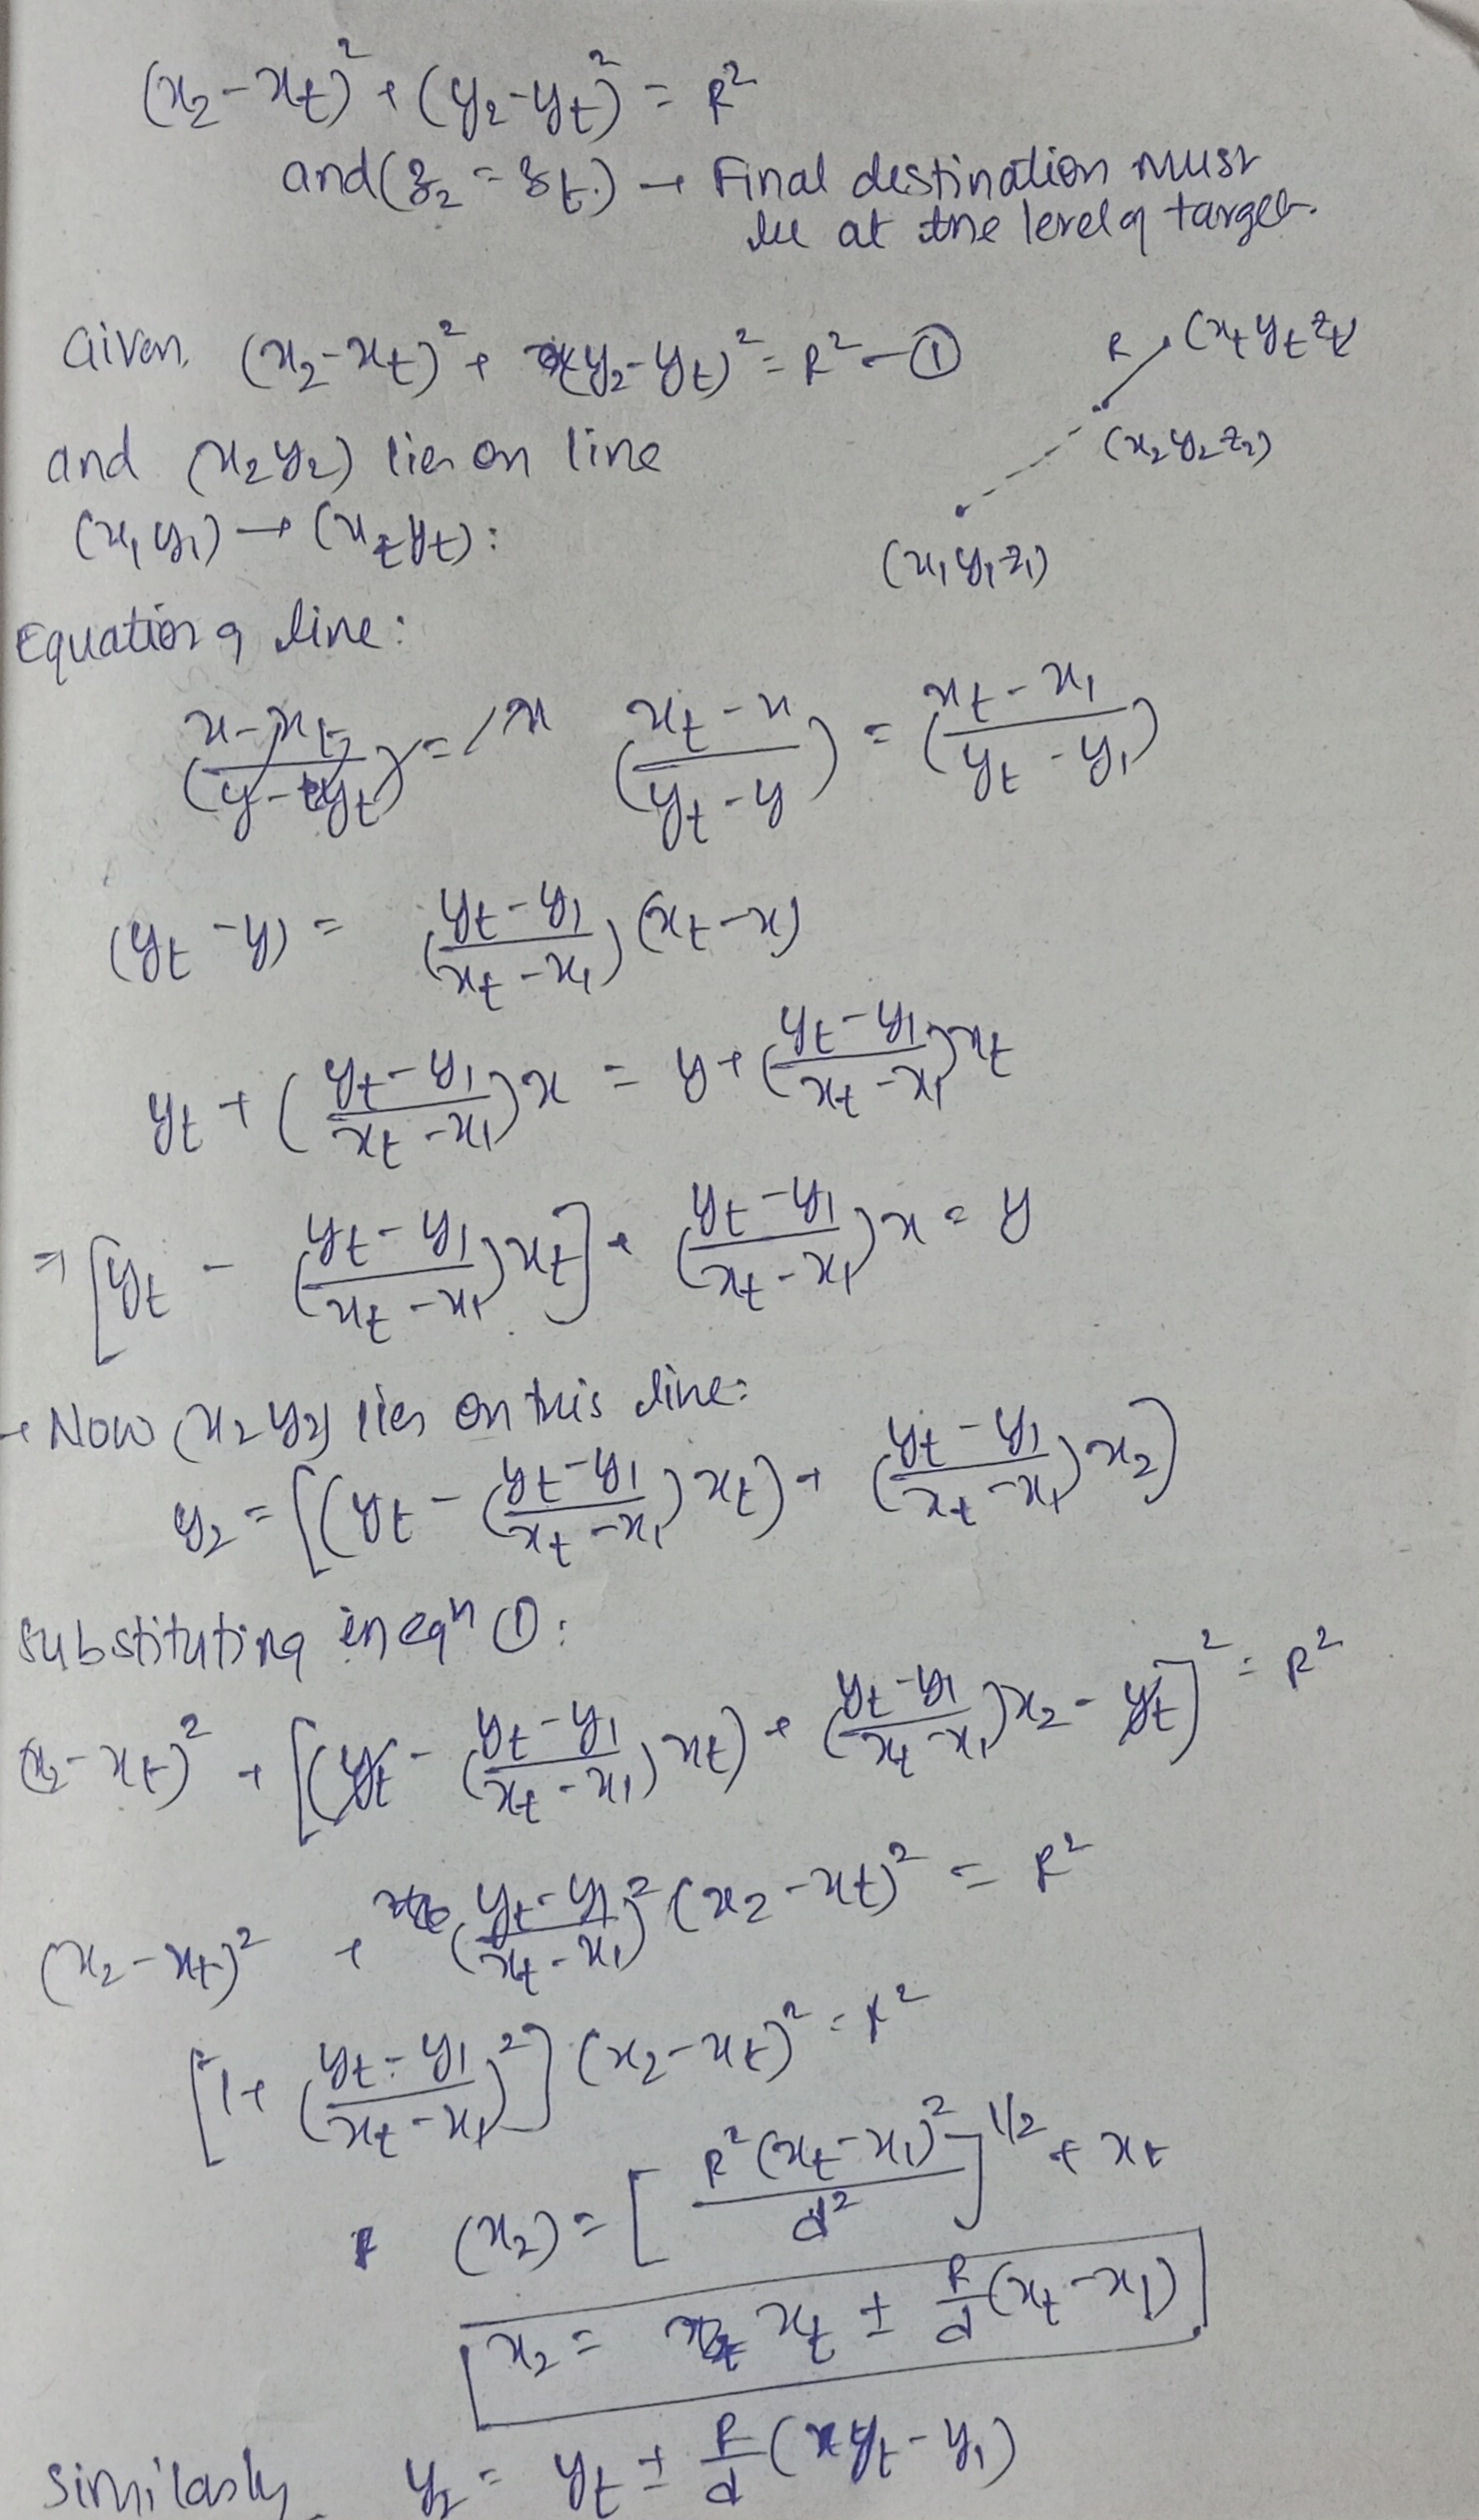
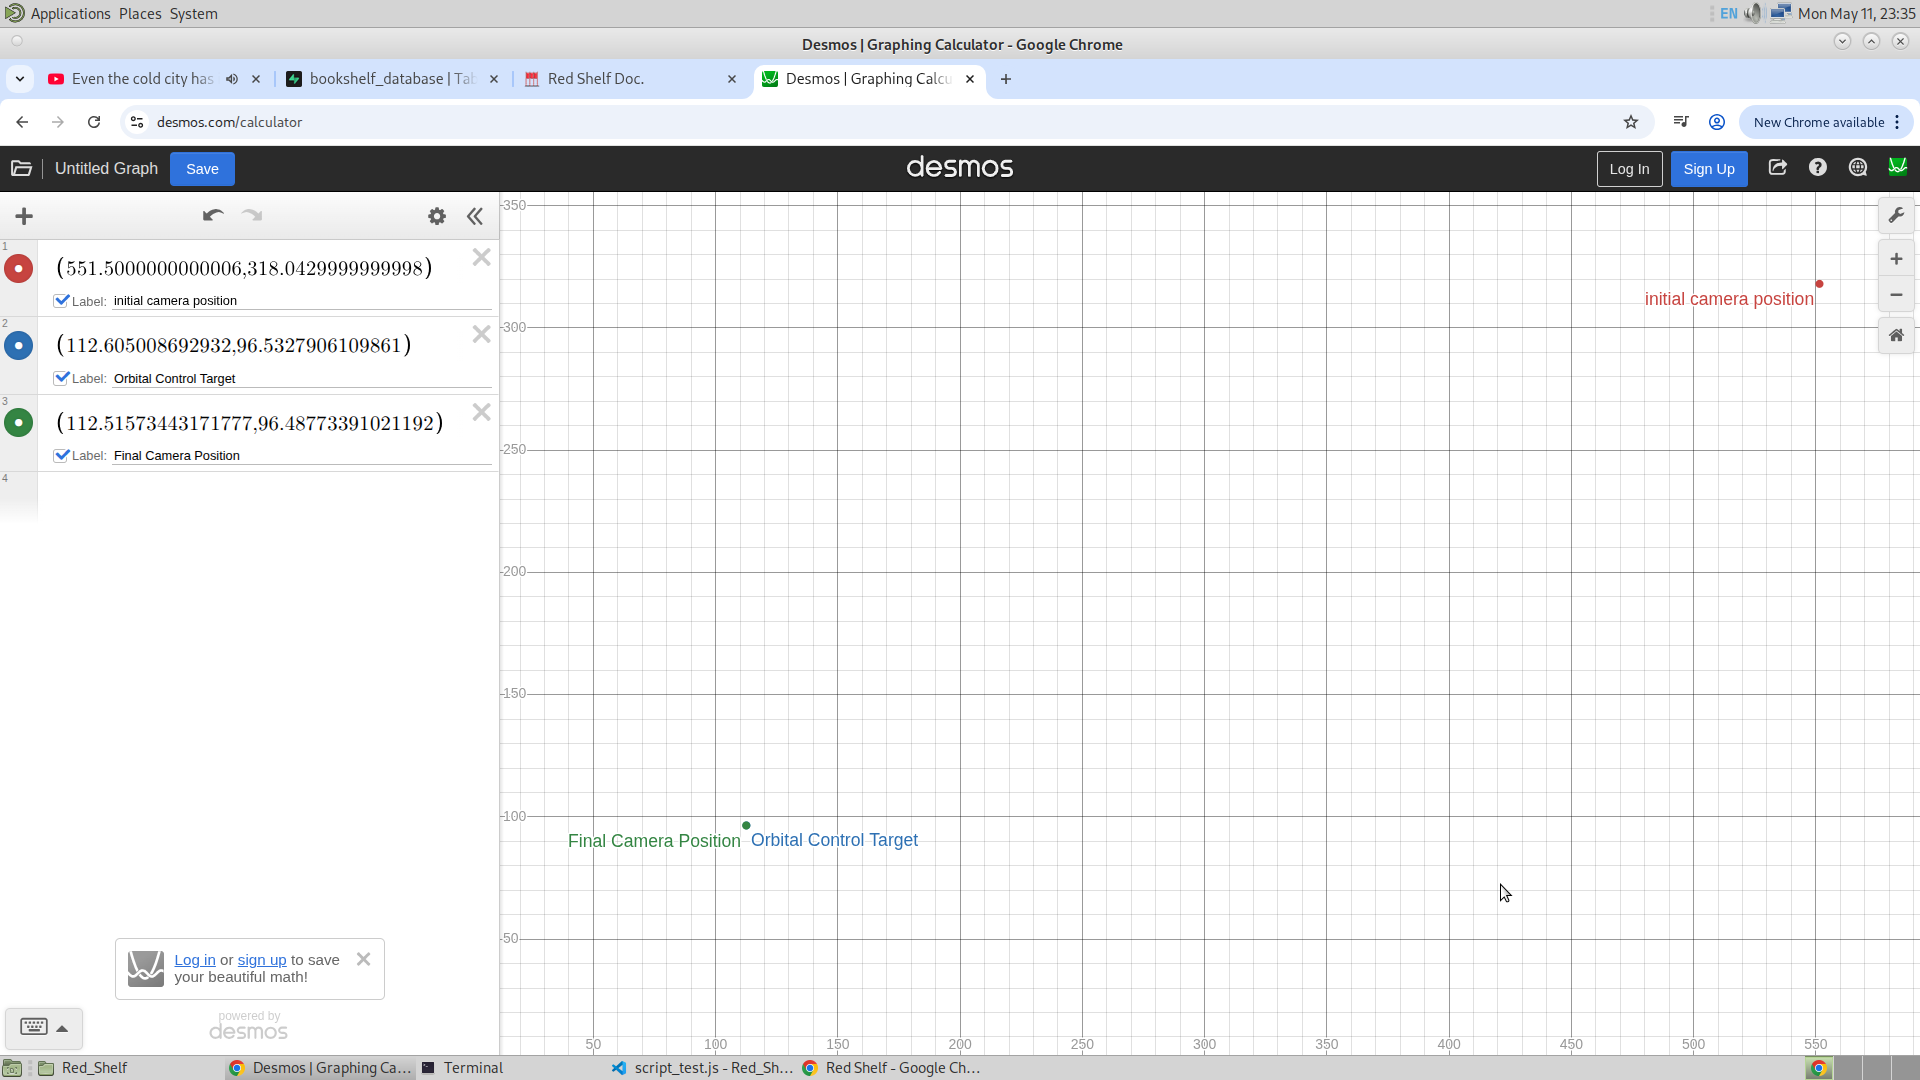
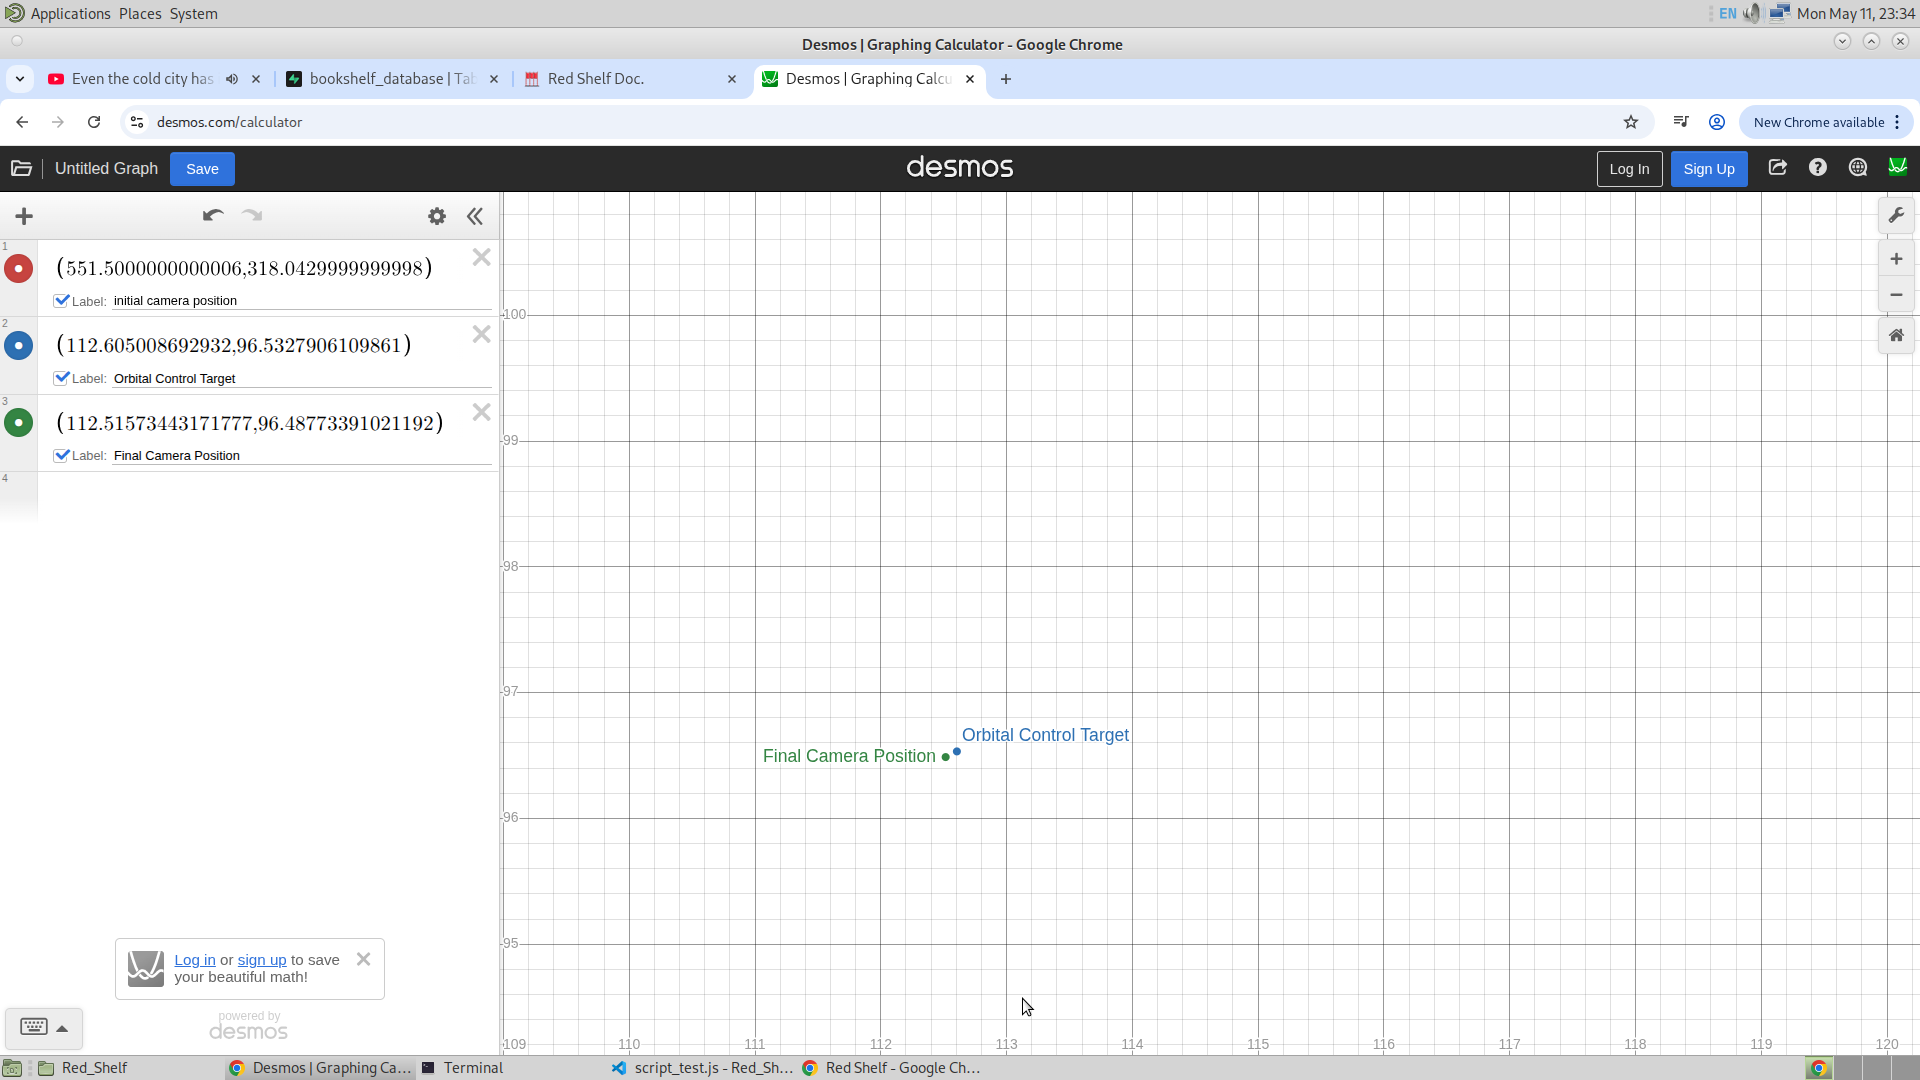
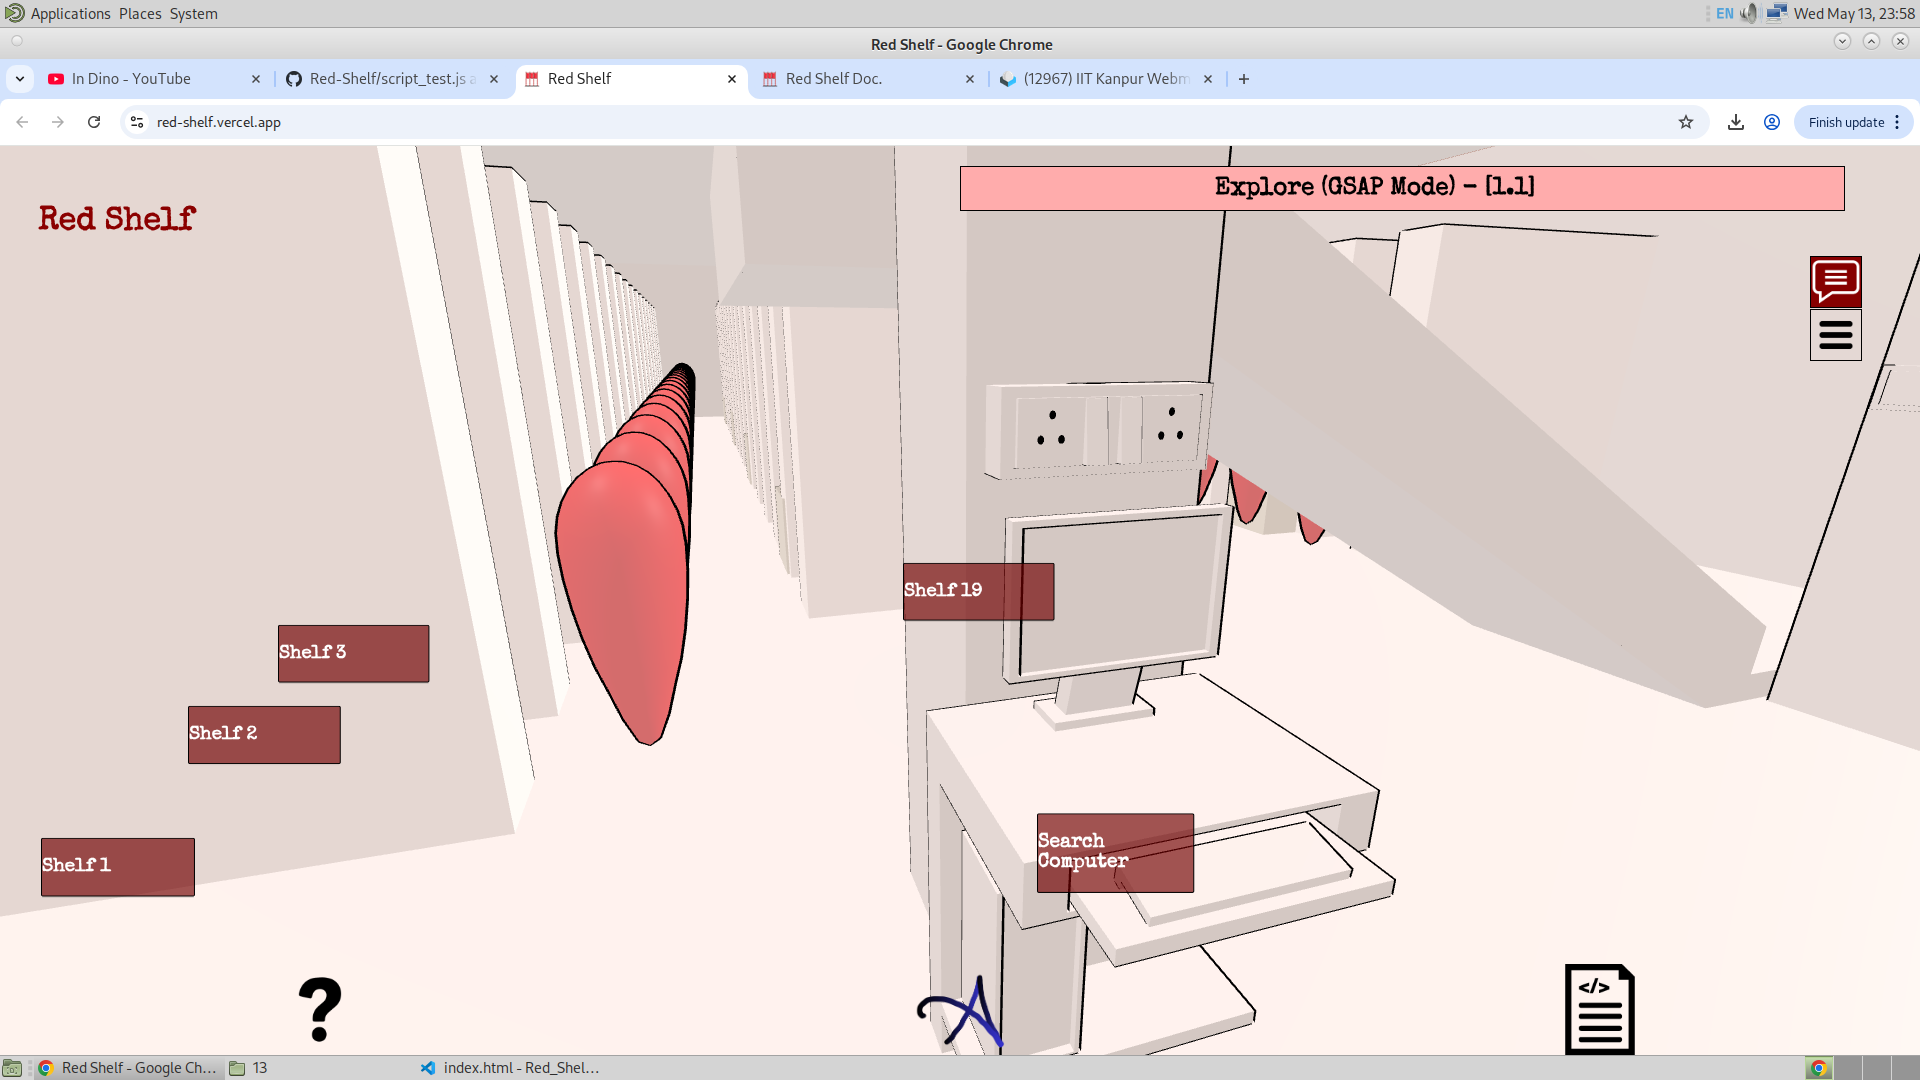
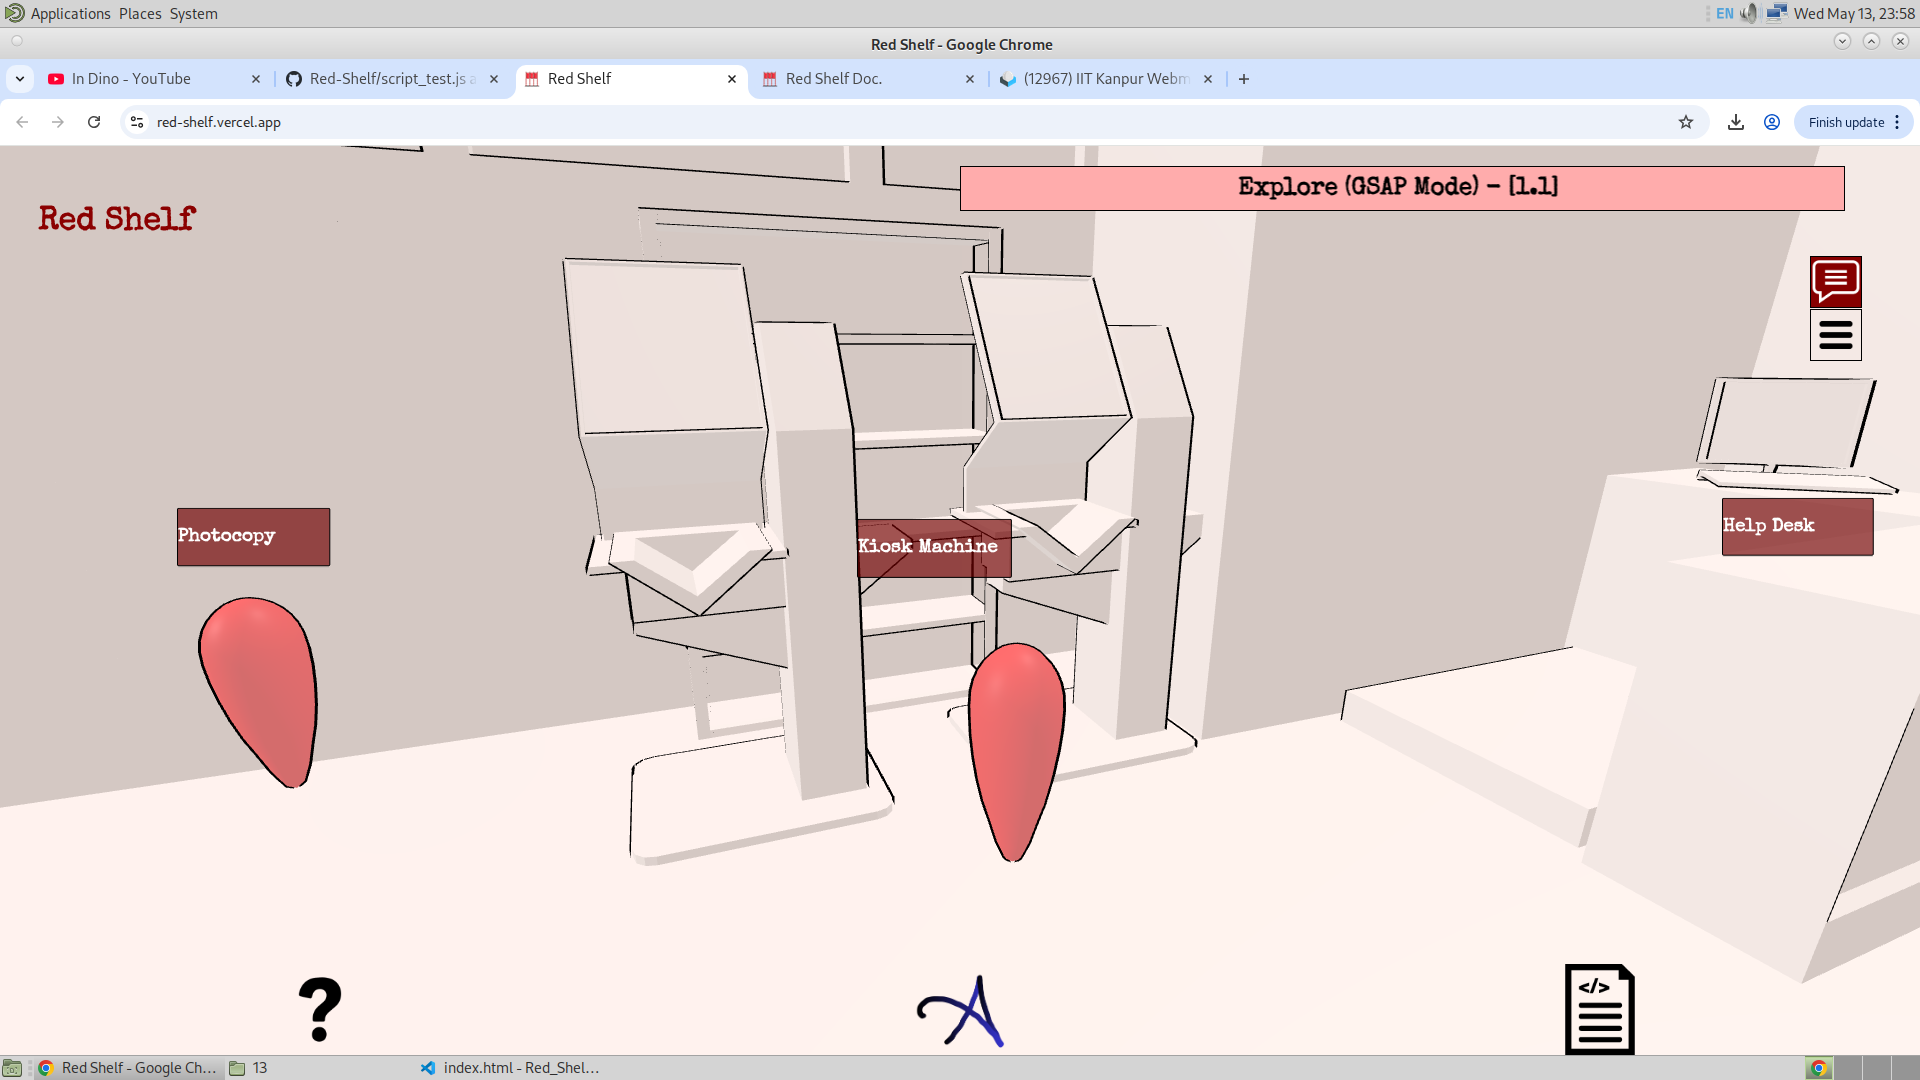
For the Frustum, I have done the following. I wanted to use the Raycasting and the frustum combination for this, but I was getting some complications. And thus, I haven't used the Raycaster at all. Rather, I have used the distance to display the frustum. Along with that, I have used the spatial position of the camera to find the position of the camera and accordingly allow certain frustums to be displayed. Given below is the snippet of the code that is used to find the current floor (which is the floor I am at) from the position of the camera.
                if(camera.position.y < 48 && camera.position.y > 0 && camera.position.x > -37.767){current_floor = -1;}
                else if(camera.position.y > 23 && camera.position.y < 70 && camera.position.x < -37.767){current_floor = 0;}
                else if(camera.position.y > 70 && camera.position.y < 91){current_floor = 1;}
                else if(camera.position.y > 91){current_floor = 2;};
                if(distance_Cam_and_obj(camera,obj) < 60 && frustum_info[String(obj.name)].floor == current_floor){
                    frustum_info[String(obj.name)].isDisplay = true;
                    updatePopupScale(frustum_info[String(obj.name)].div,obj);
                    updatePopupCordinates(obj,frustum_info[String(obj.name)].div,false);
                } else {
                    frustum_info[String(obj.name)].isDisplay = false;
                }
New Logo :
It doesn't matter, but for the sake of completeness, I have designed the new logo of this application and it is given as:
I aimed to keep it minimal yet distinctive.
And another important update to mention is the Frustum of the bookshelf. I was told in the last meeting that after the user searched for the book, first the floor where the user will find the bookshelf should turn on immediately (which is the first floor), and then the searched bookshelf or the red shelf must be visible with some frustum. So now here is what happens. One searches for a book by call number and the first floor appears, and the bookshelf turns red. And most importantly, if the frustum is turned on, a popup appears describing the shelf number. And when clicked, as usual a dialogue box appears. And if instead the user searched for a subject, then all the bookshelves that are related to that subject will turn red. And hence those many numbers of popups will appear.
I have got an idea where let's say that if someone searched for the book, the popup that appears could be clicked and then the dialogue box will contain the list of all the books in that bookshelf. Maybe I could make another three.js file with the information of the bookshelf. And this will be a complete sub-website (<iframe>) of the bookshelf only. One can find the book in the bookshelf. And this will be like adding the final detail to the website. This sounds awesome and I'll see if this could be made possible before I leave.
15/5/26
So I had a meeting on the 13th and there were suggestions. Some of them were adding the frustum of the bookshelf when searched, and also being able to search through the sides of the bookshelf (A and B). They have also asked me to add the images into the frustum wherever this is necessary, like the important quick searches and bookshelves. Also, yesterday, they successfully hosted the website on the intranet. I am not sure if they have used CDN for the modules used in the projects (Three.js and GSAP), or if they have installed the package. Today is hopefully my last meeting, and today everything will hopefully be done. So let me quickly discuss the updates.
Database Updates :
Here, as mentioned, to add the additional frustum of the bookshelf (where the pop-up will show the shelf number), I have added that data into the database, along with the previous frustum. You can see the Shelf Frustum all appearing in the explore mode as shown below :
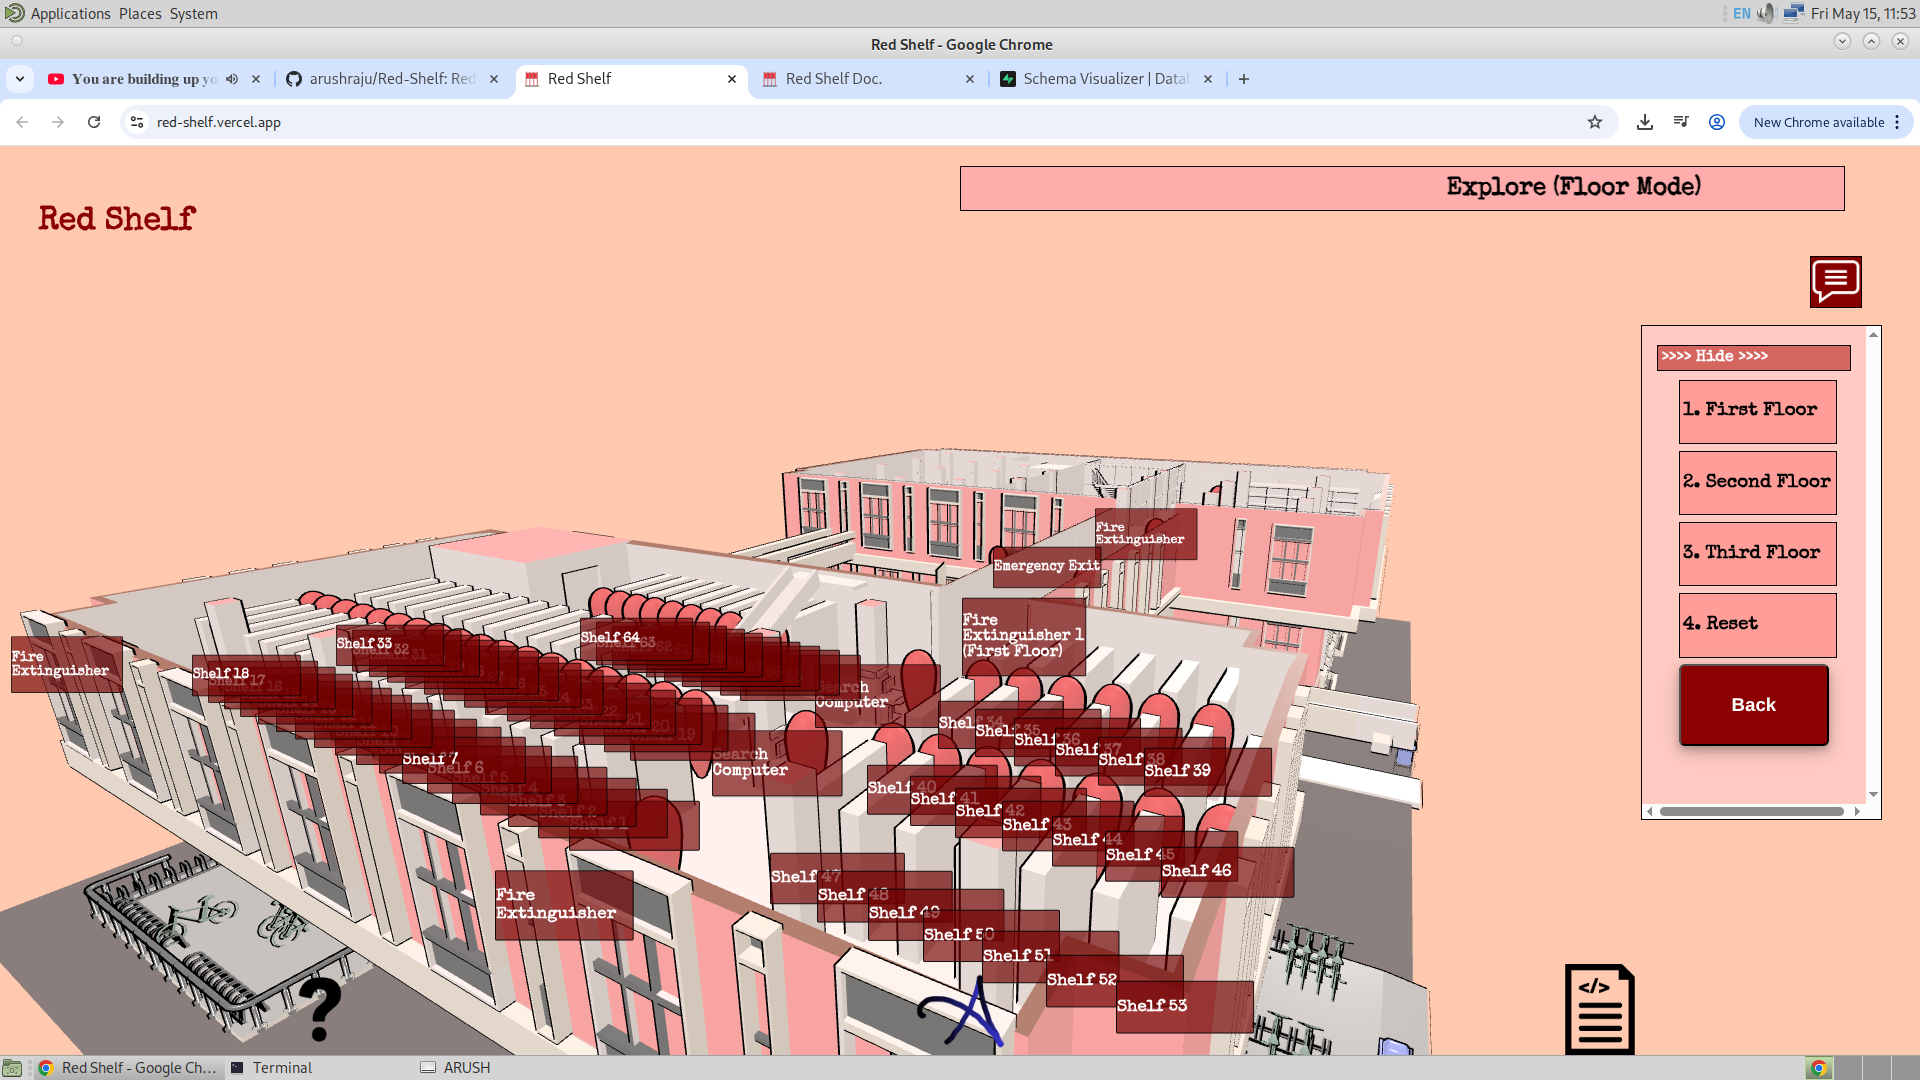
Also, I have made another table called "bookshelf_side_database". This will contain information about what will be the bookshelf number and the side of the bookshelf for a given call number. This database has been used to show the user not just on which bookshelf he/she will find the required book, but also on which side of the bookshelf. Now there is some more to it, and this will be discussed later. Given below is the image showing all the tables present in the database of this website.
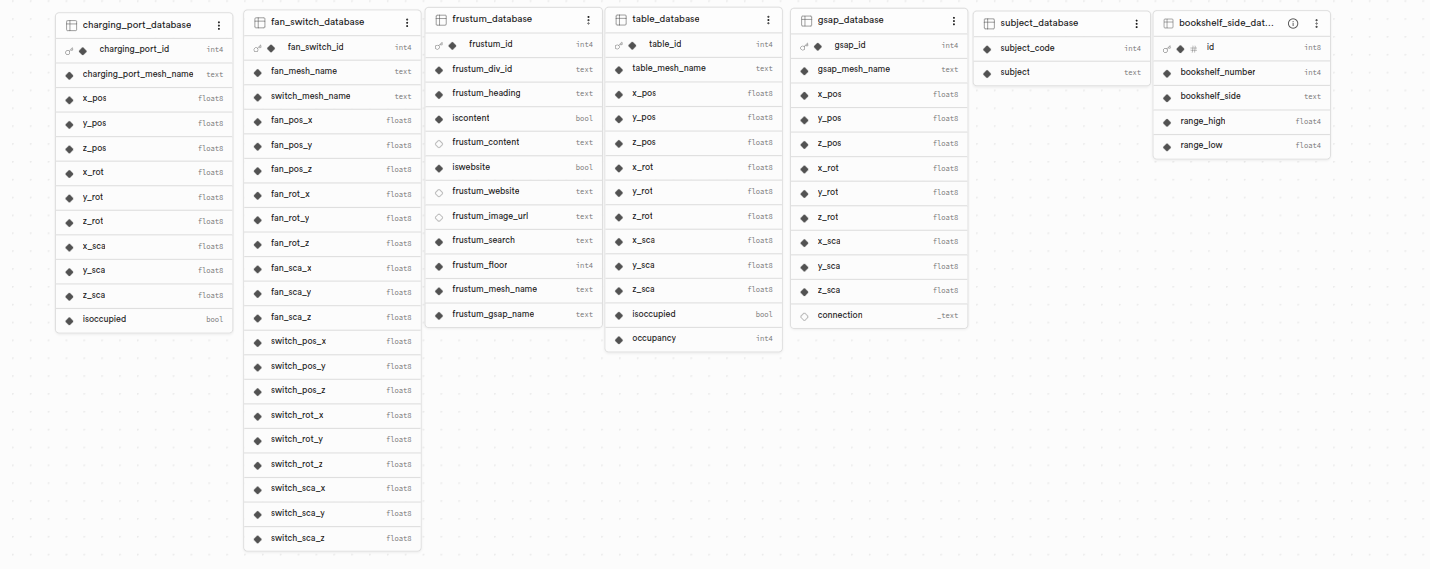
Notice the "bookshelf_side_database" present here.
Red Shelf Sub Website :
This must be the third best feature after GSAP movement and the frustum. Here, I have made another file called book.js in the same directory, and have made a separate Three.js project where it just handles the bookshelf. So given below is the model of the bookshelf I have used to display it on this sub-website. (I have used Trackball Controls in this Three.js file)
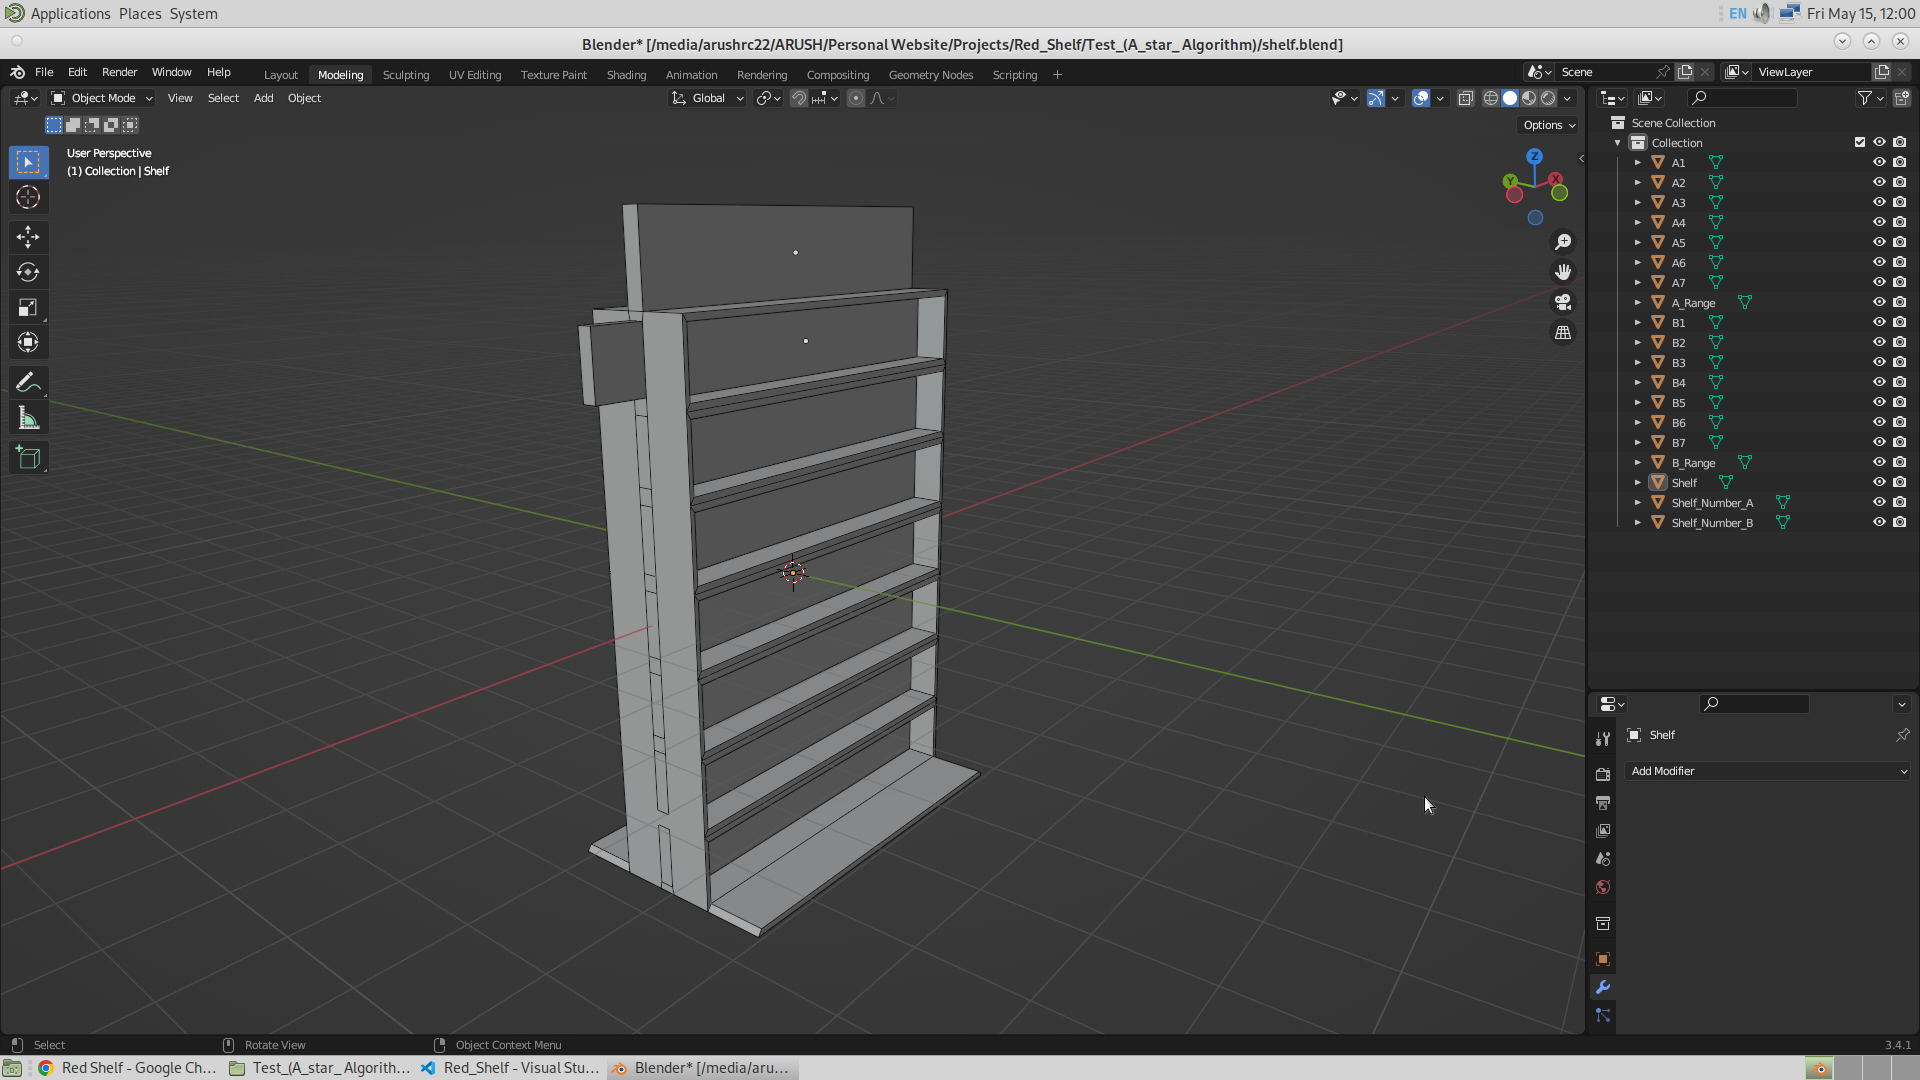
Now this mesh contains seven objects representing the seven shelf levels, and another seven objects for the shelf levels on the other side. Also, there are two objects on each side representing the shelf number and the shelf range. So in total, it is ((7+2)+(7+2)) objects that I will be controlling dynamically in the Three.js file.
So when one searches for a book by call number, he/she will see the frustum pop up on the bookshelf that has turned red. Here, there is no scope for exploring, and hence always one specific bookshelf will turn red. And then, once the user clicks on this special pop-up of the bookshelf, he/she will see the heading of the pop-up and the content inside it as usual, but along with that, he/she will also see this sub-website. This will show the model of the bookshelf that he/she has searched for. Given below is the image of the pop-up that appears on the shelf when a book is searched by call number. Also given below is the appearance of this special pop-up when clicked on it.
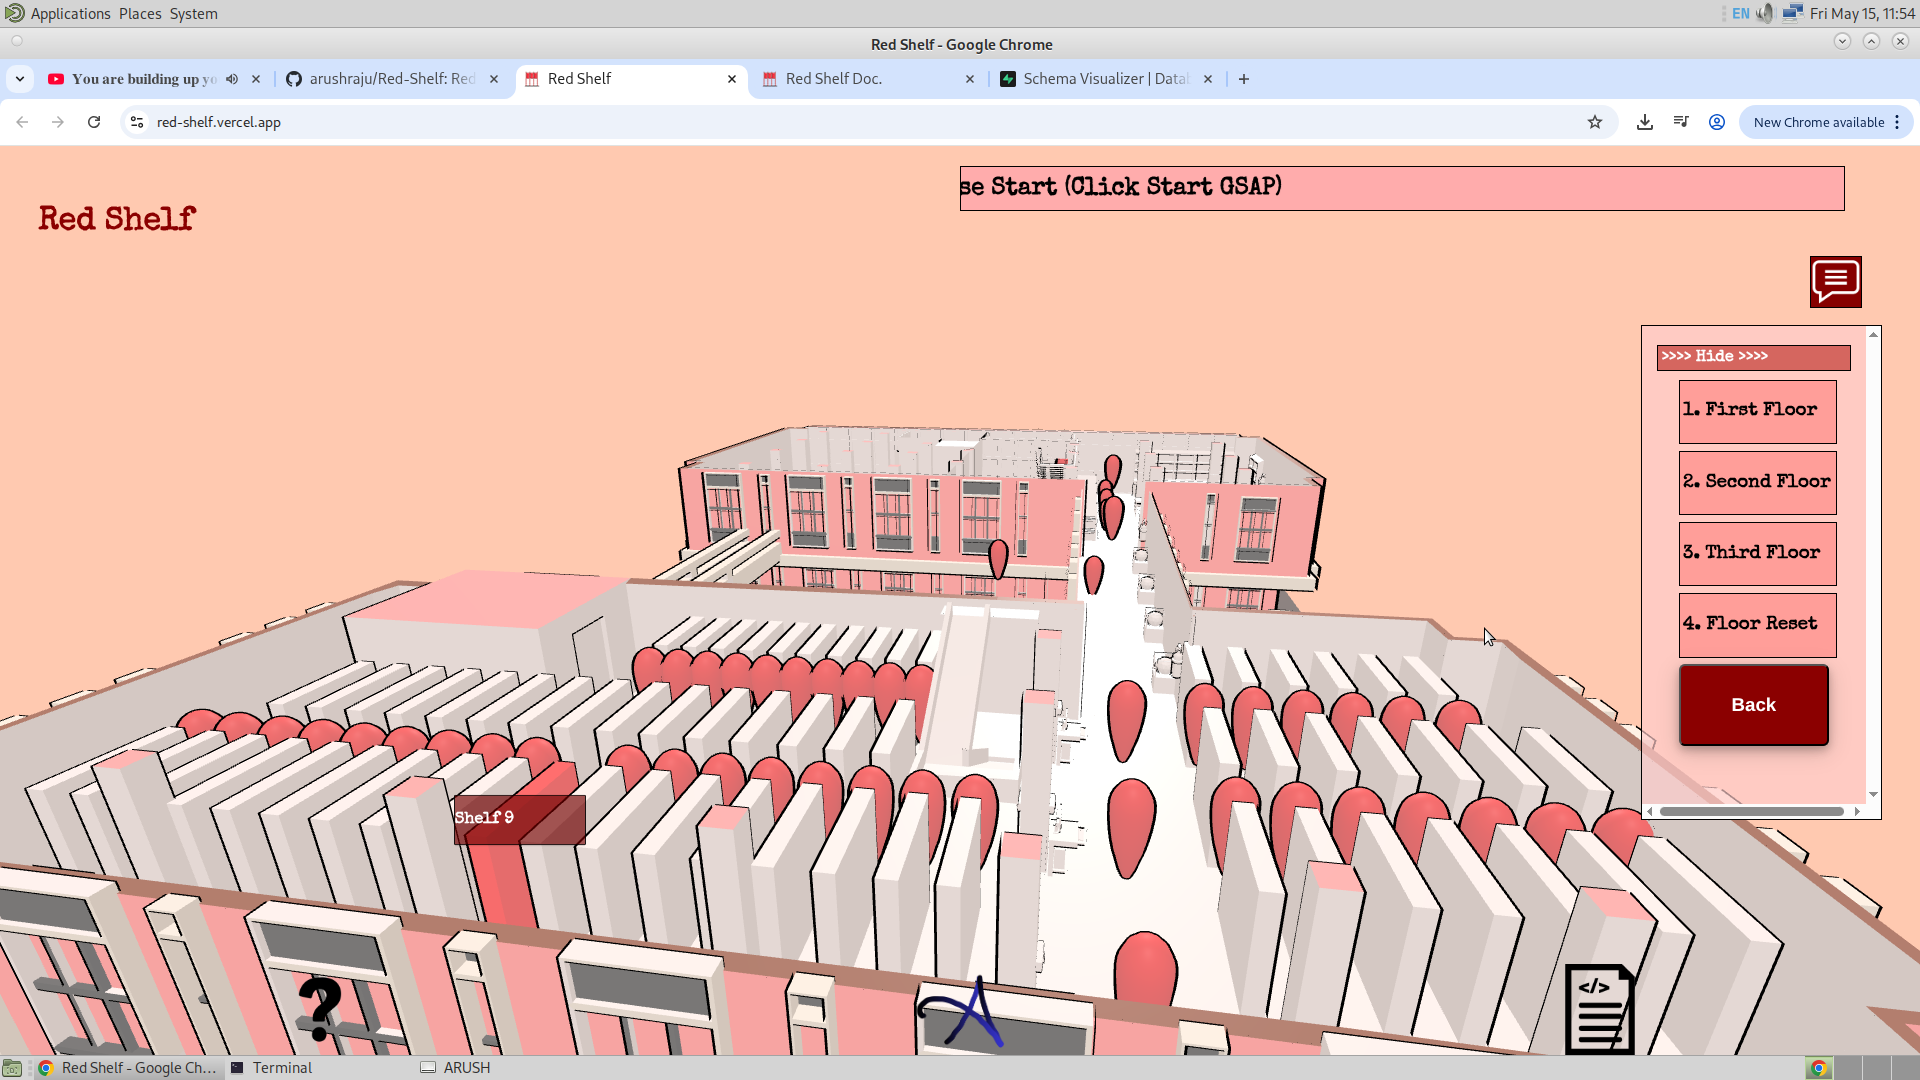
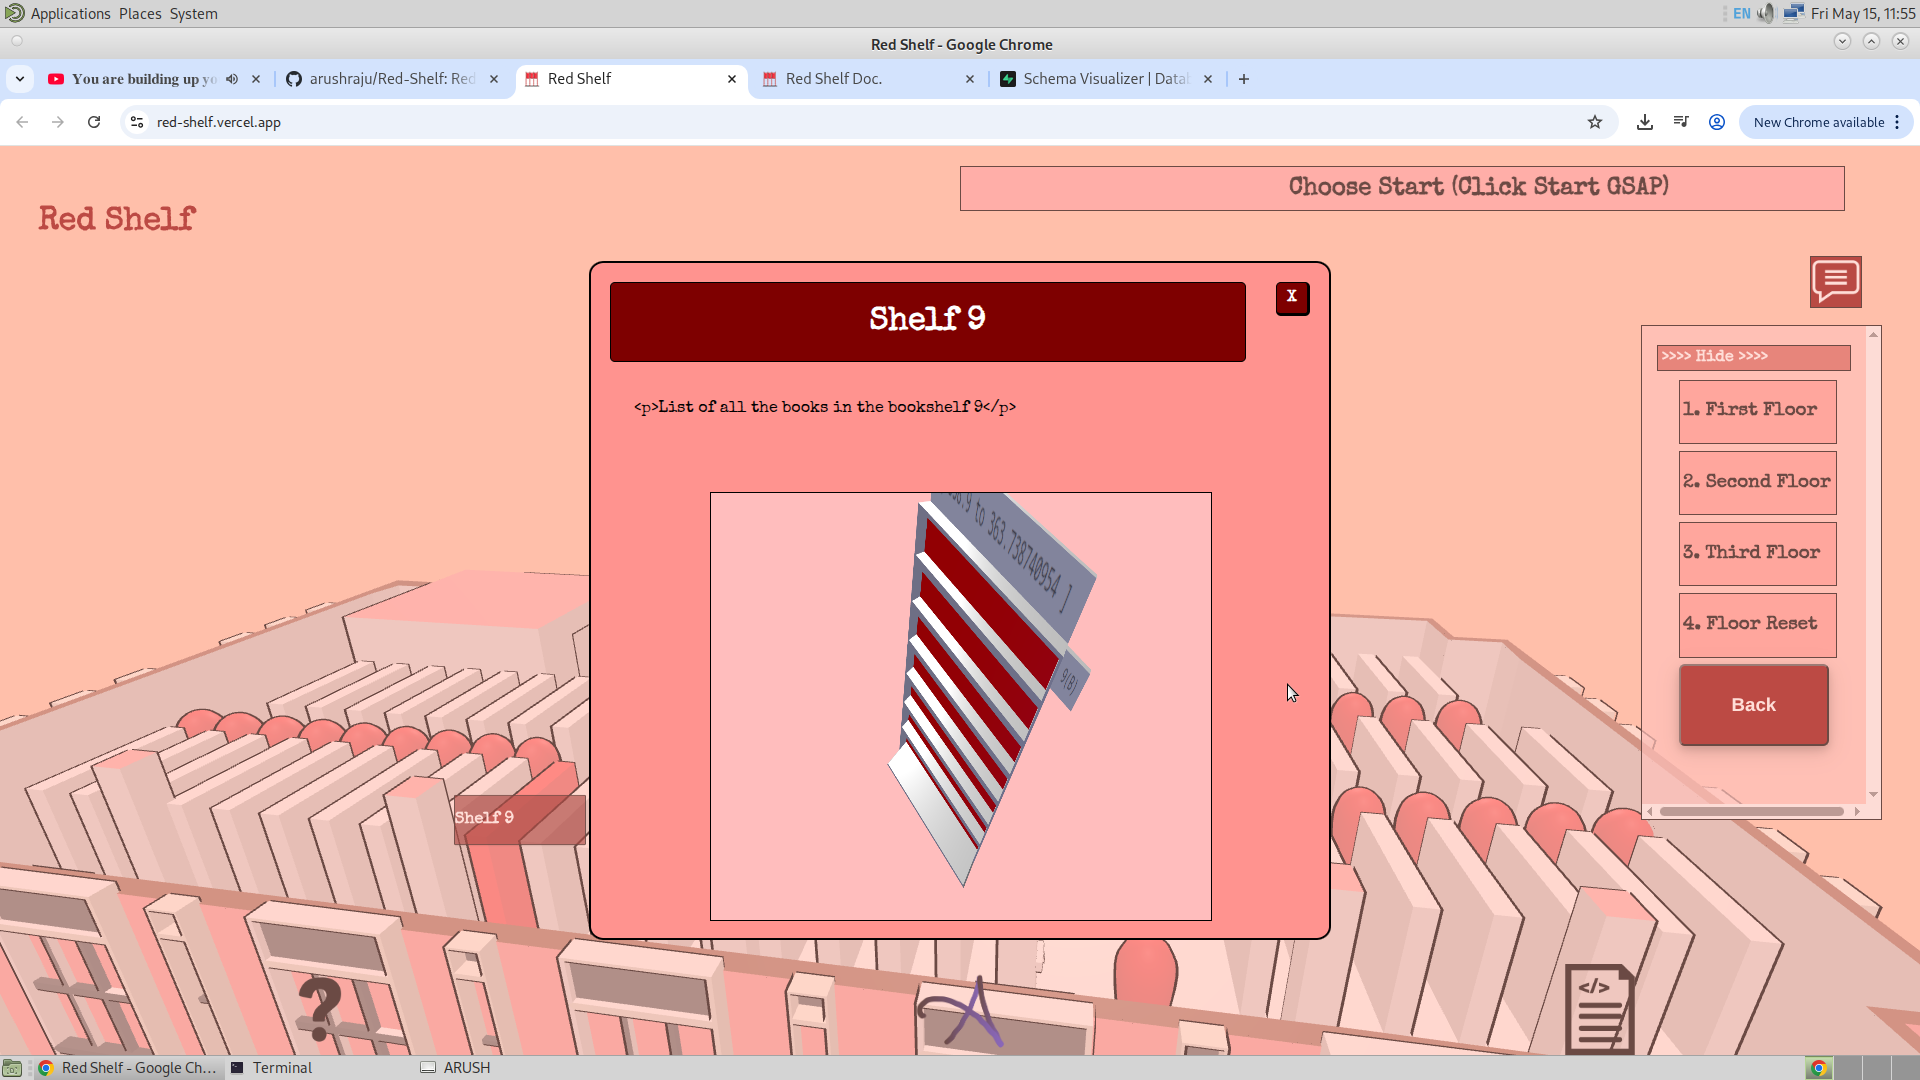
Notice that the side of the bookshelf where the user will find the book that he/she has searched for has turned red. A powerful ability of this feature is that now it is also possible to show at which level of the bookshelf the book will lie. Remember that I have used 7 objects on each side of the bookshelf for each level. Right now, I am turning all of them red because I do not have the data about the book and the level, but once I get that, I will then be able to show in which bookshelf, on which side, and on which level the searched book lies.
Also notice that the side of the bookshelf (9A) and its range are also visible in the model as a signboard. I have used the same model, but the UV map of the model is changed through Three.js in the front end. So I have the images of all the sides of the bookshelf and also the range of the bookshelf, and these images are changed on the same model depending on the shelf searched or selected. Given below are the images of how, for example, the side board of the bookshelf is mapped on the images.
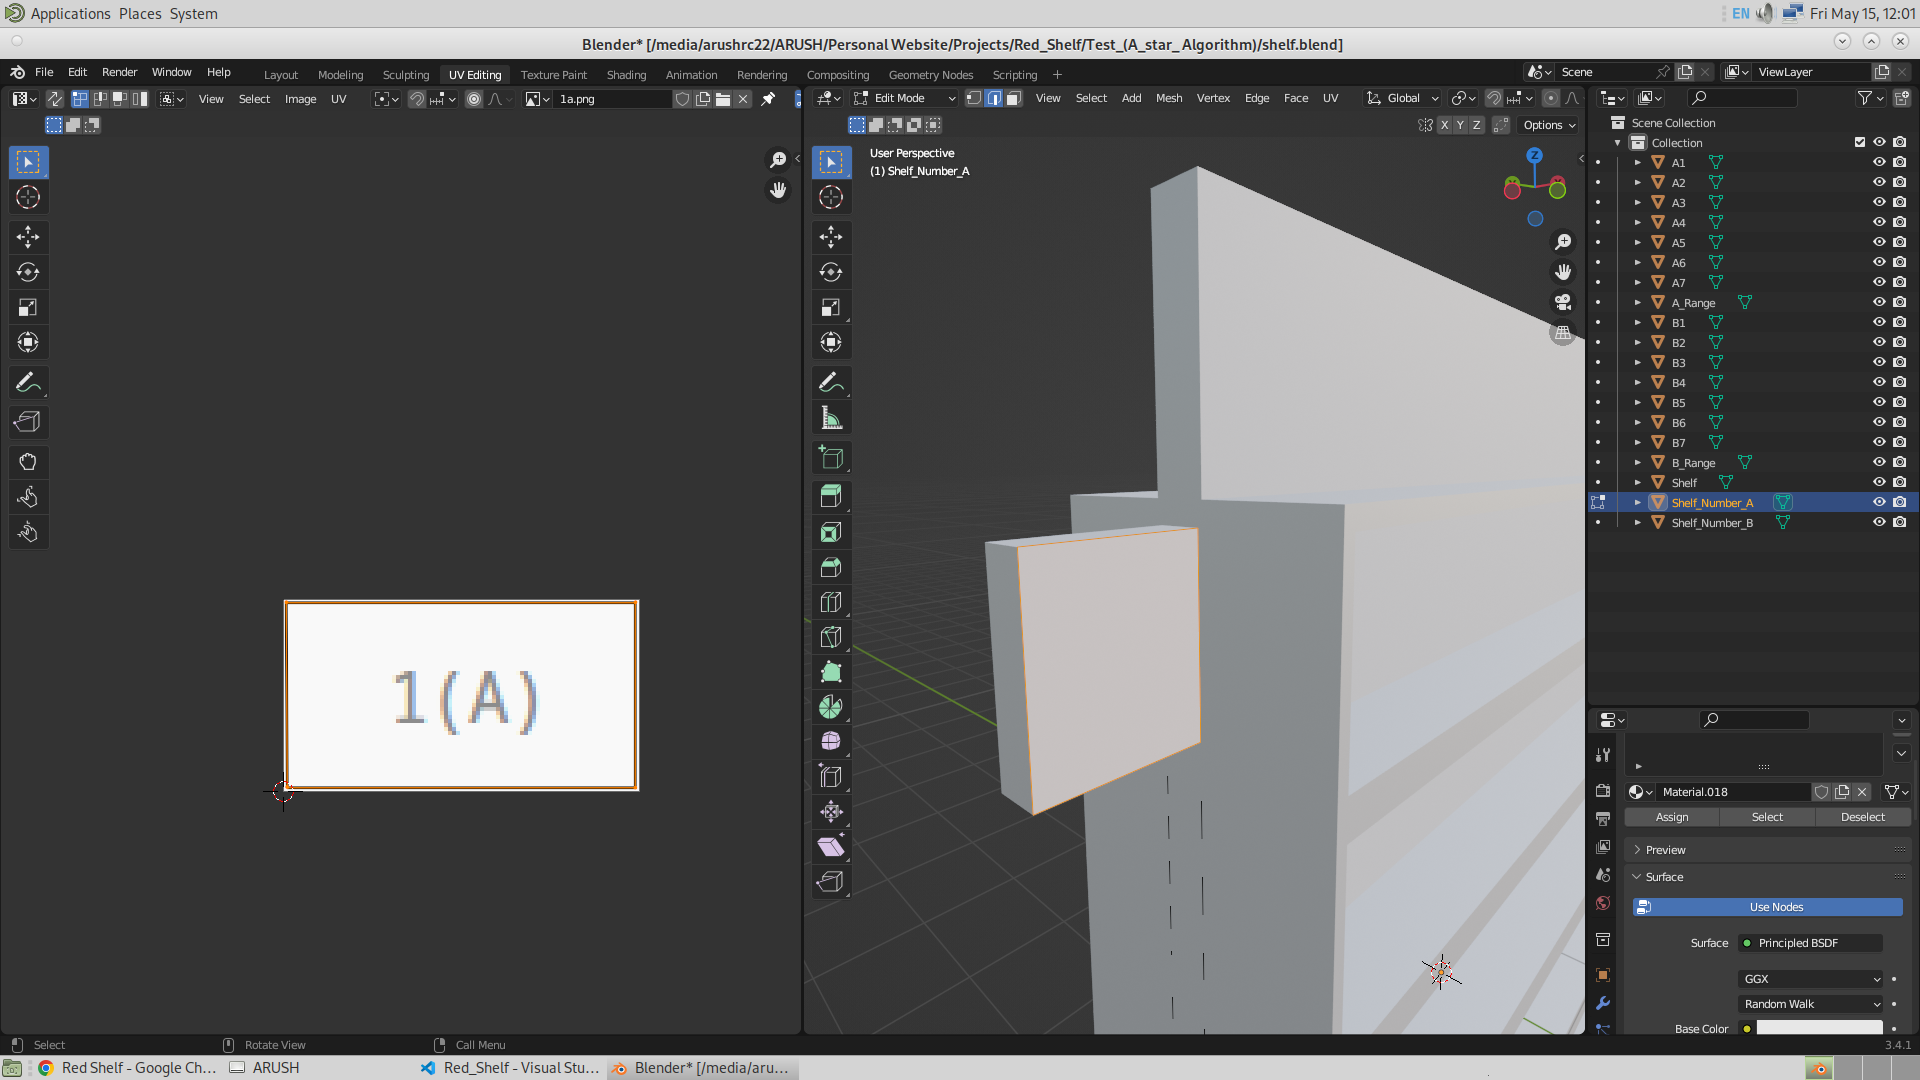
Now if the user rather searches for a shelf via subject, then in this case there is a scope for searching the book within the shelf as well. So in that case, firstly, after searching, those specific shelves where one can find the searched subject book will turn red as usual, and also those frustums will turn on. Then, while searching through each shelf, one will find that one could also search for the book through that shelf. The image shows shelves that have turned red for a specific subject and also the pop-up above them. Then, when clicked, the pop-up will have the model of the shelf along with the search bar to search for the book present in that bookshelf.
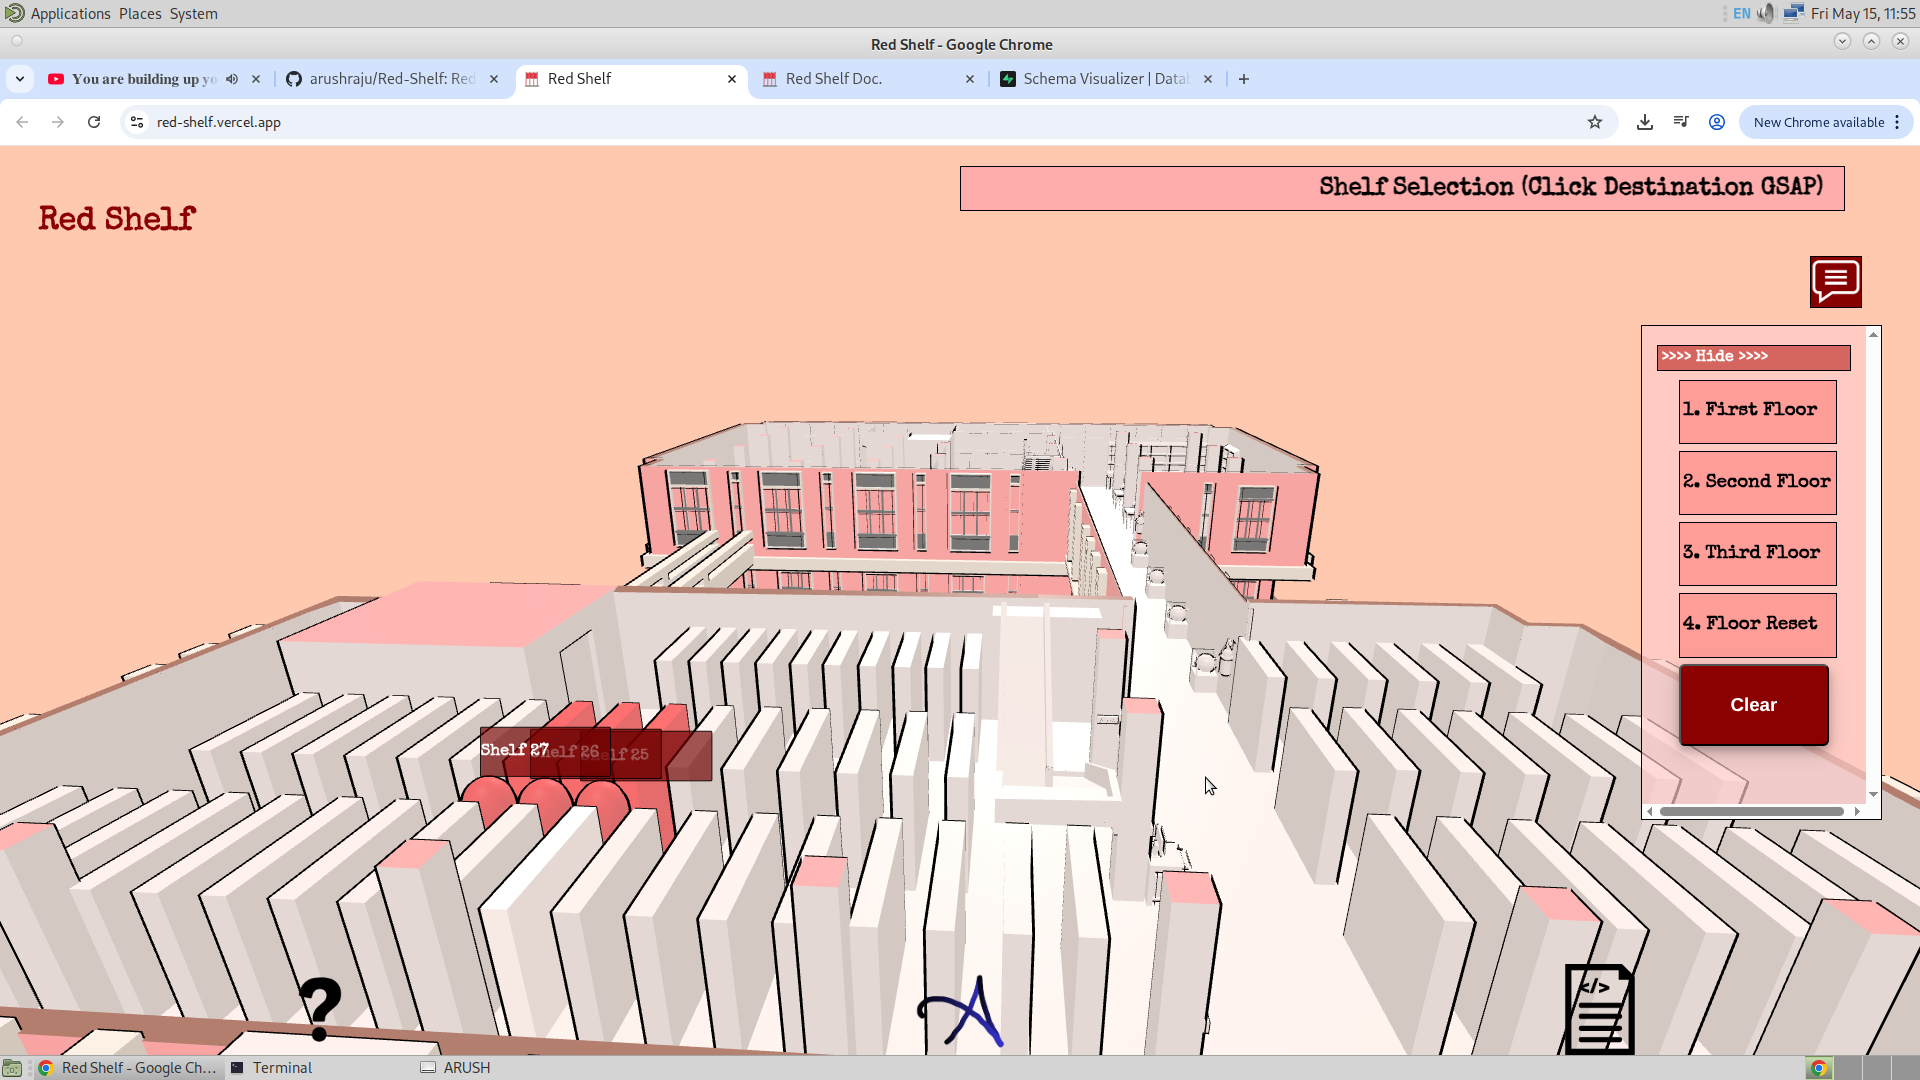
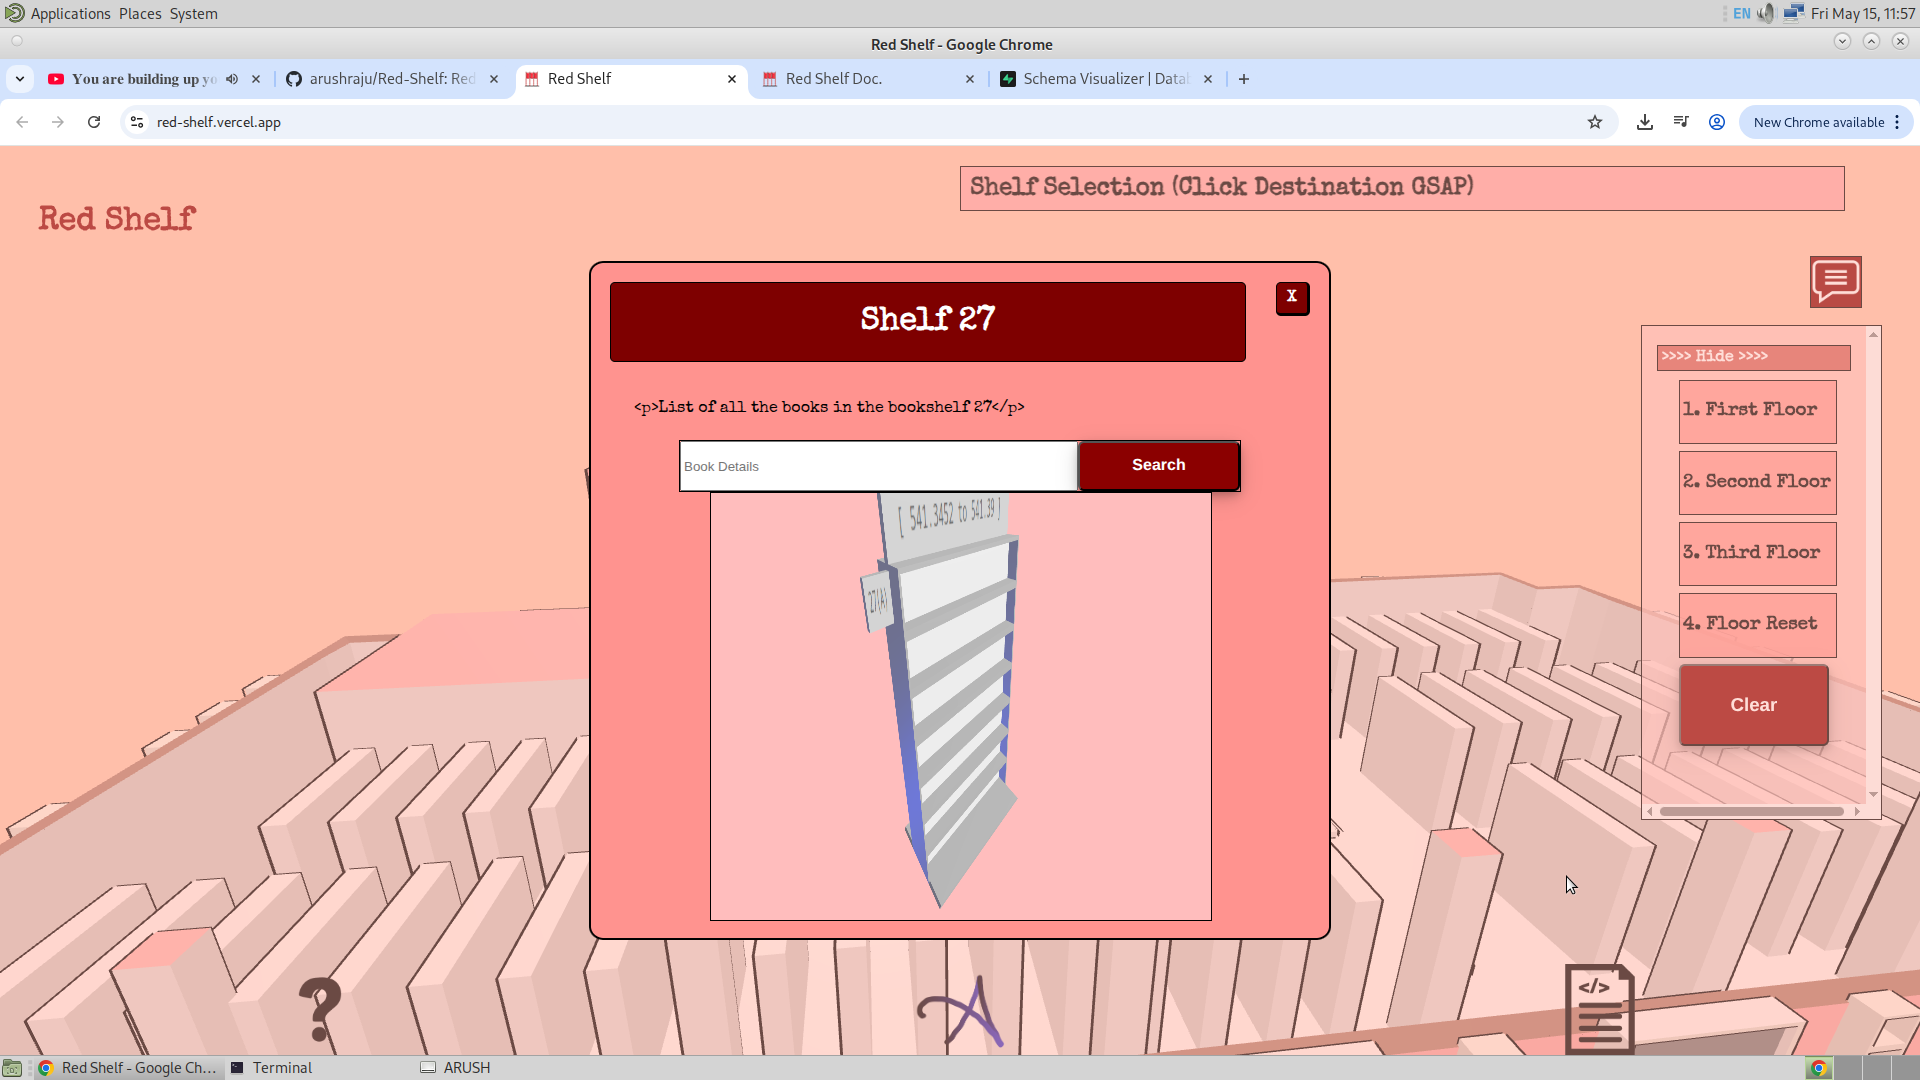
Now since the database has been hosted on the intranet locally by the staff members, the only thing left for me is to hand them over the database. Then they will have the source code and the database which will be used by the website. Well, one way to share the database is to share the .sql file, which has the SQL code to run and re-create the table with the right values. It can be found in this Directory on Github.
17/05/26
Now I have finally set up the helper content in the application. What I am still left with is the addition of the images, but I see there are many pop-ups, and taking images of each one of them will surely take time. Tomorrow is my first demo, and I am excited for that. Well, I believe that the content or the descriptions of different objects and the rooms are best known by the staff members and not me. And I believe they understand this.
There were also many hindrances in setting the right CSS for the Bookshelf Canvas. I have somehow fixed this by manually detecting the screen size and setting the size of the canvas, which worked temporarily on phones and desktops, but it was still a slight mess on the iPad.